Follow:
Browsing Category:

Tutorial

    Tutorial, Uncategorised

    Striping Tape Manicure Tutorial

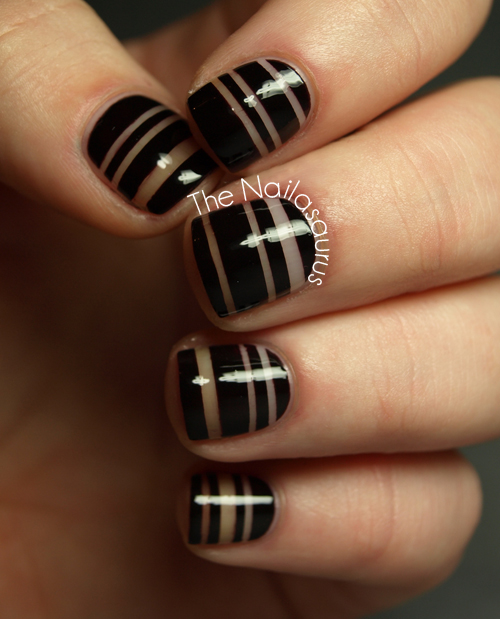
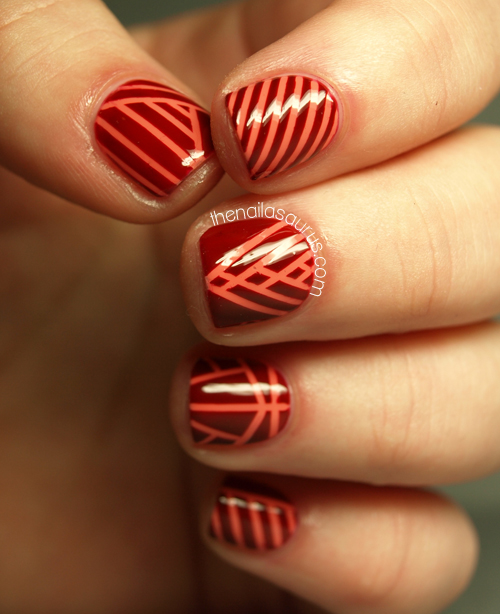
    You can do some amazing stuff with striping tape but it can be tricky to work with! I’ve been doing a lot of striping manicures recently so I thought I’d pass on a few tricks I’ve picked up in the process. You do need a healthy dose of patience and a steady hand but with a bit of practice, I think anyone can do it and the possibilities are literally endless.
    Striping tape is crazy cheap and you can buy it from any number of places online. I find the cheapest place to purchase is eBay, just search for ‘striping tape’ and you’ll get thousands of results. Obviously it’s cheaper if you don’t mind waiting a few weeks for delivery from China but even if you buy domestic, it’s still cheap!
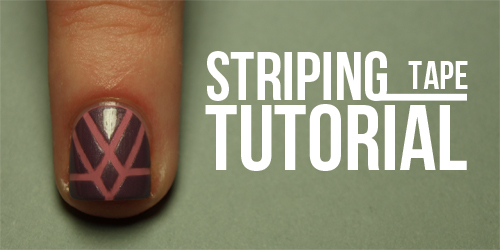
    You’ll need at least two nail polishes (mine are Tiger Lily from Primark and China Glaze Pink-ie Promise), a top coat, some tweezers, striping tape and a pair of scissors.
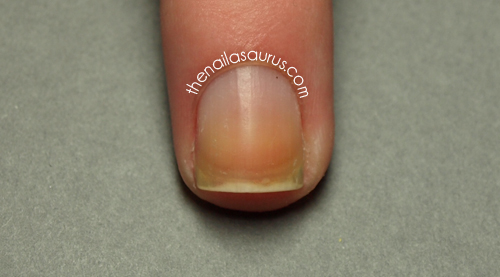
    Start by painting your base colour and making sure it’s completely dry before moving on the next step. I normally use a quick drying top coat (like Seche Vite) to speed up the process.
    Snip small sections off the roll of striping tape to use on your nails. I do this by hanging a long length of it from my desk lamp, then gripping the end with my tweezers and snipping off about 1-2cm at a time.

    I always use tweezers to handle the striping tape which make it soooo much easier! I honestly don’t think I’d ever approach a striping manicure unless I was armed with a pair of tweezers.
    I have these pointy ones which are great for nail art but regular tweezers will work too. You can buy the pointy ones on Amazon in the US and UK.

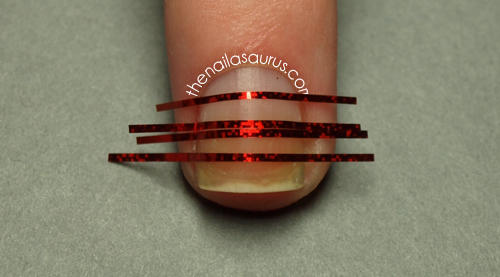
    Place the tape in your pattern of choice on your nails and make sure it’s smoothed down right to the edges or nail polish will seep underneath. Most importantly, make sure the tape carries on past your nail so you have space to grip and remove it later. 
    Try to remember which order you applied them in! You’ll see why later.

    Paint your second colour over the top of the tape.

    Here comes the tricky bit….
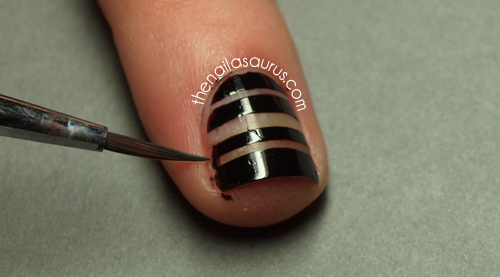
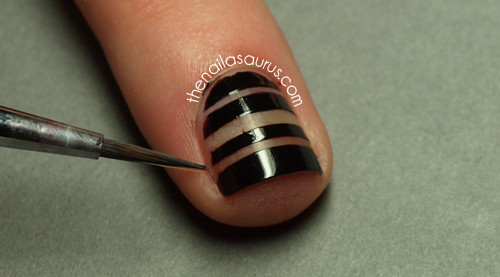
    Immediately, while the top colour is still wet, remove the strips in REVERSE order to the way that you put them on so that you can pull each one off without it snagging on anything and potentially ruining all your hard work so far.

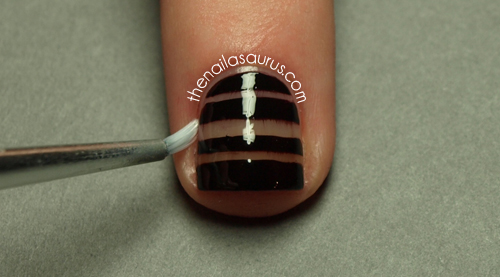
    Finally, apply a top coat or two and once that’s dry, you can use a small paintbrush dipped in acetone to clean up any mess that’s left on your cuticles.
    Like I said, the possibilities are endless! Just go crazy and see what happens.
    Share:
    Tutorial, Uncategorised

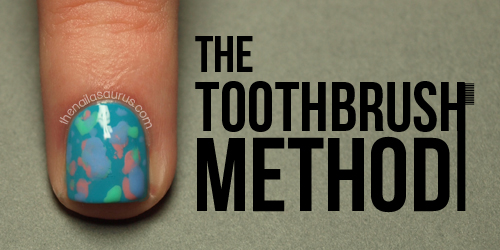
    Money Smart Nail Art: The Toothbrush Method Tutorial

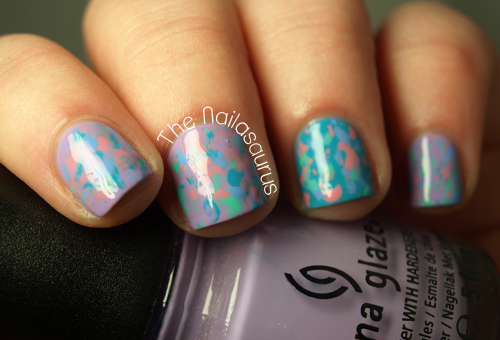
    Here’s the tutorial for the hodge splodge nail art I posted earlier in the week. It had a great response and 5 of you guessed my tool correctly – it was a toothbrush! Angie D, TheNailNut, Caitlin, TheBeauBow and Lisa all got it right… give yourselves a high five from me!
    This is my entry to Money Supermarket’s Money Smart Nail Art competition. I don’t make any secret of the fact that I am a stingy SOB and I like to think myself a thrifty, bargain sniffing miss. For this criteria, I really wanted to create a tutorial for a nail art look that only used nail polish and tools that you would already have around the house, or that cost literally pennies to buy. It really doesn’t get much more money smart than an 18p pack of toothbrushes. That’s a quarter to my American friends.

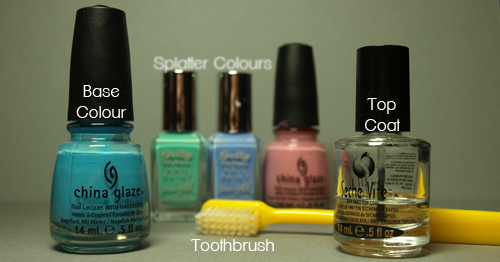
    To create this nail art, you’ll need to pick a polish for your base colour, a few others that you want to use for the splodges, a toothbrush and a top coat. You’ll also need nail polish remover or acetone because there’ll be a bit of cleaning up to do at the end.

    The colours I’m using here are (l-r) China Glaze Sunday Funday, Barry M Greenberry, Barry M Blueberry and China Glaze Pink-ie Promise.

    I got these toothbrushes from Tesco and for 18p! You can but cheap toothbrushes pretty much anywhere that sells toothbrushes but try to make sure you get ones where the bristles are all the same length.  

    Step 1: Paint on your base colour and wait for it to dry completely.

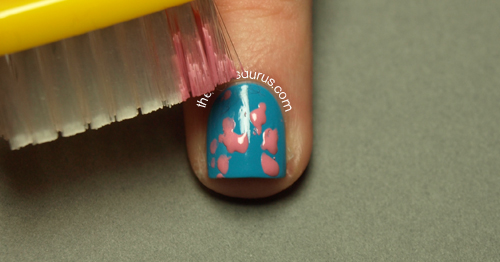
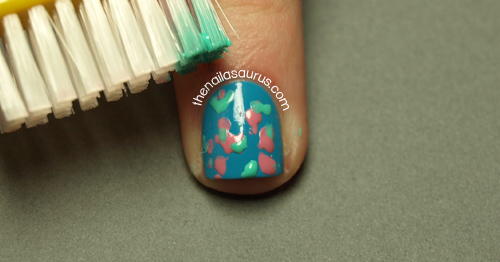
    Step 2: Paint your first splodge colour straight from the bottle on to the bristles near the end of the toothbrush. Be quite generous with the polish otherwise it won’t transfer on to your nails.

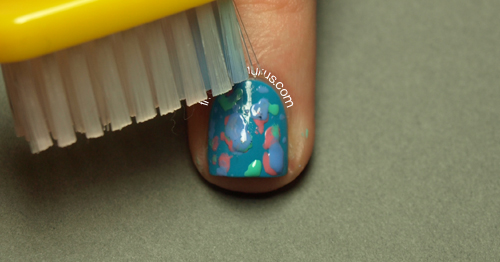
    Step 3. Carefully dab the brush down on to your nails to create your first splodges. Wait for them to dry before moving on.

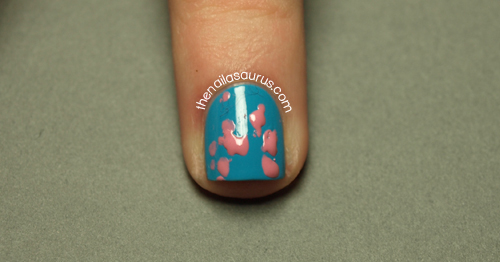
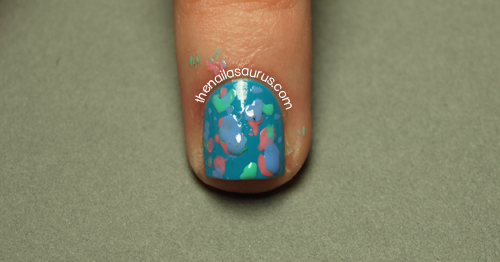
    Step 4. Apply more colours in the same way until you’re happy with the look. Between each colour, you’ll need to clean the toothbrush and wait for each layer to dry. You can clean the toothbrush by wiping it with a tissue or dipping it in to nail polish remover/acetone and drying on a cotton pad. 

    Step 5: The finished result might be a bit bumpy so apply a thick layer of your top coat.

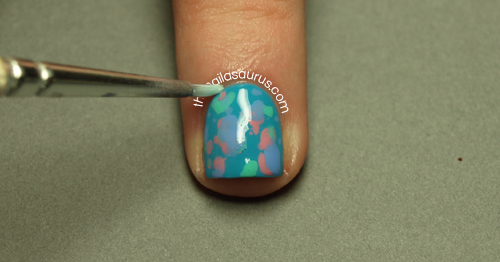
    Step 6: Finally, use a small paintbrush dipped in acetone or polish remover to clean up any of the bits that got around your nail and you’re done!

    TwitterBloglovin’Tumblr

    Share:
    31 Day Challenge, Tutorial, Uncategorised

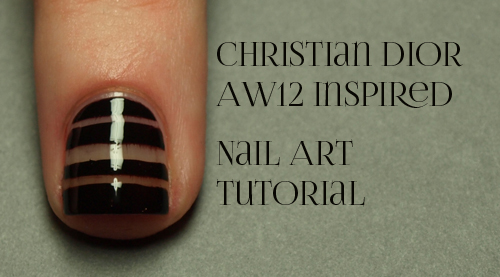
    Christan Dior AW12 Fashion Nail Art Tutorial

    Here’s a tutorial for my Day 25 Inspired by Fashion Manicure from this year’s 31 Day Challenge. You can see the original post here with plenty of pictures.
    The basics you’ll need are striping tape, black nail polish (or any other colour of your choice) and a top coat.
    I’ve also used tweezers, acetone and some nail art brushes but you’ll see more about that below.

    Make sure your nails are completely clean. If there’s any oil or dirt on your nails, the tape will have a hard time sticking properly. 
    You can use a base coat or colour if you like but I did the design straight on to my bare nails. If you are going to apply any polish make sure it’s completely dry before you apply any tape.

    Place strips of striping tape across your nail and double up a few to make thicker lines. I used some tweezers  to help me place the tape exactly where I wanted it. Try to make sure the tape is stuck down all the way to the edges.

    One nail at a time, paint on your colour. Try to choose one that only needs one coat to be opaque. I just used one coat of A-England Lancelot. Move swiftly on to the next step.

    While the polish is still wet, peel off the tape in one smooth motion from one side to the other.

    If there are any patches where the polish got underneath the tape, use a nail art brush dipped in acetone to remove the unwanted bits.

    Wait until the polish is completely dry and apply your top coat. I didn’t wait long enough and you can see the smudges!
    Use a small paintbrush dipped in acetone to clean up around the edges and there you go!

    TwitterBloglovin’Tumblr

    Share:
    Tutorial, Uncategorised

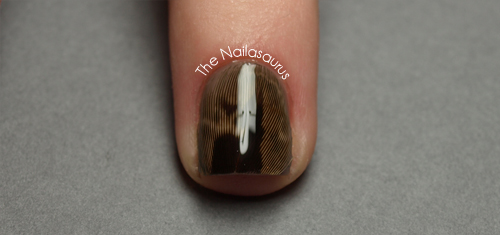
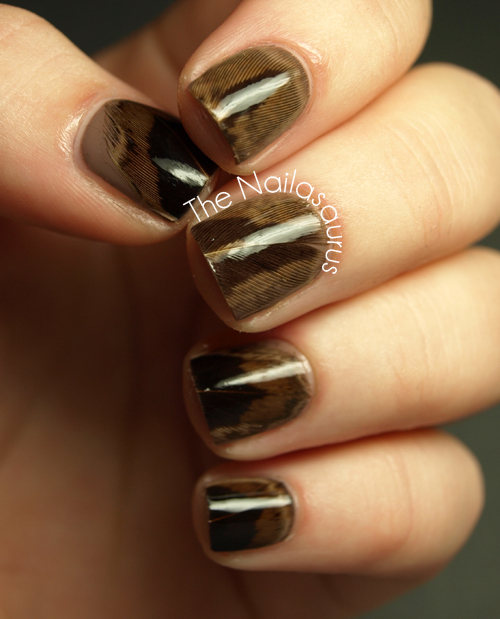
    Real Feather Nail Art Tutorial

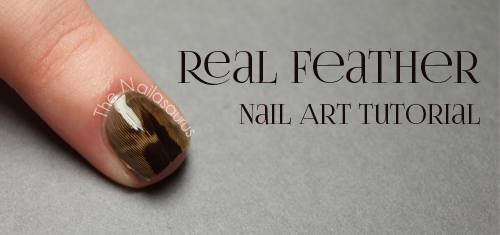
    This tutorial is for the feather nail art I posted yesterday. I tried my best to explain the way I did it, but as they say, a picture speaks a thousand words so I think you’ll find this tutorial much easier to understand!
    You will need…
    A base colour. I chose Essie Glamour Purse.
    A few top coats – one that’s very thick (I’m using a bottle of Essence Better Than Gel Nails that’s a few months old) and one that dries quickly (like Seche Vite).
    A nail file
    A small pair of scissors
    And, of course, some feathers! The thinner and lighter the better.
    I got mine from Hobbycraft in a huge bag for £2.99 but you should be able to find something suitable in most large craft stores. I think Michaels is the US equivalent of Hobbycraft in the UK.

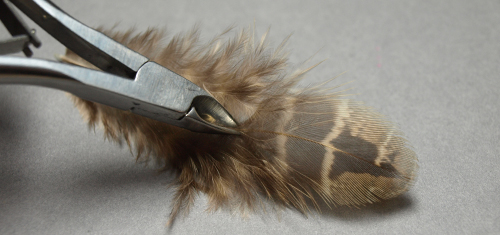
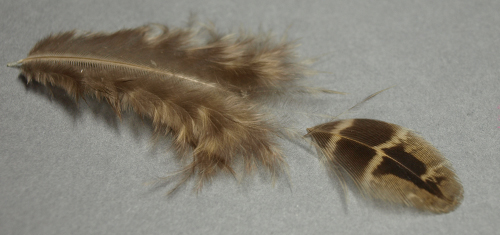
    Before you start, prepare all of the feathers you plan to use by cutting off the ends. This is the only part we need to use. Pick out feathers that match the size of your nail(s) so that you don’t have too much overhang at the cuticles which can be a pain to trim. 
    Paint on your base colour, let it dry, then add a thick coat of your thick clear top coat.

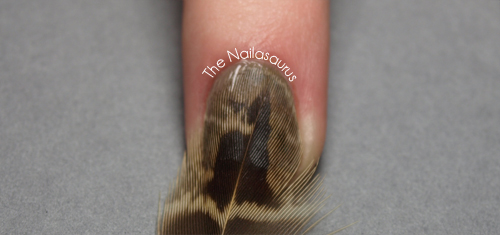
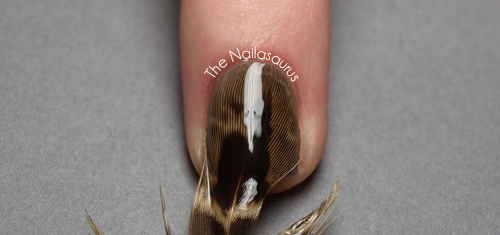
    While the clear coat is still tacky, carefully place the feather on to your nail. Try to only cover the part of your nail that has colour on.
    Lick the index finger on your other hand and use that to very gently press the feather down in to the sticky nail polish. Don’t worry about the unwanted feather hanging off the end of your nail just yet.
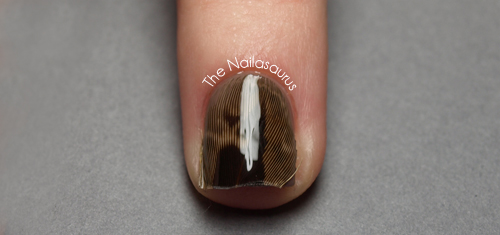
    When that’s completely dry, apply a few coats of your fast drying top coat. Carry it on past the end of your nail to make the feather hard and easy to cut/file. I used 3 coats of Seche Vite to give it a thick glaze!

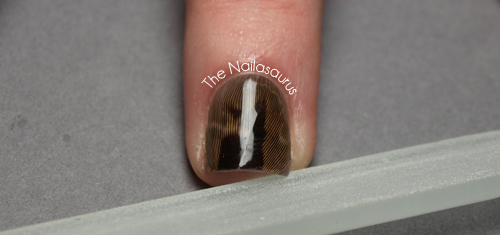
    Once that’s dry, use scissors or cuticle clippers to trim off most of the excess feather hanging off the end of your nail.
    You can remove what’s left with a nail file which also leaves you with a nice smooth edge. This will stop it from annoyingly catching on your clothes and remove the temptation to pick it off!
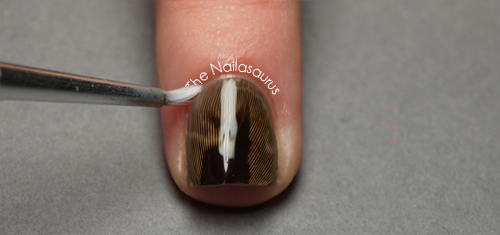
    I like to clean up around my cuticles with pure acetone and a small paintbrush, especially after piling on all that top coat!
    And here’s the result…

    TwitterBloglovin’Tumblr

    Share:
    Glitter, Tutorial, Uncategorised, Video

    Glequin Video Tutorial!

    Sorry that you’ve had to pester and pester me for this. I always say it, but I’m such a slacker when it comes to making tutorials. This is by far my favourite tutorial that I’ve made. Editing was minimal and I managed to get most of the shots I needed first time round without any camera or other equipment disasters. I think tutorial making is, like almost everything, one of those instances where practice makes perfect. I’m learning from my mistakes and my videos are getting better for it.

    Hopefully this will answer any questions you might have had about how I apply glequins. Here is a link to the Glitters on Born Pretty Store and don’t forget you’ll get 10% off your order with my code, SA5X31.

    TwitterBloglovin’Tumblr

    Share:
    Freehand, Tutorial, Uncategorised

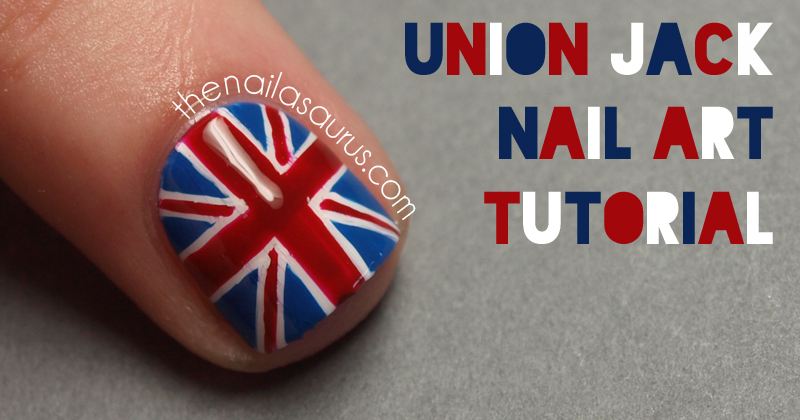
    Union Jack Nail Art Tutorial

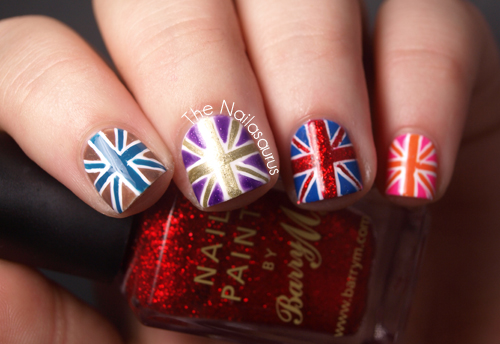
    You’ve seen the Union Jack a.k.a. the flag of the United Kingdom here many times before. It comes in handy on patriotic occasions such as the Queen’s Jubilee and now the Olympics are finally here. I’ve been thinking about doing a tutorial for while and I figured now would be the perfect time!
    It’s actually way easier to do than it looks because it’s completely made up of straight lines. I’m sure there are lots of other ways to do this but this is the way I’ve always done it! Enjoy!
    Union Jack British Flag Nail Art Tutorial

    Union Jack British Flag Nail Art Tutorial
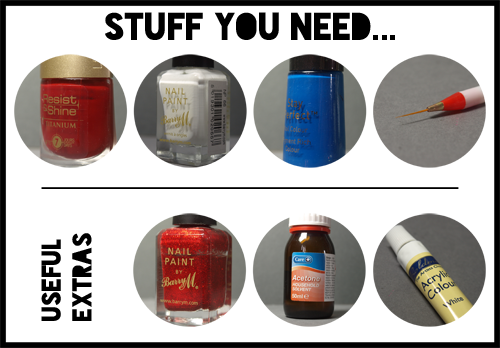
    Before you start, make sure you have everything you’re gonna need already in front of you. You’ll need:
    Red Nail Polish
    White Nail Polish
    Blue Nail Polish 
    A Nail Art Brush which you can buy here and here
    If you want to add some sparkle, you can also grab a glitter polish.
    Acetone will work much more effectively than nail polish remover for cleaning the brush and also when it comes to cleaning up at the end.
    Acrylic paint is more opaque than nail polish and some people prefer to use it in their nail art. In this tutorial, I just used a tiny bit of white paint towards the end.
    Ready? Here we go!
    Union Jack British Flag Nail Art Tutorial
    Step 1
    Paint on a base of white. Try to keep the surface as smooth as possible with steady brush strokes.
    Union Jack British Flag Nail Art Tutorial
    Step 2
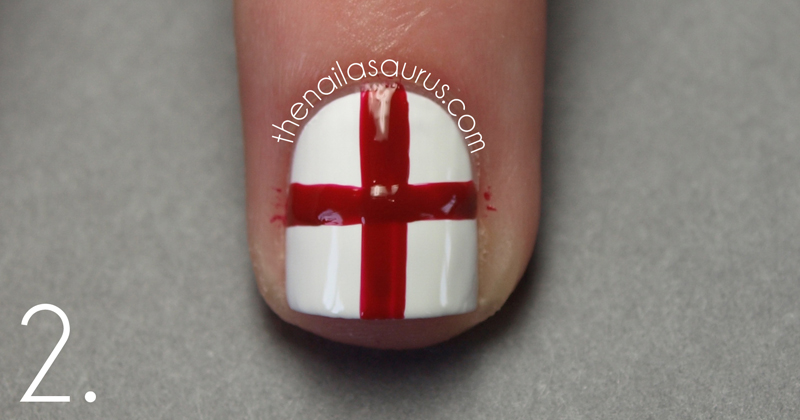
    When your base colour is completely dry, use the red nail polish and your nail art brush to paint on a thick cross. Start with a vertical line straight down the middle and then go across.
    Union Jack British Flag Nail Art Tutorial
    Step 3
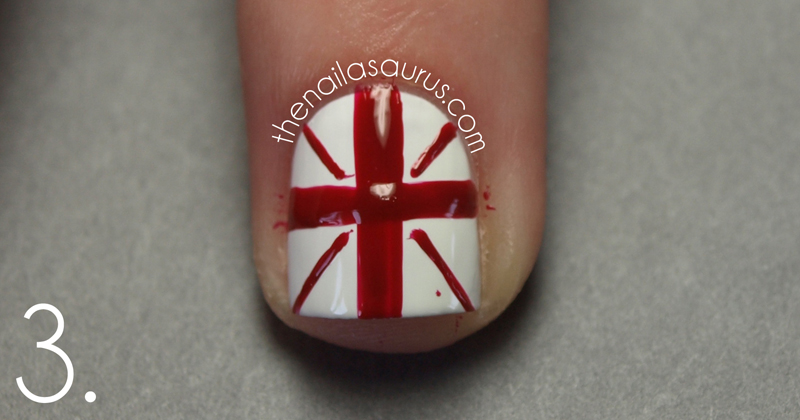
    Add some smaller line going from the centre outwards. Try not to touch the thick cross if you can avoid it.
    Union Jack British Flag Nail Art Tutorial
    Step 4
    Fill in the 8 blank triangles you are left with. Again, try not to touch any of the details that are already there but don’t worry if you do, it can be tidied up later.

    Union Jack British Flag Nail Art Tutorial
    Step 5
    There are a lot of steps rounded up in to this one. Let me give you a run down.
    If you are going to add glitter, this would be the time to do so! Just apply it carefully on top of the existing colours with the nail art brush.
    When everything is dry, take some white acrylic paint or nail polish on a nail art brush and go over the white lines to tidy up any mishaps and get crisper lines.
    Using a small paintbrush dipped in acetone, run it around your cuticles to clean up the bits of polish that have been left there and leave you with a perfectly round edge.
    Finally, add a few coats of your favourite top coat to make it shiny, make it last and smooth out the surface which will probably be a bit bumpy at this point.
    All done!
    Union Jack British Flag Nail Art Tutorial
    Share:
    Tutorial, Uncategorised

    Laser (Disco, Moonbeam?) Nail Art Tutorial

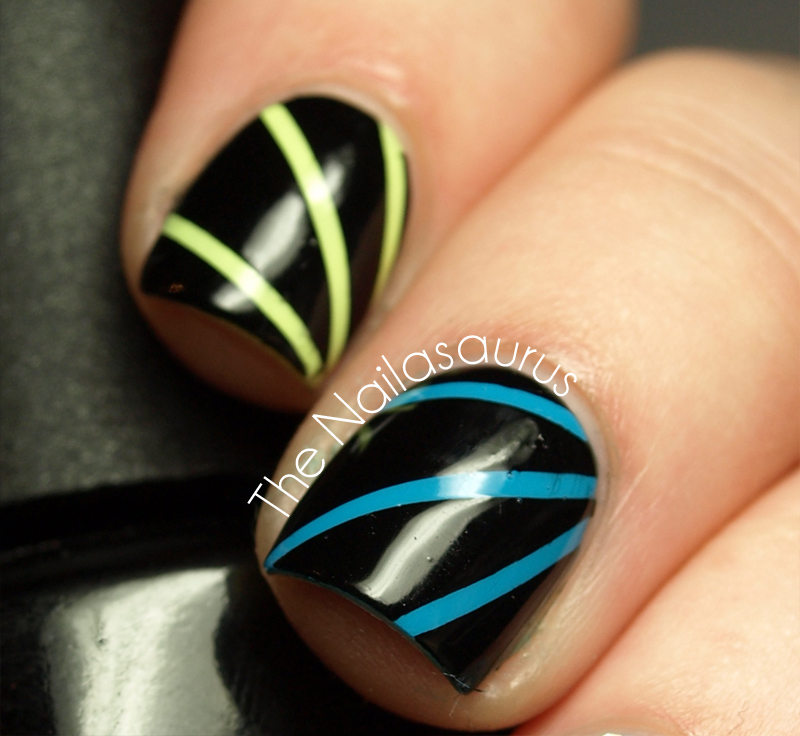
    Today I have a tutorial for the ‘Strobe Lights’ part of my Disco Mani from earlier in the week. I suppose you could also call them Lasers or Moonbeams. Ooh, I like Moonbeams – the Moonbeam Mani has kind of a ring to it, don’t you think? Although I don’t think Moonbeams come with a neon option! Can you tell I’m just typing as I think tonight?!
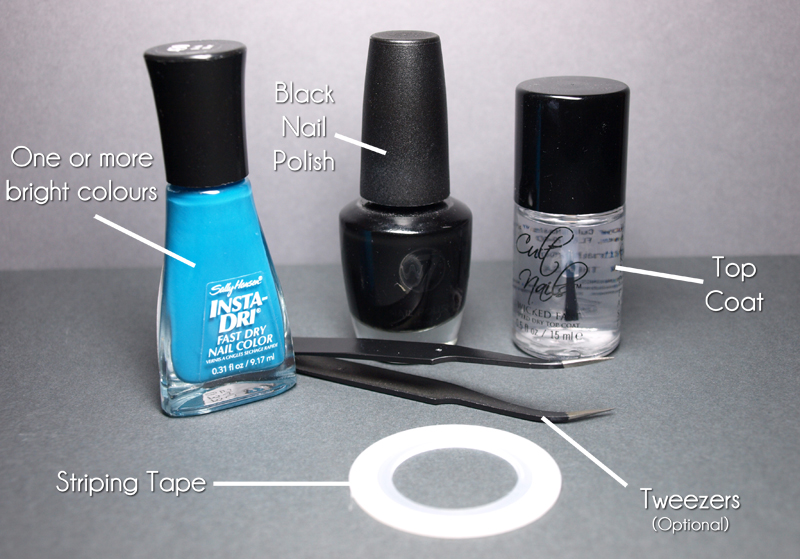
    You Will Need

    Laser Nail Art Tutorial from The Nailasaurus
    Bright colours for the ‘lasers’. I’m using Sally Hansen Insta-Dri in Brisk Blue.
    Black nail polish. I use W7 Black.
    Clear top coat that’s fast drying. This one is Cult Nails Wicked Fast.
    Striping tape which you can get on eBay or from online nail art supply stores.
    Tweezers. These are optional but I find they come in handy at a few points in this technique.
    The Fun Part!

    Step 1
    Paint on your bright base colour and make sure it is completely dry before moving on to the next step. I normally use a thin coat of quick drying top coat at this point to speed up the process. If your base coat isn’t dry, it will peel off with striping tape later on.
    You can stick with one colour for every nail or be a bit adventurous by mixing and matching!
    Laser Nail Art Tutorial from The Nailasaurus

    Step 2
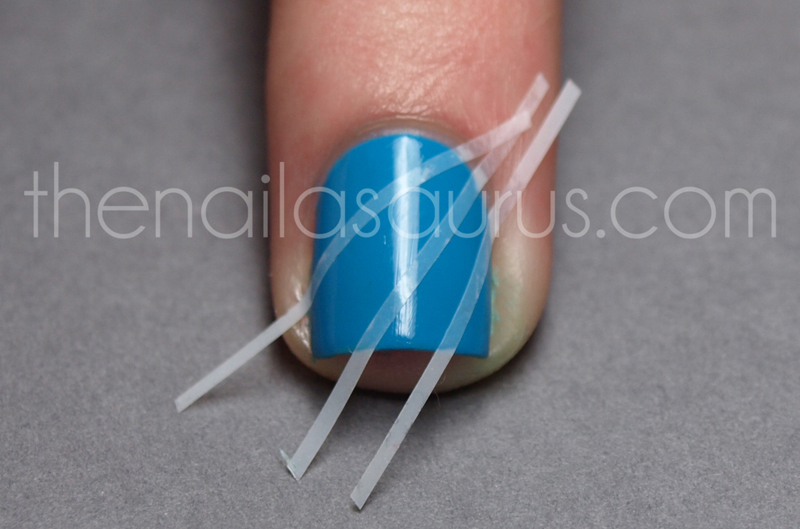
    Cut a few lengths of striping tape about twice the length of your nail and place them where you want your lasers to be. You can use tweezers for extra precision. Make sure the strips are stuck down right up to the edges of your nails so you get a crisp line. 
    Laser Nail Art Tutorial from The Nailasaurus
    Step 3
    One nail at a time, paint your black polish all over your nail and move straight on to step 4.

    Laser Nail Art Tutorial from The Nailasaurus
    Step 4
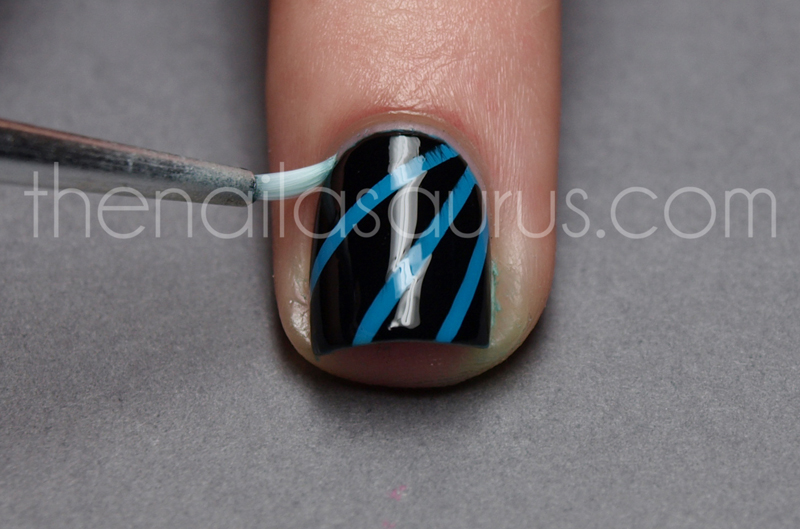
    While your black polish is still wet, carefully remove the striping tape one strip at a time. Use an up and backward motion – I hope I’m explaining this clearly enough but I’d describe it as pulling the tape back on itself. Basically, just pull it off in a straight line and you should be safe. This is a step where tweezers might come in handy for a bit of extra grip on the fiddly tape. We’re nearly done!

    Laser Nail Art Tutorial from The Nailasaurus
    Finishing Up
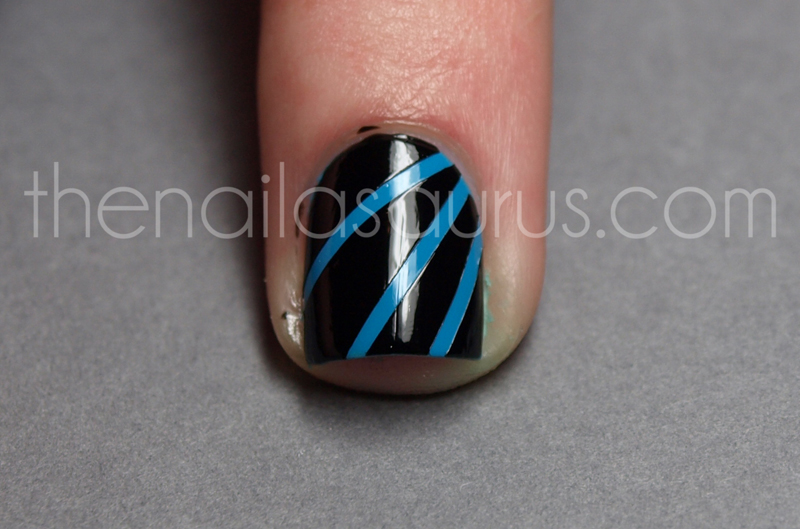
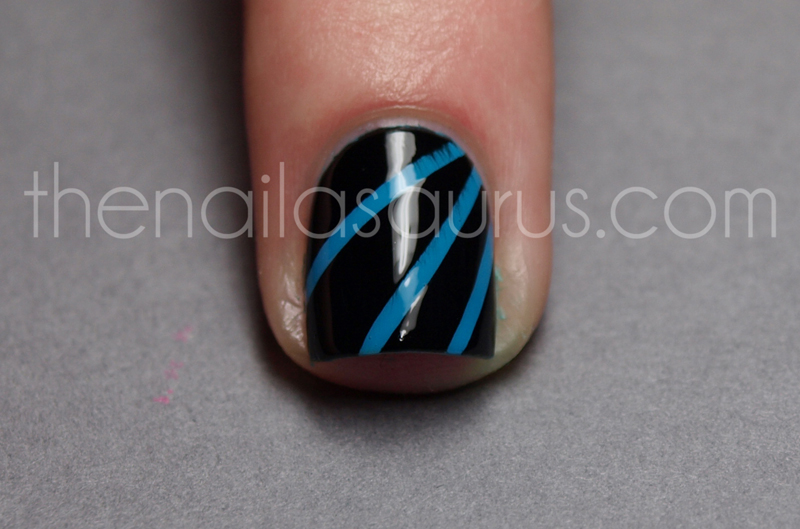
    Wait for your black polish to dry and add a top coat to smooth out any bumps and make your mani last longer. Don’t be impatient like I was and apply your top coat too soon else you’ll end up with smears.
    To clean up around your cuticles, take a small paint brush and dip it in to acetone or nail polish remover before running it around your cuticles to remove any unwanted bits of polish and leave you with a crisp edge.

    Laser Nail Art Tutorial from The Nailasaurus
    Ta-Dah!
    All finished! I want to see you all rocking this mani at every disco you attend henceforth!

    Laser Nail Art Tutorial from The Nailasaurus
    Share: