Follow:
Browsing Category:

Tutorial

    Gradient, Tutorial, Uncategorised, Video

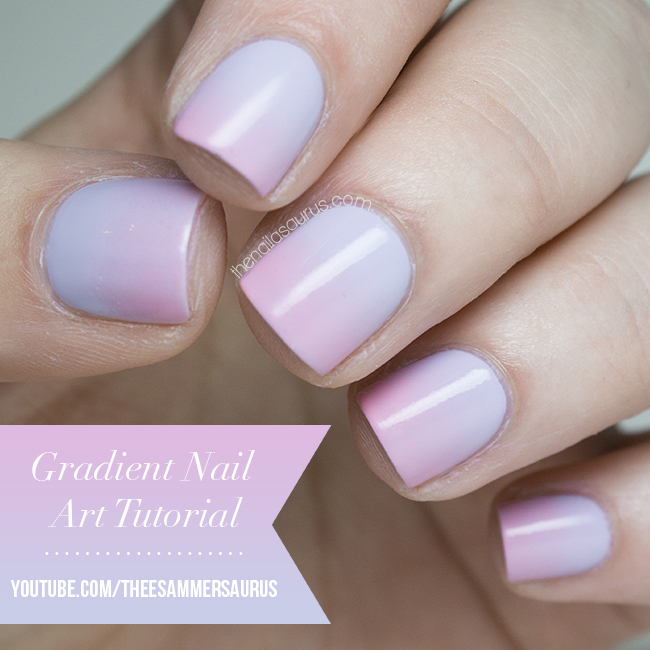
    Gradient Nail Art Tutorial Video and FAQ

    Gradient Nail Art Video Tutorial

    When I ventured back in to making videos recently, it seemed inevitable that I’d be making a gradient nail art video since my picture version was quite a success and many people have asked to see me do it in a video. This mani does take a while but most of that time is spent waiting for polish to dry. Once you get the hang of it, sponging on the gradient is easy!
    While we’re here, I also thought it would be a great opportunity to answer some of the questions I get asked most frequently about this technique. Over time I’ve learnt a lot more about the process and how to overcome a few of the difficulties that you might come across on your first couple of tries.
    What polishes work best for gradients?
    You can’t go wrong with creme polishes that are quite runny. They don’t have to be very opaque either, streaky polishes often work best for gradients.
    How do you avoid bits coming off the sponge and sticking to your nail?
    I don’t think there’s any way to avoid this. If you see little flecks of sponge breaking off and sticking to your nail, just pick up a new sponge and continue where you left off.
    You can use tweezers to pick these flecks out of your mani but if they’re only small, usually your top coat will hide them!
    Should you wet the sponge first?
    Personally I never use water but I know others that use a damp sponge with amazing results. Try both ways and see what works for you!
    How do you clean the sponge after?
    I don’t bother trying to clean the sponges. I just throw them away and use a fresh one the next time.
    Any other tips?
    It’s super important to wait for your polish to dry in between layers. If you try to sponge over wet polish, you’ll just start picking up the polish that’s already there and it’ll be a gloopy mess. Watch a movie while you’re doing it to avoid boredom!

    If you try this mani yourself, don’t forget to use #looknailasaurus on Instagram so I can see your results!

    Share:
    Glitter, Tutorial, Uncategorised

    Faviana Prom Dress Nail Art Tutorial

    For today’s post I’ve teamed up with Faviana, to bring you a nail art tutorial inspired by one of their designer prom dresses. The website is chock full with a good mix of short and flirty, insanely glamorous and classical formal dresses and the one that inspired this nail art is somewhere in between all of them. I picked Faviana Style 7364 which is cheeky with a hint of glamour and completely perfect for any formal occasion.
    With prom season coming up, I know a lot of you will be matching your nail art to your prom dress and you can keep it simple by painting your nails a perfectly complimentary or contrasting colour or go all out and take elements from the dress like I have!

    Tutorial Equipment

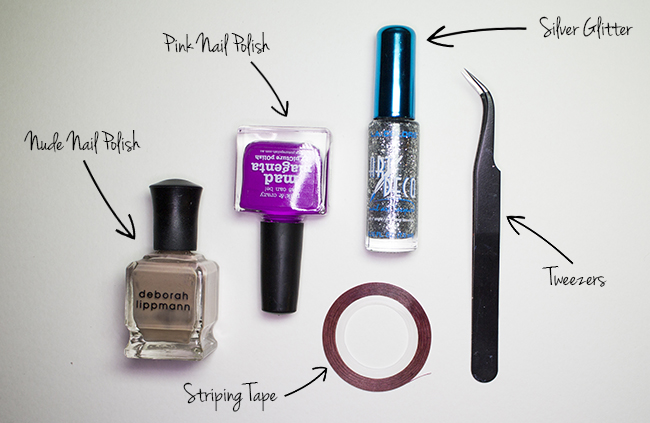
    Before you start, make sure you have everything you need. I’m using Deborah Lippmann Fashion and piCture pOlish Mad Magenta as my main colours along with a LA Colors silver striper. You’ll also need some striping tape – in a pinch, you can cut up scotch tape in to very thin strips. The tweezers are an optional extra but I’d suggest keeping a pair on standby if you can!

    1. Start with a nail polish that matches your skin tone and let it dry completely. You can add a fast drying top coat like Seche Vite to speed up the process.
    Tip: You can completely skip the first step and do this on naked nails for a negative space manicure.
    2. Place striping tape on the nails where you want the base colour to show through. I’ve marked off a triangle at the base of my nail and then a few strips at the sides. I used a pair of tweezers to place the tape on my nail.
    3. Using your pink polish, paint over the tape taking care to avoid the triangle near the base of your nail. You can cover the triangle with a piece of scotch tape if you want to be sure you won’t paint over it.
    4. While the polish is still wet, remove the striping tape. Again, I always use a pair of tweezers to do this because it’s a really fiddly job.
    5. This is what your nails should look like once your tape’s removed.
    6. Take your glitter polish and add a healthy amount over the sections at each side.
    7. Finally, add your favourite top coat and sweep around the edges with a clean-up brush dipped in acetone to get rid of any mishaps.
    faviana-nail-art-tutorial
    faviana-nail-art-tutorial-01
    Make sure you stop by faviana.com for more prom nail art inspiration and any last minute dress shopping!
    Share:
    Tutorial, Uncategorised, Video, Waterfall

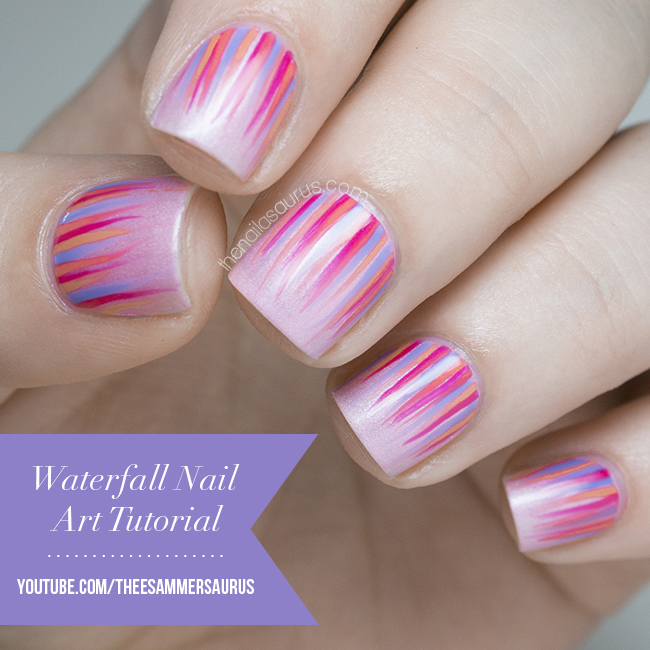
    Waterfall Nail Art Tutorial Video

    Here’s step one on my ‘Done is Better Than Perfect‘ mission… tutorial videos! This is something I’ve been intending to do for more than a year and tried more than a few times but there was always something I was unhappy with. The main issue was lighting but once I decided to stop fussing and just get on with it, I did my research and found a really cool lighting setup that lets me get nice and close without blocking out any light.

    For my first video, I started simple with a Waterfall Nail Art Tutorial to accompany the picture tutorial I posted last July. I must say, I’m really happy with the way it’s turned out which has definitely encouraged me to keep going with videos!

    Share:
    Tutorial, Uncategorised

    Nimbus Nail Art Tutorial

    As I promised, today’s post is a tutorial for the nail art I posted yesterday. As many of you guessed – I did indeed use a q-tip/cotton bud! I really love this nail art so no doubt I’ll be posting a lot of these in the coming weeks. It also makes a great base for stamping and other nail art so stay tuned for that!
    I had mentioned that I didn’t know what to call this style, but Laura’s suggestion of ‘Halo’ was spot on. Thank you Laura! I decided on Nimbus (which is another word for Halo according to thesaurus.com!) to avoid any confusion with video game themed nail art. Nimbus nail art also rolls off the tongue quite nicely and it makes me think of Harry Potter! Win, win!
    Nimbus Nail Art Tutorial by The Nailasaurus

    Nimbus Nail Art Tutorial by The Nailasaurus
    All you need for this nail art is:
    Cotton Buds
    Acetone – You can get acetone from most beauty supply stores and most pharmacies. I did try this with nail polish remover but it wasn’t as effective. You can also use polish thinner, but that could get pricey as you need to use a fair amount.
    A white nail polish for your base

    A selection of 3-4 colours – I’m using Barry M Plum, Prickly Pear and Bright Purple and H+M Midnight Mystery.
    Top coat
    Start by painting all of your nails white, or another very light shade and letting it dry. Using a light base will make the colours much more vibrant when you add them over the top.
    Nimbus Nail Art Tutorial by The Nailasaurus
    This is the important part! Lay out some nail polish on a sheet of plastic or foil and pour out some acetone. If you don’t have a suitable container, just use the lid of the bottle.
    Touch a cotton bud to the surface of the acetone and let it soak up in to the cotton.
    Start thinning out the polish using the acetone soaked cotton bud by working it in a circular motion.

    Nimbus Nail Art Tutorial by The Nailasaurus
    Test the consistency by blotting the cotton bud on to the plastic. You want it to be watery but still pigmented.

    Nimbus Nail Art Tutorial by The Nailasaurus
    When you’re happy with the consistency, blot the cotton bud randomly on to your nail. I like to start with the darkest colour and work my way towards the lightest.

    Nimbus Nail Art Tutorial by The Nailasaurus
    Pick up a fresh cotton bud and repeat with your second colour.

    And the third! If you want to get the colour right up to the edges of your nails, it will start pooling in your cuticles. Don’t worry about it too much yet, it can easily be cleaned up when you’re done.

    Nimbus Nail Art Tutorial by The Nailasaurus

    Blot on a layer of your lightest colour to blend everything together nicely.

    Nimbus Nail Art Tutorial by The Nailasaurus
    Because the layers of colour are so thin, you can keep adding colours until you’re happy. Just make sure you give it time to dry in between colours otherwise the acetone can start removing the layers underneath.

    Nimbus Nail Art Tutorial by The Nailasaurus
    Once you’re finished, add a top coat and wait for everything to dry. Clean up around the edges using a clean-up brush and you’re done!
    A few tips
    – Your cotton bud should be saturated with acetone, but not dripping with it!
    – If at any point your cotton bud starts deteriorating – stray fibres etc – just pick up a new one.
    – If any little bits of cotton do get on to your nail, you can remove them with a pair of tweezers.
    I want to see your take on this technique so I’d love if you tag #looknailasaurus if you post your mani on Instagram, Twitter or Tumblr!

    Nimbus Nail Art Tutorial by The Nailasaurus

    TwitterBloglovin’Tumblr

    Share:
    Halloween, Tutorial, Uncategorised

    Halloween Patchwork Nail Art Tutorial

    Here’s a tutorial for yesterday’s Halloween themed nail art. I mentioned that I freehanded the design but this time around I created the tutorial using scotch tape as I know straight lines can be hard to master with a brush.

    You’ll need:
    Orange Nail Polish – Essie Fear and Desire
    Purple Nail Polish – Models Own Pukka Purple
    Green Nail Polish – Sally Hansen Grass Slipper
    Black acrylic paint or nail polish
    Scotch Tape
    Top coat – preferably fast drying
    Start by painting on your base colour and topping it with a thin layer of your top coat. Wait 5-10 minutes, or until the polish is completely dry before moving on.

    Place two strips of tape on your nail to mark off your first patch – it can be absolutely any shape but I’ve gone with a triangle.

    Paint on your first colour and immediately remove the tape.

    Add another thin top coat to make it dry quickly.

    Once it’s dry, section off your next patch using tape. This time I’ve gone for a strip straight across my nail.

    Just like last time, paint straight over the tape and immediately remove the tape.

    Now you’ve got your patches! If you’re a whizz with a nail art brush, you could get to this point without using tape.

    For the stitching detail, take a nail art brush and first, outline the patches.

    Next, paint on the stitches.

    To finish up use a top coat or two and then clean up any mess around your cuticles using a clean-up brush dipped in pure acetone.

    And you’re done!
    I love to see your manis so if you try this look, don’t forget to tag #looknailasaurus if you post it Instagram or Twitter!

    TwitterBloglovin’Tumblr

    Share:
    Freehand, Galaxy, Tutorial, Uncategorised

    Let Me Update You

    With the 31 Day Challenge commandeering my blog this month, I’ve talked about little else here. There are a few bits of news I wanted to share so I thought I’d do a little round up post to get up to date!

    A few days ago, I made an Instatorial for the Art Deco nail art I created for Day 8 of the challenge which I thought would be good to share here too. I also confessed my intention to make more YouTube tutorials to the whole world. I guess that means no take backs!

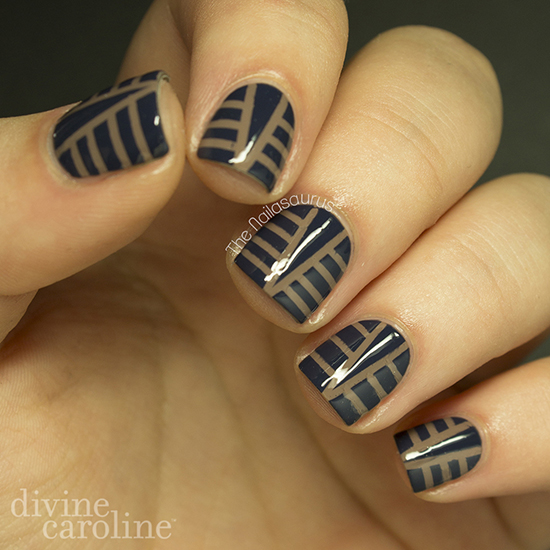
    Staying on the theme, my post at Divine Caroline this week is an Art Deco inspired striping design.
    Check out the whole post with extra pictures here.

    Allie invited me to write a guest post for her blog, Brit Nails, while she’s away on holiday this week so I created some galaxy nails. No surprise there huh?!
    See the full post here.

    Share:
    Glitter, Tutorial, Uncategorised

    piCture pOlish Blog Fest 2013

    Press Sample


    – Celebrating the Year of the Blogger –

    I’ve been absent for a bit longer than planned since my holiday but I’m back with a bang today as it’s piCture pOlish’s Blog Fest! This will be the second year that piCture pOlish have held Blog Fest which involves dozens (maybe even hundreds) of nail bloggers worldwide. We’re all posting our nail art creations today and 3 of us will be chosen to create a collaboration shade with piCture pOlish. One will be voted for by you guys on Pinterest, one by the participants and the final one will be chosen by the girls at piCture pOlish!

    If you want to vote, you can check out all the entries on the Pinterest Board and submit your favourite on the piCture pOlish website!

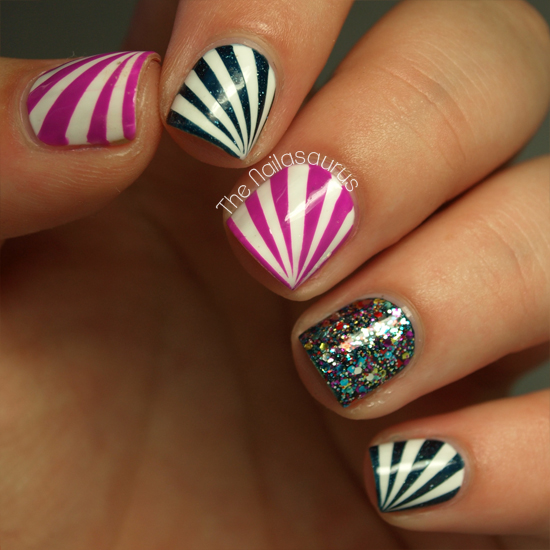
    I was sent three piCture pOlish shades to work with; Blogger, Hope and Mad Magenta. I decided to create this starburst design using scotch tape with an accent nail of two coats of Blogger over two coats of Hope. Cutting the tape is definitely the trickiest part of this nail art! At first it’s difficult to get such tiny strips but once you get the hang of it, it’s comes easy.
    Step 1: Start with a base coat of white nail polish, I used Barry M White, and apply a fast drying top coat. 

    Step 2: Cut some very thin triangles out of scotch tape. Aim for about 4-5 triangles per nail.

    Step 3: When your base colour is completely dry, use tweezers to place the triangles on to your nail working from one corner outwards. Make sure there’s a bit of overhang by the cuticles so you can easily grab it to remove.
    Step 4: Paint your second colour over the tape.
    Step 5: As soon as possible, carefully remove the strips of tape.
    Step 6: Finally, add a top coat and use a nail art brush dipped in acetone to clean up any mess around your cuticles.

    piCture pOlish ship worldwide from their website but you can also click here to find piCture pOlish stockists in your country. Make sure you check out there Everyday Deals page before you order so you’re not missing out on any offers!
    Where to find piCture pOlish
    Share: