Follow:
Browsing Category:

Tutorial

    Galaxy, Tutorial, Uncategorised

    Galaxy Nail Art Tutorial

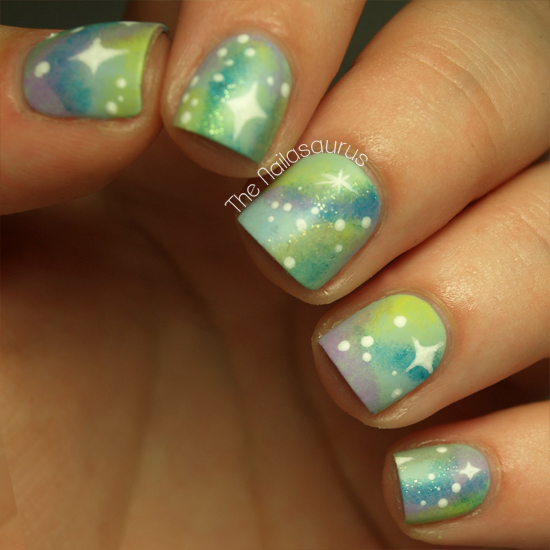
    Since you guys loved my Pastel Galaxy Nails so much I thought I’d make a tutorial to show you my process. There are a few different ways to do it but this is my method of choice!

    I’m using mostly pastel polishes for this look. From left to right, the pastel polishes I used are Sally Hansen Green Tea, NYC Raindrop, China Glaze Tart-y for the Party and NYC Lexington Yellow.

    Next up are the shimmers, Essence Choose Me and Essence Irreplaceable. I think that a bit of sparkle is really important to get the nebula look. Holographic polishes, very fine glitters and shimmery polishes all make great additions to galaxy nails.

    NYC Matte Me Crazy is my matte top coat of choice at the moment.

    You’ll also need a make-up sponge and a pair of tweezers. And the things I forgot to photograph (doh!)… white nail polish or acrylic paint, a nail art brush and a dotting tool.

    Start by painting on your base coat and letting it dry completely.

    Tear off a small piece of the sponge and grip it in the tweezers.

    I dab out my colours on to a sheet of plastic and dip the sponge in but if you prefer you can paint the polish straight from the bottle on to the sponge. You only need a small amount on the sponge, it’s best to build up the colour than to splat on too much straight away!
    Use a fresh piece of sponge for each colour.

    Start adding your colours by dabbing the sponge on to your nail in random patterns. I started with NYC Lexington Yellow.
    Next up is NYC Raindrop.
    And the last creme, China Glaze Tart-y for the Party. I sometimes go through my selection of colours twice to make sure I get a really good mix of them on the nail.

    Add just a little bit of shimmer here and there.

    I do the shiny stars by painting on a little cross, then joining up all 4 points with a curve.

    Using a dotting tool, add some smaller stars of different sizes.

    I always use a fast drying top coat to smooth everything over and make the whole thing dry. At the moment my favourite is No7 Stay Perfect Top Coat.
    I clean up the messy bits around my cuticles using a nail art brush dipped in acetone.

    Finally I added a coat of NYC Matte Me Crazy

    TwitterBloglovin’Tumblr
    Share:
    Freehand, Tutorial, Uncategorised, Waterfall

    Waterfall Nail Art Tutorial

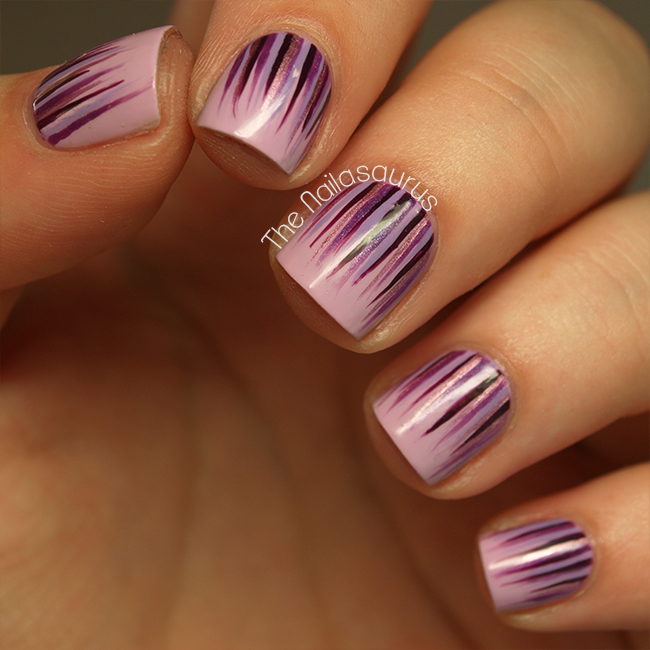
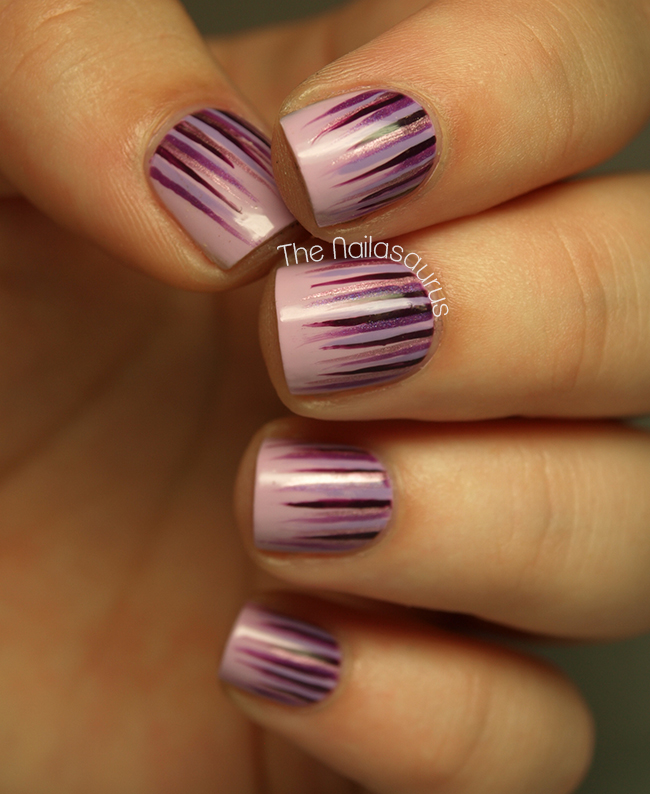
    Since you guys love the waterfall looks as much as me, here’s a tutorial detailing how I do it! It’s a really simple process that I’ve explained as best I can in my previous posts but I know pictorials always shed a lot of light when it comes to nail art so I hope you enjoy it! If you only want to see the video, just scroll down to the end of the post.
    Waterfall Nail Art Tutorial


    Waterfall Nail Art Tutorial

    For this nail art, all you need is:
    – A base colour and a selection of others for the waterfall. I’d say about 4-6 is a good number but it’s entirely up to you!
    For this tutorial, I used NYC Lavender Cupcake as my base colour and Sally Hansen Plum Luck, Rimmel Purple Reign, NYC Power of Elements and China Glaze Tart-y for the Party as my waterfall colours.
    – A top coat of your choosing. My current favourite is No7 Stay Perfect.
    – Acetone (not pictured) for cleaning your brush and cleaning up at the end.
    – A nail art brush…

    Waterfall Nail Art Tutorial
    …the brush is a very important ingredient for this style of nail art. You’ll need one that’s thin, at least 10mm long and that tapers off at the tip. You can get these in a set from eBay.

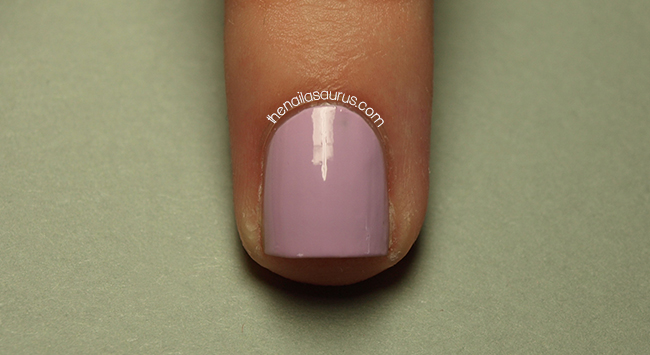
    Start by painting on your base coat and letting it dry.

    Waterfall Nail Art TutorialUsing your nail art brush and Colour #1, paint on a few staggered lines starting just over the edge of the polish at your cuticle and working towards the tip of your nail. Vary the length of the lines too.
    As you get to the end, lift the brush tip slightly away from the nail to get the tapered point on each line.

    Take Colour #2 and paint more lines just to the side of Colour #1.

    Waterfall Nail Art Tutorial
    Colour #3 goes to the side of Colour #2…

    Waterfall Nail Art Tutorial
    …and so on!

    Waterfall Nail Art Tutorial
    Finally, add a top coat and use a nail art brush dipped in acetone to clean up around your cuticle line.
    Waterfall Nail Art Tutorial

    Waterfall Nail Art Tutorial

    Waterfall Nail Art Tutorial

    Waterfall Nail Art Tutorial

    Waterfall Nail Art Tutorial

    Update

    Now there’s a video tutorial too!

    TwitterBloglovin’Tumblr
    Share:
    Tutorial, Uncategorised

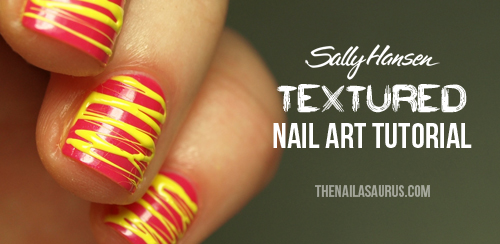
    Sally Hansen Textured Nail Art Tutorial: Sugar Spun Nail Art

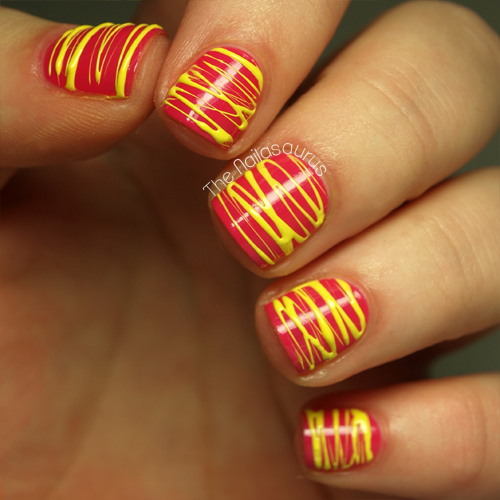
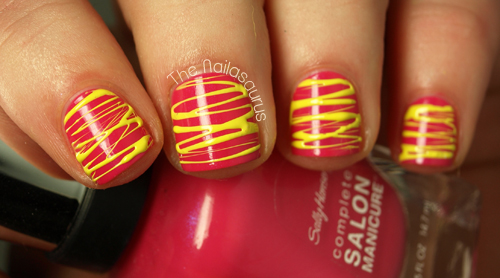
    June is the last month for you guys to enter Sally Hansen’s I ♥ Nail Art competition over on their Facebook page so I’m here with some inspiration for this month’s theme… Textured Nail Art! I’ve gone for the sugar spun look because whenever I wear this design, I find myself constantly running my fingers over the textured surface. The process is a bit messy but I think it’s worth it for the finished look!

    For this design I’m using Sally Hansen Xtreme Wear Mellow Yellow and Sally Hansen Complete Salon Manicure Back to the Fuschia. You’ll also need some toothpicks and a top coat. My favourite is Sally Hansen Dries Instantly

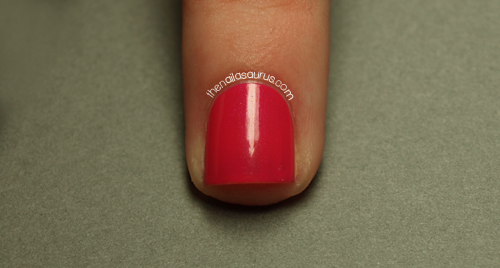
    Start by painting your nails with Back to the Fuschia and applying a top coat of Dries Instantly. Wait for them all to dry and then move on to the next step.
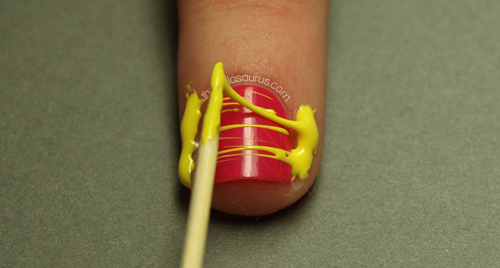
    Lay out a sheet of plastic, baking paper or something similar and make a little puddle of Mellow Yellow. Leave it for a few minutes then start to stir it with a toothpick. You’ll notice it getting thick and stickier but try to keep the consistency regular by working it with the toothpick. When the polish is making strings like you see in the picture, you’re ready to move on.

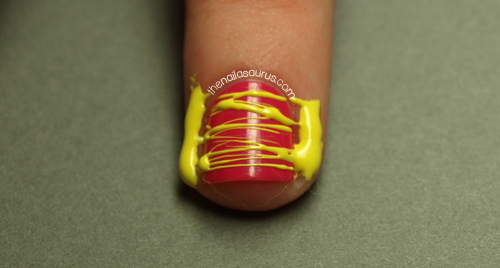
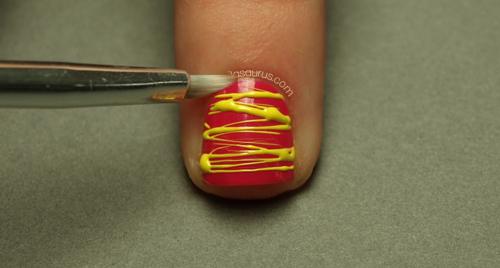
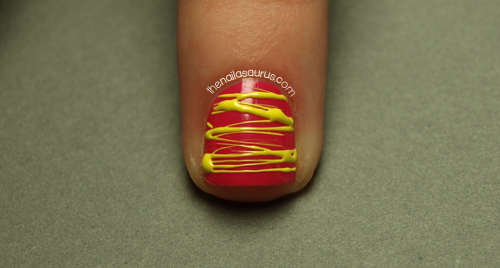
    This is where things get messy and a little more tricky! Get a little blob of Mellow Yellow on the end of your toothpick and dab it on the skin at one side of your nail, then quickly move it over to the other side stretching the polish as you go. 
    You could use a product like Liquid Palisade around your nails before you start to make cleaning up the mess a little easier.

    Once you’re happy with your sugar, wait for it to dry completely.

    Using a small nail art brush dipped in acetone, clean up around the edges of your nails. I choose not to apply a top coat on top of the design to keep as much texture as possible.

    All done! Don’t forget to enter your own Textured Nail Art looks in to Sally Hansen’s I ♥ Nail Art competition on Facebook for the chance to win $500 and a trip to NYC!

    Share:
    Studs, Tutorial, Uncategorised

    Sally Hansen Street Style Tutorial: Studs n’ Chains

    This month, Sally Hansen’s I ♥ Nail Art theme is Street Style and the call for inspiration is ‘heavy metal, pop art and graffiti glam’. I stopped reading at heavy metal… it’s got to be the studs for me!

    Before you start make sure you’ve got everything you need. The only polishes I’m using for this are Sally Hansen Black Out and Dries Instantly.
    I’m using some gold bullion for the studs, an old necklace for the chains, a pair of pointy tweezers, a nail art brush and a few toothpicks.

    I’ve got a selection of chains which I’ve collected just for nail art purposes! Some of them are necklaces I’ve tired of and instead of throwing them out I’ve done a bit of upcycling and started wearing them on my nails. Others are ones I’ve picked up in the cheap in stores. If you need a chain, just pop in to places like Claire’s to see if there are any chains thin enough for your nails.

    To avoid any smudges on your polish, before you even paint on the base colour measure and cut off a piece of chain for each of your nails. Just rest it across to get an idea of how much you need, then snip it off with scissors, wire cutters or anything else that will do the job!

    Start with a base of Sally Hansen Black Out and let it dry.

    Using the nail art brush, paint on a line of clear nail polish where you want to stick the chain and move swiftly on to the next step…

    Place the chain across your nail and pat it down in to the polish to make sure it’s really stuck there!

    I always use a toothpick to place the studs. I dip the end in a bit of clear nail polish to make it sticky and use it to pick up the fiddly little beads.

    Add a coat of Dries Instantly and place the studs on to your nail while it’s still wet.

    Finally, when everything is completely dry, dip a small paintbrush in acetone and sweep it along your cuticle line for a nice clean finish.
    Don’t forget to enter your own Street Style looks over at Sally Hansen’s Facebook Page. As always, there’s $500 and a trip to NYC up for grabs. I’d also love it if you tag me on Twitter or Instagram (@thesammersaurus) so I can see your entries too!

    TwitterBloglovin’Tumblr
    Share:
    Freehand, Tutorial, Uncategorised

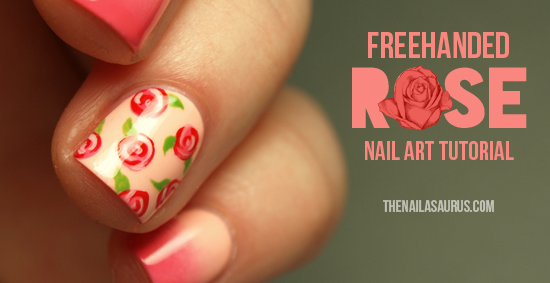
    Freehanded Rose Nail Art Tutorial

    Now that summer’s here I’m seeing floral prints everywhere. I’m not one for going all out on prints in my outfit choices but I think a little here and there looks great. I’ve been using these roses as accents in a few of my manis and I had a few requests for a tutorial so today I’m gonna share my method. It’s much simpler than it looks and the results are definitely a stand out.

    The stuff you need
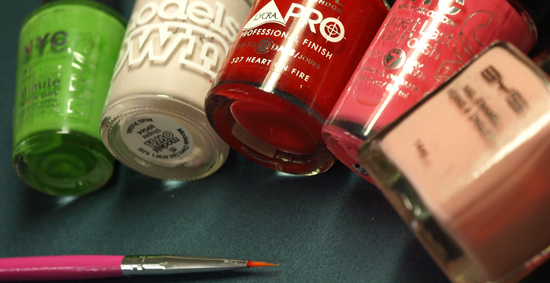
    A small nail art brush is essential and you’ll need quite a few nail polishes too…
    From right ← left
    Base colour: BYS Pretty as a Peach
    3 colours for the roses: NYC Bubblegum Pink, Rimmel Heart on Fire and Models Own Utopia
    A green colour for the leaves: NYC High Line Green
    I also use acetone to get my brush super clean between colours. Nail polish remover works too but I find it’s not quite as hardcore at cleaning as the acetone!

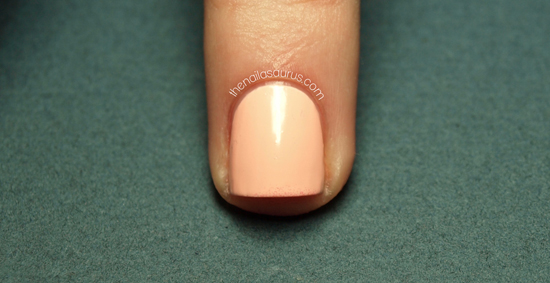
    Start by painting on your base colour and letting it dry completely.

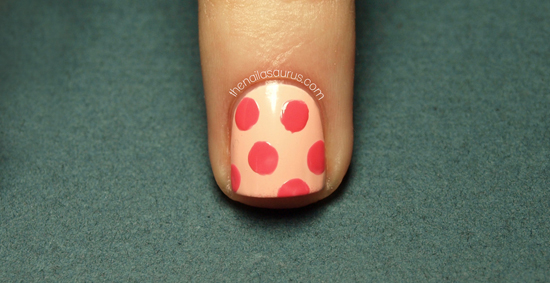
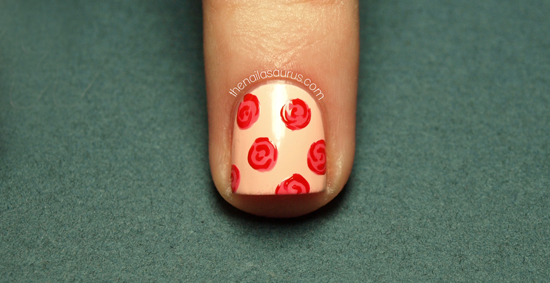
    Paint on some random circles and don’t worry if they aren’t perfectly round. You could even use a large dotting tool for this part.

    Take a darker colour and draw some contour lines within each circle.

    Next, using a lighter colour, draw on some highlights in the same way. You can skip this step and still get a really nice result.

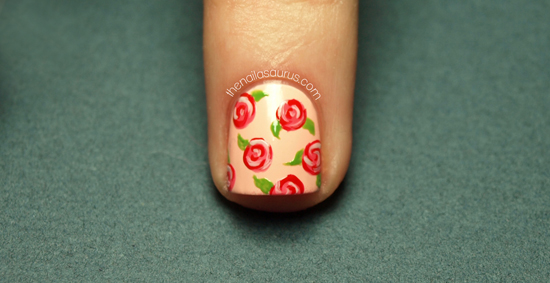
    Add one or two leaves to each flower.

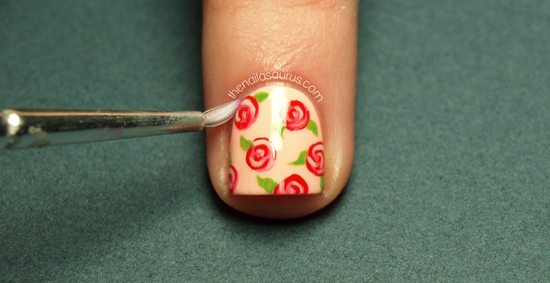
    Finally, add a top coat then use a small paintbrush dipped in acetone to clean up around the edges of your nail and you’re all done!

    TwitterBloglovin’Tumblr
    Share:
    Tutorial, Uncategorised

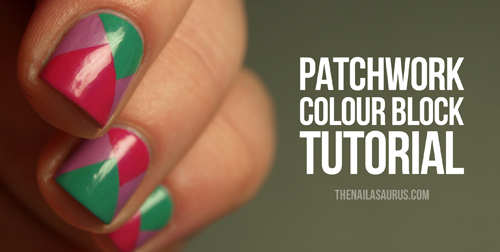
    Patchwork Colour Block Tutorial

    A little while ago, Sally Hansen got in touch to see if I’d like to be a Nail Art Ambassador for their I ♥ Nail Art campaign. As you’ll know if you’ve been reading for a while, my undying love for Sally Hansen is no big secret around here so of course I was more than happy to get involved!

    Each month there’s a new theme and you can submit your nail creations for the chance to win amazing prizes. I’ll be bringing you two tutorials every month and for the month of April, the theme is Colour Blocking!

    Before you start, make sure you have everything you need:
    Three (or more!) colours. I’m using Back to the Fuschia (what an amazing name!), Lively Lilac and Mint Sprint.
    A quick drying top coat. I’ve picked Dries Instantly for this one.
    Some Scotch tape, or anything similar. I decided to invest in one of those nifty gadgets which slides over your knuckles and dispenses it in little strips. If you’re cutting from the roll it’s a good idea to snip off some little strips before getting stuck in to the painting.
    Start by painting on your base colour, this is the colour that will show at the sides. At this point I apply a top coat to make it dry nice and quickly. 
    Sticking scotch tape to wet nails is a big no no so wait until it’s completely dry before moving on. I normally give it about 15-30 minutes just to be sure.

    Apply one piece of scotch tape diagonally across your nail…

    … and then another at a right angle to that piece. You want to be able to see an exposed patch in an off centre triangle shape at the bas of your nail.
    Make sure your tape is pressed down firmly so that absolutely no polish seeps underneath. You can use a pair of tweezers to make things a bit easier.

    Paint your second colour on to the exposed triangle and immediately peel off the tape… very slowly and carefully!
    Once that patch is mostly dry, I apply another top coat to speed up the drying but still wait about 15-20 minutes before applying any more tape.

    Apply the second batch of tape in the same way. First with a strip diagonally across your nail (this time you can use the patch that’s already there as a guide), then another headed towards the tip of your nail.

    Paint on colour number 3 and peel off the tape.

    Finally, add one last top coat and use a small paintbrush dipped in acetone to clean up any mess around your cuticles!
    You can enter your own colour blocking manis in to Sally Hansen’s I ♥ Nail Art competition and check out the gallery for plenty more inspiration here.
    Although I kept the base coat the same on every nail, I alternated the colours I used to paint on my patches. There are so many ways to make this mani your own. Your can mix up your base colours, try out some different patches and even experiment with the angles!

    TwitterBloglovin’Tumblr

    Share:
    Tutorial, Uncategorised

    OH SNAP: How I Take My Pictures

     As they say, ‘a picture speaks a thousand words’ so you want your blog pictures to make the right impression, especially to first time visitors.
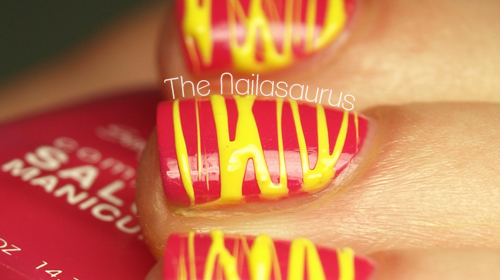
    Back when I started out as a nail blogger, my photography skills left a lot to be desired and my photos were undoubtedly giving off a dull impression. Fortunately since then I’ve picked up little bits of photography knowledge here and there and today my photos are looking pretty fly if I do say so myself! I get a lot of questions about my camera, lighting, set-up etc. so today I’m going to share everything I can think of that contributes to the final images you see in my posts.

    Camera: Olympus E510 w/ 14-42mm lens
    Lamp: Plain old fluorescent desk lamp (£19.99 at Argos)
    Background: Grey mount board (sold as scraps at local craft store)
    I’ve got a very basic little setup going on at the end of my desk. For my background I use mount board, aka very thick card. I prop one piece of board up against the wall and set another on the surface. 
    My camera sits on its side (taking portrait photos) and I’ve found I get the best macro shots with the zoom at full and holding the camera further away. I normally rest the lamp on top of the lens.

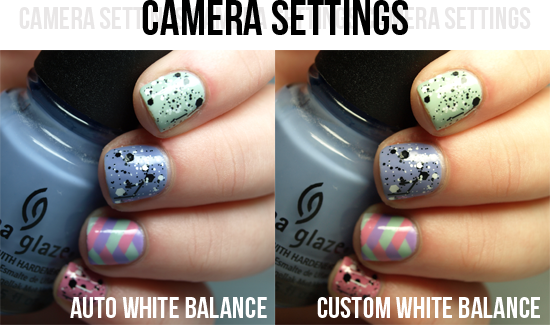
    I normally use my camera on the auto or macro setting but I always set the white balance.
    I don’t really know too much about the science behind this, I just know that setting the correct white balance will give you colours that are very true to real life which is obviously really important when swatching nail polish. If you want to read up, there’s a good article at Cambridge in Colour.
    The exact process varies depending on your camera but your instruction manual will tell you how to do it. You can either manually select your ‘colour temperature’ or set it according to your environment by pointing the camera at a sheet of white paper and letting the camera decide for you. Again, this is something to consult the manual about!
    You may have noticed that I have a couple of go to ‘hand poses’. I like to keep a bit of consistency running through my blog so I always aim to have 4-5 photos with the same set of poses in each nail art post. It’s not as easy as it sounds, it’s like yoga for your fingers! You have to practice to strike the same poses every time. This is why you don’t see my right hand very often – my fingers just aren’t as poseable on that hand!
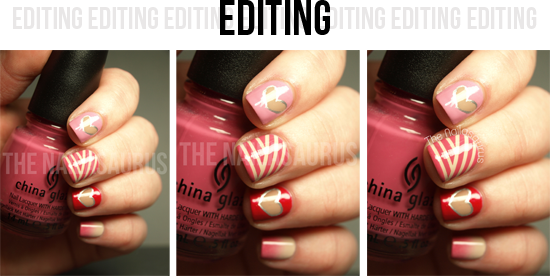
    At the moment, I’m using Adobe Photoshop CS5 to edit my photos and the process is very quick and simple. I just crop them down and add my watermark which I get to curve around my nail by using the ‘Path’ tool. There’s a good video tutorial for using that function here which explains the process really well.
    If you don’t have Photoshop, GIMP is the next best thing that you can get for free!
    Share: