
Browsing Category:
Nail Art


I really enjoyed putting together a Thnks Fr Th Mmrs post earlier this month so I think I’m going to make it a regular feature around here if that’s okay with you!
Today is the one year anniversary of my Gradient Nails Tutorial and just I knew I had to mark the occasion with a little homage. That tutorial is the most visited page on my blog… by miles and miles and lightyears even to this day.
I think it really took off because everyone was having the same problem as me. They were seeing pictures of pretty gradient nails on the internet and wanted to do it themselves, but there wasn’t an easy DIY tutorial out there yet until the one that I wrote came along to fill that gap.
As you can see, my gradient skills have improved immensely since then which is a good testament to my motto, ‘Practice makes perfect’ or as Macklemore more eloquently put it, ‘The greats weren’t great because at birth they could paint, the greats were great because they’d paint a lot’.
No one gets it perfect first time and you pick up tricks as you go; the little things which can’t be taught that you just have to learn from your own experience. For example, the sponge that I was using at first wasn’t ideal and now I’ve learned to use much ‘finer’ sponges… make up wedges are the best! Gradient nails… thanks for the memories!
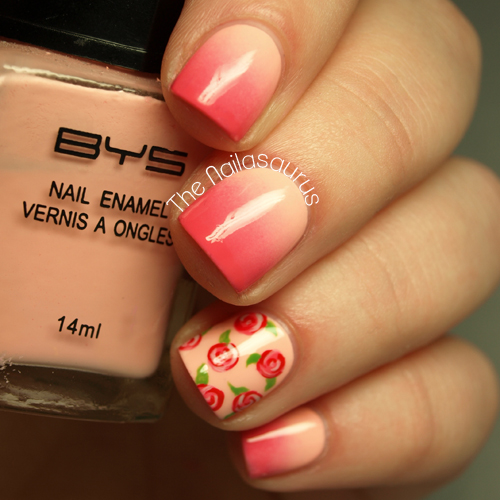

I used the same base colour, BYS Pretty as a Peach, as I did last year but unfortunately the darker of the two colours has long since dried up so I replaced it with NYC Bubblegum Pink which I think is a pretty good match.
I couldn’t resist adding some roses for an accent finger. For those I used the NYC Bubblegum Pink again, Rimmel Heart on Fire, Models Own Utopia and NYC High Line Green with a nail art brush.
It’s all topped off with a coat of of Sally Hansen Dries Instantly.


Twitter ♥ Bloglovin’ ♥ Tumblr
This weekend has completely passed me by, I really can’t believe it’s already over! I’ve had a good balance of excitement and mundaneness. Think a Saturday night drinking with old friends and watching Iron Man 3 today vs. lots of cleaning and a nail polish cull!
I reorganised my Helmer and picked out 37 bottles for recycling, or as I like to call it…. frankening fun! It was good to go through my stash and rediscover a lot of polishes that I’d kind of forgotten about. Every two minutes I’d be like, ‘Aaaah yes, I remember you!’. It made me realise I probably need to figure out a way to catalogue my ever growing collection. Call me crazy, but that job sounds like hella fun!


The two colours here are Barry M Lychee and Barry M Blood Orange. I painted on the red ruffians using a nail art brush and added some orange studs from Born Pretty Store. Finally I topped it all off with a coat of Sally Hansen Dries Instantly.


Twitter ♥ Bloglovin’ ♥ Tumblr
When I was out shopping on the weekend, I spotted a pen with a funky chevron pattern and of course, the first thing that ran through my brain was ‘I can put that on my nails!’. I bought the pen solely for that reason! I actually only planned to paint a chevron and maybe a few stripes on each nail but I may gotten a little carried away.


The colours I used are Barry M White, W7 Black and Sally Hansen Fairy Teal. I varied the base colour on each finger and painted on the details with a nail art brush. True story.
It’s all top coated with Sally Hansen Dries Instantly.


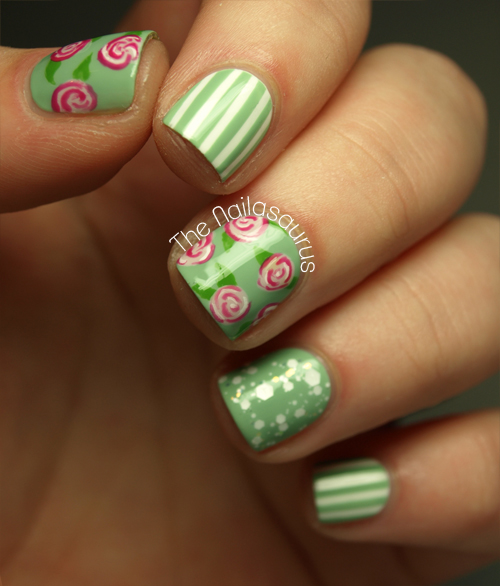
Every now and then, one of those special manis comes along. The ones you absolutely love and never want to take off. This is one of those! I wore it for very close to 48 hours which is probably the longest I’ve kept anything on my nails all year.

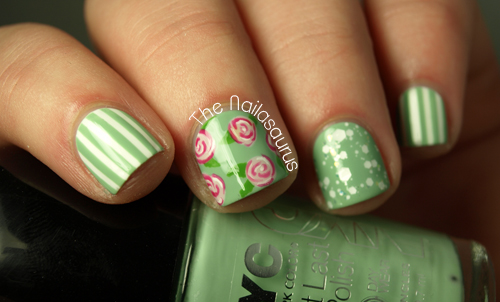
The green polish is NYC Mint Macaroon although I’d say it’s closer to Jade green than mint, stuck somewhere in between.
For the pinstripe nails, I started with a coat of Born Pretty Matt White then used the striping tape method to create the thin stripes (tutorial here).
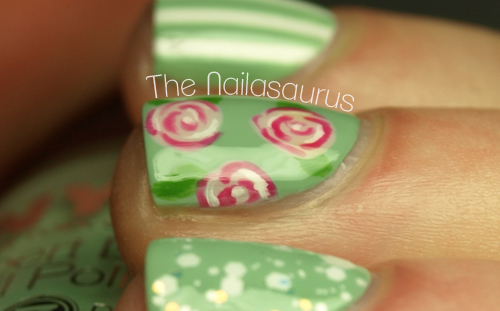
I freehanded the roses with a nail art brush using Models Own Utopia, NYC Moma and a hint of the Born Pretty White. The leaves are NYC High Line Green.
The glitter on my ring finger is Sonnetarium Snowfall.
Twitter ♥ Bloglovin’ ♥ Tumblr
I found myself in a tricky spot earlier this week when I tried to get Google+ integrated with my blog. What a nightmare. I’ve never been a fan of Google+ or the way it was sort of forced upon us all and I was reminded exactly why when I tried to get a simple gadget for my sidebar!
Now that Google Reader’ facing iminent death (with GFC and Feedburner likely to follow), I suspect Google have some major changes up their sleeve to do with Google+ so I thought it was about time I just accept that and let it happen! I’m pleased to tell you The Nailasaurus now on Google+ right here and I really appreciate all your spare +1s or if you add me to one of your circles or something. There’s also a gadget in the sidebar where you can add me directly!
If, like me, you’re not quite sold on the idea of Plus just yet, there are plenty of ways to follow this blog over there in the sidebar but I must say I recommend Bloglovin’ if you want to keep up with every post.
Today’s nails really remind me of Art Attack. It’s completely unintentional but when I was admiring my handywork after the fact, that TV show came to mind. I loved watching that cheesy old show as a kid!


My base colour is two coats of Sally Hansen Ion.
I used a small art nail brush for the drips and the polishes I used, from pinky to thumb, are:
NYC Wild With Passion, Sally Hansen Himalayan Blue, Sally Hansen Grass Slipper, Sally Hansen Rapid Red, NYC Lexington Yellow
I used China Glaze Dandy Lyin’, a shimmery white, for the highlights.
It’s all topped off with a few coats of Sally Hansen Dries Instantly.
Twitter ♥ Bloglovin’ ♥ Tumblr
After a tip off on Twitter last weekend, I found myself browsing Fragrance Direct and I found out where they’ve been hiding all those discontinued Sally Hansen shades! That website has stackloads of them for £1.49 including my favourite off-white – Ion, and flittery gold – Gilded Lily. After Googling for swatches of all the shades I didn’t already have, I settled on 3 colours including this beauty – Gray by Gray. It’s a very rich, blue tinted, dark grey.


I started with a base colour of Sally Hansen Gray by Gray then stamped on the Paisley design from Bundle Monster Plate BM-315 using Essie Blue Rhapsody, a metallic blue.
The glitter on my ring finger is Chit Chat Ariel which I picked up in Poundland. I finished it all off with a coat of Sally Hansen Dries Instantly plus an extra two coat over the glitter.


Twitter ♥ Bloglovin’ ♥ Tumblr