Follow:
Browsing Category:

Nail Art

    Freehand, Uncategorised

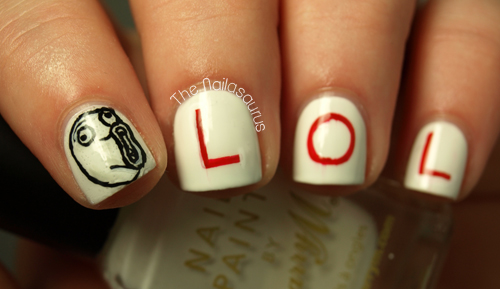
    LOL

    Like a lot of you here (you know who you are!), I’m a bit of a meme addict and I’m slowly but surely making my way through Know Your Meme on my nails! 
    I kind of cheated with this one by creating a decal rather than freehanding it straight on to my nail.
    I started by painting a thin coat of clear polish about 2x2cm on to a sheet of plastic and letting it dry. Then I used acrylic paint with a nail art brush to draw the face. Once it was all dry, I peeled the whole thing away from the plastic and stuck it to my nail using a coat of clear polish and smoothing it down with my finger. Finally I used a brush dipped in acetone to remove the excess at the edges and top coated it.
    Unfortunately the result is chock full of air bubbles but they’re not super visible unless you get very very close!
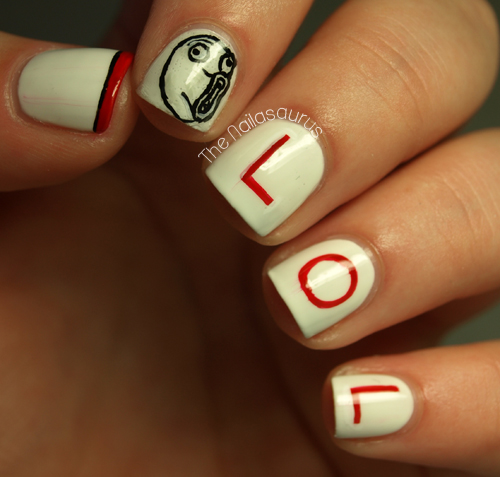
    I used Barry M White as my base colour and created the face using the method described above. For the LOL text, I used a nail art brush with Rimmel Heart on Fire.

    TwitterBloglovin’Tumblr

    Share:
    Freehand, Uncategorised

    Life’s Like a Box of Chocolates

    … you never know what you’re gonna get! 
    I’ve never tried sugar spun nail art before but I wanted to give it a go this week and Forrest Gump served for the perfect inspiration. I wanted to create the look of fancy boxed chocolates and I think the sugar spun technique was the right way to go.  I had to add the foil heart because it seems to me like you get one of those in every single box of chocolates! 

    The colours I used for the chocolate are NYC Midtown Mink, Essie Glamour Purse and Stargazer White. I added a top coat of Essence Better Than Gel Nails to each nail before adding the sugar spun details. You can watch a tutorial for that just here.
    On my middle finger I freehanded the heart with NYC Enchanting Fire with a small nail art brush over 2 coats of NYC Midtown Mink.

    TwitterBloglovin’Tumblr

    Share:
    Glitter, Stamping, Uncategorised

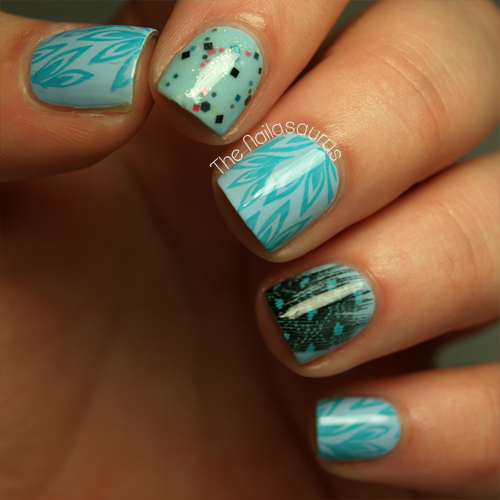
    Raindrop Blue Me Away

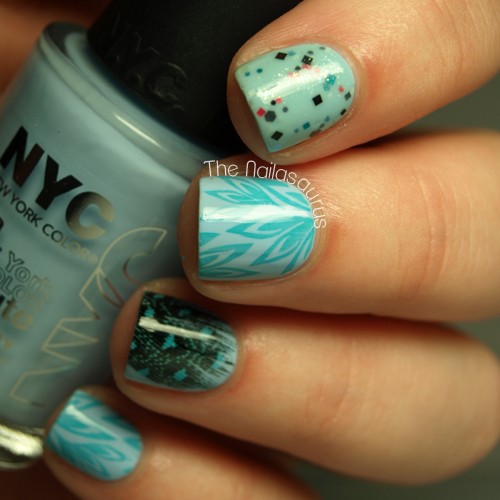
    On the weekend I had a good streak of nail shopping luck. As you may have seen, I already have some neutral coloured feathers but I’ve been on the lookout for some coloured ones for a very, very long time. I checked in every single craft shop I passed but to no avail. So I was amazed to find a packet of all shapes and colours in Ryman the stationers! 
    I also spotted the new NYC Foil polishes so I picked up a few from the stand. I knew the foils would be ideal for stamping so I got the Enchanting Fire and Power of Elements foils plus this amazing minted pastel blue called Raindrop. I was immediately drawn to it and I dropped it in to my basket without hesitating! I know a lot of people have complaints about the lasting power of NYC polishes but it’s one of my favourite ranges on the high street. Whenever I see new colours on the stand my eyes nearly pop right out of my skull and for the bargain price, I don’t think there’s much wiggle room for complaints.

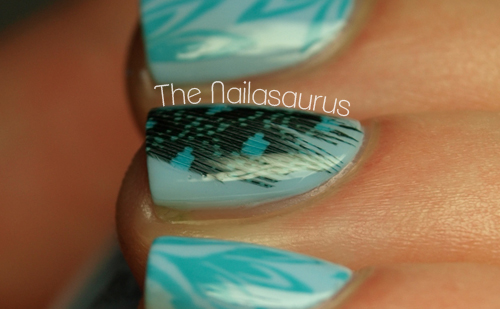
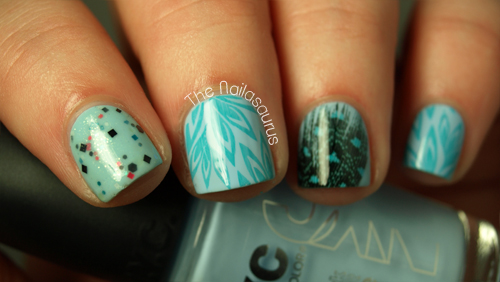
    I used two coats of NYC Raindrop as my base colour on every nail and added the blue feather to my ring finger following this tutorial. I stamped on the feathers from Bundle Monster Plate BM210 using Barry M Guava. The glitter on my first finger is two coats of Black Cat Lacquer’s minty shimmer We Can Pickle That (over NYC Raindrop).
    I finished it all off with a coat of Essence Better Than Gel Nails.

    TwitterBloglovin’Tumblr

    Share:
    Glitter, Gradient, Uncategorised

    Summer Gradient

    How has everyone’s weekend been? I hope you all had a chance to soak in some sun! I’m a real fusspot when it comes to the heat but even I have to admit that the weather this weekend was just perfect. I spent yesterday with a BBQ, campfire and plenty of cider, then visited an old friend in the beautiful city of Bath today. I’m currently fanning myself (literally) and considering taking a good old fashioned nap on the grass outside!

    I used a base of  Barry M Blueberry and created the gradient with Barry M Key Lime. I added some glitter, Sinful Colors Call You Later, to the tip on my accent finger for a bit of sparkle. Finally I finished it off with two top coats of Essence Better Than Gel Nails.

    TwitterBloglovin’Tumblr

    Share:
    Freehand, Uncategorised

    Monsters University Nail Art

    A few days ago Mollie requested some Mike and Sully nail art
    in time for the new movie, Monsters University. Straight away I was on the case
    and I dug out this blue flocking powder which is just perfect for Sully’s fur. 

    For Mike I used Barry M Key Lime as a base colour, then used white acrylic paint for the eyeball, with Barry M Guava for the Iris and W7 Black for the pupil.
    For the University colour nails I used Barry M Matt White and Sally Hansen Thinking of Blue with the striping tape method on my thumb and pinky.
    Sully’s fur was created with Sky Blue Flocking Powder from Born Pretty Store.
    I also used a selection of Nail Art Brushes and Dotting Tools throughout.

    TwitterBloglovin’Tumblr

    Share:
    Glitter, Stamping, Uncategorised

    Roundquins?!

    It’s been a while since I wore any glequins and it’s been playing on my mind so I decided to dig out some of the little things and get busy. When I dove in to my supplies to pick out some colours, I spotted these round versions of my hexagonal favourite which I’ve never tried out. I couldn’t quite believe it myself.
    These, um… round-quins are from Born Pretty Store (betcha didn’t see that one coming huh?) and they come in a pack of 12 colours. 9 out of the 12 are iridescent and I must say I’m not a fan of those, but there are holographic gold, silver and black ones which are just beautiful.

    The main purple colour on show here is China Glaze Tart-y for the Party, the glitter on my pointer is La Femme Purple Glitter and the round glequins are from Born Pretty Store. On my thumb and pinky, I stamped a design from Winstonia plate W111 using A-England Bridal Veil. My middle finger is a base of Bridal Veil and I used the striping tape technique with a top colour of CG Tart-y for the Party. It’s all topped off with two coats of Sally Hansen Dries Instantly.

    TwitterBloglovin’Tumblr

    Share:
    Glitter, Stamping, Studs, Uncategorised

    Pop

    The pink polishes in my collection get overlooked most of the time – I’m just not a pink and sparkly kind of girl. I spotted this colour combination somewhere this week (although I have no idea where!) and it just popped right out at me so the next logical step was to paint it on my nails! 

    The blue is Barry M Guava and the pink is an unnamed Kriston polish which is a brand I’ve only ever seen in my local pharmacy.  On my pointer finger, I used one coat of the Kriston polish with two coats of Sally Hansen Lady Luck. The black studs are from Born Pretty Store and on my ring finger I’m wearing a base coat of Barry M White stamped with W7 Black and Bundle Monster Plate BM201.

    TwitterBloglovin’Tumblr

    Share: