Follow:
Browsing Category:

Nail Art

    Freehand, Glitter, Uncategorised

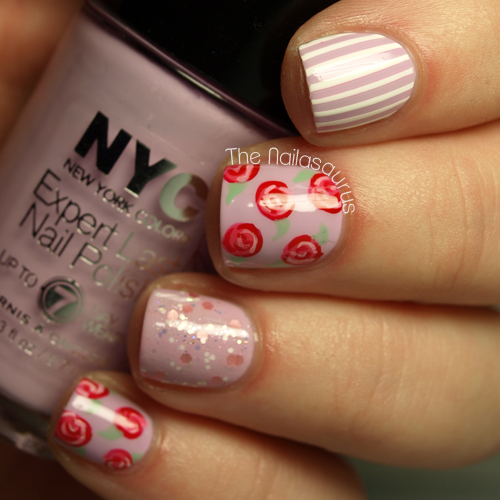
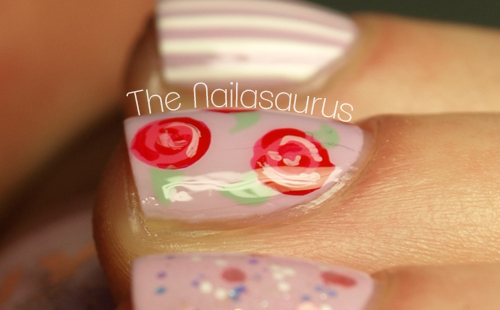
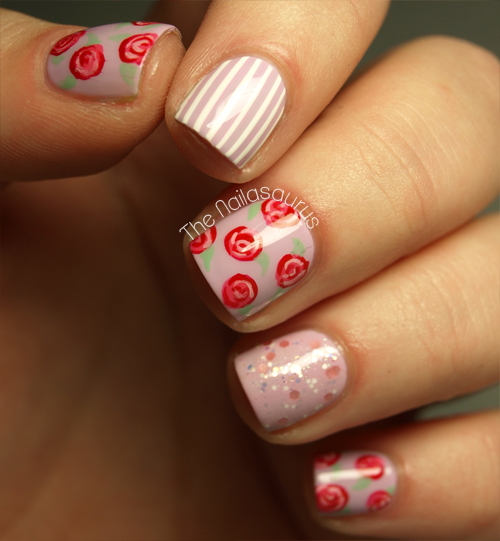
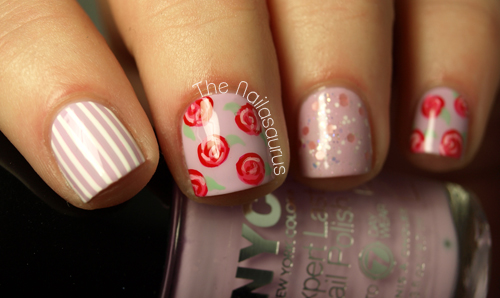
    Stop and Smell the Roses

    Happy Monday! I know some of you will be thinking that Monday is not a day to be happy, but it’s recently become my favourite day of the week because it means a new episode of Game of Thrones! I can’t believe there are only 2 episodes left in the season after today’s. I must confess I haven’t read the books, so far I’ve only made it half way through the first, so I have plenty of material to tide me over until the fourth series.

    I used NYC Lavender Cupcake as my base colour with Sonnetarium Lenten Rose glitter on my ring finger. I did the pinstripes on my index finger using striping tape and BK Matt White. For the roses I used NYC Bubblegum Pink, Barry M Blood Orange and BK Matt White with NYC Mint Macaroon for the leaves. There’s a full tutorial for the roses here. Finally I topped it all off with two coats of Sally Hansen Dries Instantly.

    TwitterBloglovin’Tumblr
    Share:
    Studs, Tutorial, Uncategorised

    Sally Hansen Street Style Tutorial: Studs n’ Chains

    This month, Sally Hansen’s I ♥ Nail Art theme is Street Style and the call for inspiration is ‘heavy metal, pop art and graffiti glam’. I stopped reading at heavy metal… it’s got to be the studs for me!

    Before you start make sure you’ve got everything you need. The only polishes I’m using for this are Sally Hansen Black Out and Dries Instantly.
    I’m using some gold bullion for the studs, an old necklace for the chains, a pair of pointy tweezers, a nail art brush and a few toothpicks.

    I’ve got a selection of chains which I’ve collected just for nail art purposes! Some of them are necklaces I’ve tired of and instead of throwing them out I’ve done a bit of upcycling and started wearing them on my nails. Others are ones I’ve picked up in the cheap in stores. If you need a chain, just pop in to places like Claire’s to see if there are any chains thin enough for your nails.

    To avoid any smudges on your polish, before you even paint on the base colour measure and cut off a piece of chain for each of your nails. Just rest it across to get an idea of how much you need, then snip it off with scissors, wire cutters or anything else that will do the job!

    Start with a base of Sally Hansen Black Out and let it dry.

    Using the nail art brush, paint on a line of clear nail polish where you want to stick the chain and move swiftly on to the next step…

    Place the chain across your nail and pat it down in to the polish to make sure it’s really stuck there!

    I always use a toothpick to place the studs. I dip the end in a bit of clear nail polish to make it sticky and use it to pick up the fiddly little beads.

    Add a coat of Dries Instantly and place the studs on to your nail while it’s still wet.

    Finally, when everything is completely dry, dip a small paintbrush in acetone and sweep it along your cuticle line for a nice clean finish.
    Don’t forget to enter your own Street Style looks over at Sally Hansen’s Facebook Page. As always, there’s $500 and a trip to NYC up for grabs. I’d also love it if you tag me on Twitter or Instagram (@thesammersaurus) so I can see your entries too!

    TwitterBloglovin’Tumblr

    Share:
    Gradient, Stamping, Uncategorised

    Barry M Summer 2013 Gellys

    Press Sample

    Next month Barry M are adding 5 new shades to their amazing Gelly range ready for summer. I feel kinda bad teasing you with them this early but I really couldn’t wait to show you… forgive me?! 
    As always I’ve got only good things to say about these shades, the formula is perfect and the colours are absolutely stunning. Without a doubt, these are my favourite shades to come out of the Gelly range yet. I’ve split the polishes in to two batches – the warms and the cools – to do some nail art!

    Passion Fruit is a coral which leans more towards orange and it’s the best coral I’ve ever worn. Too often I find coral shades are very jelly like and almost impossible to get opaque but this one only needs two thin coats.
    Mango is a creamy orange colour, again perfect in two coats. Beware though, this one’s a stainer so make sure you wear a good base coat underneath.
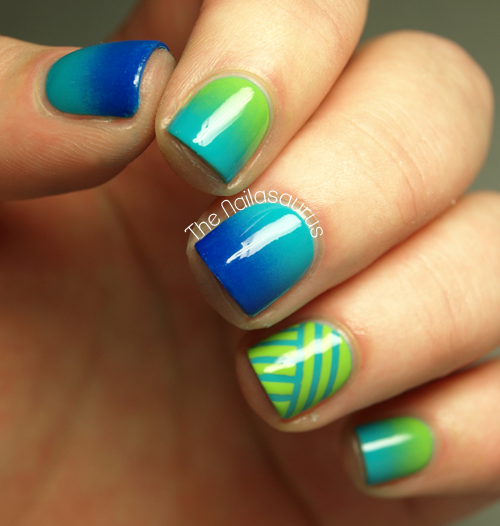
    On my index finger, I used Mango as a base and stamped using Passion Fruit and Konad plate M60. There’s a gradient tutorial here and a striping tape tutorial here for the other nail art. It’s all topped with a coat of Sally Hansen Dries Instantly.

    My favourite of the 5 new shades is Guava – the aqua blue. I’m a sucker for blue nail polish, especially when it applies this easily, looks this good and doesn’t stain my nails. 
    The green, Key Lime, is also another stand out for me. It’s so close to being slime green but it’s just on the right side of bright and beautiful – one of the first bright greens that works with my skin tone. And how amazing does it look next to Guava? It did leave a bit of staining so use a base coat!
    Finally we have Blue Grape, the cobalt blue. This is a great dupe for Revlon Royal and the most ‘jelly finish’ like polish of the bunch but it’s completely opaque in two coats, unlike Royal which needs a lot of coats and tends to drag at the cuticles.

    Again, we have a gradient tutorial here and a striping tape tutorial here and it’s topped off with a coat of Sally Hansen Dries Instantly.

    These new shades will be available in Superdrug on June 5th and Boots on June 12th.

    TwitterBloglovin’Tumblr

    Share:
    Freehand, Gradient, Uncategorised

    Facets of Fishtail

    It’s only now that I’m writing this post that I remember I really wanted to mattify this manicure! I think the purple glitter would look phenomenal with a matte top coat. I’ve had matte on my mind for a long time now but it always skips my mind when I’m actually in a position to use it, doh! I think I need to put my matte top coat in prime position on my desk so I don’t forget it next time I wear a pretty glitter.

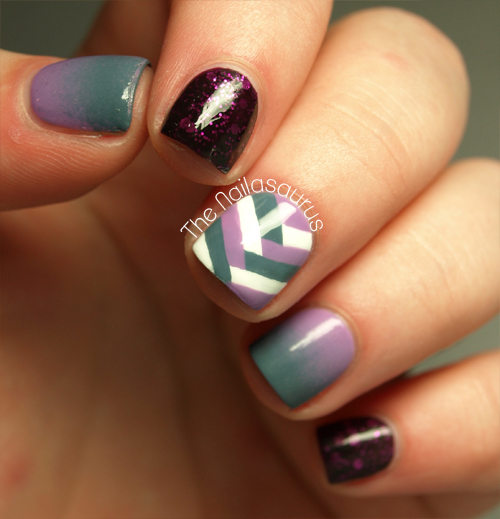
    The beaut of a glitter is Revlon Facets of Fuschia and I applied that over a coat of PVA glue to make removal nice and easy.
    I created the gradients using Sally Hansen No Hard Feelings as the base with Sally Hansen Gray by Gray. Finally, for the fishtail nail I used a nail art brush to apply those two Sally Hansen shades with Born Pretty’s Matt White polish.
    It’s all topped off with a coat of Sally Hansen Dries Instantly.

    TwitterBloglovin’Tumblr

    Share:
    Freehand, Tutorial, Uncategorised

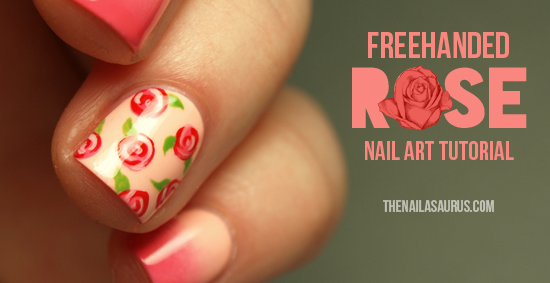
    Freehanded Rose Nail Art Tutorial

    Now that summer’s here I’m seeing floral prints everywhere. I’m not one for going all out on prints in my outfit choices but I think a little here and there looks great. I’ve been using these roses as accents in a few of my manis and I had a few requests for a tutorial so today I’m gonna share my method. It’s much simpler than it looks and the results are definitely a stand out.

    The stuff you need
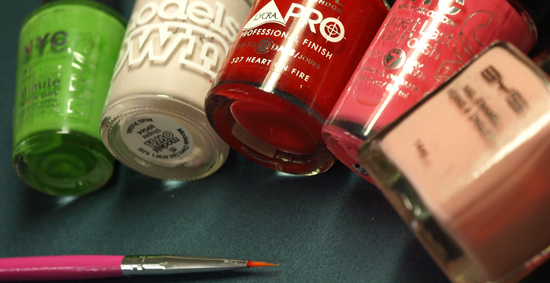
    A small nail art brush is essential and you’ll need quite a few nail polishes too…
    From right ← left
    Base colour: BYS Pretty as a Peach
    3 colours for the roses: NYC Bubblegum Pink, Rimmel Heart on Fire and Models Own Utopia
    A green colour for the leaves: NYC High Line Green
    I also use acetone to get my brush super clean between colours. Nail polish remover works too but I find it’s not quite as hardcore at cleaning as the acetone!

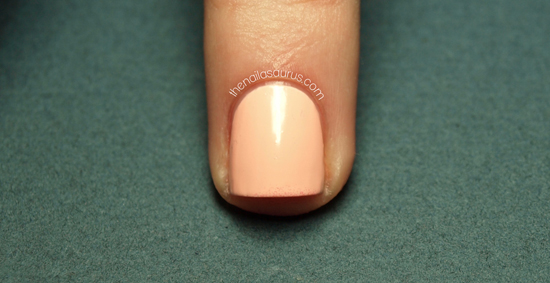
    Start by painting on your base colour and letting it dry completely.

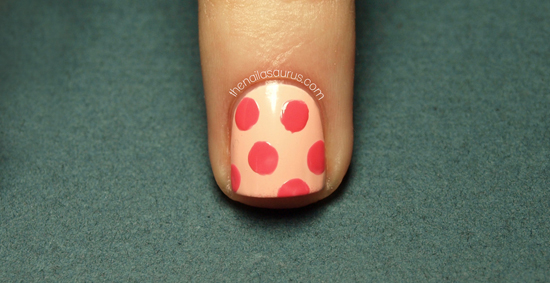
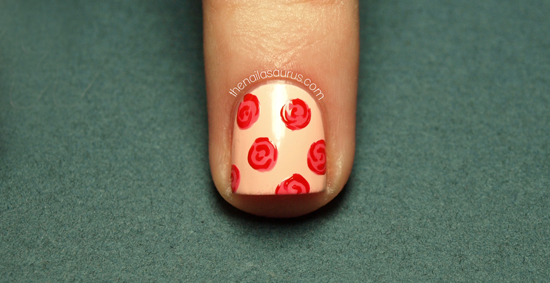
    Paint on some random circles and don’t worry if they aren’t perfectly round. You could even use a large dotting tool for this part.

    Take a darker colour and draw some contour lines within each circle.

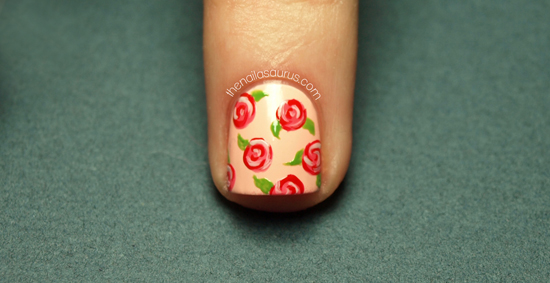
    Next, using a lighter colour, draw on some highlights in the same way. You can skip this step and still get a really nice result.

    Add one or two leaves to each flower.

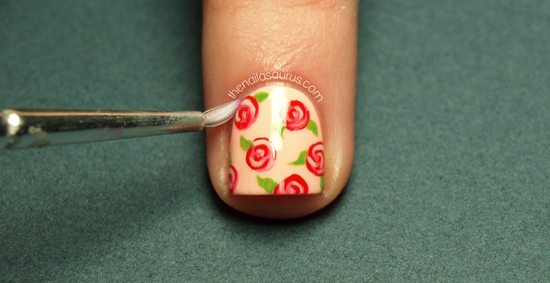
    Finally, add a top coat then use a small paintbrush dipped in acetone to clean up around the edges of your nail and you’re all done!

    TwitterBloglovin’Tumblr
    Share: