Follow:
Browsing Tag:

Striping Tape

    Studs, Uncategorised

    Fresh Lookin’ Studs

    Yesterday you guys provided me with inspiration by the bucket load when I asked on Facebook and Instagram which colours you thought I should use with these new mint studs from Born Pretty. The ideas that popped up time and again were purple, green and brown (to make mint choc chip!). I tried the brown idea because it sounded very appetising but I couldn’t make it work so I moved on to option two… something with purple and green.


    The studs are the new 2mm coloured ones from Born Pretty Store and it’s $3.59 for a pack of 200 studs. There are 11 colours ranging from pastels to bright. It’s been a while since I had a good browse of Born Pretty so I’ve been surprised to see the amazing new items they have on offer. I’ve already placed two orders with them this week so I’ve got some square pastel studs on their way too. I can’t wait to play with them!

    1. For the nail art I used a base coat of Barry M White then topped it off with a coat of No7 Stay Perfect Top Coat.
    2. Once that was dry, I placed on two strips of striping tape where I wanted the white to show through.
    3. Using the brushes straight from the bottle I very carefully painted on NYC Water Street Blue and Lavender Cupcake between the lines of tape. I removed the tape immediately.
    4. I used a nail art brush to dot a tiny bit of clear nail polish on to my nail where I wanted to stick the studs. I picked up the studs using the same brush while it was sticky and pressed the studs down in to the polish to make them really stick (video here).
    5. The colour on my other fingers is Sally Hansen Green Tea.
    6. I topped it all off with a coat of No7 Stay Perfect Top Coat.

    TwitterBloglovin’Tumblr

    Share:
    Gradient, Uncategorised

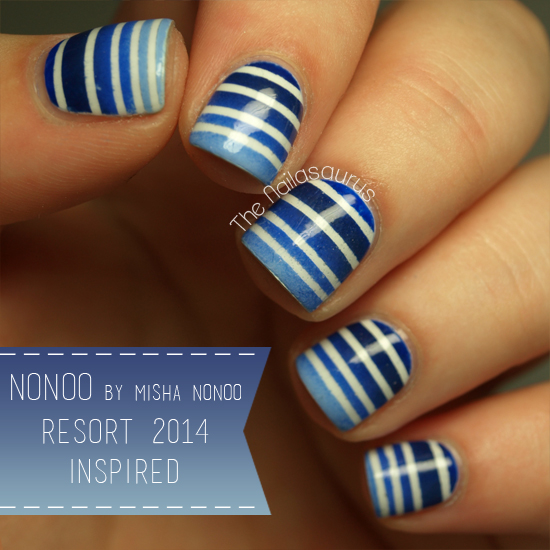
    Nonoo Resort 2014 Inspired Nail Art

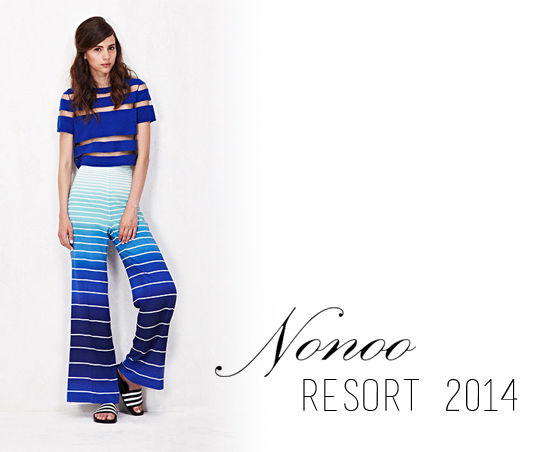
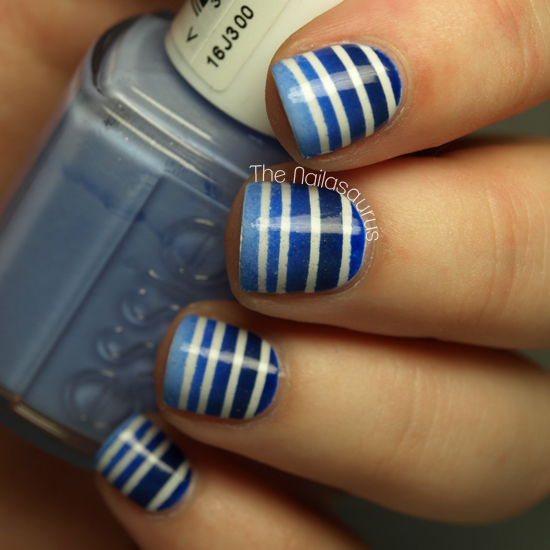
    Yesterday I was checking out the finalists for 2013’s CDFA/Vogue Fashion Fund at Glamour.com and when I saw the lookbook image from Nonoo’s Resort 2014 collection, my heart skipped a beat. As we all know, I have a weakness for stripes, gradients and anything blue so within seconds I’d decided that it was going on my nails!

    Image source: Nonoo.com

    I’m going to try a new way of writing out the steps I took today. I’m hoping a broken down step-by-step is going to be easier to follow than the regular massive paragraph of description!
    1. I used a base of Barry M White and a coat of No7 Stay Perfect Top Coat to make it dry a bit quicker.
    2. Using a pair of tweezers, I placed striping tape across all of my nails nail where I wanted the white to peek through.
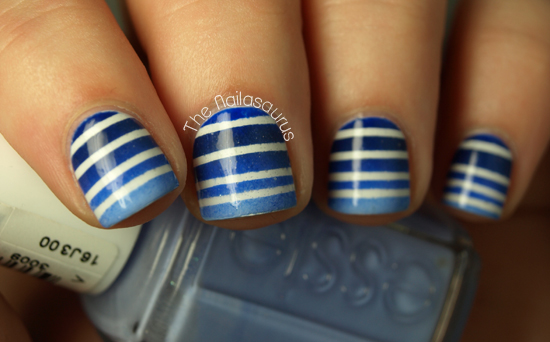
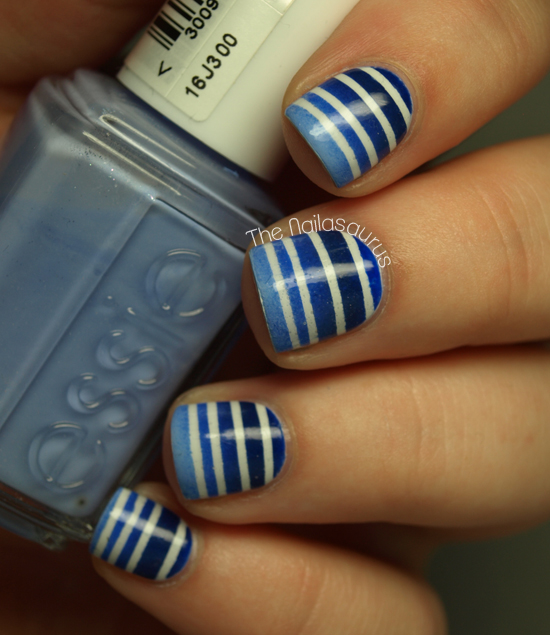
    3. For the gradient, I used Barry M Grape, Sally Hansen Thinking of Blue, Sally Hansen Pacific Blue and Essie Bikini So Teeny in that order from cuticle to tip.
    Instead of using my normal gradient technique, I painted the colours straight on to the sponge. I then dabbed it on to a sheet of plastic to blend the colours slightly before sponging it on to my nail, one nail at a time.
    4. Straight after sponging on the gradient, I peeled the tape off my nail and moved on to the next.
    5. Once it was all dry, I added two coats of No7 Stay Perfect Top Coat to smooth everything over.

    TwitterBloglovin’Tumblr

    Share:
    Holographic, Swatch, Uncategorised

    Art Deco Accents

    A-England are back with the Burnes-Jones Dream collection. A collection of holos named after some of the works of Pre-Raphaelite artist Edward Burne-Jones. One of the things I love about getting a new A-England polish is learning a little slice of history along with it. The names are so intriguing that I have to Google them and I always end up spending hours on Wikipedia reading up on English legend!
    This beauty is Rose Bower – a deep berry scattered holo. I used two coats here topped with No7 Top Coat. The polish peeking through on my accent fingers is A-England Excalibur from the Mythicals Collection. It’s a silver foil with fine gold flakes running through it – very shiny! Again, two coats was perfect.
    You can purchase A-England polishes directly from th website, a-england.co.uk, if you’re in the UK. If you’re overseas click here to see stockists in your country.
    A-England Rose Bower

    A-England Rose Bower
    For the deco nails I used a base coat of Excalibur then a coat of No7 Stay Perfect Top Coat to make it dry. I followed that by placing on some striping tape in an art deco-esque pattern and painting over it in Rose Bower. There’s a striping tape tutorial here in case the explanation wasn’t too clear!
    When it was all dry I topped it with two coats of No7 Top Coat.
    A-England Rose Bower

    A-England Rose Bower

    TwitterBloglovin’Tumblr

    Share:
    Uncategorised

    Happy Fourth of July

    Being in the UK I don’t get to celebrate Independence Day but I’d still like to wish all my US friends a happy Fourth of July! The holiday looks like a helluva lot of fun to me (I may or may not be a closet pyro!). Here we have to wait until November 5th for bonfires and fireworks! However, geographical misfortunes won’t stop me when I spy the opportunity for some themed nail art! 

    I actually created this mani (plus a tutorial) for Divine Caroline where I’ll be doing a bit of writing here and there from now on. So if you want to see the tutorial for this look, jump on over to my post on DivineCaroline.com… Stars and Stripes Nail Art

    TwitterBloglovin’Tumblr

    Share:
    Freehand, Glitter, Uncategorised

    Spots and Stripes

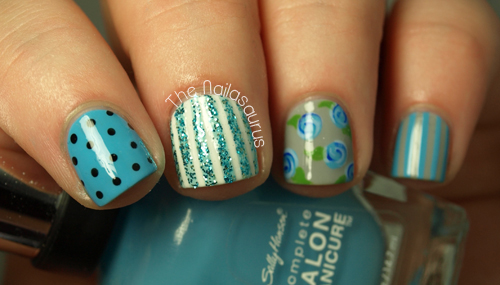
    I’m back on the Blues this week and it feels gooood! Polka dots are a rarity on my nails and since I do so many stripes I thought I’d give spots a go too.

     
    The main colours here are Sally Hansen Himalayan BlueBarry M WhiteSally Hansen Dorian Grey and W7 Black.
    I created the roses following this tutorial with SH Himalayan Blue, Essie Mezmerised and NYC Raindrop. The stripes on my middle finger are in W7 Cosmic Blue and there’s a tutorial for striping here!
    I topped it all off with two coats of No7 Stay Perfect Top Coat.

    TwitterBloglovin’Tumblr

    Share:
    Uncategorised

    Matte vs Glossy Stripes

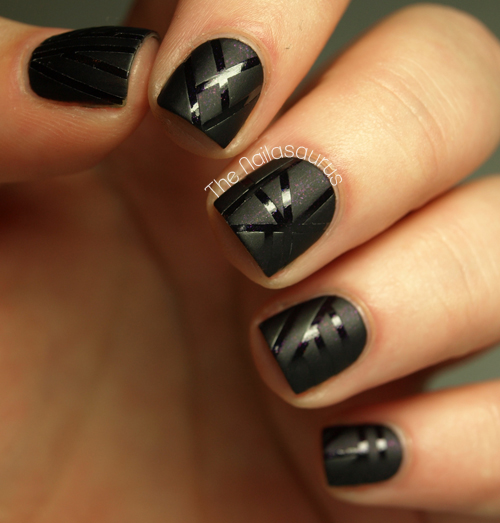
    I’ve tried to cut down on my striping as it was slowly taking over my life but I couldn’t stay away from the thought of using a matte top coat over the tape instead of a completely different colour. I’m glad I gave in to the temptation though because this looks amazing! I think I’d like to try it with some different colours to give it a bit more dimension, I think it would look good with a glittery base colour.

    The base colour is A-England Ophelia and I used a coat of Sally Hansen Dries Instantly to speed things along. Click here to see a tutorial to see how I created the crisp lines using a coat of Rimmel Matte Top Coat.

    TwitterBloglovin’Tumblr

    Share:
    Uncategorised

    Models Own Ice Neons

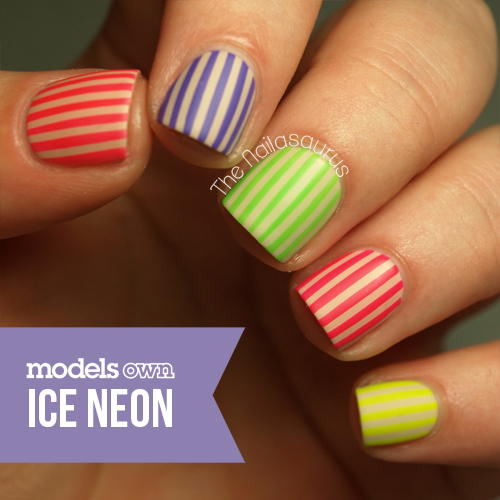
    I predicted a little while back that Neon would be a big trend this summer and it seems I was right. I’m loving all the neon nails that I see on my Tumblr and Pinterest browsing adventures. When Models Own release a nail collection of anything, you can bank on it becoming a thing!
    Models Own kindly sent me the collection to give it a test run and I’m very pleased with the polishes. Most of them have a very jelly like finish so they’re best applied over a white or light coloured polish if you prefer full opacity. The purple is the only one I’d wear without a lighter creme underneath. Applying them over white ensures they’re as bright as they can possibly be too!

    For this nail art, I applied a base of Barry M Lychee followed by a coat of Essence Better Than Gel Nails Fast Dry Top Sealer. I then applied striping tape in uniform lines to each nail before painting over it with the Models Own Neon Ice shades (click here for a tutorial). The shades, from thumb to pinky, are Pink Puch, Pukka Purple, Toxic Apple, Bubblegum and Luts Lemon. Finally I added a coat of Sally Hansen Dries Instantly followed by a coat of Rimmel’s Mattifying Top Coat.

    TwitterBloglovin’Tumblr

    Share: