Follow:
Browsing Tag:

Striping Tape

    Glitter, Stamping, Uncategorised

    Roundquins?!

    It’s been a while since I wore any glequins and it’s been playing on my mind so I decided to dig out some of the little things and get busy. When I dove in to my supplies to pick out some colours, I spotted these round versions of my hexagonal favourite which I’ve never tried out. I couldn’t quite believe it myself.
    These, um… round-quins are from Born Pretty Store (betcha didn’t see that one coming huh?) and they come in a pack of 12 colours. 9 out of the 12 are iridescent and I must say I’m not a fan of those, but there are holographic gold, silver and black ones which are just beautiful.

    The main purple colour on show here is China Glaze Tart-y for the Party, the glitter on my pointer is La Femme Purple Glitter and the round glequins are from Born Pretty Store. On my thumb and pinky, I stamped a design from Winstonia plate W111 using A-England Bridal Veil. My middle finger is a base of Bridal Veil and I used the striping tape technique with a top colour of CG Tart-y for the Party. It’s all topped off with two coats of Sally Hansen Dries Instantly.

    TwitterBloglovin’Tumblr

    Share:
    Uncategorised

    3 Stripes on my Sneakers (Adidas Nail Art)

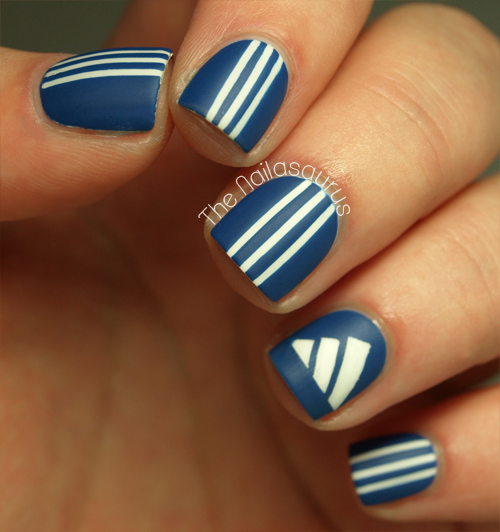
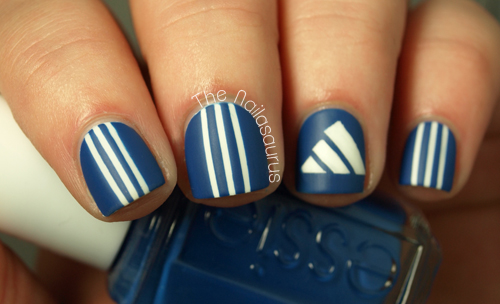
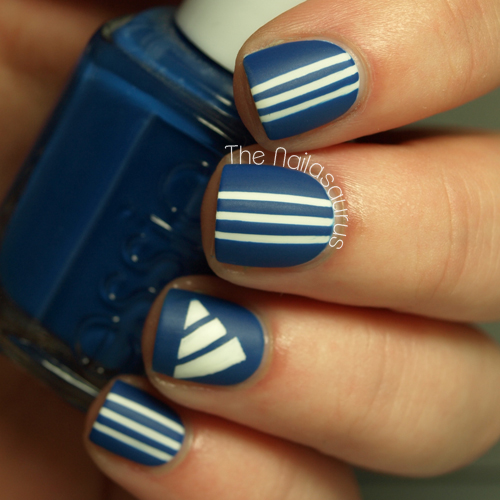
    When I was a kid it was all about the Adidas poppers… you know the ones I’m talking about! The tracksuit bottoms with three stripes and poppers running all up the side? Please tell me I wasn’t the only one!
    I had a grey pair which I wore to death. Man I loved those things when I was 11 but I don’t think I’ve worn a pair of tracksuit bottoms in public since. Oh 90s fashion, thank you for staying in the 90s!

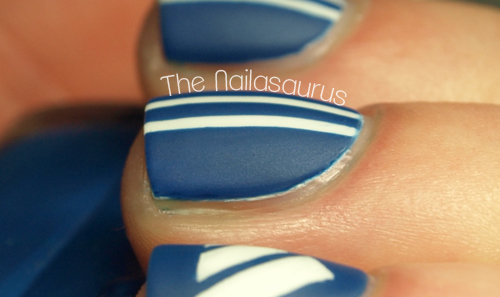
    For the stripe nails, I used 2 coats of Barry M White and then topped it with a coat of Sally Hansen Dries Instantly. Next I used striping tape to mark off three stripes and painted over it using Essie Mezmerised  before peeling off the tape (tutorial here). On my ring finger I used Mezmerised first and marked off the logo using striping tape to keep my lines nice and straight, then I filled in the gaps using BK Matt White and a nail art brush. Finally, I topped it all of with one coat of Rimmel Matte Finish.

    TwitterBloglovin’Tumblr

    Share:
    Freehand, Glitter, Uncategorised

    Stop and Smell the Roses

    Happy Monday! I know some of you will be thinking that Monday is not a day to be happy, but it’s recently become my favourite day of the week because it means a new episode of Game of Thrones! I can’t believe there are only 2 episodes left in the season after today’s. I must confess I haven’t read the books, so far I’ve only made it half way through the first, so I have plenty of material to tide me over until the fourth series.

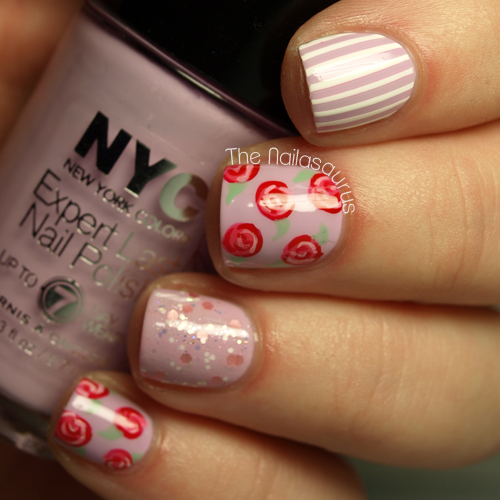
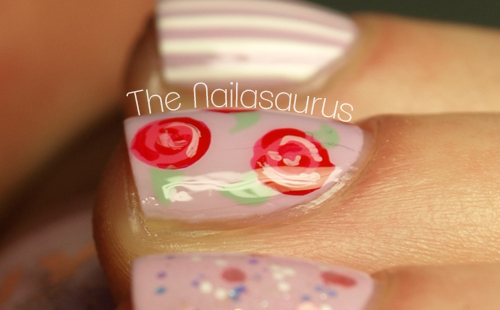
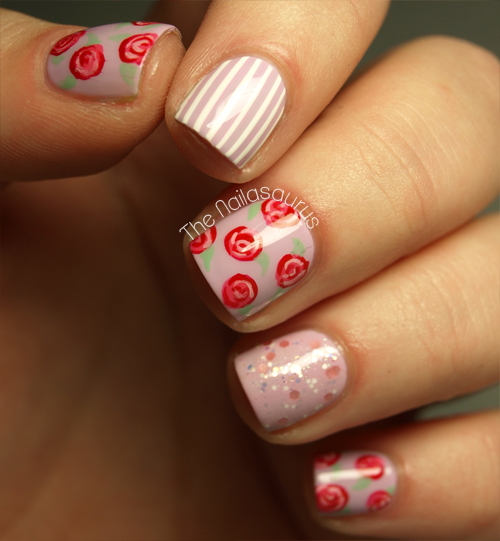
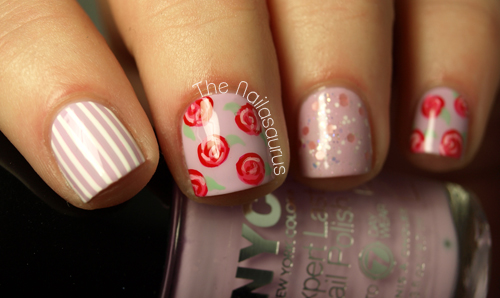
    I used NYC Lavender Cupcake as my base colour with Sonnetarium Lenten Rose glitter on my ring finger. I did the pinstripes on my index finger using striping tape and BK Matt White. For the roses I used NYC Bubblegum Pink, Barry M Blood Orange and BK Matt White with NYC Mint Macaroon for the leaves. There’s a full tutorial for the roses here. Finally I topped it all off with two coats of Sally Hansen Dries Instantly.

    TwitterBloglovin’Tumblr

    Share:
    Uncategorised

    I Like My Candy Mattified

    Press Sample

    I like it when my nails look tasty! Thanks to that super bright pink, my nails are looking sugary sweet today and the matte top coat is just a perfect addition. I got this effect using striping tape and although it would figure that it took a long time because it took a hell of a lot of tape, it was actually a lot quicker than some of my more intricate tape manis. I think because once I’d done one nail, all I had to do was repeat it on all the others and I had a good rhythm going by the end!

    I used two coats of Barry M Lychee as my base colour and topped it with a coat of Sally Hansen Dries Instantly. Once it was all dry, I placed on some striping tape where I wanted Lychee to show through (tutorial here). Next, I painted over it with Models Own Bubblegum and Barry M Mango one nail at a time and immediately removed the tape.
    I topped it with another coat of Dries Instantly and finally once it was all dry, I added one coat of Rimmel’s Matte top coat.

    TwitterBloglovin’Tumblr

    Share:
    Uncategorised

    The Great Gatsby Inspired Nail Art

    Since I first saw a trailer for The Great Gatsby I’ve been completely besotted. I like Baz Luhrmann and I love Leonardo DiCaprio (who doesn’t amirite?!) so I can’t wait to see the movie. I’m a sucker for beautiful looking films and I’m sure this one won’t disappoint in the aesthetics department. The posters alone are gorgeous enough and you know I can’t resist a good gold and black combo so today’s nail art is inspired by the amazing art deco pattern plastered all over the artwork for the movie.

    For the base I used one coat of  Barry M Gold Foil and one coat of Sally Hansen Gilded Lily to get the luxurious, glistening gold look. I painted on a thin coat of Sally Hansen Dries Instantly and waited about 15 minutes before applying striping tape where I wanted the gold to show through. Next I painted W7 Black over the top and swiftly removed the tape. There’s a full striping tape tutorial here which explains in more detail. Finally I topped it off with another two coats of Dries Instantly to smooth everything over.

    TwitterBloglovin’Tumblr

    Share:
    Gradient, Stamping, Uncategorised

    Barry M Summer 2013 Gellys

    Press Sample

    Next month Barry M are adding 5 new shades to their amazing Gelly range ready for summer. I feel kinda bad teasing you with them this early but I really couldn’t wait to show you… forgive me?! 
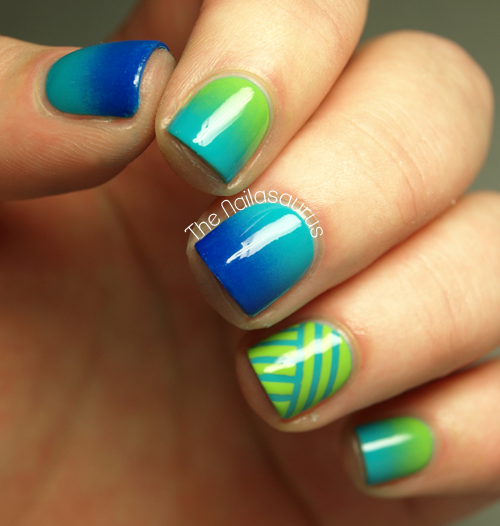
    As always I’ve got only good things to say about these shades, the formula is perfect and the colours are absolutely stunning. Without a doubt, these are my favourite shades to come out of the Gelly range yet. I’ve split the polishes in to two batches – the warms and the cools – to do some nail art!

    Passion Fruit is a coral which leans more towards orange and it’s the best coral I’ve ever worn. Too often I find coral shades are very jelly like and almost impossible to get opaque but this one only needs two thin coats.
    Mango is a creamy orange colour, again perfect in two coats. Beware though, this one’s a stainer so make sure you wear a good base coat underneath.
    On my index finger, I used Mango as a base and stamped using Passion Fruit and Konad plate M60. There’s a gradient tutorial here and a striping tape tutorial here for the other nail art. It’s all topped with a coat of Sally Hansen Dries Instantly.

    My favourite of the 5 new shades is Guava – the aqua blue. I’m a sucker for blue nail polish, especially when it applies this easily, looks this good and doesn’t stain my nails. 
    The green, Key Lime, is also another stand out for me. It’s so close to being slime green but it’s just on the right side of bright and beautiful – one of the first bright greens that works with my skin tone. And how amazing does it look next to Guava? It did leave a bit of staining so use a base coat!
    Finally we have Blue Grape, the cobalt blue. This is a great dupe for Revlon Royal and the most ‘jelly finish’ like polish of the bunch but it’s completely opaque in two coats, unlike Royal which needs a lot of coats and tends to drag at the cuticles.

    Again, we have a gradient tutorial here and a striping tape tutorial here and it’s topped off with a coat of Sally Hansen Dries Instantly.

    These new shades will be available in Superdrug on June 5th and Boots on June 12th.

    TwitterBloglovin’Tumblr

    Share: