Follow:
Browsing Tag:

Purple

    Glitter, Holographic, Stamping, Uncategorised

    When Whimsy Collides

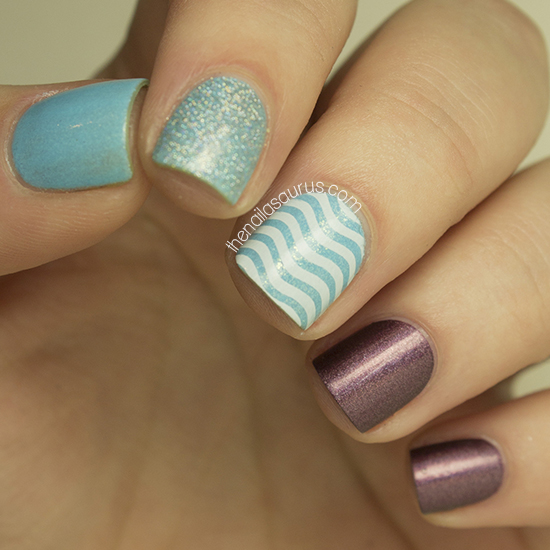
    Today’s nail art is very simple. I mean VERY simple! I tried a few nail art possibilities with the purple holographic polish but in the end I decided to keep it as it was in all its mauve beauty.

    This holographic glitter was first spotted on the blog last week and I’ve worn it almost every day since. I’m completely obsessed. I’ve never been someone that was distracted by sparkly shiny things but there’s something about a glitter that glistens like this that has me hooked. It really is like magic! In the same post, I mentioned my long standing desire to own China Glaze Fairy Dust and over the weekend I finally ordered a bottle. As if by fate, I had an email from Nail Polish Direct declaring a China Glaze sale and took it as a sign from the Fairy gods!

    piCture pOlish Whimsy with Nail Art


    China Glaze When Stars Collide with Nail Art


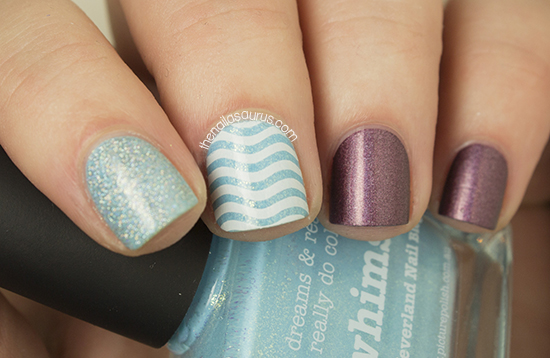
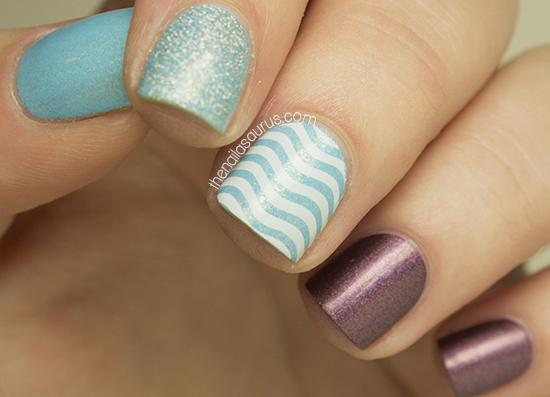
    The blue base colour is piCture pOlish Whimsy and the purple holographic polish is China Glaze When Stars Collide.
    I stamped on the wavy design from MoYou Sailor 05 using BK Matt White.
    The glitter on my index finger is Claire’s Holographic Glitter.
    It’s all topped off with a coat of Essence Better Than Gel Nails Top Sealer.

    piCture pOlish Whimsy with Nail Art

    piCture pOlish Whimsy with Nail Art

    Share:
    Freehand, Glitter, Uncategorised

    Criss Cross

    I’ve been so short on time over the last few weeks so I haven’t had a chance to do much nail art and I’ve been very short on ideas anyway. For this nail art I decided to rely on what I hope you’ll agree is a pretty colour combination and just do something simple!

    The criss cross nails are a base of piCture pOlish Mad Magenta with two diamonds of Nails Inc All Saints Row freehanded on with a nail art brush. I added a thick top coat and added some gold sliver while it was still tacky to accentuate the lines.

    The glitter polish on my accent nails is KBShimmer Totally Tubular.

    It’s all topped off with two coats of KBShimmer Clearly on Top.

    Recently I had a lot of fun putting together some gift guides for Divine Caroline. If you know a creative type, cocktail lover or nail fanatic and are looking for some gift ideas, hop over to Divine Caroline for some inspiration. You’ll also see my own personal wishlist up there if anyone wants to know what I asked Santa for this year!

    Share:
    Freehand, Glitter, Holographic, Uncategorised

    …On The Seashore

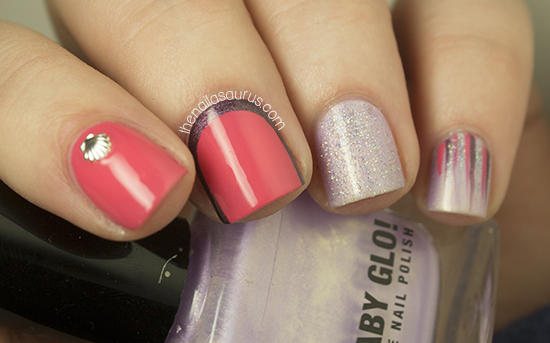
    Last weekend I came across She Sells Seashells which is an amazing online store that sells lots of little bits and pieces for nail art within the UK. They stock a great range of unique items at crazy low prices and judging by the sneaky Instagram previews there’s only more where that came from! What I really love is that everything they sell is miniature! My nails are teeny tiny so I always go for the smallest option when it comes to nail art decorations and there are so many tiny items on She Sells Seashells that I was spoilt for choice.

    You already saw me using the little deer decal in my Christmas Nail Art and today is the debut of the seashells!

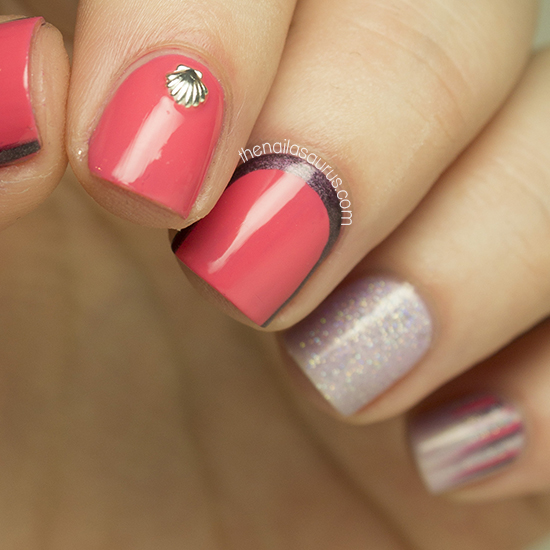
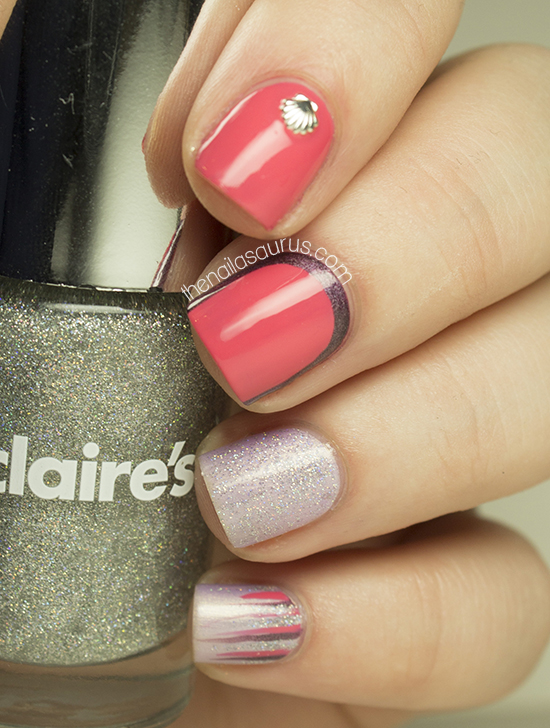
    Coral Nail Art with 3.5mm Seashells

    Coral Nail Art with 3.5mm Seashells
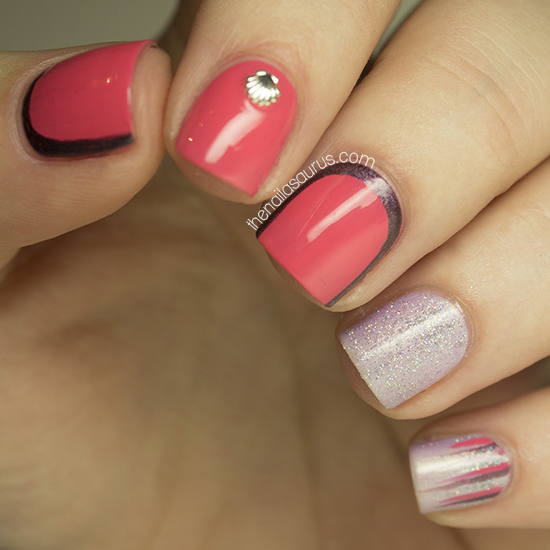
    I started off with Sally Hansen Coral Reef and a shimmery purple from Primark as my base colours. 
    The seashell is hollow inside so I made a very small dot of clear nail polish where I wanted to place it and let that dry to a little lump so there was something 3D for the decal to ‘hold on to’! To stick it down, I applied a little more clear polish on the lump and pressed the seashell down on to my nail. I used a top coat to seal it in and it’s lasted 24 hours so far!
    The fine, holographic glitter on my ring finger is from Claire’s. I was hoping it would be a good dupe for China Glaze Fairy Dust and just from looking at it, I’d be convinced. However, this isn’t a smooth holographic like Fairy Dust but a very very fine glitter and as gorgeous as it is, there’s no getting away from that fact. While Glitter and I are better friends than we used to be, we’re hardly BFFs and I still have Fairy dust on my to-buy list. I still absolutely love this Clarie’s polish though – it’s opaque in 3 coats and insanely sparkly!
    For the purple ruffian/half frame details, I applied China Glaze When Stars Collide freehanded with a nail art brush.
    It’s all topped off with two coats of Cult Nails Wicked Fast.

    Coral Nail Art with 3.5mm Seashells

    Coral Nail Art with 3.5mm Seashells

    Coral Nail Art with 3.5mm Seashells

    Share:
    Glitter, Studs, Uncategorised

    So Long and Thanks For All The Likes

    This week was very exciting! The page that I run to accompany this blog reached 1,000,000 likes on Facebook. I thought I’d mention it here as I feel like this is one to write home about and feel very proud of! I haven’t mentioned it on the blog but the number has been increasing steadily over the last few months although I never, ever thought it would reach 1 million. So I just want to say a huge thank you to anyone reading this that likes the page!

    As a little celebration, I’m running a discount code in The Nailasaurus Emporium through until midnight on Monday (Dec 2nd). It’ll give you 30% off all orders over £10 and you just have to enter ‘millionaire‘ at the checkout. THANK YOU SO MUCH!

    For this nail art I created the Nimbus Nail Art over a base of white using Barry M White using Sally Hansen Coral Reef, China Glaze Tart-y For The Party, Models Own Bubblegum and China Glaze Pink-ie Promise.

    I added some gold triangle studs from The Nailasaurus Emporium right at the base of the nimbus nails.

    The textured glitter on my accent fingers is Barry M Countess from the new(ish) Royal Glitters collection.


    It’s all topped off with a coat of KBShimmer Clearly On Top

    Share:
    Glitter, Stamping, Uncategorised

    Pop Pop!

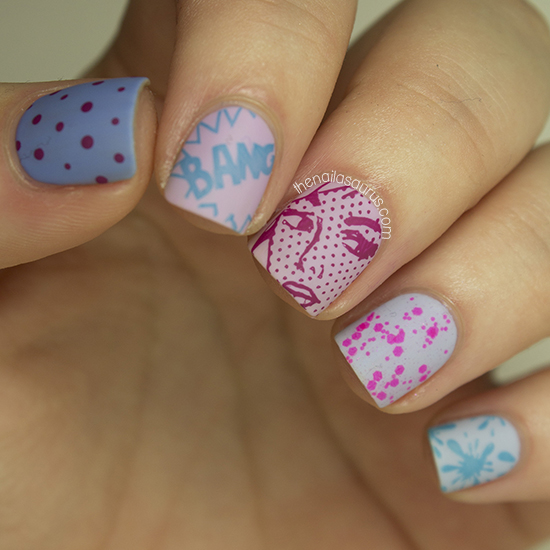
    I’m still exploring all the possibilities of my MoYou plates and I came across some amazing pop art designs on Pro Collection – 10. Mix that with some pastels and brights and I found myself with a manicure that just screams, POP POP!

    The base colours I used in this mani are NYC Lavender Cupcake, Rimmel Aqua Cool and Maybelline Ceramic Blue
    The neon glitter on my ring finger is Wicked Polish Fairy Blood Splatter.
    I stamped the designs from MoYou London Plate Pro Collection 10 using an unnamed bright pink from Kriston and NYC Water Street Blue.
    I topped it all with one coat of Cult Nails Get It On and then one of NYC Matte Me Crazy.
    I’m going to take a leaf from Accio Lacquer’s book today and illustrate this post with a topical gif! Any Magnitude fans out there?

    Share:
    Glitter, Gradient, Halloween, Uncategorised

    Happy Halloween!

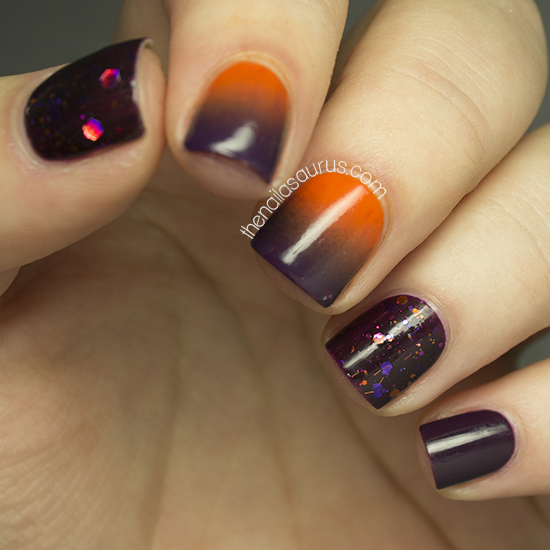
    I have two Halloween manicures that I never got around to posting this month so I thought I would smash them both out today while I still have the chance! The second look will be coming later today.
    I got a package from Harlow and Co this week and inside I found an amazing Halloween glitter – KBShimmer You Go Ghoul! It’s a black jelly with purple and orange glitter bits of all shapes and sizes. It’s a shade that you could wear all year round unlike some holiday polishes that are really only suitable for 3 weeks out of the year.

    I used two coats of  KBShimmer You Go Ghoul! over one of Barry M Plum for the accent nails.

    The gradient (tutorial here) was created with a base of Essie Fear and Desire and Barry M Plum. Clean up was a bitch on this one! I didn’t use my trusty liquid pallisade to protect my cuticles and the surrounding areas from the Orange polish which is why there’s a bit of staining there.

    I used two top coats of Rica Glossy Glam.

    Share:
    Tutorial, Uncategorised

    Nimbus Nail Art Tutorial

    As I promised, today’s post is a tutorial for the nail art I posted yesterday. As many of you guessed – I did indeed use a q-tip/cotton bud! I really love this nail art so no doubt I’ll be posting a lot of these in the coming weeks. It also makes a great base for stamping and other nail art so stay tuned for that!
    I had mentioned that I didn’t know what to call this style, but Laura’s suggestion of ‘Halo’ was spot on. Thank you Laura! I decided on Nimbus (which is another word for Halo according to thesaurus.com!) to avoid any confusion with video game themed nail art. Nimbus nail art also rolls off the tongue quite nicely and it makes me think of Harry Potter! Win, win!
    Nimbus Nail Art Tutorial by The Nailasaurus

    Nimbus Nail Art Tutorial by The Nailasaurus
    All you need for this nail art is:
    Cotton Buds
    Acetone – You can get acetone from most beauty supply stores and most pharmacies. I did try this with nail polish remover but it wasn’t as effective. You can also use polish thinner, but that could get pricey as you need to use a fair amount.
    A white nail polish for your base

    A selection of 3-4 colours – I’m using Barry M Plum, Prickly Pear and Bright Purple and H+M Midnight Mystery.
    Top coat
    Start by painting all of your nails white, or another very light shade and letting it dry. Using a light base will make the colours much more vibrant when you add them over the top.
    Nimbus Nail Art Tutorial by The Nailasaurus
    This is the important part! Lay out some nail polish on a sheet of plastic or foil and pour out some acetone. If you don’t have a suitable container, just use the lid of the bottle.
    Touch a cotton bud to the surface of the acetone and let it soak up in to the cotton.
    Start thinning out the polish using the acetone soaked cotton bud by working it in a circular motion.

    Nimbus Nail Art Tutorial by The Nailasaurus
    Test the consistency by blotting the cotton bud on to the plastic. You want it to be watery but still pigmented.

    Nimbus Nail Art Tutorial by The Nailasaurus
    When you’re happy with the consistency, blot the cotton bud randomly on to your nail. I like to start with the darkest colour and work my way towards the lightest.

    Nimbus Nail Art Tutorial by The Nailasaurus
    Pick up a fresh cotton bud and repeat with your second colour.

    And the third! If you want to get the colour right up to the edges of your nails, it will start pooling in your cuticles. Don’t worry about it too much yet, it can easily be cleaned up when you’re done.

    Nimbus Nail Art Tutorial by The Nailasaurus

    Blot on a layer of your lightest colour to blend everything together nicely.

    Nimbus Nail Art Tutorial by The Nailasaurus
    Because the layers of colour are so thin, you can keep adding colours until you’re happy. Just make sure you give it time to dry in between colours otherwise the acetone can start removing the layers underneath.

    Nimbus Nail Art Tutorial by The Nailasaurus
    Once you’re finished, add a top coat and wait for everything to dry. Clean up around the edges using a clean-up brush and you’re done!
    A few tips
    – Your cotton bud should be saturated with acetone, but not dripping with it!
    – If at any point your cotton bud starts deteriorating – stray fibres etc – just pick up a new one.
    – If any little bits of cotton do get on to your nail, you can remove them with a pair of tweezers.
    I want to see your take on this technique so I’d love if you tag #looknailasaurus if you post your mani on Instagram, Twitter or Tumblr!

    Nimbus Nail Art Tutorial by The Nailasaurus

    TwitterBloglovin’Tumblr

    Share: