Follow:
Browsing Tag:

Purple

    Uncategorised

    The Manicure of my Dreams

    For a very long time, I’ve had an image of some nail art in my head. I don’t know if it’s something I’ve seen before or a complete fabrication but this week I finally figured out how to make it real! The look I pictured was a marble-like mash up of colours that all blend together and look dreamy on the nails. 
    In my quest to figure this out, I tried a couple of things including the saran wrap and watercolour tecniques. The watercolor came closest but I still wasn’t happy so I set out on my own and tried a few new things. Eventually I found the perfect tool and technique and I’m so in love with this style of nail art. Now I’m not going to ruin a perfectly good chance at a guessing game by telling you the tool that I used – you guys have to guess! All I will say is that it’s an every day item (or items) that you would normally find in the bathroom. Any ideas?
    All will be revealed tomorrow when I post a tutorial for this look. I haven’t quite settled on a name for it yet so suggestions are appreciated!

    For this manicure I used a lot of Barry M Polishes: WhitePlum, Prickly Pear and Bright Purple all feature as well as H+M Midnight Mystery. I used Color Club’s Top Coat.

    TwitterBloglovin’Tumblr

    Share:
    Freehand, Halloween, Uncategorised

    Halloween Patchwork Nail Art

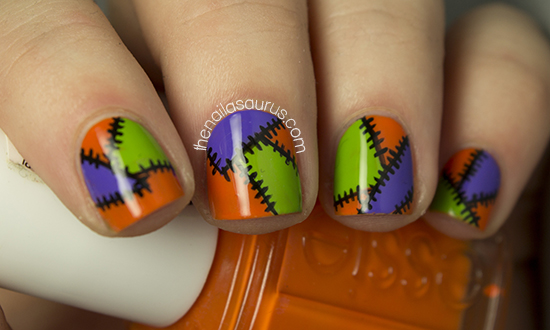
    With Halloween coming up I’ve been racking my brain for nail art ideas so I plucked the spookiest colours I own out of my stash and decided on a patchwork design. This is one of those designs that’s quite versatile and is completely changed by the colour selection. Imagine it in pastel colours with white stitching and tell me it wouldn’t be perfect wear for a baby shower!

    I used Essie Fear and Desire as my base colour and then freehanded on the colour blocks using a nail art brush with Sally Hansen Grass Slipper and Models Own Pukka Purple. If you’re not very confident with a brush, you could also use scotch tape to section off the squares and paint in the colour before peeling the tape away.

    For the stitching detail, I used Black Acrylic Paint and a nail art brush. I started by outlining the blocks of colour and then adding the little stitches.

    It’s all topped off with a coat of Color Club Top Coat.

    P.S. I did a tutorial for bloody drips, another look perfect for Halloween, over at Divine Caroline this week. See the full post here.

    TwitterBloglovin’Tumblr

    Share:
    31 Day Challenge, Galaxy, Uncategorised

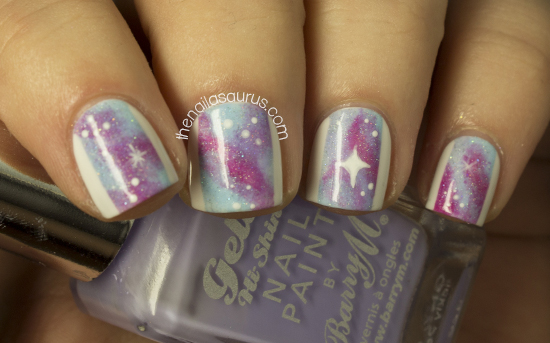
    31DC2013 Day 19: Galaxies

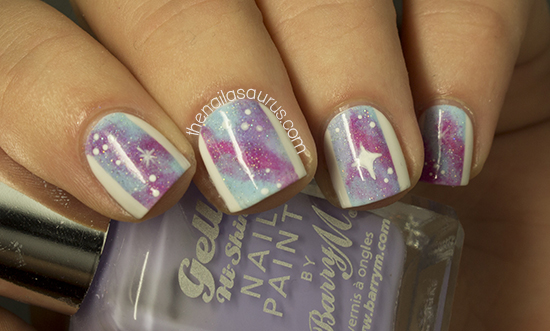
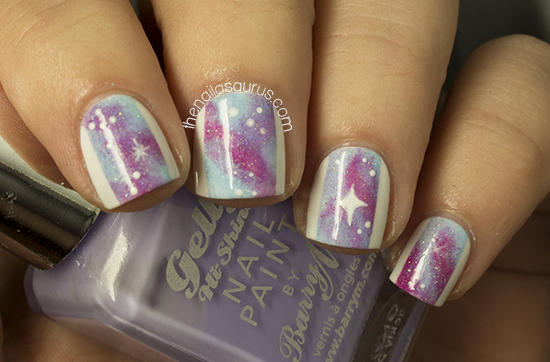
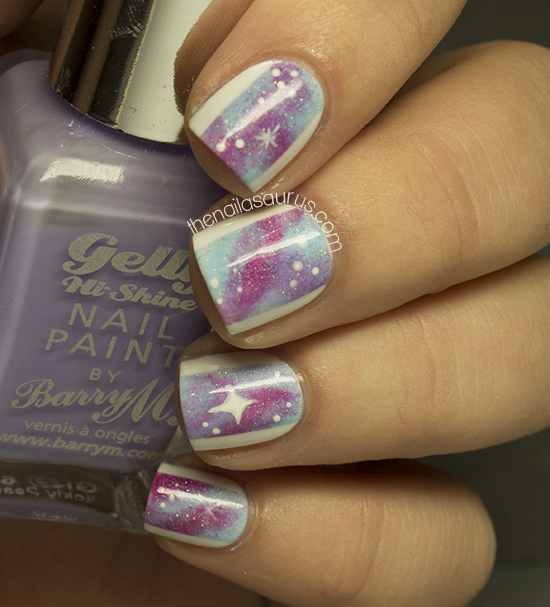
    I made a huge effort to stay away from the pastel galaxy nails today but I just kept getting drawn back. I tried a few variations with dark colours and I didn’t like any of them as much as I did the pastels so I just stuck with my favourite colour combination – pink, blue and purple!

    I started with a base of Barry M White followed by a coat of No7 Stay Perfect Top Coat to dry it off.
    I placed scotch tape on the sides of my nails to mark off the white ‘frame’ and then created the galaxy by sponging on the different colours. There’s a full galaxy tutorial here.
    The colours I used for the galaxy are Barry M Prickly Pear, NYC Raindrop and NYC MoMa. I painted over them in a coat of Calvin Klein Blue Wants to be a Millionaire and added the star details using acrylic paint with a nail art brush and dotting tool.
    It’s all topped off with a coat of Essence Better Than Gel Nails High Gloss Top Sealer.

    Day 19: Galaxies 2012
    Day 19: Galaxies 2011
    See what’s coming next in the 31 Day Challenge 2013!

    TwitterBloglovin’Tumblr

    Share:
    31 Day Challenge, Glitter, Uncategorised

    31DC2013 Day 17: Glitter

    Press Sample

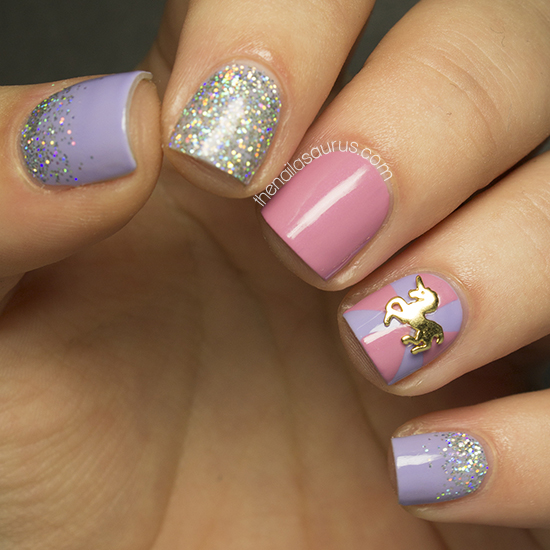
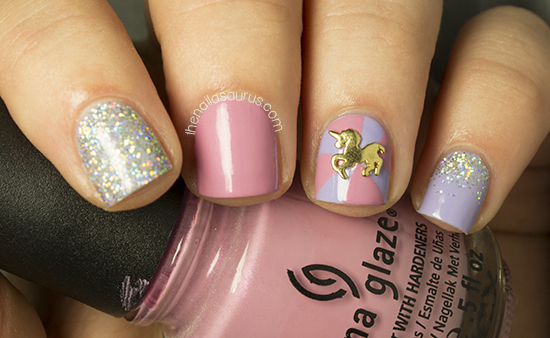
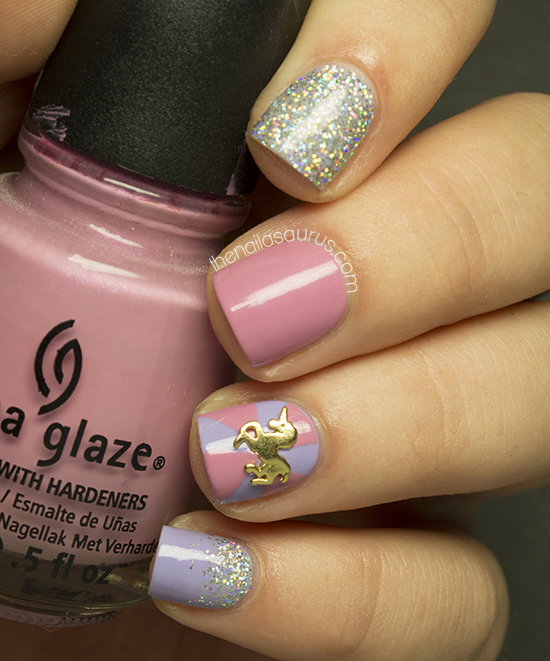
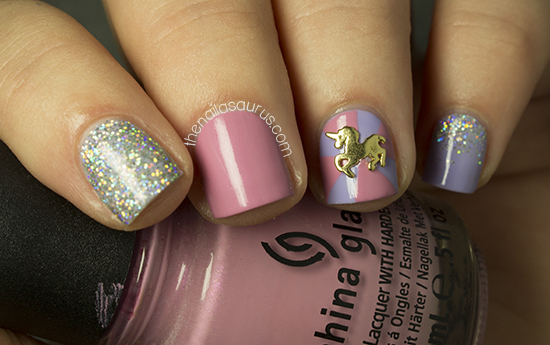
    Even though Glitter was the only prompt that I had an idea for before the challenge even began, today’s design still isn’t as glitter packed as I’d originally planned because I kept changing my mind about the specifics! I ended up with one glitter covered nail and a few sprinkles here and there so I think it can still pass right?
    As I mentioned in my Day 15 post, I’m working my way through a selection of Hex nail charms and second on my list is the Unicorn! ($1.75 at hexnailjewelry.com HERE). I wanted to do some nails that were ethereal, mystical and enchanting to match the charm so I knew it would have to include holographic glitter and pastels which is why I saved it for Day 17. I’m so in love with this nail art and it’s made me realise that I definitely need more holographic glitters.

    The creme colours are China Glaze Pink-ie Promise and Barry M Prickly Pear. The glitter is H+M Jo Is In The House. To get full coverage on my index finger, I used a base coat of Barry M Prickly Pear and then sponged on the glitter. For the nails with glitter on, I used a base coat of PVA Glue to make for easy, peel off removal.
    I topped everything off with two coats of No7 Stay Perfect Top Coat and applied the nail charm using a dot of nail glue.

    Day 17: Glitter 2012
    Day 17: Glitter 2011
    See what’s coming next in the 31 Day Challenge 2013!
    Share:
    31 Day Challenge, Gradient, Holographic, Uncategorised

    31DC2013 Day 10: Gradient

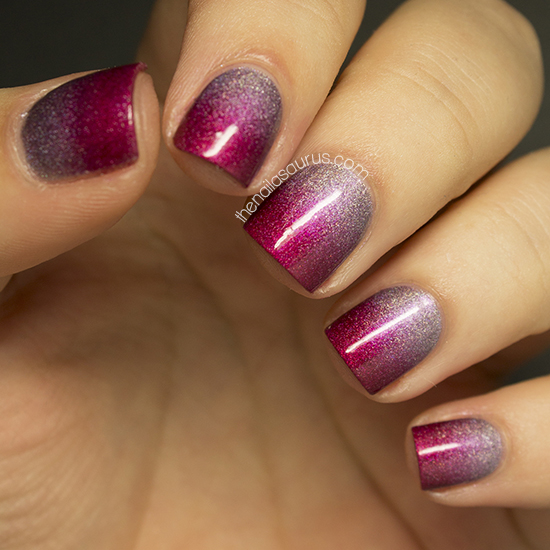
    So today is the last of what you might call the ‘easy’ challenges. From here on out it’s hardcore nail art time! This is actually my 3rd gradient in the challenge to date. I’ve been pretty bad at planning, or even glancing, ahead so far! I must admit, this is my favourite of the bunch. It looks good enough to drink, like a sickly sweet cocktail. Mmmmm… cocktails!

    The lighter colour that I used for the base is A-England Princess Tears and I created the gradient with A-England Rose Bower. There’s a gradient tutorial here with detailed instructions.
    I used one coat of Sally Hansen Dries Instantly as my top coat.

    TwitterBloglovin’Tumblr

    Share:
    31 Day Challenge, Studs, Uncategorised

    31DC2013 Day 6: Violet Nails


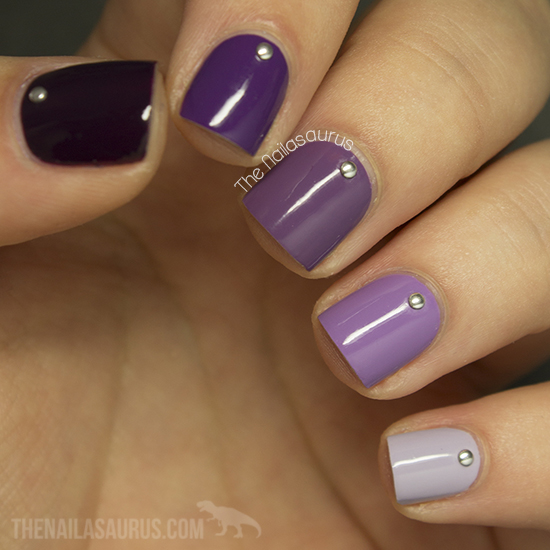
    For Day 6, the last day of the plain colour prompts I wanted to do something simple so I decided on something I’ve never done before… an ombré manicure! I’ve attempted ombré before but I never seem to gather up the right combination of colours and it always ends up looking like a skittle mani. Today I used one of the ombré kits from The New Black so I already had the perfect graduation of colours set out for me. Easy peasy!

    For this manicure I used the Haze Ombré set from The New Black. I switched out the darkest colour in the set for Sally Hansen Plum Luck (on my thumb) because the one included is a shimmer and I wanted to keep the finish the same on each finger.
    Once the colours were dry, I added a top coat of Sally Hansen Dries Instantly and used a toothpick to place and push some 1.5mm Silver Studs down in to the polish.

    TwitterBloglovin’Tumblr

    Share:
    Glitter, Studs, Uncategorised

    Cirque Helios with Pastels

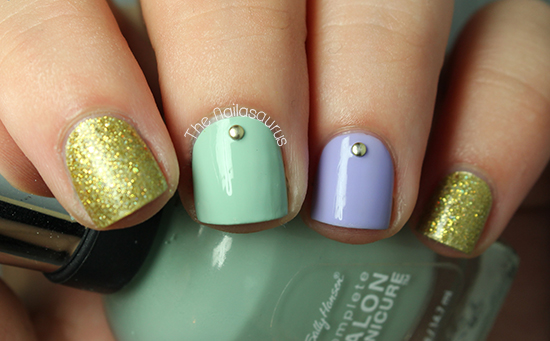
    I have another Cirque polish to show you today! Here we have Helios… a very fine gold glitter with holographic glitter sprinkled in. I decided to dress it up with some pastel colours. When pairing up gold with another colour, I normally go straight to black but I’m wayyy happier with the pastels this time.

    For the glitter fingers, I used one coat of Barry M Gold Foil with 3 thin coats of Cirque Helios. You could wear Helios on its own with 3 coats but you’d have nail poking through the glitter so I chose to put a similar shade base colour underneath.
    The pastels I used are Sally Hansen Green Tea and Barry M Prickly Pear.

    It’s all topped off with a coat of Sally Hansen Dries Instantly and one of Essence Top Sealer. I added some 1.5mm gold studs on top while the Essence polish was still wet.

    Visit cirquecolors.com for stockists or to buy directly.

    TwitterBloglovin’Tumblr

    Share: