Follow:
Browsing Tag:

Purple

    Freehand, Tutorial, Uncategorised, Waterfall

    Waterfall Nail Art Tutorial

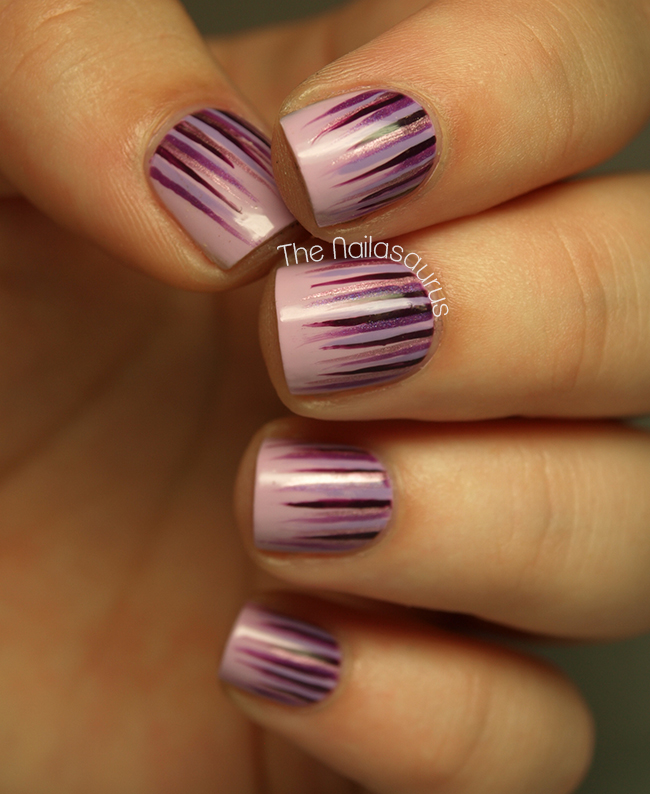
    Since you guys love the waterfall looks as much as me, here’s a tutorial detailing how I do it! It’s a really simple process that I’ve explained as best I can in my previous posts but I know pictorials always shed a lot of light when it comes to nail art so I hope you enjoy it! If you only want to see the video, just scroll down to the end of the post.
    Waterfall Nail Art Tutorial


    Waterfall Nail Art Tutorial

    For this nail art, all you need is:
    – A base colour and a selection of others for the waterfall. I’d say about 4-6 is a good number but it’s entirely up to you!
    For this tutorial, I used NYC Lavender Cupcake as my base colour and Sally Hansen Plum Luck, Rimmel Purple Reign, NYC Power of Elements and China Glaze Tart-y for the Party as my waterfall colours.
    – A top coat of your choosing. My current favourite is No7 Stay Perfect.
    – Acetone (not pictured) for cleaning your brush and cleaning up at the end.
    – A nail art brush…

    Waterfall Nail Art Tutorial
    …the brush is a very important ingredient for this style of nail art. You’ll need one that’s thin, at least 10mm long and that tapers off at the tip. You can get these in a set from eBay.
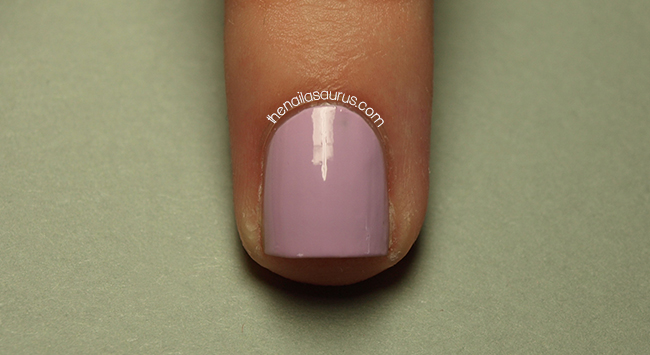
    Start by painting on your base coat and letting it dry.

    Waterfall Nail Art TutorialUsing your nail art brush and Colour #1, paint on a few staggered lines starting just over the edge of the polish at your cuticle and working towards the tip of your nail. Vary the length of the lines too.
    As you get to the end, lift the brush tip slightly away from the nail to get the tapered point on each line.

    Take Colour #2 and paint more lines just to the side of Colour #1.

    Waterfall Nail Art Tutorial
    Colour #3 goes to the side of Colour #2…

    Waterfall Nail Art Tutorial
    …and so on!

    Waterfall Nail Art Tutorial
    Finally, add a top coat and use a nail art brush dipped in acetone to clean up around your cuticle line.
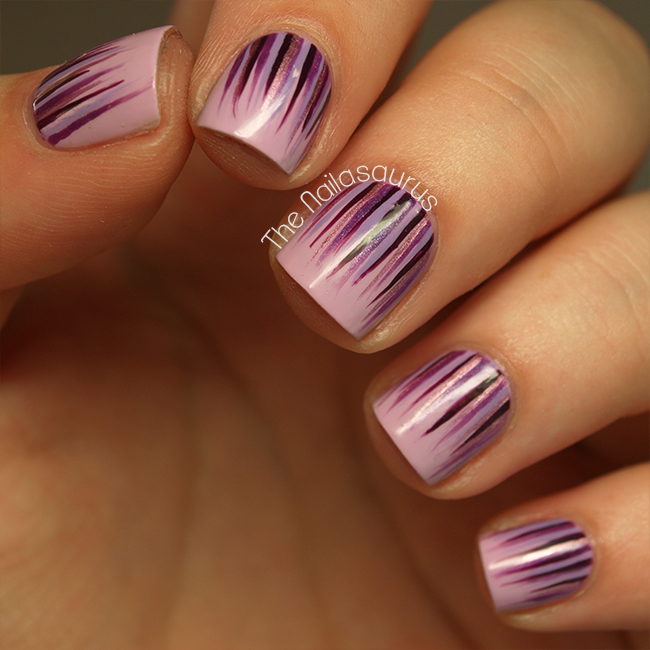
    Waterfall Nail Art Tutorial

    Waterfall Nail Art Tutorial

    Waterfall Nail Art Tutorial

    Waterfall Nail Art Tutorial

    Waterfall Nail Art Tutorial

    Update

    Now there’s a video tutorial too!

    TwitterBloglovin’Tumblr

    Share:
    Freehand, Uncategorised, Waterfall

    Blue Waterfall Nail Art

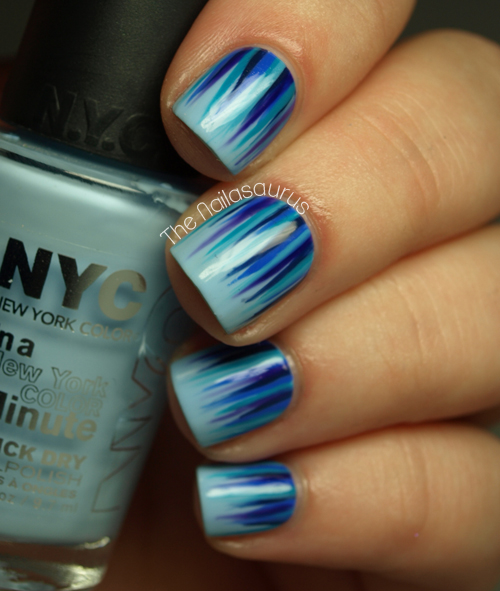
    This nail art builds on one of my manis from last week – Getting Skirty. That mani was so simple, I absolutely loved wearing it and was left wanting more. I thought I’d try it again this week but build on it a little and this was the result!
    Honestly, I am head over heels, pure in love with this style! I can’t wait to try out some more colour combinations. I think the complimentary colours look nice but it would look really edgy with clashing colours. If there are any colour combos you’d like to see let me know because you’re definitely going to be seeing a few more of these manis from me.

    I used NYC Raindrop as my base colour and then took a striping brush to paint on all the different colours from the cuticles upwards towards the tip.
    The colours included in the ‘waterfall’ are Barry M Blue Grape, Sally Hansen Himalayan Blue, Sally Hansen Pacific Blue, Nails Inc Belgrave Place and NYC Water Street Blue.
    It’s all finished off with two coats of No7 Stay Perfect Top Coat.

    TwitterBloglovin’Tumblr

    Share:
    Freehand, Glitter, Uncategorised

    Cirque Queen Majesty with Nail Art

    Press Sample

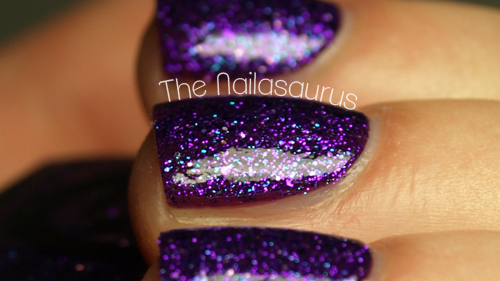
    Today’s nail art is something simple but, I think, totally stunning! I love this vibrant colour combination and this glitter is to die for. It’s one of Cirque’s new shades from the Arcus Collection – Queen Majesty – and it’s very close to the top, if not at the top, of my list of amazing glitters! 
    The glitter is very fine and there are teeny tiny pieces of blue in there which come out in the light – it’s just my dream glitter! It’s beautiful on its own with three coats but I apply two coats of it over a dark purple base colour to bring out all the beauty.
    Cirque Colors Queen Majesty Nail Art
    Read more for a lot more pictures including a proper swatch of the glitter! 

    Cirque Colors Queen Majesty Nail Art
    For the nail art I started with a base colour of China Glaze Sunday Funday. I drew on the drips using a nail art brush with Barry M Plum and then going over it with a bit of Cirque Queen Majesty. It’s all topped off with two coats of No7 Stay Perfect Top Coat. 

    Cirque Colors Queen Majesty Nail Art

    Cirque Colors Queen Majesty Nail Art

    Cirque Colors Queen Majesty Nail Art

    Cirque Colors Queen Majesty Swatch
    Two coats of Cirque Queen Majesty over Barry M Plum with two top coats of No7 Stay Perfect Top Coat. This is a thirsty glitter so if you want a shiny smooth finish, be prepared to use at least two layers of your top coat.

    Cirque Colors Queen Majesty Swatch

    TwitterBloglovin’Tumblr

    Share:
    Uncategorised

    Matte vs Glossy Stripes

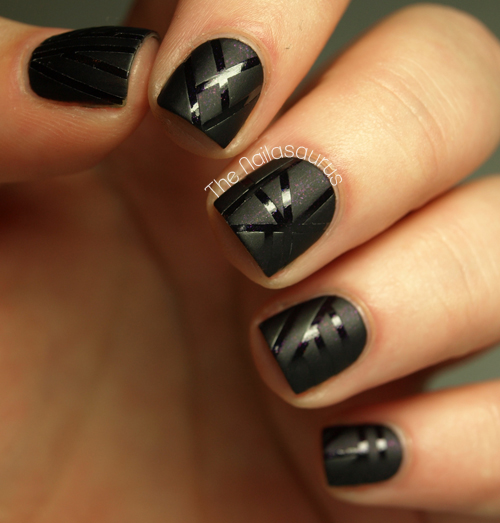
    I’ve tried to cut down on my striping as it was slowly taking over my life but I couldn’t stay away from the thought of using a matte top coat over the tape instead of a completely different colour. I’m glad I gave in to the temptation though because this looks amazing! I think I’d like to try it with some different colours to give it a bit more dimension, I think it would look good with a glittery base colour.

    The base colour is A-England Ophelia and I used a coat of Sally Hansen Dries Instantly to speed things along. Click here to see a tutorial to see how I created the crisp lines using a coat of Rimmel Matte Top Coat.

    TwitterBloglovin’Tumblr

    Share:
    Uncategorised

    Tape Chevrons (with Step-by-Step)

    Yesterday I finally picked up some craft scissors perfect for cutting scotch tape in to all sorts of interesting designs. I found them in Tesco and they had zig-zag and scallop patterns so I picked up both and set about creating some chevron nails. I’ve attempted this a few times freehand but every time was a fail so I set my sights on some of these scissors! Chevrons seem to be a big trend coming in to summer so I’m sure I’ll get plenty of use out of them.
    My base colour is NYC Lavender Cupcake and the silvery, gun metal grey is A-England Dorian Gray.

    To get this look you’ll need some scotch tape and craft scissors that cut in a zig-zag. Cut of plenty of thin chevron strips before you start so they’re ready to go!

    1. Make sure your base colour is completely dry and apply the strips to your nail using tweezers. Keep them as parallel as possible and line up the points.
    2. Paint over the whole nail using your second colour.
    3. While the second colour is still wet, carefully peel off the tape. Once everything is dry, apply your top coat and use a small nail art brush dipped in acetone to clean up around your cuticle.
    Share:
    Glitter, Stamping, Uncategorised

    Roundquins?!

    It’s been a while since I wore any glequins and it’s been playing on my mind so I decided to dig out some of the little things and get busy. When I dove in to my supplies to pick out some colours, I spotted these round versions of my hexagonal favourite which I’ve never tried out. I couldn’t quite believe it myself.
    These, um… round-quins are from Born Pretty Store (betcha didn’t see that one coming huh?) and they come in a pack of 12 colours. 9 out of the 12 are iridescent and I must say I’m not a fan of those, but there are holographic gold, silver and black ones which are just beautiful.

    The main purple colour on show here is China Glaze Tart-y for the Party, the glitter on my pointer is La Femme Purple Glitter and the round glequins are from Born Pretty Store. On my thumb and pinky, I stamped a design from Winstonia plate W111 using A-England Bridal Veil. My middle finger is a base of Bridal Veil and I used the striping tape technique with a top colour of CG Tart-y for the Party. It’s all topped off with two coats of Sally Hansen Dries Instantly.

    TwitterBloglovin’Tumblr

    Share: