Follow:
Browsing Tag:

NYC

    Studs, Uncategorised

    Fresh Lookin’ Studs

    Yesterday you guys provided me with inspiration by the bucket load when I asked on Facebook and Instagram which colours you thought I should use with these new mint studs from Born Pretty. The ideas that popped up time and again were purple, green and brown (to make mint choc chip!). I tried the brown idea because it sounded very appetising but I couldn’t make it work so I moved on to option two… something with purple and green.


    The studs are the new 2mm coloured ones from Born Pretty Store and it’s $3.59 for a pack of 200 studs. There are 11 colours ranging from pastels to bright. It’s been a while since I had a good browse of Born Pretty so I’ve been surprised to see the amazing new items they have on offer. I’ve already placed two orders with them this week so I’ve got some square pastel studs on their way too. I can’t wait to play with them!

    1. For the nail art I used a base coat of Barry M White then topped it off with a coat of No7 Stay Perfect Top Coat.
    2. Once that was dry, I placed on two strips of striping tape where I wanted the white to show through.
    3. Using the brushes straight from the bottle I very carefully painted on NYC Water Street Blue and Lavender Cupcake between the lines of tape. I removed the tape immediately.
    4. I used a nail art brush to dot a tiny bit of clear nail polish on to my nail where I wanted to stick the studs. I picked up the studs using the same brush while it was sticky and pressed the studs down in to the polish to make them really stick (video here).
    5. The colour on my other fingers is Sally Hansen Green Tea.
    6. I topped it all off with a coat of No7 Stay Perfect Top Coat.

    TwitterBloglovin’Tumblr

    Share:
    Freehand, Uncategorised, Waterfall

    Fiery Waterfall

    So it seems you guys like the waterfall mani as much as I do! Thank you for letting me know your amazing ideas for colours. I’ve noted them all down and will be trying them out asap!
    The weather today has been insane. I’ve spent half the day moving around at quarter speed and the other half laid down completely still with a fan pointed at me trying to cool off! I’m really not one for this scorching heat… when it gets to May I’m always like, ‘Hmmm this isn’t too bad. Maybe I like summer now’, but as soon as July hits I remember the torture and start counting down the days to October!

    For this nail art I used Sally Hansen Crinolin, a super pale pink, as my base colour then painted on streaks of Barry M Papaya, Essie Lollipop, NYC Lexington Yellow and NYC Full Metal Jacket.
    I topped it with two coats of No7 Stay Perfect Top Coat.

    TwitterBloglovin’Tumblr

    Share:
    Freehand, Uncategorised, Waterfall

    Blue Waterfall Nail Art

    This nail art builds on one of my manis from last week – Getting Skirty. That mani was so simple, I absolutely loved wearing it and was left wanting more. I thought I’d try it again this week but build on it a little and this was the result!
    Honestly, I am head over heels, pure in love with this style! I can’t wait to try out some more colour combinations. I think the complimentary colours look nice but it would look really edgy with clashing colours. If there are any colour combos you’d like to see let me know because you’re definitely going to be seeing a few more of these manis from me.

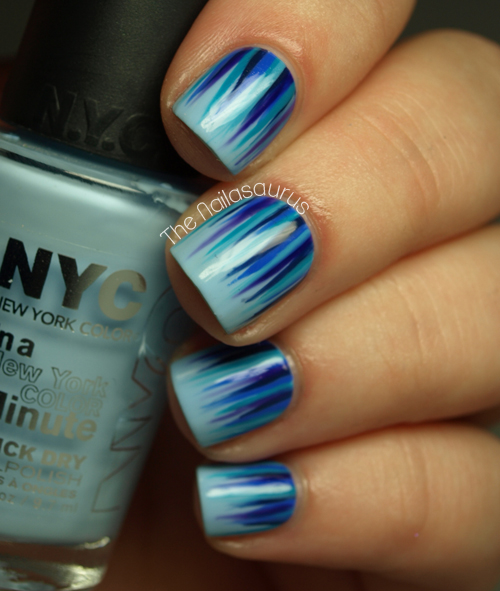
    I used NYC Raindrop as my base colour and then took a striping brush to paint on all the different colours from the cuticles upwards towards the tip.
    The colours included in the ‘waterfall’ are Barry M Blue Grape, Sally Hansen Himalayan Blue, Sally Hansen Pacific Blue, Nails Inc Belgrave Place and NYC Water Street Blue.
    It’s all finished off with two coats of No7 Stay Perfect Top Coat.

    TwitterBloglovin’Tumblr

    Share:
    Glitter, Studs, Uncategorised

    Half/Stud/Half

    I know it’s been quiet around here this week. I’ve been more than a little bit poorly but I’m on the mend now and slowly getting back in to the swing of things. I’ll start with something sweet… pastels!

    The colours here are Sally Hansen Green Tea, Sally Hansen Dorian Gray, NYC Raindrop, NYC Lavender Cupcake with Sonnetarium Lenten Rose on the ring finger.
    I painted them all on as skittles then added a top coat to make them dry nice and quickly. Once the base colours were dry, I used scotch tape to mark a clean line halfway down each nail. Then I painted a second colour over the top one nail at a time and removed the tape straight away. I waited for that to dry and added a final top coat, attaching the studs while that was still wet.

    TwitterBloglovin’Tumblr

    Share:
    Freehand, Uncategorised

    Life’s Like a Box of Chocolates

    … you never know what you’re gonna get! 
    I’ve never tried sugar spun nail art before but I wanted to give it a go this week and Forrest Gump served for the perfect inspiration. I wanted to create the look of fancy boxed chocolates and I think the sugar spun technique was the right way to go.  I had to add the foil heart because it seems to me like you get one of those in every single box of chocolates! 

    The colours I used for the chocolate are NYC Midtown Mink, Essie Glamour Purse and Stargazer White. I added a top coat of Essence Better Than Gel Nails to each nail before adding the sugar spun details. You can watch a tutorial for that just here.
    On my middle finger I freehanded the heart with NYC Enchanting Fire with a small nail art brush over 2 coats of NYC Midtown Mink.

    TwitterBloglovin’Tumblr

    Share:
    Glitter, Stamping, Uncategorised

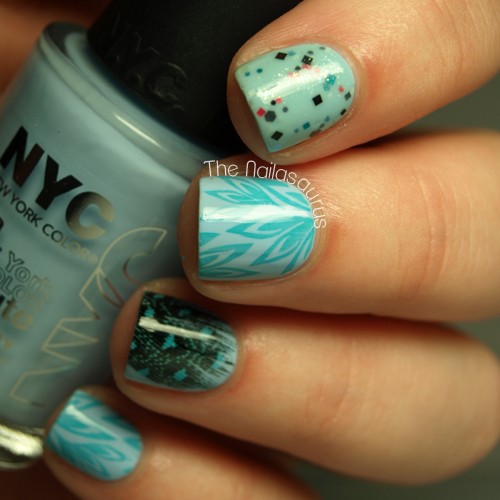
    Raindrop Blue Me Away

    On the weekend I had a good streak of nail shopping luck. As you may have seen, I already have some neutral coloured feathers but I’ve been on the lookout for some coloured ones for a very, very long time. I checked in every single craft shop I passed but to no avail. So I was amazed to find a packet of all shapes and colours in Ryman the stationers! 
    I also spotted the new NYC Foil polishes so I picked up a few from the stand. I knew the foils would be ideal for stamping so I got the Enchanting Fire and Power of Elements foils plus this amazing minted pastel blue called Raindrop. I was immediately drawn to it and I dropped it in to my basket without hesitating! I know a lot of people have complaints about the lasting power of NYC polishes but it’s one of my favourite ranges on the high street. Whenever I see new colours on the stand my eyes nearly pop right out of my skull and for the bargain price, I don’t think there’s much wiggle room for complaints.

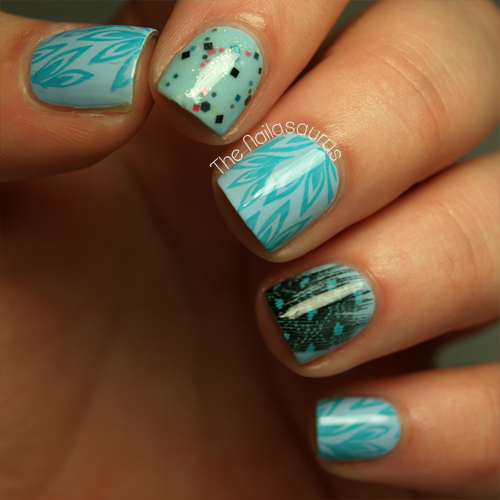
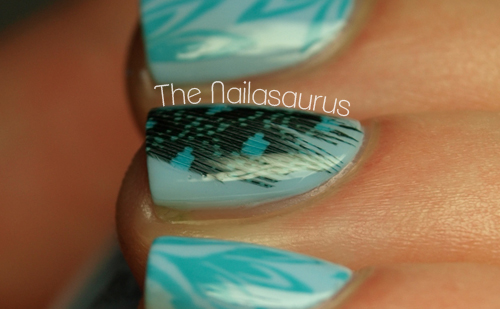
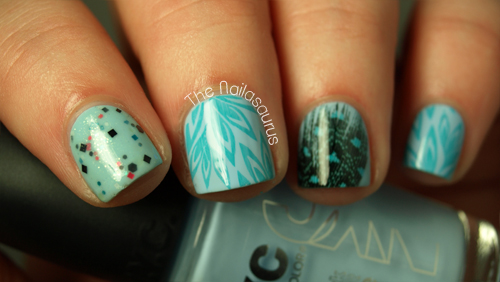
    I used two coats of NYC Raindrop as my base colour on every nail and added the blue feather to my ring finger following this tutorial. I stamped on the feathers from Bundle Monster Plate BM210 using Barry M Guava. The glitter on my first finger is two coats of Black Cat Lacquer’s minty shimmer We Can Pickle That (over NYC Raindrop).
    I finished it all off with a coat of Essence Better Than Gel Nails.

    TwitterBloglovin’Tumblr

    Share:
    Uncategorised

    Tape Chevrons (with Step-by-Step)

    Yesterday I finally picked up some craft scissors perfect for cutting scotch tape in to all sorts of interesting designs. I found them in Tesco and they had zig-zag and scallop patterns so I picked up both and set about creating some chevron nails. I’ve attempted this a few times freehand but every time was a fail so I set my sights on some of these scissors! Chevrons seem to be a big trend coming in to summer so I’m sure I’ll get plenty of use out of them.
    My base colour is NYC Lavender Cupcake and the silvery, gun metal grey is A-England Dorian Gray.

    To get this look you’ll need some scotch tape and craft scissors that cut in a zig-zag. Cut of plenty of thin chevron strips before you start so they’re ready to go!

    1. Make sure your base colour is completely dry and apply the strips to your nail using tweezers. Keep them as parallel as possible and line up the points.
    2. Paint over the whole nail using your second colour.
    3. While the second colour is still wet, carefully peel off the tape. Once everything is dry, apply your top coat and use a small nail art brush dipped in acetone to clean up around your cuticle.
    Share: