Follow:
Browsing Tag:

A-England

    Gradient, Uncategorised

    Purple Gradient

    It would seem that I’m hell-bent on trying every possible colour combination for gradient nails and I may even venture in to 3 colours soon. I’ve been insanely uninspired when it comes to nail art recently, despite having plenty of new tools and colours to play with. It’s almost like I’m so overwhelmed with choice that my brain just frizzles every time I think about it! So I’m sorry for the simple/boring nail art I’ve been sporting recently and hopefully things will pick up soon!
    Purple Gradient Nail Art

    Purple Gradient Nail Art
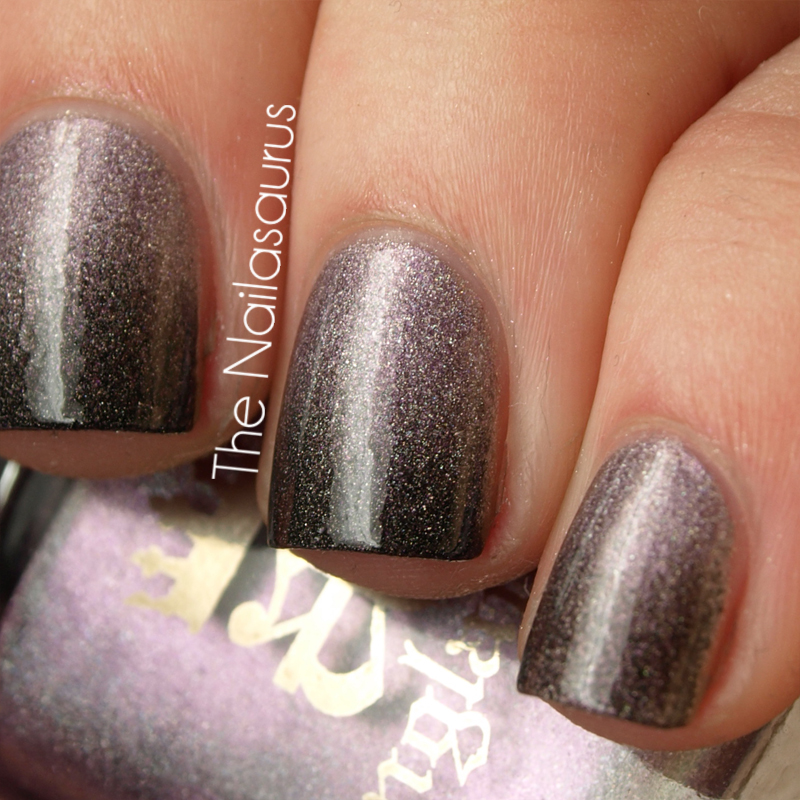
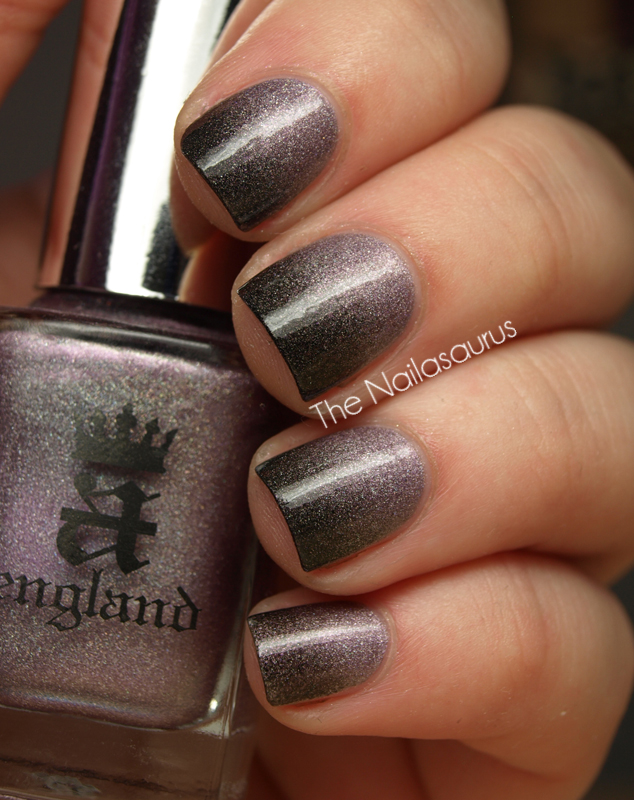
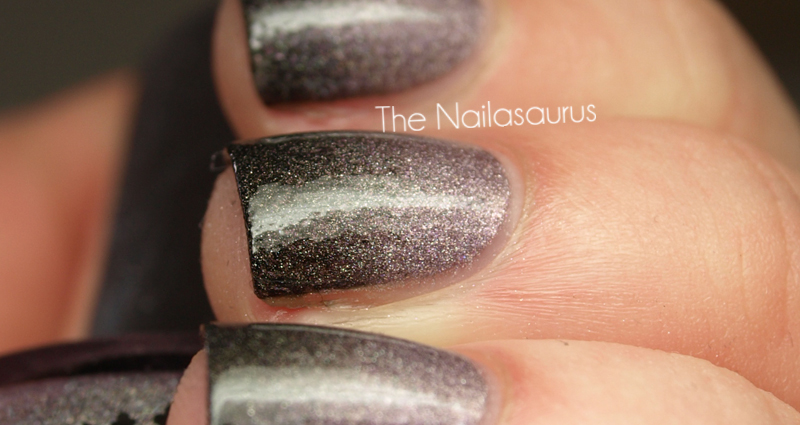
    Gradient Nails using A-England Guinevere and Revlon Plum Night. Tutorial here.

    Purple Gradient Nail Art

    Purple Gradient Nail Art

    TwitterBloglovin’Tumblr

    Share:
    Stamping, Swatch, Uncategorised

    A-England Guinevere Swatch + Stamping

    A-England is a brand I have buckets of admiration for. I’ve yet to find one of their polishes that disappoints and the brands creator, Adina, is one of the most inspiring women I’ve ever had the pleasure of speaking to. Guinevere is from the Mythicals collection – a collection of sublime cremes – and this one’s no different. Look how creamy!! The colour is a slightly greyish lilac, it’s so pretty and neutral enough for work.
    All swatches are 2 coats of A-England Guinevere* with a top coat of Cult Nails Wicked Fast.
    A-England Guinevere Swatch

    A-England Guinevere Swatch
    Click ‘read more’ for more pictures and the nail art!


    A-England Guinevere Swatch

    You can buy Guinevere from A-England.co.uk right here with free worldwide shipping!

    A-England Guinevere with Stamping

     Stamping Plate: Red Angel RA108
    Base Colour: A-England Guinevere
    Stamping Colour: Barry M Gold Foil
    Top Coat of NYC

    A-England Guinevere with Stamping
    * Items marked with an asterisk were sent for consideration. See my Disclaimer for more information
    Share:
    Gradient, Holographic, Uncategorised

    Hologradient

    I’m back to doing gradients again! In the tutorial I wrote, the sponge I’m using is a bathroom sponge and is quite porous. A lot of other bloggers have been using make-up sponges to create their gradients and many of you lovely lot suggested I try one myself to get a smoother fade and less ‘bumpy’ gradient. It definitely works – make up sponge  > bath sponge for gradient nails!
    Holographic Gradient Nail Art

    Holographic Gradient Nail Art
    I used A-England Princess Tears as a base and then added A-England Bridal Veil to create a gradient following this tutorial.

    Holographic Gradient Nail Art

    Holographic Gradient Nail Art

    TwitterBloglovin’Tumblr

    Share:
    Uncategorised

    Strippy McStrip Stripe

    I seem to be posting later and later every day as this week goes on. I’m so easily distracted, especially when you put me in front of anything with an internet connection! So even when I sit down and fully intend to focus all my attention in to writing a post, it normally ends up taking 3 hours or so to get it done in between all the other interesting things I can find to take up my time. For instance, tonight I opened up blogger and uploaded pictures then proceeded to watch 3 episodes of Fresh Meat before I remembered I had a post waiting to be written! 
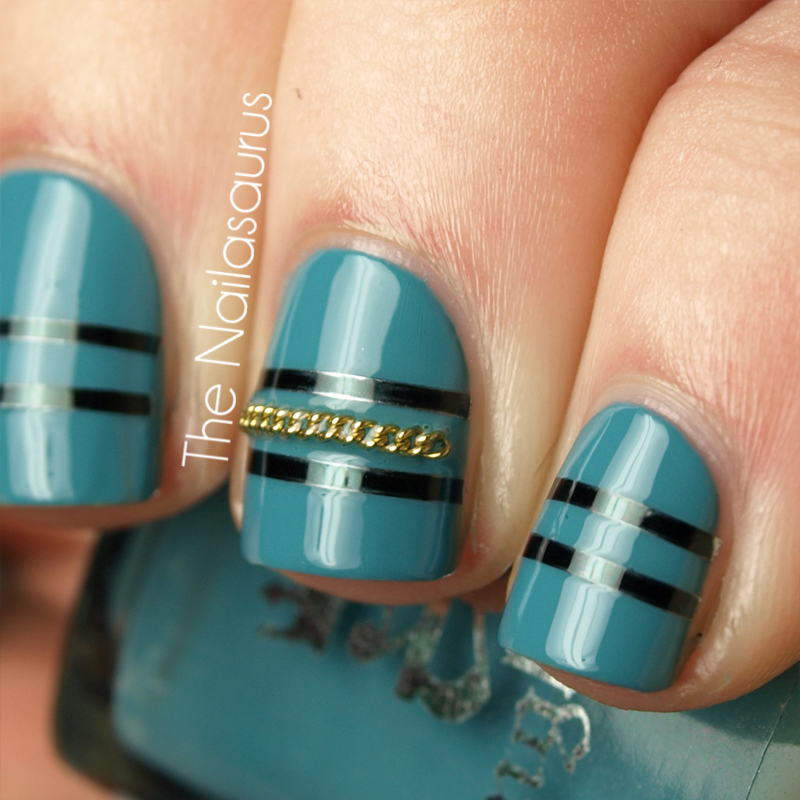
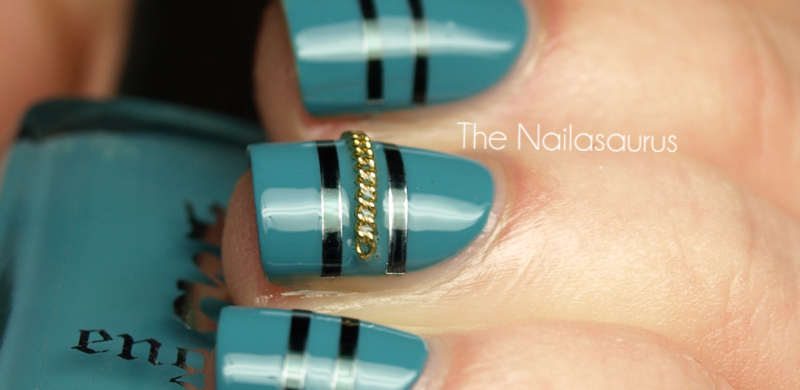
    Since I first used metal chain in a manicure back in March, I’m always on the lookout for chains that would be suitable for sticking to my nails. I found this one in a charity shop and picked it up for £1. It is really really tiny and absolutely perfect for nail art.The best part is I don’t even need pliers to cut it, my nail clippers slice through the metal like it’s butter!
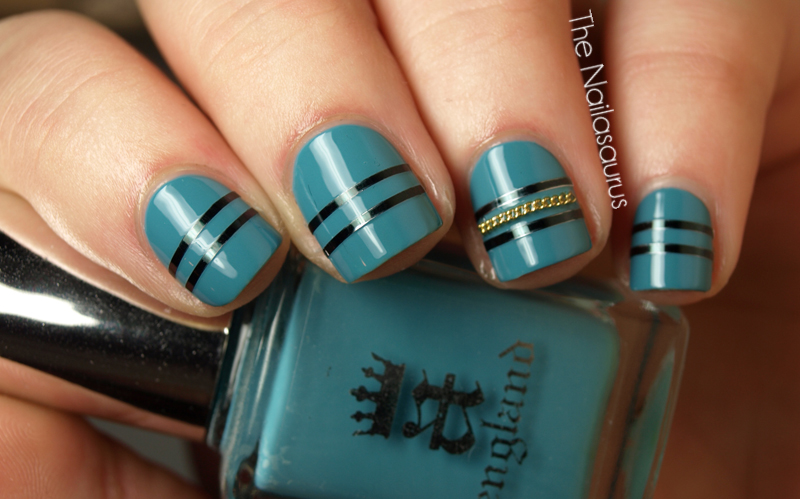
    This is my first time trying striping tape! I decided to get one from Born Pretty Store to see if we would get along and I’m pleased to report we’ve become good friends. I’ve purchased a set of ten rolls from eBay here for an absolute bargain of 99p so prepare for more stripy nails in the future.
    A-England Galahad with Striping Tape
    A-England Galahad with Striping Tape
    I started with two coats of A-England Galahad and waited fro that to dry before applying the striping tape. My main concern with the tape was how I would cut it to the right size so I started with a generous guess, placed it at one side using my Mash Tweezers and slowly smoothed it down towards the other edge. If there  was any excess, I chopped it off using nail clippers before smoothing it down right to the edge.
    I applied a clear top coat and placed on the chain while that was still tacky, again using the Mash Tweezers. Finally, I added another top coat just to my ring finger.
    A-England Galahad with Striping Tape

    A-England Galahad with Striping Tape
    If you have time today, please stop by Bundle Monster’s Facebook Competition and vote for your favourites. If you’d like to put in a vote for me, you can go directly to my entry by clicking here. Thanks so much to everyone that’s voted for me already, your support really means a lot much to me!

    TwitterBloglovin’Tumblr

    Share:
    Stamping, Studs, Uncategorised

    It’s Been a While

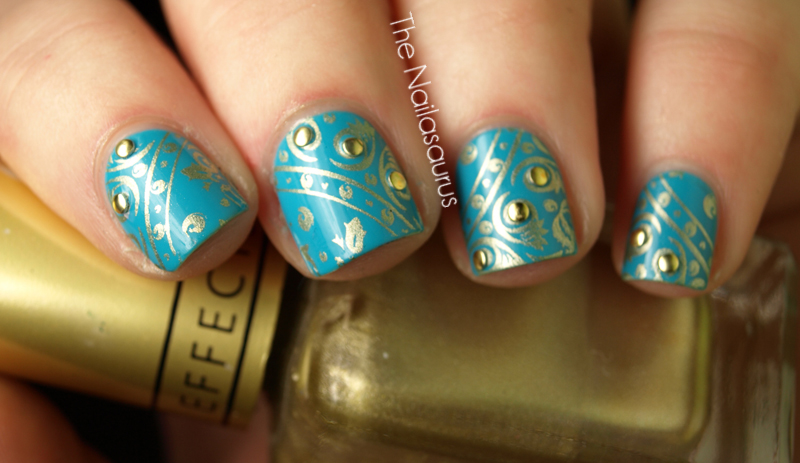
    I just had a look through the pages of The Nailasaurus and it’s been nearly a whole month since I posted any stamping nail art. Crazy when you consider that’s the only thing I ever posted for at least the first year of its existence.
    I love having my nubbins back. Whenever I have long(er) nails, or rather when I haven’t trimmed them for a while, there will come a day when I look at them and just think ‘You have got to go!’ and I just cut them down. When I was a kid, I always thought it would be really awesome to have long nails one day but now that I’ve been there and done that, I can safely say I prefer them short and square. After a trim, I always paint them black or some other very dark colour and find myself staring at them like they’re a new pair of shoes!
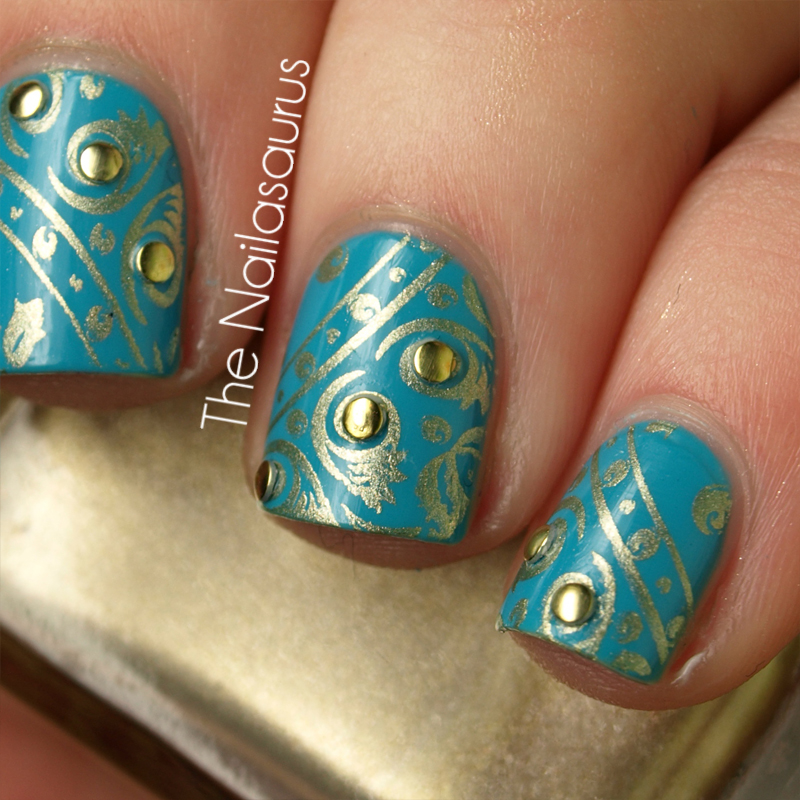
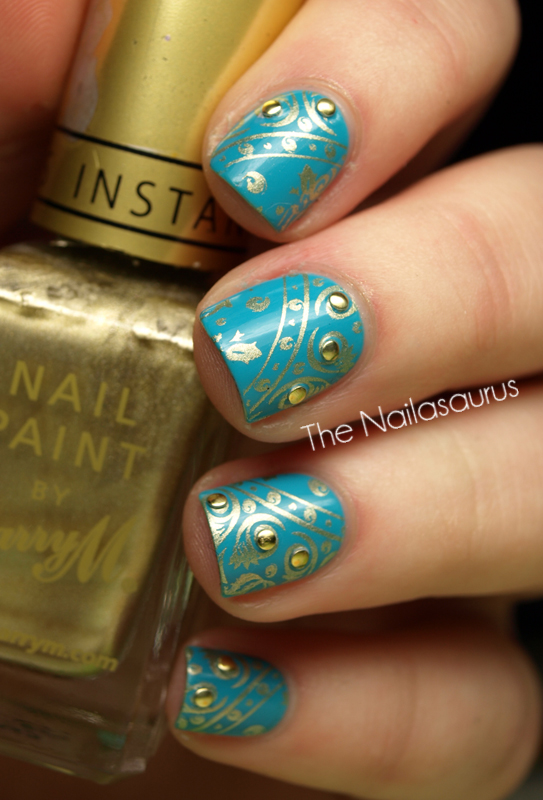
    Barry M Gold Foil Stamping

    Barry M Gold Foil Stamping


    Stamping Plate: Red Angel RA102
    Base Colour: Glo Baby Glo (from Primark) in Yes Cyan!
    Stamping Colour: Barry M Gold Foil
    Studs from Born Pretty Store
    Top Coat of NYC

    Barry M Gold Foil Stamping
    P.S. Voting is still open for the Bundle Monster Nail Art Contest. My entry can be found here and your votes are very very much appreciated. Thanks!

    TwitterBloglovin’Tumblr

    Share:
    Uncategorised

    My Bundle Monster Competition Entry!

    Bundle Monster are releasing a new set of plates very soon and they’re running a competition through their Facebook for the chance to win a set! As a long time lover of the BM sets, I couldn’t pass up this opportunity so I submitted a manicure! For my entry I used Bundle Monster plate BM210 with A-England St George over a base of BYS Kung Fu Blue. I used Barry M Gold Foil to accent the design on my ring finger.
    If you like my entry, I’d love it if you could head over and vote for me in the competition by clicking here or on the picture below.
    Thank You!

    TwitterBloglovin’Tumblr

    Share:
    Uncategorised

    Black and White Day 10: Your Choice

    For the last day of the challenge we decided to recreate our favourite manicure that someone else had created during the challenge. So I had the near impossible task of picking from 42 manicures! In the end, I came to a compromise, I’d dedicate one finger on my hand to my favourite design from each of the other 5 ladies.

    Black and White Challenge Day 10

    Black and White Challenge Day 10

    Pinky Finger, The Lacquerologist: Day 3
    See Emily’s original post here
    W7 Black as a base. Dotted first with Barry M White then again with Rimmel Urban Princess, Barry M Mint Green, NYC Lexington Yellow and Miss Sporty Orange.

    Ring Finger, Nails and Noms: Day 3
    See Rie’s original post here
    W7 Black as a base. Using scotch tape to mark of the triangle closest to my cuticle, I used BYS Flirty Sparkle. I gave up on scotch tape and freehanded the next triangle with Rimmel Daisy Chain.

    Middle Finger, Fab Fingertips: Day 5
    See Esther’s original post here
    A-England Galahad as a base. A-England St George for the first cloud and W7 Black for the second.

    Pointer Finger, Sincerely Stephanie: Day 2
    See Stephanie’s original post here
    Base coat of Barry M White. W7 Black with a striping brush for the center parting. Then I switched to a dotting tool using the same two colours.

    Thumb, Let Them Have Polish: Day 1
    See Christina’s original post here
    Barry M White as my base colour. First I used a large dotting tool and W7 Black, then a slightly smaller dotting tool with Barry M White to dot in the centres.

    Finally, I finished off each nail with two coats of NYC In A New York Minute.

    Black and White Challenge Day 10

    Black and White Challenge Day 10
    Black and White Challenge Day 10
    And finally, pop over to the other ladies’ blogs to see which design they’ve recreated!
    Esther at Fab Fingertips
    Stephanie at Sincerely Stephanie

    TwitterBloglovin’Tumblr

    Share: