Follow:
Browsing Category:

Nail Art

    Nail Art, Uncategorised

    18 Summer Nail Art Ideas to Try This Weekend

    I always have so much fun painting nail wheels and wanted to do one with some ideas for summer nail art. There are 18 designs here and I tried to make a nice mix of easy to medium difficulty designs. Read on for a breakdown of each look and if I can remember what polishes I used, I’ll list them too!

    Summer Nail Art Inspiration

    1. Triple Edge

    When your base colour is dry, paint a thin line at each edge of your nail then join the ends together with a line that goes across.
    Rimmel Breakfast in Bed | Barry M Cancun

    2. Strawberry Pinstripe

    Paint a pinstripe base using a striping polish over your base colour. To freehand the strawberries, paint some red pear shapes, then add the leaf detail at the bulky end! If you’re feeling adventurous, add some tiny dots to add texture.
    piCture pOlish Totes | Sweet Color Liner Polish

    3. Bunting

    Using white, start with 4 curved lines across your nail and then add some small triangles. Fill the triangles in with as many colours as you like!
    Barry M RhossiliSweet Color Liner Polish
    Nail Art Ideas for Summer

    4. Half/Pearls/Half

    Paint your base colour and let it dry, then paint half of your nail with the second colour. I used tape to mark off a nice straight line down the centre but if you have a steady hand you might not need to. To fix on the pearls, I used a dab of clear polish to attach them one at a time.
    Barry M Elderberry | NYC Hudson Breeze | 1.5mm Pearls

    5. Stripes

    Paint your base colour and make sure it’s completely dry. Apply some tape or straight stencils where you want to keep your base colour showing through and paint some different colours in the gaps. When it’s dry, apply striping tape where the colours meet and use a few layers of top coat to keep it stuck.
    Sally Hansen Lady Lavender | Straight Vinyl Stencils | Different Dimension Duelling Unicorns | Striping Tape

    6. Matte Gradient

    While not typical summery colours, I think the neutral and white work really well together to create a great summer look suitable for formal occasions. I created the gradient (tutorial here) and used a matte top coat to get this finish.
    Barry M Pearl | Barry M Truffle | Rimmel Matte Top Coat (alternative here)
    Nail Art Inspo for Summer

    7. Summer Waterfall

    Nicole by OPI At Least I Pink So and Yoga-Then-Yogurt | Sally Hansen Water Cooler | CK One Beach Party

    8. Polka Dots

    Using a set of dotting tools, I started this pattern with the largest dots in a diagonal line across the nail. I worked outwards from there decreasing the size of each row of dots.

    9. Saran Wrap Mani

    To get this effect, I blobbed out 4 different shades of green on to a sheet of plastic. I took a a small piece of bundled up saran wrap/cling film and dabbed it downwards on to the polish to muddle the colours together. Next, I quickly dabbed it on to the nail to create this textured effect. There’s a tutorial coming soon, I promise!
    18 Summer Nail Art Ideas

    10. The Deep V

    Paint your base colour and use a striping brush to outline a long, thin V that meets right at the tip. Fill it in and then outline if you want to!
    Barry M Huckleberry | Sally Hansen So-nata Problem | Striping Brush

    11. Pastel Galaxy Nails

    Nicole by OPI I Shop Mintage | NYC Lexington Yellow | China Glaze Fairy Dust

    12. Summer Holiday

    These are all DIY Nails water decals from the Aloha set
    Barry M Coconut | DIY Nails Aloha 
    Summer Nail Art

    13. Make Like a Tree…

    …and leave!
    Let your base coat dry and paint a line diagonally across your nail then start painting lines from one edge to meet the line in the middle. Next, paint lines going downwards, matching them up where the horizontal lines touch the middle.

    14. Daisy, Daisy

    Paint about 5 white lines bursting out from the centre of your cuticle and build a petal shape around each line. Once that’s dry, add a yellow centre and finish with top coat.
    NYC Hudson Breeze | Pure Color Liner Polish | NYC Lexington Yellow

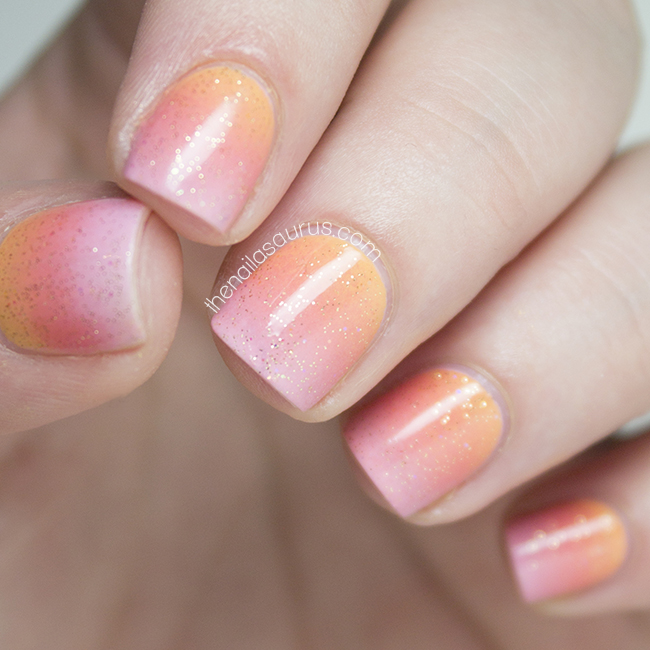
    15. Sunset Gradient

    Nicole by OPI At Least I Pink So | piCture pOlish Totes | China Glaze Fairy Dust
    Summer Nail Art Ideas

    16. Pastel Glitter

    Barry M Rose Hip | Claire’s Shiver

    17. Walk The Line

    Using a striping brush, paint the thinnest line possible straight down the middle of your nail. SImple but effective!
    Rimmel You Had Me at Hello | Barry M Gold Foil | Striping Brush

    18. Dragonfruit

    W7 Salt and Pepper | piCture pOlish Electric Dream
    If you post your recreations on Instagram, please tag #looknailasaurus as I love to see them and sometimes miss them if you only tag my name.
    Share:
    Glitter, Nail Art, Stamping, Uncategorised

    Raindrops on Roses

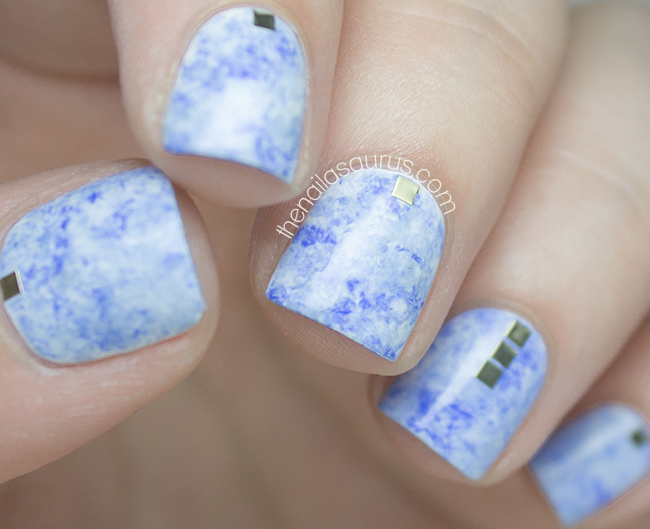
    Pastel on pastel is never going to look bad but it’s so hard to find pastel shades that are pigmented enough to use with stamping. I mentioned in my post about piCture pOlish’s Urban Shades collection (see that here) that I thought Chillax would work well for stamping and I’m so glad that it does. While it is admittedly on the bright side for a pastel, I think it can pass as it does look a little more muted with the stamps!
    I used Barry M Rose Hip as my base colour here. On the accent nails, I used Claire’s Shiver which is a glitter in a shimmery clear base with white and pastel green hexes.
    For the stamping, I used piCture pOlish Chillax.
    The designs are from MoYou’s Fairytale Collection Plate 02 and Pro Collection Plate 07 (which isn’t on the website anymore, but the same rose pattern is on XL Plate 07). To get 20% off your first order at moyou.co.uk, log in to your account and use the code SAMMY20.
    It’s all topped with a coat of Glisten & Glow HK Girl.
    Share:
    Nail Art, Uncategorised

    #guiltfreeze Colour Blocking + IBIZA!

    yoomoo have recently upped the stakes of their #guiltfreeze competition with the announcement of the grand prize… a trip to Ibiza for you and a friend!* The competition closes on July 13th so make sure you get your entries in as soon as you can! Don’t forget to keep up with yoomoo on Facebook to see when they post the next nail art tutorial.
    The latest yoomoo x Nails Inc #guiltfreeze nail art tutorial is for this colour blocked nail art. I couldn’t resist trying it out for myself but I picked out a slightly different colour combination which I think works really well for summer – a good mix of soft and bright colours. I love minimal designs and colour blocking is one way to get away with minimal effort nail art that gives some stunning results. All you need is a killer combination and you’re good to go. If you’re stuck for colour ideas, Adobe Kuler is an amazing resource that I sometimes use when I need a dose of colour inspiration. The shades I used here are China Glaze Fade Into Hue, China Glaze Mimosa’s before Mani’s and the yoomoo exclusive Nails Inc Udderly Shocking Pink. You’ll find the video tutorial below.

    How to enter #guiltfreeze

    1. Pick up your money off voucher here and grab yourself a pot of yoomoo frozen yogurt
    2. Snap a picture of your yoomoo inspired nail art with your pot of yoomoo in hand
    3. Post your picture to Instagram with the hashtag #guiltfreeze to win a trip to Ibiza and exclusive Nails Inc prizes!
    *the prize for this competition is £1000 in Thomas Cook vouchers so you can plan your own dream Ibiza holiday for you and a friend!
    Share:
    Nail Art, Stamping, Uncategorised

    Short Circuit

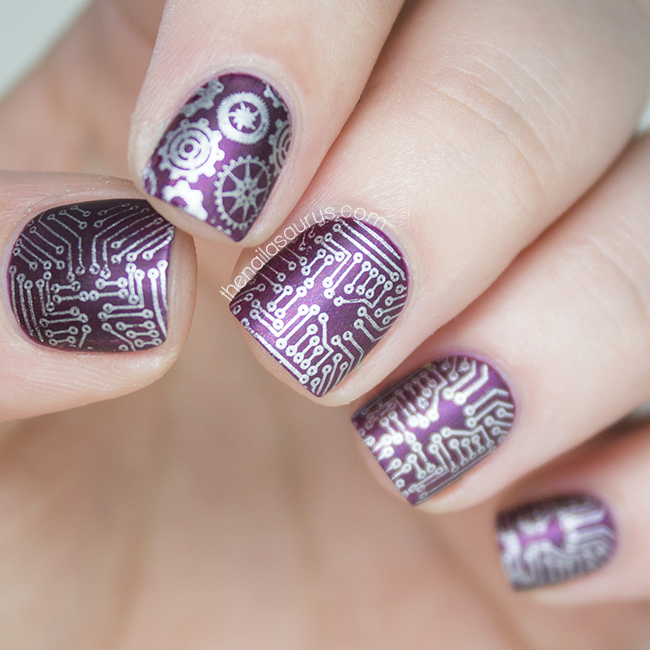
    I did these nails a little while ago when I was desperate to wear my favourite purple, China Glaze Cowgirl Up, and mattify it. To spice up the manicure a little, I added some stamping using A-England’s Excalibur Renaissance with Bundle Monster Plate BM415.

    Bit of a tangent but I feel compelled to mention that circuit is one of those words that doesn’t look like it should be a word (although I know this often comes down to opinion). A freak-of-language combination of letters that just isn’t very pleasing to the eye. I wonder how it came to be that circuit would be pronounced ser-kit? The mind boggles. Well, my mind at least!

    Share:
    Glitter, Gradient, Holographic, Nail Art, Uncategorised

    Well That’s Just Peachy

    Gradient Nail Art | The Nailasaurus
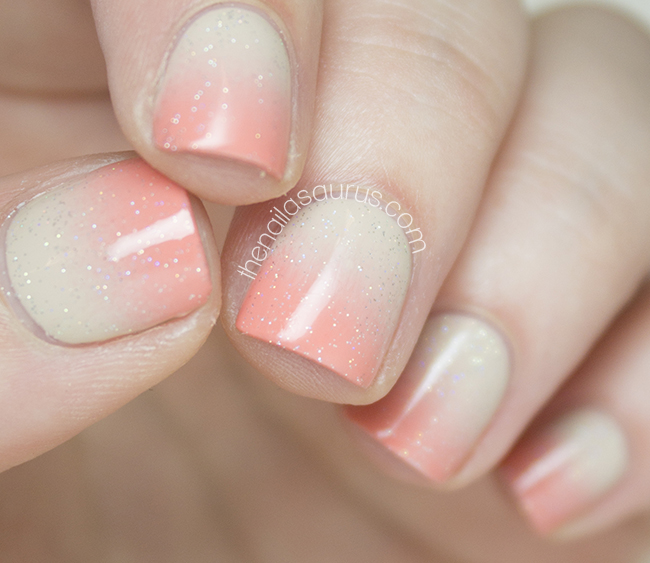
    Every nail polish addict in the UK knows Poundland is the place to be! It’s impossible for me not to get my hopes up whenever I’m in there as they nearly always have Sally Hansen or Revlon and occasionally something new will pop up. When I was browsing (or perhaps rummaging is a better word) yesterday, I spotted some fresh meat and took a closer look. It was this holographic glitter from a brand called Filthy Gorgeous which I remember seeing for £9+ retail in the past…. for £1! Of course, there was no question. I had to buy it. I love me some holographic glitter and I don’t think a girl can ever have enough.

    For this nail art, I used Barry M Lychee as my base colour and created the gradient using NYC Peach Popsicles.
    There’s a gradient tutorial here.
    I painted one thin coat of Filthy Gorgeous Prism and finished it off with Glisten & Glow HK Girl.
    Gradient Nail Art | The Nailasaurus
    Gradient Nail Art | The Nailasaurus
    Gradient Nail Art | The Nailasaurus
    Gradient Nail Art | The Nailasaurus
    Share: