Follow:
Browsing Tag:

Striping Tape

    Freehand, Glitter, Uncategorised

    Press Play

    Since I was 16, I’ve had a pair of headphones almost permanently attached to my person. Whenever I’m on my own, I put them in my ears and disappear in to my own little world. The best mp3 player I ever had was a Creative Zen Micro. Does anyone remember those?!
    I actually had a total of four in my time, one in almost every colour, because I’m a klutz and I break pretty much every piece of technology I touch! Even when they stopped manufacturing them, I’d be straight on eBay scouring for a new one as soon as mine bit the bullet. You can even still buy them! The symbols on the touchpad glowed blue and that’s the inspiration behind today’s manicure.
    I used China Glaze Tart-y For The Party as my base colour. The dark purple details are Barry M Blackberry and I outlined them in Calvin Klein Blue Wants to be a Millionaire.
    The glitter on my ring finger is La Femme Purple Glitter and I did the stripes on my pinky by applying a few strips of striping tape, then painting over them using the Barry M and quickly peeling them off.
    It’s all finished with a coat of Seche Vite.

    TwitterBloglovin’Tumblr

    Share:
    Uncategorised

    Stripe Me Down

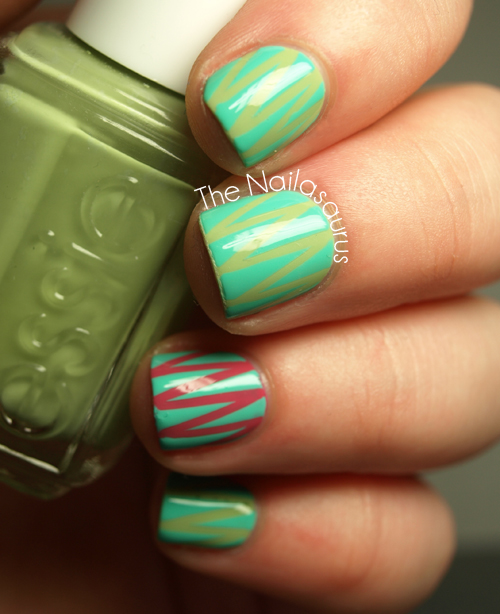
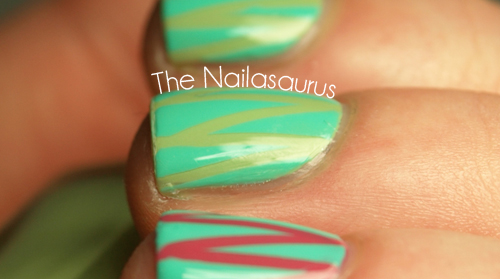
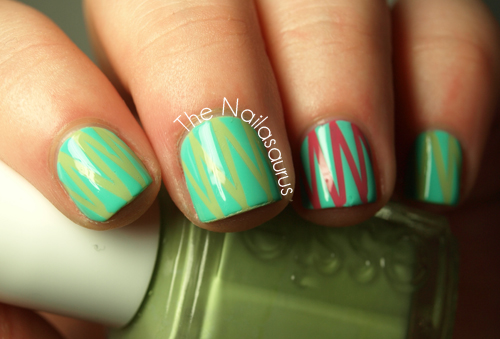
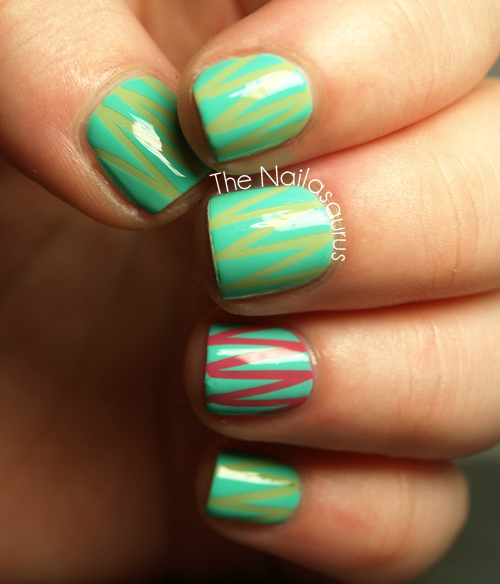
    I am getting completely obsessed with striping tape manis. The possibilities are just endless and I find myself reaching for the rolls again and again recently. In hindsight, this was too subtle of a colour combo to pick for photographing under a bright light. The contrast was much more visible in real life but hopefully you can see it well enough in the pictures.

    I used China Glaze Passion for Petals as the base colour on my ring finger and Essie Navigate Her on the rest. I used one coat of Seche Vite and waited 15 minutes before applying striping tape first in lines straight from cuticle to tip, then diagonally between those lines using a pair of pointy tweezers.
    Next I painted on one thick coat of Barry M Greenberry one nail at a time and removed the tape while that was still wet. I topped it all off with one coat of Seche Vite.

    TwitterBloglovin’Tumblr

    Share:
    Glitter, Uncategorised

    ‘Simplicity is the ultimate sophistication’

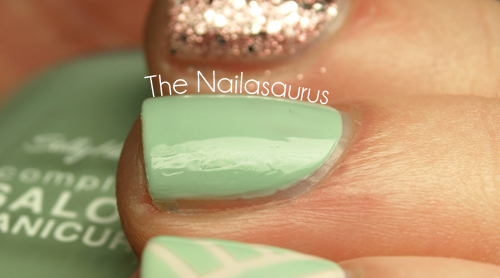
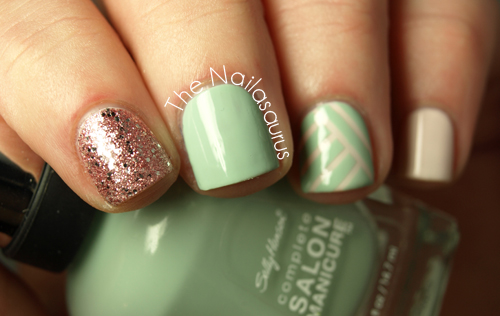
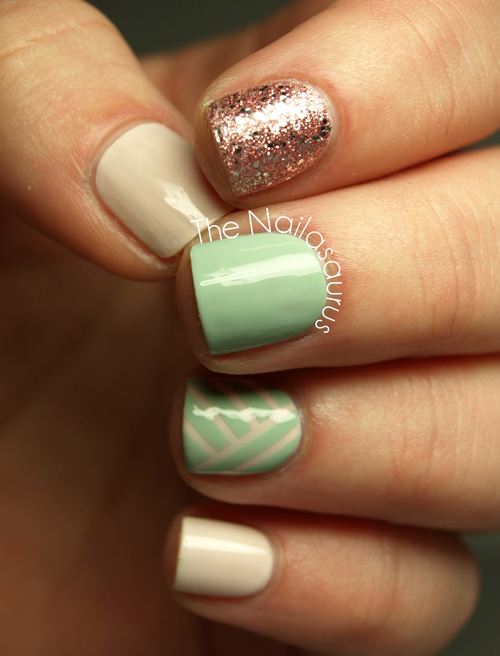
    I felt like wearing a simple, clean springtime manicure today but I wanted to mix things up with a colour combination I haven’t tried before – Green and Pink. The great thing about pastels is you can mix absolutely any colours, even ones that would normally hurt your eyes. Can you imagine a combination of bottle green and hot pink? I can and it’s not an image I want to hold on to… but make them both pastels and it looks so freakin’ pretty!

    I used Sally Hansen Crinoline as my base colour with Green Tea just on my middle finger. I added three thin coats of Sally Hansen Gem Crush Razzle Dazzler* to my ring finger to add some sophisticated sparkle. For the criss cross on my ring finger, I made sure the pink base was completely dry before applying small strips of striping tape using nail art tweezers. Then I painted on one thick coat of Green Tea and peeled off the tape while that was still wet.
    Finally, I topped everything with two coats of Seche Vite for a glassy finish.

    TwitterBloglovin’Tumblr

    Share:
    Glitter, Uncategorised

    Confessing My Love

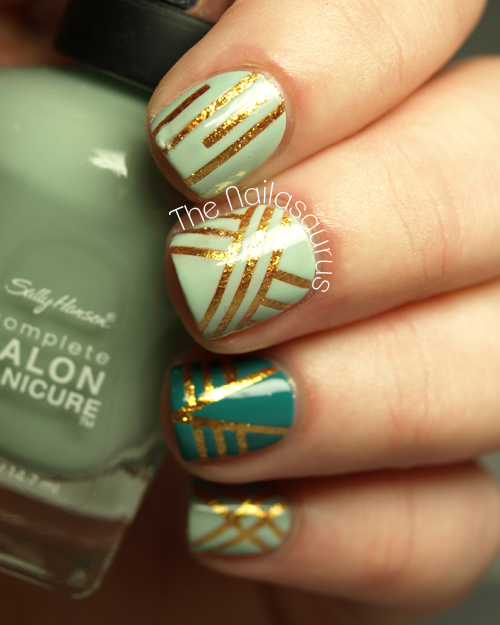
    I love Sally Hansen. It’s true. I only realised it today, but there’s no denying it!
    Recently I’ve been finding a lot of Sally Hansen Complete Manicure polishes in Poundland. Yeah, you read that right. That shop where everything is just £1 – it’s the equivalent of a dollar store in the US. Anyways, there are normally only a few good colours on the shelves at any one time so I’ve picked up one or two at a time and now have a total of six bottles and I think it’s my new favourite line of polish.
    Today I found two new colours – Fairy Teal, which I first fell in love with years ago when I saw it on a blog that I unfortunately can’t remember the name of anymore, and Green Tea which is the perfect mint creme that I’ve been searching for all these years. Ladies, if you’re in the UK, you need to go to Poundland. Now. Like, yesterday!
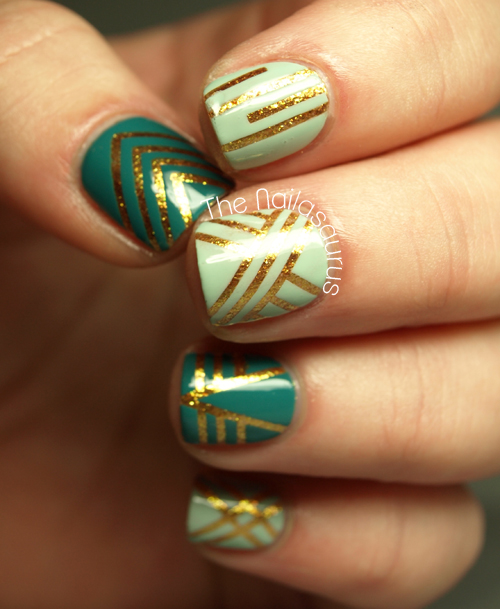
    In order to fully express my love for this brand, however fleeting it may be, today’s mani was created with nothing but SH polishes.

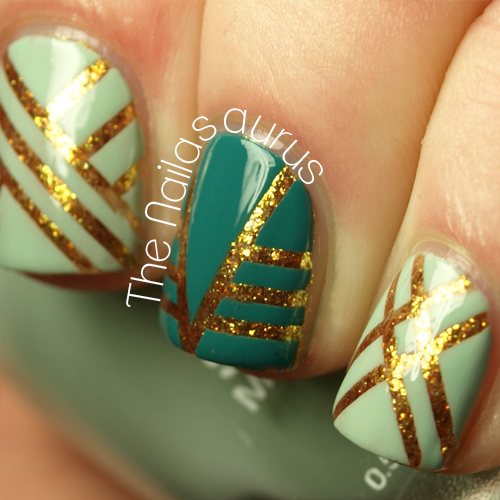
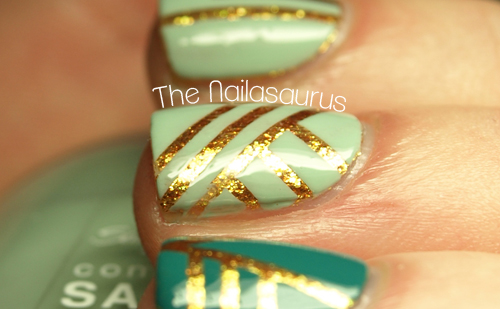
    I used Sally Hansen’s Green Tea and Bamboo Base Coat. Then I applied two coats of Gilded Lily* as my base colour and applied one coat of Insta-Dri*.
    Next, one nail at a time, I placed small strips of striping tape where I wanted to keep the golden base coat visible. I did this using some nail art tweezers – it’s way too fiddly to do it precisely using just your fingers. I applied Green Tea and Fairy Teal over the striping tape and peeled off the strips while the polish was still wet. Finally, I topped it off with two coats of Insta-Dri, which I would definitely rate highly as a fast drying top coat.

    TwitterBloglovin’Tumblr

    Share:
    31 Day Challenge, Uncategorised

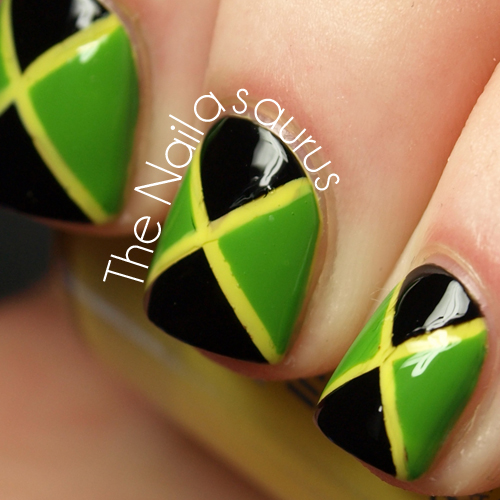
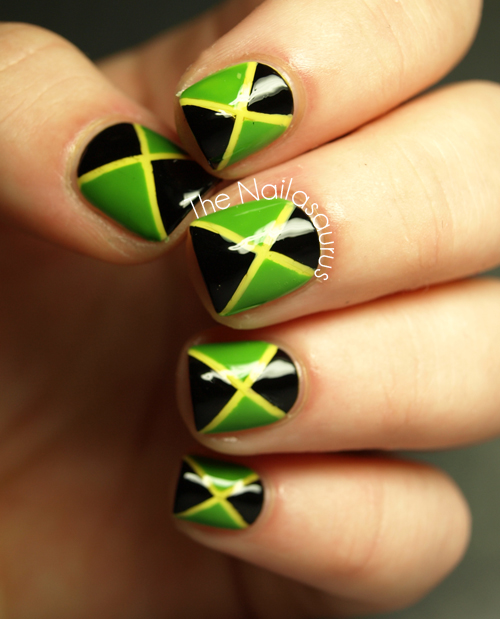
    31DC2012 Day 28: Inspired by a Flag… Jamaica

    My weekends used to be a chance to relax and unwind and get a bit of blogging done but recently they’ve become so hectic. I’ve just found 10 minutes in the middle of all the hustle and bustle before I set off to Birmingham for The Black Keys’ gig tonight. I am excite!
    Today’s challenge prompt is Inspired by a Flag and I picked Jamaica’s. Rie has had to postpone her challenge but Cris has her flag nail art waiting for you here

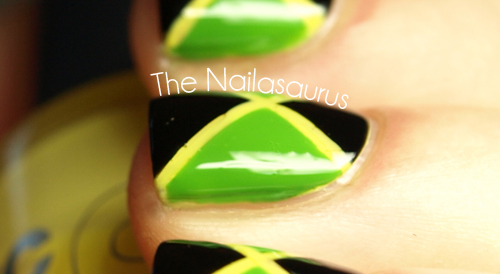
    I started with one coat of Barry M White and then 2 coats of NYC Lexington Yellow before adding one top coat of Seche Vite to make it dry ready for… striping tape which I placed on the nail in a cross to mark off where the yellow lines would stay. 
    I used W7 Black and NYC High Line Green* with a nail art brush to paint on the triangle sections, being careful not to overlap the striping tape too much. 
    Next I peeled of the striping tape and used a bit of the NYC Lexington Yellow with a striper brush to neaten up any of the bit where the dark colours had crept under the tape.
    Finally, I used two coats of NYC In a New York Minute to top it all off.

    TwitterBloglovin’Tumblr

    Share:
    31 Day Challenge, Uncategorised

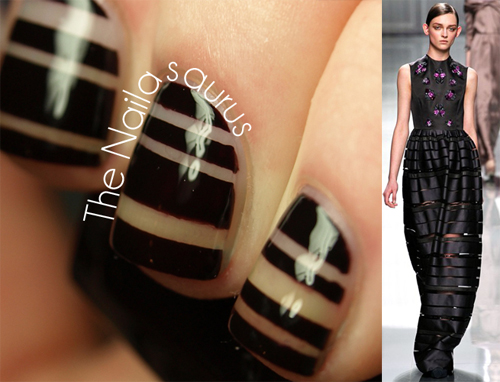
    31DC2012: Day 25 Inspired by Fashion

    Welcome to Day 25 of the challenge! Today, we have to create nails inspired by fashion so the first thing I did (again) was type ‘Fashion’ in to Google! I came across the Vogue website and started clicking through this season’s catwalk shows.
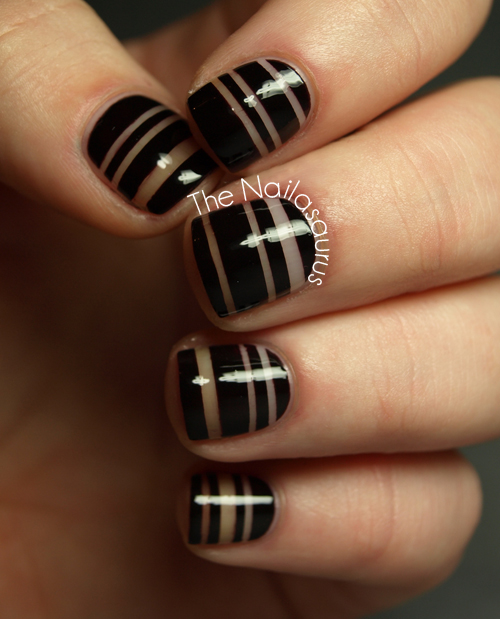
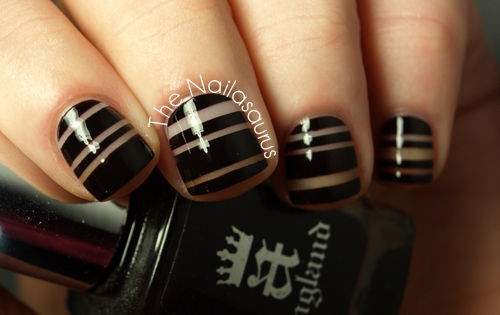
    I spent a long time looking through and I was waiting to see something… ANYTHING that I could immediately envisage on my nails when the bottom half of a dress from Christian Dior’s ready-to-wear collection caught my eye. I immediately knew that this would be the nail art I’d do to match and I’m so pleased with the way it turned out.

    Runway photo credit: Vogue.co.uk

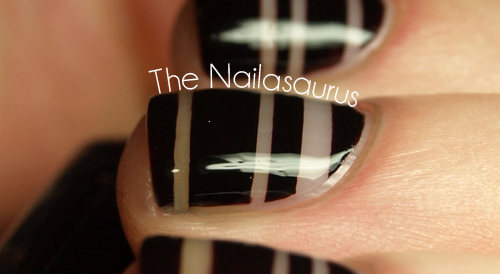
    For this manicure, I didn’t use a base colour or even a base coat, I went straight in with some striping tape to mark off the lines. I did this for two reasons. Firstly of course, you’ve got the authentic see through look and also I couldn’t be bothered to wait for anything to dry! For the thicker lines I just used two pieces of tape right next to each other. I used nail art tweezers for this step because it’s very fiddly.
    When all the tape was in place, I painted on a coat of A-England Lancelot, one nail at a time, and carefully peeled off the tape using the tweezers. There was some polish out of place, especially near the edges where the tape had come away from the nail a little, so I dipped a nail art brush in some acetone to clean away the bits I didn’t want. When everything was completely dry, I used two coats of Seche Vite to glaze it over.

    Now go to Rie and Cris‘ blogs to see their fashionicures!

    TwitterBloglovin’Tumblr

    Share:
    Tutorial, Uncategorised

    Laser (Disco, Moonbeam?) Nail Art Tutorial

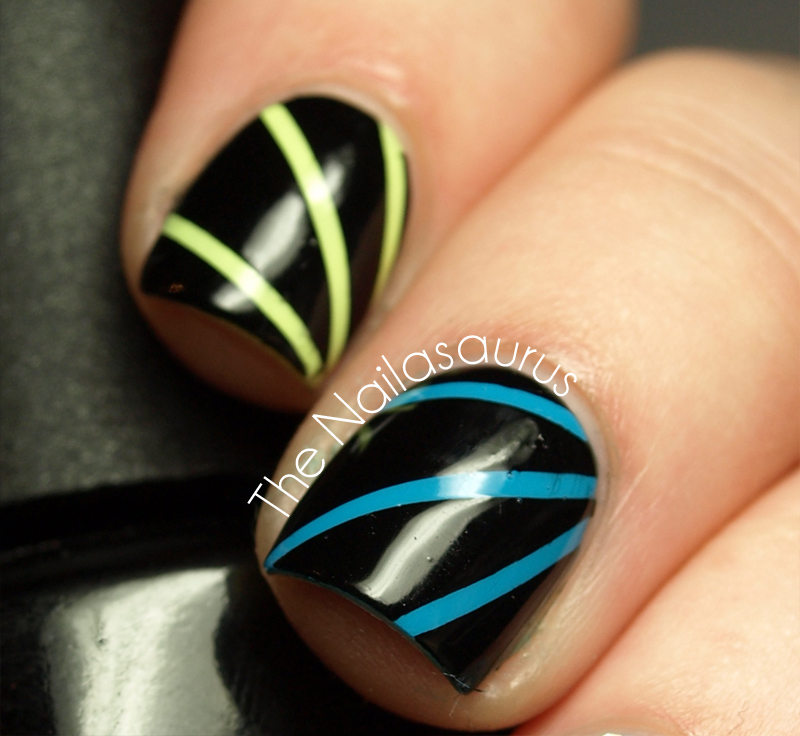
    Today I have a tutorial for the ‘Strobe Lights’ part of my Disco Mani from earlier in the week. I suppose you could also call them Lasers or Moonbeams. Ooh, I like Moonbeams – the Moonbeam Mani has kind of a ring to it, don’t you think? Although I don’t think Moonbeams come with a neon option! Can you tell I’m just typing as I think tonight?!
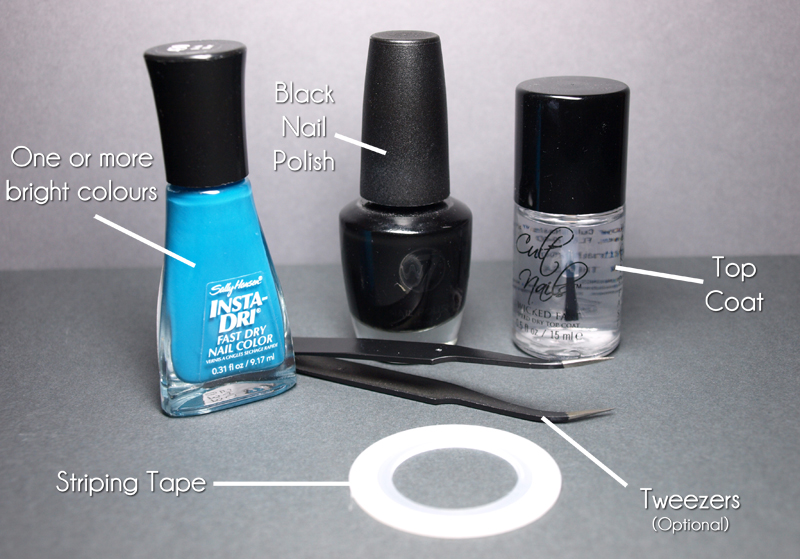
    You Will Need

    Laser Nail Art Tutorial from The Nailasaurus
    Bright colours for the ‘lasers’. I’m using Sally Hansen Insta-Dri in Brisk Blue.
    Black nail polish. I use W7 Black.
    Clear top coat that’s fast drying. This one is Cult Nails Wicked Fast.
    Striping tape which you can get on eBay or from online nail art supply stores.
    Tweezers. These are optional but I find they come in handy at a few points in this technique.
    The Fun Part!

    Step 1
    Paint on your bright base colour and make sure it is completely dry before moving on to the next step. I normally use a thin coat of quick drying top coat at this point to speed up the process. If your base coat isn’t dry, it will peel off with striping tape later on.
    You can stick with one colour for every nail or be a bit adventurous by mixing and matching!
    Laser Nail Art Tutorial from The Nailasaurus

    Step 2
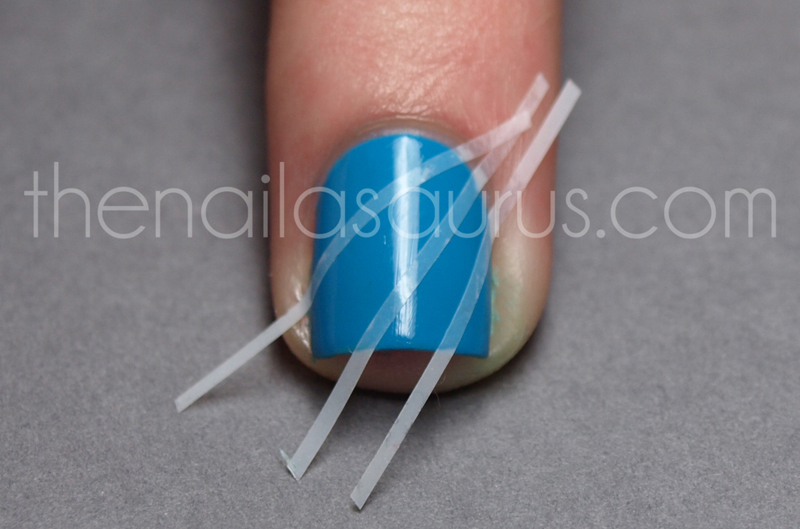
    Cut a few lengths of striping tape about twice the length of your nail and place them where you want your lasers to be. You can use tweezers for extra precision. Make sure the strips are stuck down right up to the edges of your nails so you get a crisp line. 
    Laser Nail Art Tutorial from The Nailasaurus
    Step 3
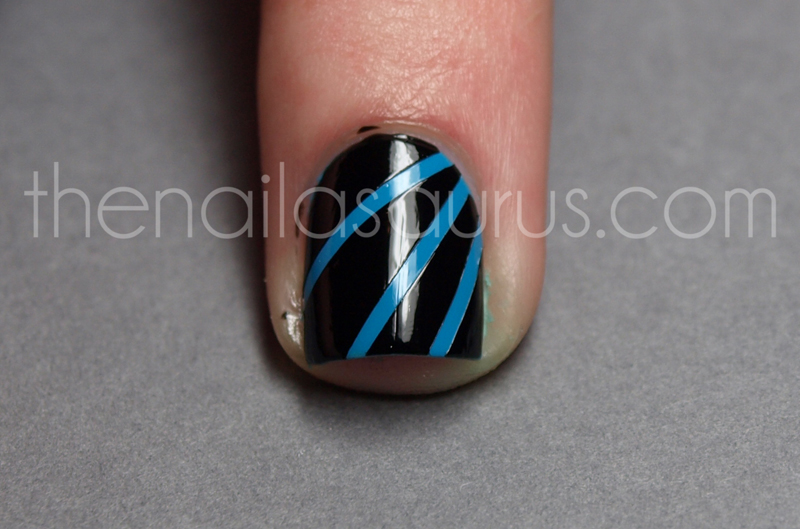
    One nail at a time, paint your black polish all over your nail and move straight on to step 4.

    Laser Nail Art Tutorial from The Nailasaurus
    Step 4
    While your black polish is still wet, carefully remove the striping tape one strip at a time. Use an up and backward motion – I hope I’m explaining this clearly enough but I’d describe it as pulling the tape back on itself. Basically, just pull it off in a straight line and you should be safe. This is a step where tweezers might come in handy for a bit of extra grip on the fiddly tape. We’re nearly done!

    Laser Nail Art Tutorial from The Nailasaurus
    Finishing Up
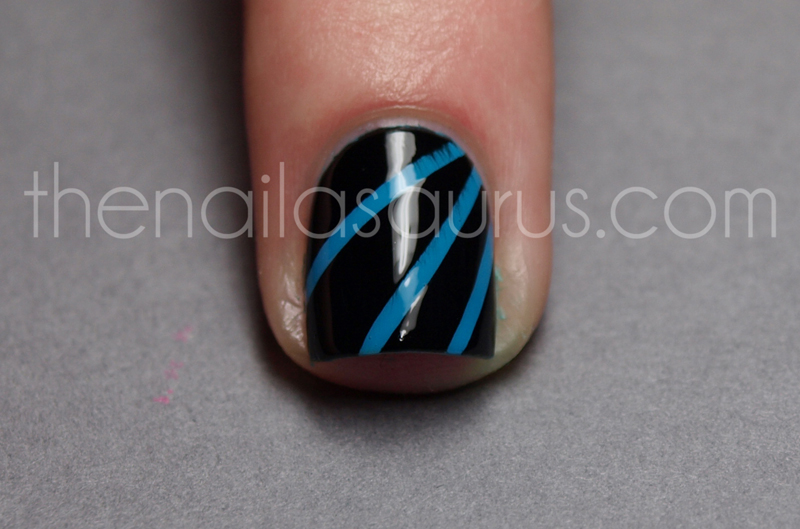
    Wait for your black polish to dry and add a top coat to smooth out any bumps and make your mani last longer. Don’t be impatient like I was and apply your top coat too soon else you’ll end up with smears.
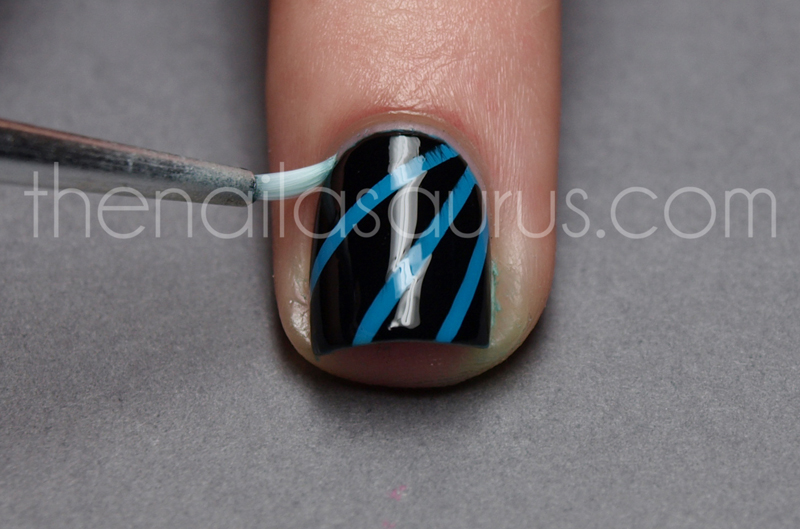
    To clean up around your cuticles, take a small paint brush and dip it in to acetone or nail polish remover before running it around your cuticles to remove any unwanted bits of polish and leave you with a crisp edge.

    Laser Nail Art Tutorial from The Nailasaurus
    Ta-Dah!
    All finished! I want to see you all rocking this mani at every disco you attend henceforth!

    Laser Nail Art Tutorial from The Nailasaurus
    Share: