Follow:
Browsing Tag:

Black

    Freehand, Uncategorised

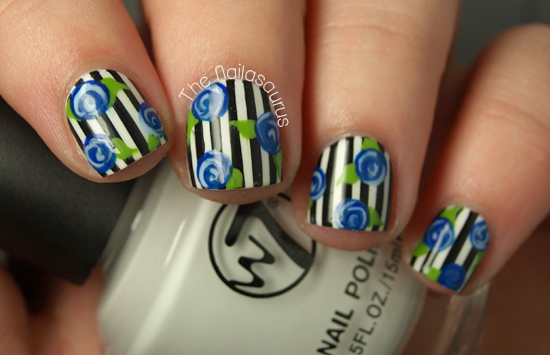
    Rosey Posey Pinstripe

    Today is the first time in a very long while that I’ve decorated every nail with the same design and I have to be honest – I don’t like the feeling! As much as I love this nail art, I’m just itching to remove the polish from a couple of nails and add in a plain glitter accent or some simple studding!
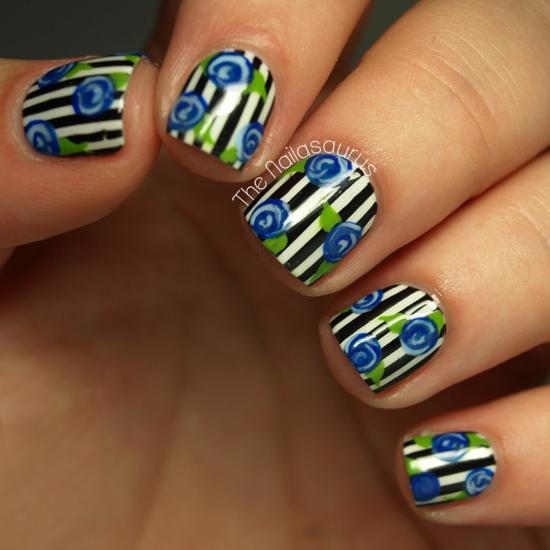
    1. I used a base of W7 White followed by a coat of No7 Stay Perfect Top Coat.
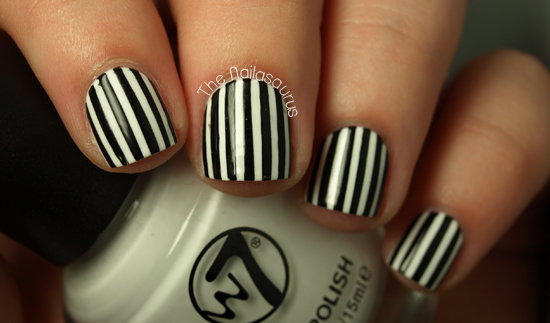
    2. I used striping tape to mark off pinstripes and painted over it with W7 Black. While the black polish was still wet, I removed the striping tape.
    3.  I waited for it to dry and added another coat of No7 Stay Perfect.
    4. I freehanded the roses using a nail art brush with Barry M Blue Grape, Nails Inc. All Saints Road and NYC Raindrop. I used Saly Hansen Grass Slipper for the leaves. There’s a tutorial for the roses here.
    5. Finally, it’s all topped off with another coat of No7 Stay Perfect!
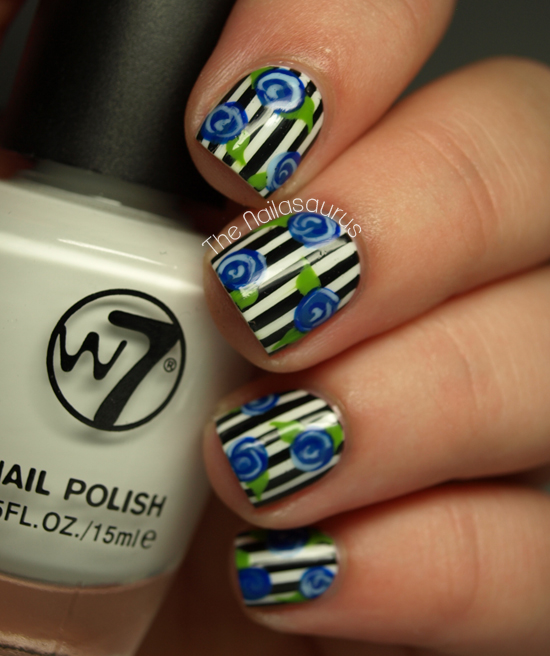
    And a few shots before the flowers because I was proud of my pinstripe!

    TwitterBloglovin’Tumblr

    Share:
    Freehand, Uncategorised, Waterfall

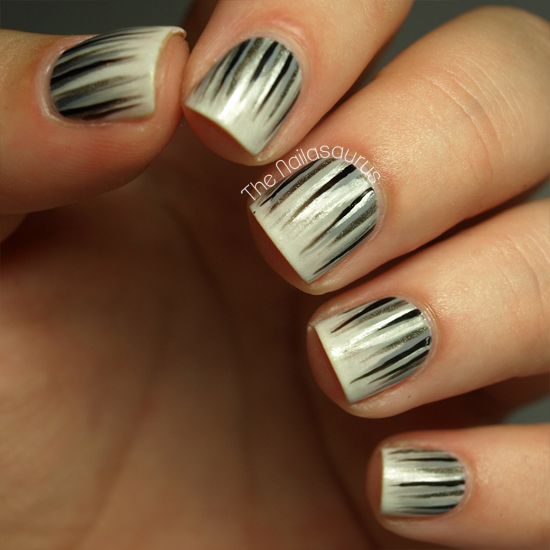
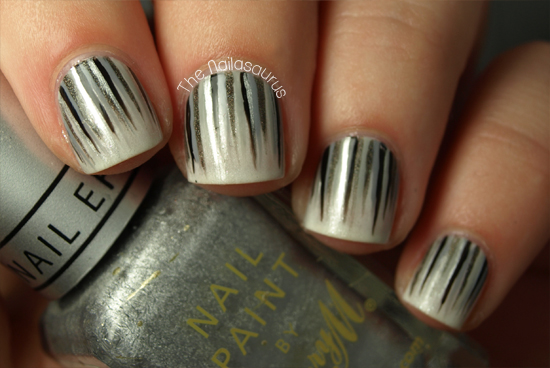
    Monochrome Waterfall

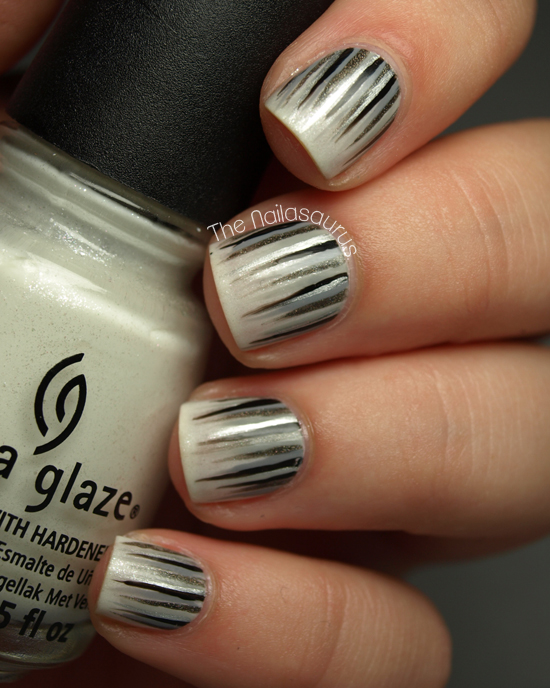
    The last thing on my list of must-do waterfall manis was a monochrome creation. This was suggested in the comments on the first ever waterfall mani I posted and I finally got round to it this week! 

    My base colour is China Glaze Dandy Lyin’ Around which is a shimmery creamish white. I thought I’d step away from the Barry M White on this one as it seems I’m using it in almost every manicure recently!
    For the details, I used Rimmel Grey Matter, Sally Hansen Dorian Grey, No7 Just Black and A-England Fated Prince. There’s a tutorial for the waterfall look here.
    I finished it all off with a coat of No7 Stay Perfect Top Coat and then one coat of Essence Better Than Gel Nails Top Sealer.

    Friendly reminder that my blog is shortlisted in the Established Beauty Blog category at this year’s Cosmo Blog Awards and you can vote for me here.
    Share:
    Freehand, Uncategorised

    Banish the Blues: Getting Skirty

    Day 2 of Banish the Blues and so far so good… not an ounce of Blue in sight! When I sat down with this idea in mind last night I had no idea where it came from but I knew it would work. As I was getting dressed today I spotted a skirt in my wardrobe which I haven’t worn or even thought about for aaaaages with this same exact pattern on! I guess I had recently seen the skirt but only noticed it subconsciously until it surfaced as a nail art idea. Spooky stuff!

    I used Barry M Lychee as my base colour and then painted on the spiky stripes from the cuticle upwards using a nail art brush and No7 Just Black and Born Pretty Fluorescent Polish #15. It’s all topped off with a coat of No7 Stay Perfect Top Coat.

    Here’s an insta-shot of the skirt (kind of). I added an accent of black glitter this morning after the other pictures were taken!
    @thesammersaurus on Instagram

    TwitterBloglovin’Tumblr

    Share:
    Uncategorised

    Matte vs Glossy Stripes

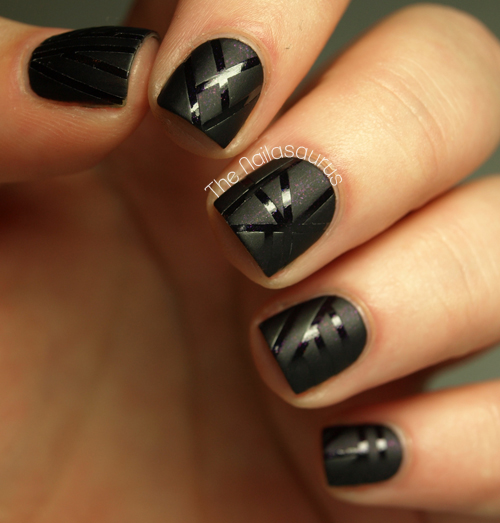
    I’ve tried to cut down on my striping as it was slowly taking over my life but I couldn’t stay away from the thought of using a matte top coat over the tape instead of a completely different colour. I’m glad I gave in to the temptation though because this looks amazing! I think I’d like to try it with some different colours to give it a bit more dimension, I think it would look good with a glittery base colour.

    The base colour is A-England Ophelia and I used a coat of Sally Hansen Dries Instantly to speed things along. Click here to see a tutorial to see how I created the crisp lines using a coat of Rimmel Matte Top Coat.

    TwitterBloglovin’Tumblr

    Share:
    Glitter, Uncategorised

    The Lady is a Vamp

    I don’t really know what came over me but today I attempted, once again, to water marble… voluntarily! Once again I was reminded how much I hate it so this will probably be it for a while.
    I picked up this pretty black glitter for £1 is Store Twenty One today, it’s Thunderstorm from BYS. I was expecting it to be a pretty glitter that I could layer over black polish but it turns out you don’t even need a base colour so I was pretty happy about that. It’s even prettier than it looks in the bottle too, I think it’s going to see a lot of love from me.

    I used Sally Hansen Blackout, Rimmel Heart on Fire and BYS Thunderstorm as my base colours. The water marble was created using Heart on Fire and Blackout. Finally I finished it all off with a coat of Essence Better Than Gel Nails.

    TwitterBloglovin’Tumblr

    Share:
    Studs, Tutorial, Uncategorised

    Sally Hansen Street Style Tutorial: Studs n’ Chains

    This month, Sally Hansen’s I ♥ Nail Art theme is Street Style and the call for inspiration is ‘heavy metal, pop art and graffiti glam’. I stopped reading at heavy metal… it’s got to be the studs for me!

    Before you start make sure you’ve got everything you need. The only polishes I’m using for this are Sally Hansen Black Out and Dries Instantly.
    I’m using some gold bullion for the studs, an old necklace for the chains, a pair of pointy tweezers, a nail art brush and a few toothpicks.

    I’ve got a selection of chains which I’ve collected just for nail art purposes! Some of them are necklaces I’ve tired of and instead of throwing them out I’ve done a bit of upcycling and started wearing them on my nails. Others are ones I’ve picked up in the cheap in stores. If you need a chain, just pop in to places like Claire’s to see if there are any chains thin enough for your nails.

    To avoid any smudges on your polish, before you even paint on the base colour measure and cut off a piece of chain for each of your nails. Just rest it across to get an idea of how much you need, then snip it off with scissors, wire cutters or anything else that will do the job!

    Start with a base of Sally Hansen Black Out and let it dry.

    Using the nail art brush, paint on a line of clear nail polish where you want to stick the chain and move swiftly on to the next step…

    Place the chain across your nail and pat it down in to the polish to make sure it’s really stuck there!

    I always use a toothpick to place the studs. I dip the end in a bit of clear nail polish to make it sticky and use it to pick up the fiddly little beads.

    Add a coat of Dries Instantly and place the studs on to your nail while it’s still wet.

    Finally, when everything is completely dry, dip a small paintbrush in acetone and sweep it along your cuticle line for a nice clean finish.
    Don’t forget to enter your own Street Style looks over at Sally Hansen’s Facebook Page. As always, there’s $500 and a trip to NYC up for grabs. I’d also love it if you tag me on Twitter or Instagram (@thesammersaurus) so I can see your entries too!

    TwitterBloglovin’Tumblr

    Share:
    Glitter, Uncategorised

    Shiny Tips

    I’m not really sure where the idea of matte x glossy came from but it’s been at the back of my mind, niggling away, all week. I’ve been playing with different combinations and I really wanted to try it with stamping although nothing seemed to work. I’m going to keep at it as I’m determined to perfect glossy undercoat with matte stamping but for now, I’ve settled for something simple (again)!

    I used two coats of No7 Just Black as my base colour with one coat of W7 Cosmic Black on my ring finger, then used one coat of Rimmel’s Mattifying top coat. Then I took a nail art brush and applied NYC In a New York Minute just to the tips of my nails.

    TwitterBloglovin’Tumblr

    Share: