Follow:
Browsing Tag:

A-England

    31 Day Challenge, Freehand, Uncategorised

    31DC2013 Day 8: Metallic Nails

    I was really struggling with ideas for today’s Metallic Nails prompt but when I came across NYC Full Metal Jacket I knew it was the one! And of course, what else would I pair it with other than black?!
    Since my Great Gatsby inspired manicure I’ve been itching to try something similar and I’m so pleased with the result. I’ve been on such a freehand kick this weekend – trying lots of new things and pushing my own boundaries when it comes to freehand nail art. I’ve really surprised myself with what I can actually do! 
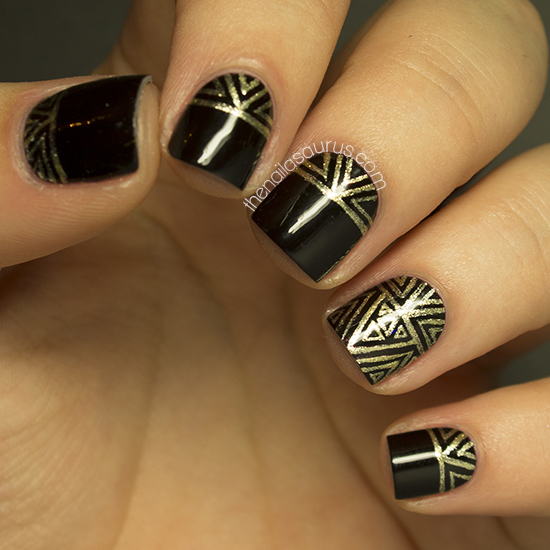
    I used A-England Lancelot as my base colour then freehanded the details in NYC Full Metal Jacket with a nail art brush. It’s all topped off with two coats of Sally Hansen Dries Instantly.

    TwitterBloglovin’Tumblr

    Share:
    Freehand, Uncategorised, Waterfall

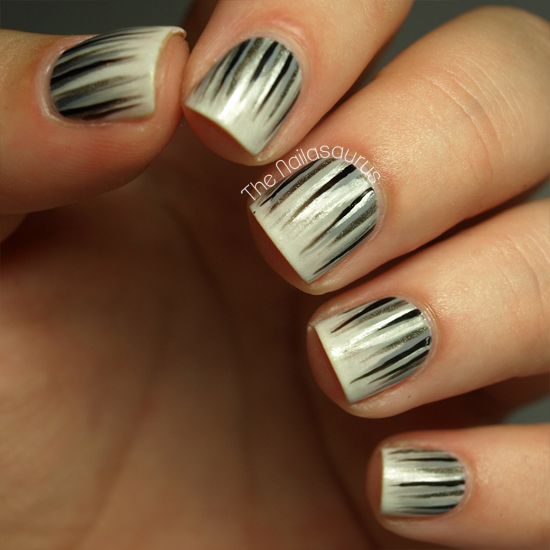
    Monochrome Waterfall

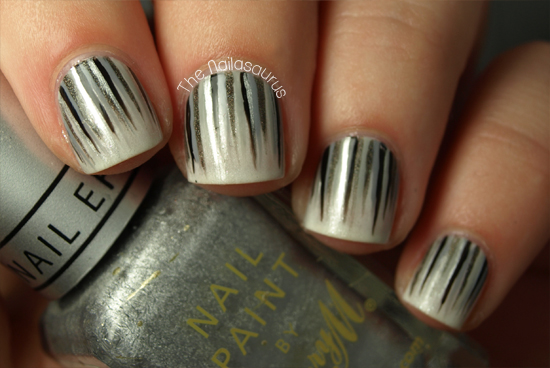
    The last thing on my list of must-do waterfall manis was a monochrome creation. This was suggested in the comments on the first ever waterfall mani I posted and I finally got round to it this week! 

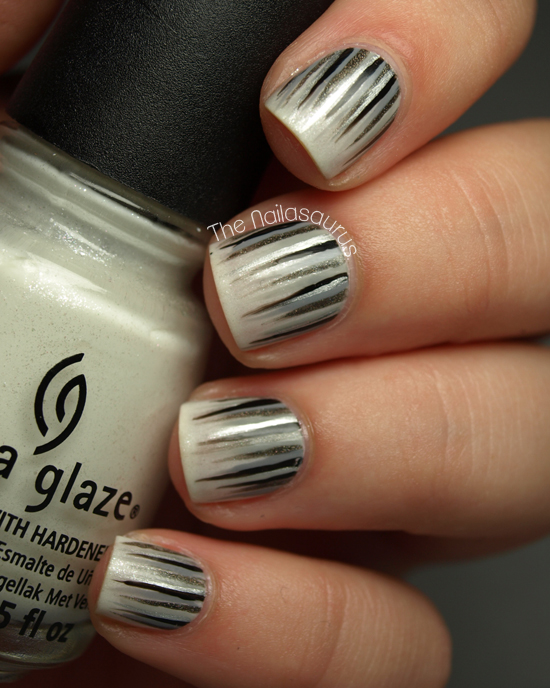
    My base colour is China Glaze Dandy Lyin’ Around which is a shimmery creamish white. I thought I’d step away from the Barry M White on this one as it seems I’m using it in almost every manicure recently!
    For the details, I used Rimmel Grey Matter, Sally Hansen Dorian Grey, No7 Just Black and A-England Fated Prince. There’s a tutorial for the waterfall look here.
    I finished it all off with a coat of No7 Stay Perfect Top Coat and then one coat of Essence Better Than Gel Nails Top Sealer.

    Friendly reminder that my blog is shortlisted in the Established Beauty Blog category at this year’s Cosmo Blog Awards and you can vote for me here.
    Share:
    Holographic, Swatch, Uncategorised

    Art Deco Accents

    A-England are back with the Burnes-Jones Dream collection. A collection of holos named after some of the works of Pre-Raphaelite artist Edward Burne-Jones. One of the things I love about getting a new A-England polish is learning a little slice of history along with it. The names are so intriguing that I have to Google them and I always end up spending hours on Wikipedia reading up on English legend!
    This beauty is Rose Bower – a deep berry scattered holo. I used two coats here topped with No7 Top Coat. The polish peeking through on my accent fingers is A-England Excalibur from the Mythicals Collection. It’s a silver foil with fine gold flakes running through it – very shiny! Again, two coats was perfect.
    You can purchase A-England polishes directly from th website, a-england.co.uk, if you’re in the UK. If you’re overseas click here to see stockists in your country.
    A-England Rose Bower

    A-England Rose Bower
    For the deco nails I used a base coat of Excalibur then a coat of No7 Stay Perfect Top Coat to make it dry. I followed that by placing on some striping tape in an art deco-esque pattern and painting over it in Rose Bower. There’s a striping tape tutorial here in case the explanation wasn’t too clear!
    When it was all dry I topped it with two coats of No7 Top Coat.
    A-England Rose Bower

    A-England Rose Bower

    TwitterBloglovin’Tumblr

    Share:
    Uncategorised

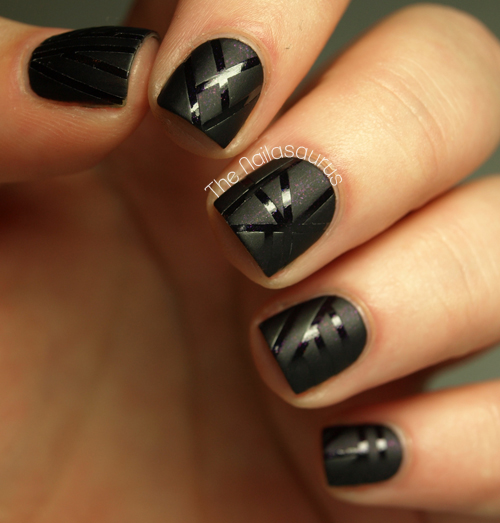
    Matte vs Glossy Stripes

    I’ve tried to cut down on my striping as it was slowly taking over my life but I couldn’t stay away from the thought of using a matte top coat over the tape instead of a completely different colour. I’m glad I gave in to the temptation though because this looks amazing! I think I’d like to try it with some different colours to give it a bit more dimension, I think it would look good with a glittery base colour.

    The base colour is A-England Ophelia and I used a coat of Sally Hansen Dries Instantly to speed things along. Click here to see a tutorial to see how I created the crisp lines using a coat of Rimmel Matte Top Coat.

    TwitterBloglovin’Tumblr

    Share:
    Uncategorised

    Tape Chevrons (with Step-by-Step)

    Yesterday I finally picked up some craft scissors perfect for cutting scotch tape in to all sorts of interesting designs. I found them in Tesco and they had zig-zag and scallop patterns so I picked up both and set about creating some chevron nails. I’ve attempted this a few times freehand but every time was a fail so I set my sights on some of these scissors! Chevrons seem to be a big trend coming in to summer so I’m sure I’ll get plenty of use out of them.
    My base colour is NYC Lavender Cupcake and the silvery, gun metal grey is A-England Dorian Gray.

    To get this look you’ll need some scotch tape and craft scissors that cut in a zig-zag. Cut of plenty of thin chevron strips before you start so they’re ready to go!

    1. Make sure your base colour is completely dry and apply the strips to your nail using tweezers. Keep them as parallel as possible and line up the points.
    2. Paint over the whole nail using your second colour.
    3. While the second colour is still wet, carefully peel off the tape. Once everything is dry, apply your top coat and use a small nail art brush dipped in acetone to clean up around your cuticle.
    Share:
    Freehand, Uncategorised

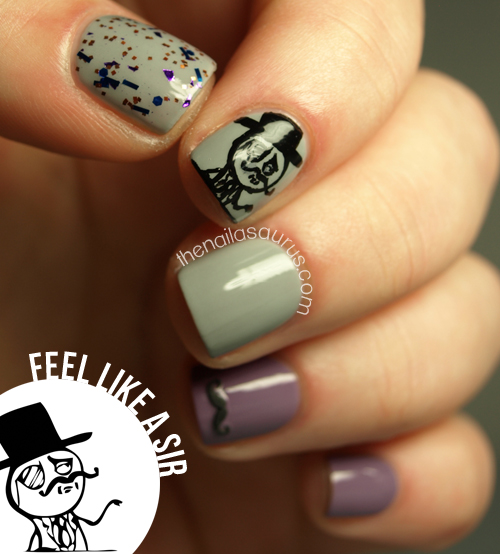
    Feeling Like A Sir

    This week I found a gem of a bargain when I was in Asda. Don’t judge me when I tell you I buy clothes and jewellery from there on a regular basis! I was browsing the girls jewellery, as you do, and I spotted a little packet of moustaches. There was no indication on the packaging as to what they were but using my detective skills I quickly deduced that they were in fact, as I had immediately suspected, nail decals! Hidden away amongst the pink clip in hair streaks and plastic tiaras!
    They were a complete steal at £1.50 for 48 stickers and they’re absolutely great. They’re kind of foamy and the adhesive layer is really thin so they’re easy to handle and stick to the nails really well. The first time I wore them, I used a top coat and they were unmovable. This time around I didn’t and the sticker slid off after about 12 hours of wear so go for a top coat if you’re going to try them yourself. 
    The smallest design, the curly one, immediately made me think of the ‘Feel Like A Sir‘ meme so of course I had to put it on my nails!

    I used Sally Hansen Dorian Grey and A-England Guinevere as my base colours with a coat of WellNails Rock In The New Year on my thumb. The Mo’ decal is, as previously stated, from Asda and I painted on the Sir using a nail art brush and acrylic paint.
    Everything is topped with a coat of No7 Stay Perfect Top Coat except for the sticker, I put that on after the top coat.

    TwitterBloglovin’Tumblr

    Share:
    Freehand, Uncategorised

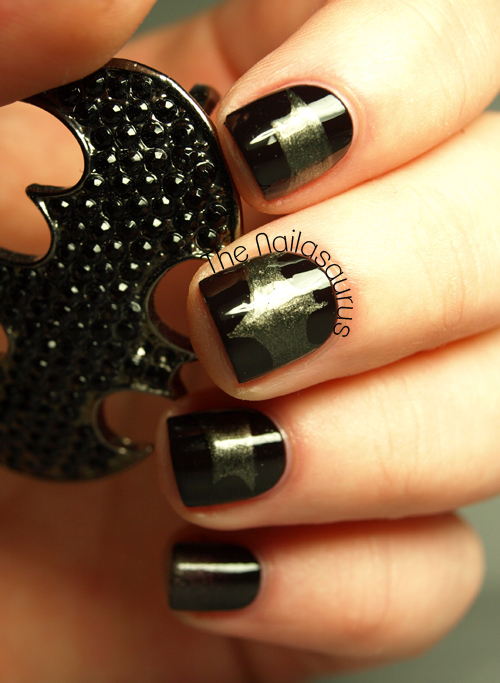
    Holy Nail Art, Batman!

    I started playing Arkham Asylum months and months ago but then stopped making time to play it. Things just got crazy busy with work and I spend nearly all my free time nowadays on this blog! Well I woke up on this fine Sunday with a couple of hours to spare and decided to give it another crack. I definitely need to put a bit more time in and complete it! 
    I’ve done Batman nails before but these are distinctly more Dark Knight themed. I love Dorian Gray, it’s an incredible polish – like a gun metal grey/black. If you like your black polishes like me, check out A-England’s Gothic Beauties,

    I used A-England Lancelot as my base and A-England Dorian Gray with a nail art brush to draw on the bat. I created the gradients on my thumb and pinky using the same two polishes following this tutorial.
    It’s all topped off with two coats of Sally Hansen Insta Dri.

    TwitterBloglovin’Tumblr

    Share: