Follow:
Browsing Category:

Nail Art

    Gradient, Uncategorised

    I Finally Mastered Gradient Nails!

    Gradient nails are something that I’ve been admiring for a long time but never quite managed to master myself. Until very recently that is! 
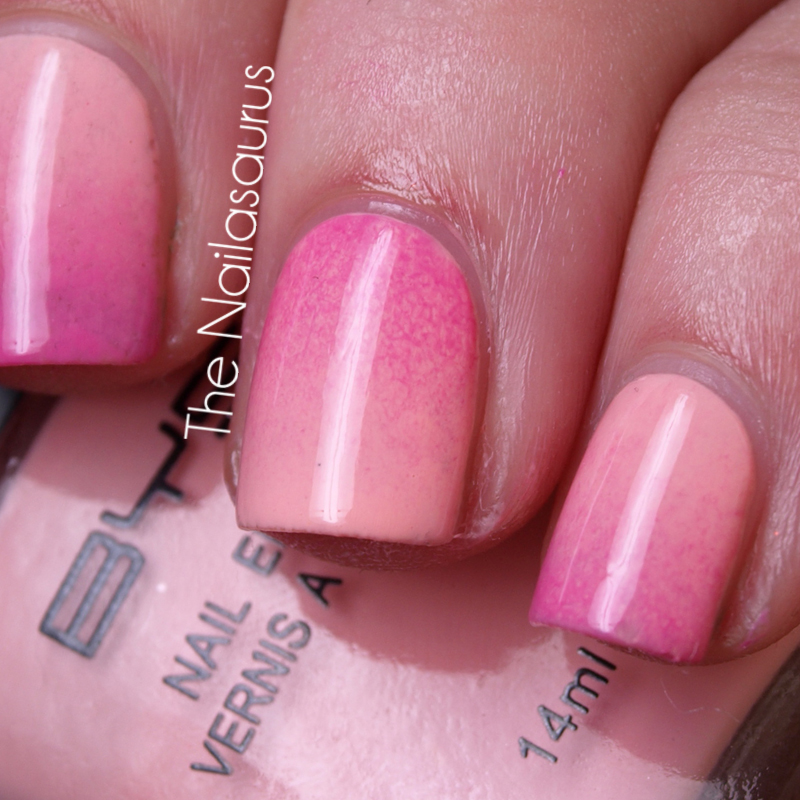
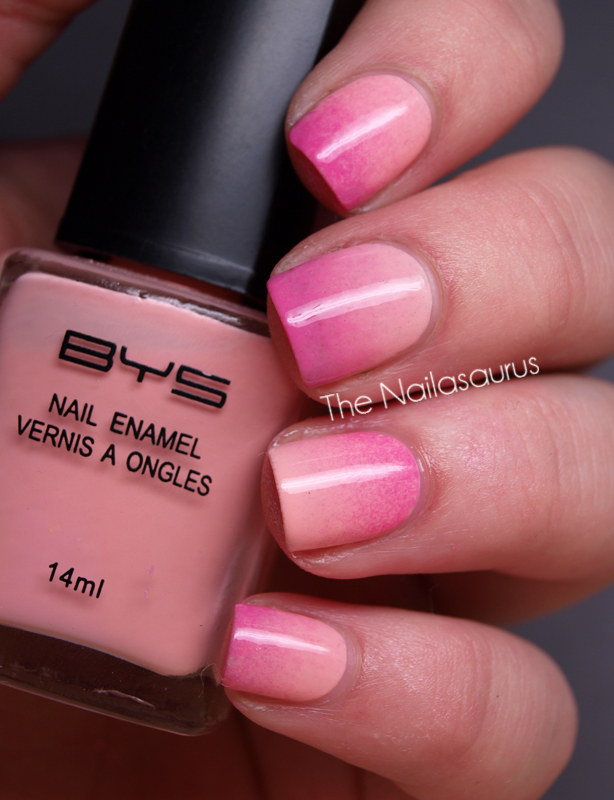
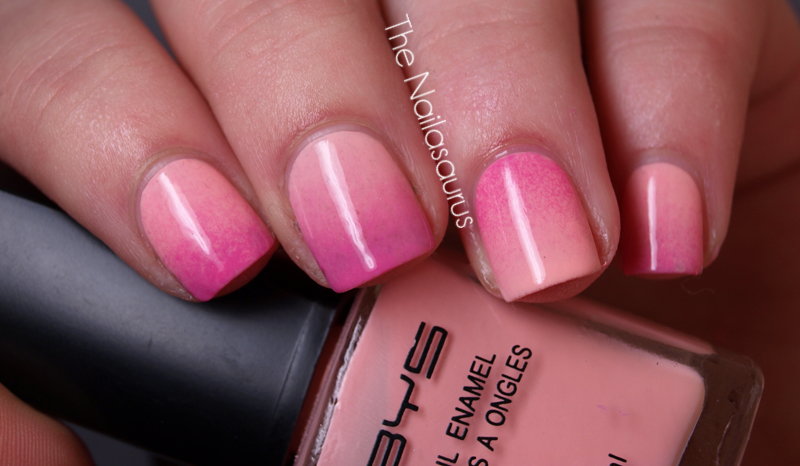
    I’ve seen a few tutorials and this one from The Beauty Department looked the most promising but using four colours seems like it would take a lot of time and effort just to get the effect of one colour fading in to another, I figured there must be an easier way! After a bit of playing around, I found a method that’s super fast, very easy and all you need is two colours and a sponge.
    Ombre Nails Nail Art

    Ombre Nails Nail Art
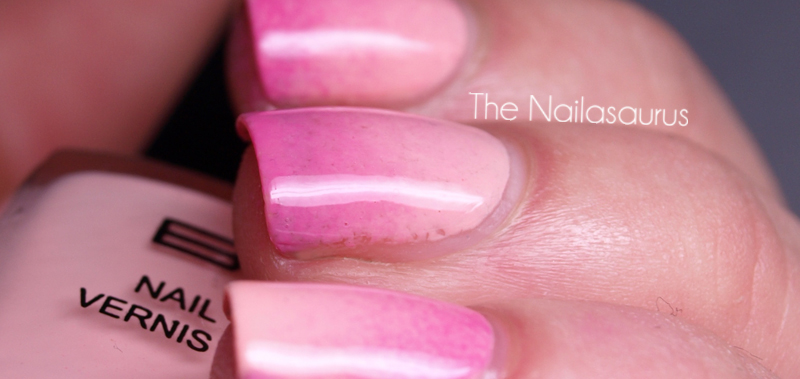
    To get this ombré result, I used BYS Pretty as a Peach, Rimmel Urban Princess and a small section of sponge. More details to follow tomorrow!

    Ombre Nails Nail Art

    Ombre Nails Nail Art

    TwitterBloglovin’Tumblr

    Share:
    Galaxy, Uncategorised

    From The Vault: Galaxy Nails

    I just found these pictures in my drafts list! I’m pretty sure they’re rejects from Day 19 of the 31 Day Challenge. You can see the ones I decided to post here. I like them and I recall liking them at the time but deciding the colour scheme was too similar to the ones I posted way back in February 2011 – my first ever attempt at Galaxy Nails.

    I can’t remember exactly what polishes I used but I’m pretty sure I can see BYS Glittering Purple, E.L.F. Twinkle and GOSH Holographic must be in the mix because I’m holding the bottle!

    Galaxy Nails

    Galaxy Nails

    Galaxy Nails

    TwitterBloglovin’Tumblr

    Share:
    Review, Studs, Uncategorised

    Stud Stripe Square

    It’s no secret that I love studs. Especially ones I can wear on my nails! Born Pretty Store is my one stop shop for nail studs. Their selection has grown a lot since I bought my first bag – they now have all shapes and sizes and because it’s Born Pretty, I know I’m getting a bargain. The most exciting addition for me was these square studs. I’ve seen them used before but couldn’t find them anywhere, until Emily alerted me to them on Born Pretty!
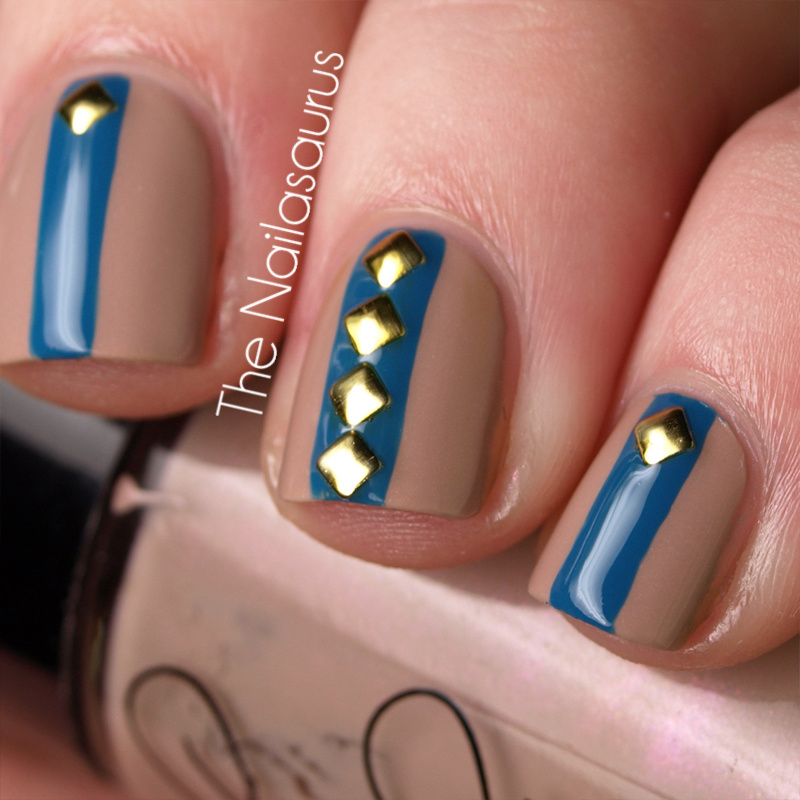
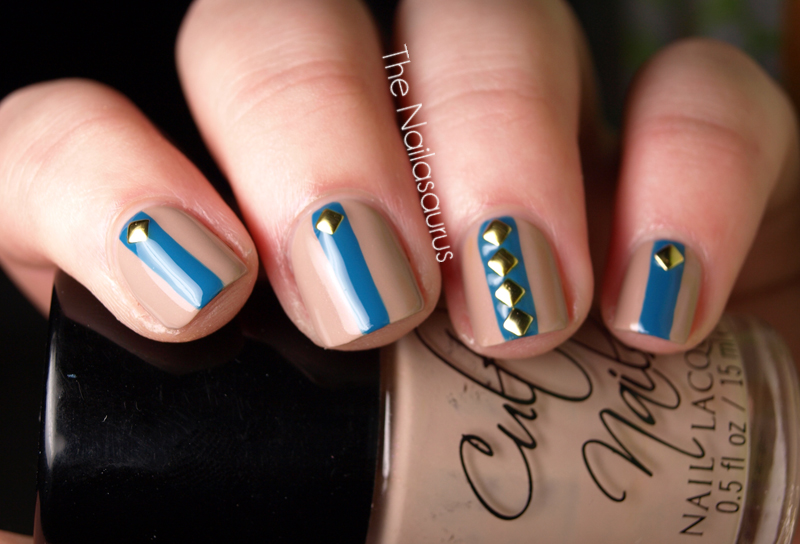
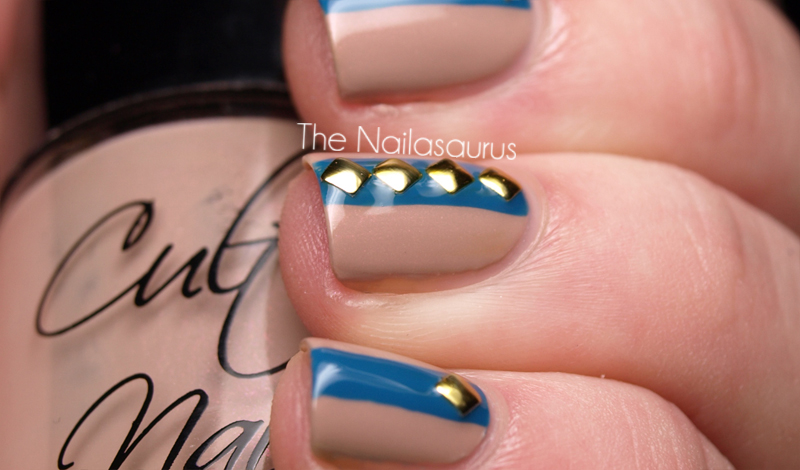
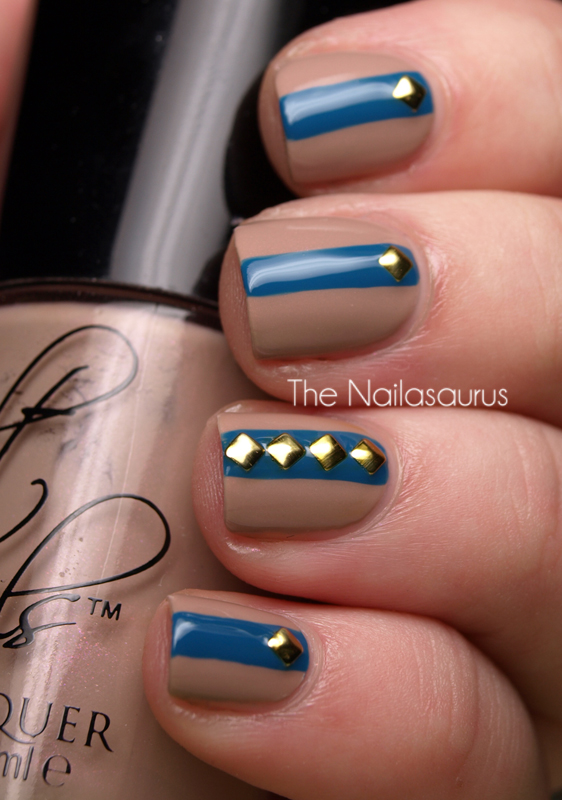
    The blue and nude isn’t a colour combination that I would have thought to use but I’ve been seeing it all over Tumblr recently and it definitely works!
    Square Stud Nail Art

    Square Stud Nail Art
    I used two coats of Cult Nails Cruisin’ Nude as a base, then used a striping brush to paint on the stripes using Barry M Cyan Blue. I placed the studs* using a toothpick dipped in clear polish while the blue was still tacky and pushed them gently down in to the polish. All finished with two top coats of NYC.

    Square Stud Nail Art

    Square Stud Nail Art
    You can buy nail studs from Born Pretty here. These are the 2mm square ones.
    You can use my code, SA5X31 at the checkout to get 7% off your whole order!

    *This item was sent for consideration. For more information, see my disclosure.

    TwitterBloglovin’Tumblr

    Share:
    Glitter, Gradient, Uncategorised

    Black and White Challenge Day 7: Black and White with Glitters

    Glitter. I hate the stuff. I truly do. Has anyone noticed that as soon as you touch something with loose glitter on it, you’ll find pieces of glitter all over yourself for the next two days at least?! Luckily, glitter polish isn’t too bad on that account but it still has a habit of sticking to you and putting up a fight when you try to remove it from your nails. 
    I got off lightly with this manicure though. Because there are so many layers of polish, it wasn’t even completely dry underneath when I removed it (about 1 hour after taking the pictures) so I could actually just peel of the whole thing one nail at a time! I can’t imagine how long it would have taken me to get it all off otherwise.
    Black and White Challenge Day 7

    Black and White Challenge Day 7
    I used W7 Cosmic Black – a black jelly packed with Silver glitter – as a base. Then I took a sponge and used it to apply W7 Cosmic Mauve from the tips. Then I added some Wet n Wild White to the mix but because it’s not very opaque, it gave it a milky look. Finally I used a little more Cosmic Mauve right on the tips and used about 3 coats of NYC Top Coat to smooth things over!

    Black and White Challenge Day 7

    Black and White Challenge Day 7
    Click over to see what the other girls have come up with today!
    Esther at Fab Fingertips
    Stephanie at Sincerely Stephanie

    TwitterBloglovin’Tumblr

    Share:
    Stamping, Uncategorised

    Black and White Challenge Day 6: Color base with White

    The ‘Skittle mani’ is not a style I sport very often. I think it’s due to my obsession with evenness and symmetry! Nevertheless, I decided to give it a go today when I couldn’t decide which pretty pastel I wanted to use on my nails and I really love the result. I’m really taken with pastels and I think the love is fueled by my desperation for summer’s return after I was given a taste of it the a few weeks back when we had a few days of sunshine!
    I’ve been doing too much online shopping this week and I have my eye on some jewellery from Fresh Trends. I’m a bit of a piercing junkie and I had my anti-helix pierced a few weeks ago as a little birthday present to myself! For whatever reason I didn’t get a chance to mention it at the time but you can see it here!  I had no idea about all the amazing jewellery you can get for the more uncommon piercings like my new addition. I think this is gonna have to go in my rook piercing on the other ear!
    Barry M Pastels

    Stamping Plate: Bundle Monster BM205
    Base Colour: Barry Ms Mint Green, Berry Ice Cream, Blueberry Ice Cream and NYC Lexington Yellow
    Stamping Colour: Sally Hansen Insta-Dri Whirlwind White
    Top Coat of NYC

    Barry M Pastels

    Barry M Pastels
    As always, my challenge homies will have some beautiful manicures for you today!
    Esther at Fab Fingertips
    Stephanie at Sincerely Stephanie

    TwitterBloglovin’Tumblr

    Share:
    Studs, Uncategorised

    Fish Egg Friday!

    Today’s nails are inspired by some nail art that Dashing Diva created for the Cushnie et Ochs show at Fall 2011 Fashion Week which you can see here
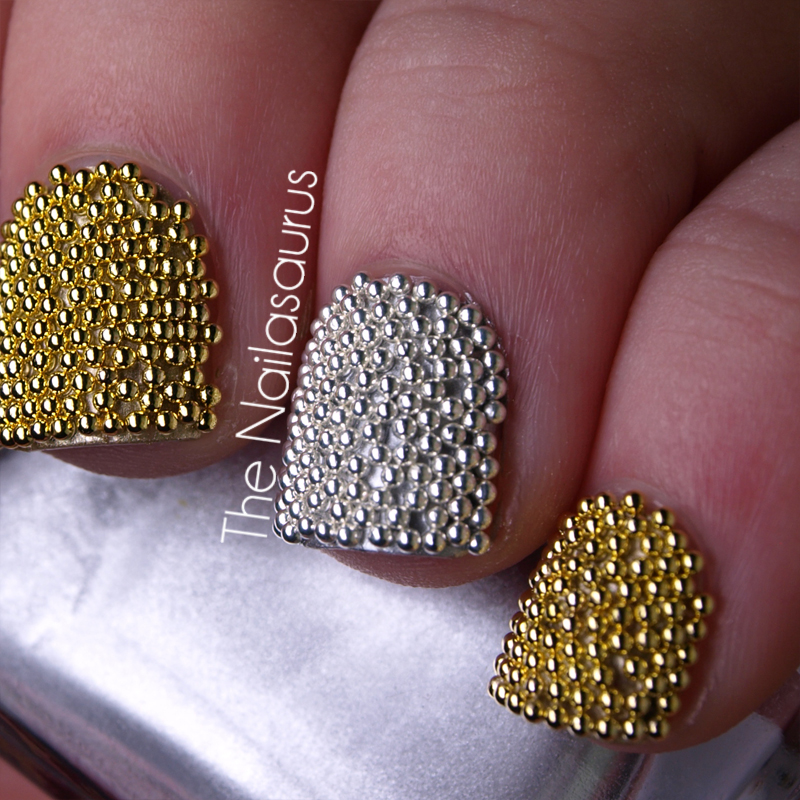
    I’m sure you’ve all been seeing a lot of this style manicure recently and I’ll be honest, I wasn’t completely sold on the look. And I also thought it would be a nightmare to apply. Now that I’ve finally tried it, I’ve surprised myself at how much I actually like it and it was way easier than I expected. It literally is a case of pouring the beads over your nail and letting them stick!
    It doesn’t show in the pictures, but these beads are so sparkly in real life. My nails are like mini mirror balls!
    It’s a long post today! More after the crack ↓

    I used Barry M Gold Foil and Silver Foil as base colours. One nail at a time, just after painting the second coat of colour, I held my nail over a plastic container and sprinkled the bullion over it. There were a few gaps so I placed a few of the beads using a sticky toothpick to fill them in. Finally, I used a toothpick to shape around the edges and flick off any beads that didn’t quite fit nicely!
    I didn’t add a topcoat because I just knew it would all go wrong at the final moment like these fiddly things have a habit of doing! If you’re planning on wearing this style for more than a few hours though, it will definitely need a top coat to seal everything in and make it last.

    There are countless places online where you can buy the Bullion or ‘steel balls’ to create this Fish Egg manicure and you might even be able to find them in a craft store near you.

    I got these from eBay here for 99 pence with free P+P. However, these are kind of big for nail bullion. They are very tiny but still big in relation to other bullion I’ve used in the past.
    (eBay Listing)

    My absolute favourite bullion EVER is from Viva La Nails here. They have a great selection of colours at £1.95 per 5g pot and Viva La Nails is a great place for nail art supplies so have a look around!
    (Viva La Nails Product Page)

    If you want a great selection of colour, Born Pretty have a set of 12 colours for $5.41 and each colour comes in a little pot so you won’t have any mix ups! However, if you’re so inclined, you can have fun mix and matching your own colour combinations.
    (Born Pretty Product Page 7% off with the code SA5X31)

    If you want to see more Fish Egg manis today, loads of lovely ladies have also posted theirs!
    Ivana at Ivana Thinks Pink
    Stephanie at Sincerely Stephanie

    Jeanette at The Swatchaholic

    Christina at Starlett Approved
    Salla at OMG! Polish ‘Em
    Esther at Fab Fingertips
    Emily at The Lacquerologist
    Tiffany at 2 The Last Drop
    Cristina at Let Them Have Polish
    Susan at Subtle Shimmer
    Melissa at Melissa White Nails
    Jen at The Polishaholic
    Goose at Gooses Glitter
    Danielle at Rock n Polish
    Katie and Allie at The Daily Varnish
    Deez at Deez Nails
    Phedre at Colour is Magic
    Lacquer and Lattes
    Danielle at Mid Western Girlie Girl
    Zelinda at Unhas caseiras da Z
    Stephanie at Aquaheart’s Obsessions
    Julie at Esmaltes de Julie
    Ria at Ria Loves Pawlish
    Shooting Star 0218
    Rhonni at Polish Ninja
    Poliship at Oje Gemisi Kalkiyor
    Jamie at Plisherrific
    Jessica at Jessica’s Nail Tales

    You an also follow the #FishEggFriday action on Twitter!

    TwitterBloglovin’Tumblr

    Share:
    Freehand, Uncategorised

    Black and White Challenge Day 5: Color base with Black

    I’m so excited to post today’s nail art! For Day 5 of the Black and White Challenge – Color base with Black, I’ve created some nail art inspired by the One Ring from The Hobbit and Lord of the Rings. I was going to wait to do this for the release of The Hobbit which I thought must be some time soon but it’s not until December!
    This nail art was first posted on Billy the Brime’s Tumblr and couldn’t wait to give it a go myself. Allison’s mani is more accurate to the original source material than mine and fair play to the girl, dang that inscription is fiddly!
    One Ring to rule them all, One Ring to find them
    One ring to bring them all and in the darkness bind them.
    Lord of the Rings Nail Art

    Lord of the Rings Nail Art

    I used Barry M Gold Foil as my base colour and black acrylic paint with a nail art brush for the details.

    Lord of the Rings Nail Art

    Lord of the Rings Nail Art
    Don’t forget to visit the other ladies’ blogs to see their Day 5 manis!
    Esther at Fab Fingertips
    Stephanie at Sincerely Stephanie

    Share: