Follow:
Browsing Category:

Nail Art

    Glitter, Gradient, Uncategorised

    Pink Lemonade from One Nail To Rule Them All

    One Nail To Rule Them All is a blog written by a lovely young lady called Alice who is bringing you today’s post. When it comes to nail art, I really don’t think there’s anything Alice can’t do! She excels at pretty much everything but her intricate freehanded patterns are a particular favourite of mine so I was psyched when I saw what she’d created for her guest post!

    Where to find One Nail To Rule Them All
    Blog – Facebook – Twitter – Instagram – Tumblr
    ——————————————————————————————-

    Hey everyone! First off I just want to say that I’m absolutely honoured that Sammy chose me to do a guest post for her. Sammy’s blog is by far my favourite nail blog out there and I still can’t quite believe that I’m posting on it! The design I chose is one that I knew would suit Sammy’s blog, because we all know that she is the queen of gradients. In fact it was her tutorial that finally helped me to master them, and her tutorial that was used in order to create these nails. So this design is definitely well suited to her corner of the internet.


    To do these I started with a base of Models Own – Strawberry Tart, from the recent Fruit Pastel Collection, and sponged on Barry M – Passionfruit. For the tribal design I used the black Barry M nail art pen, and the glitter is Nubar Black Polka Dot. I then topped it off with a coat of Seche Vite.

    Thank you so much to Sammy for having me, and thank you all for reading. If you’d like to see more of me then you can find me on my blogTwitter, Instagram, Facebook and Tumblr. I hope to see you all around!
    Share:
    Galaxy, Uncategorised

    Fractal Fingertips from Will Paint Nails For Food

    Today’s guest post is coming to you courtesy of Meghan from Will Paint Nails for Food
    Meghan’s been at the nail blogging game for less than a year but she’s already making waves and once you see her nail art you’ll know why! If you follow the nail art tag on Tumblr, you’ve probably seen her nails on there more than a few times. She’s currently in the middle of the 31 Day Challenge so make sure you go and follow her to keep up to date with her creations!

    Where to find Will Paint Nails for Food
    BlogFacebook – Instagram – Tumblr – Bloglovin’
    ——————————————————————————————-

    Hi everyone! What an honour it is to be writing for this blog. Thank you Sammy for having me here!

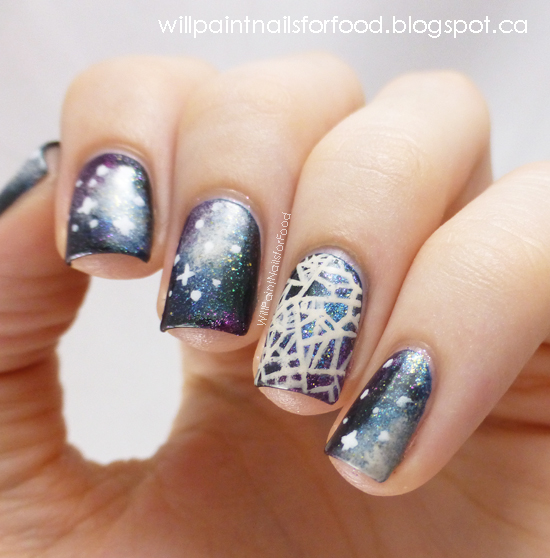
    I had the idea of combining galaxy nails with some sort of fractal design months ago. I’m no expert on the subject but simply put, fractals are complex geometric designs where the small parts are very similar to the larger overall pattern. And there are many connections between galaxies and fractals – some believe the universe is just a large fractal.

    I’m not sure how successfully the accent nail conveys the idea of fractals, however, you can check out the source image HERE .

    Here’s the steps I took for these nails:

    1. I started with a base of Essie Midnight Cami
    2. Using little bits of makeup sponge I slowly built up the colours, first with the blues using piCture pOlish Cosmos, piCture pOlish Pshiiit, Foxy Paws One More Night, and Zoya Crystal
    3. Then I built up the purples with Nicole by OPI Back In My Gloria Days, and Zoya Carly
    4. I added my blacks with Orly Liquid Vinyl and Liquid Sky Lacquer Party All Night
    5. I added the nebula effect with more Zoya Crystal and OPI My Vampire is Buff
    6. I painted the stars with a detail brush and Sally Hansen White On
    7. For the accent nail, the base is the same as the others, only I didn’t add the lighter nebula. The fractal design is painted with OPI My Vampire is Buff and a detail brush.
    8. I finished with two coats of KBShimmer Clearly On Top

    I love galaxy nails because, generally, most people use the same technique, but everyone’s looks different. I tend to use more polishes than necessary, you probably don’t need this many colours.

    I hope you enjoyed my post, and thanks again Sammy for having me here!

    TwitterBloglovin’Tumblr

    Share:
    Freehand, Uncategorised

    Watercolour Florals from Lucy’s Stash

    Welcome to my holiday week! First up on the list of mystery guest posters we have Lucie from Lucy’s Stash! Most of you will know Lucie already but in case you aren’t familiar with her blog, Lucy is a fellow British blogger whose nail art is always impeccable and she’s really got an eye for the little details, as you’re about to find out!

    Where to find Lucy’s Stash
    BlogFacebook – Tumblr – Instagram
    ——————————————————————————————-

    Hi everyone,
    I’m very excited to write a guest post for Sammy as she’s always been one of my favourite bloggers. It wasn’t easy to decide on what nail art I should do as sometimes it feels like everything has been done before. Lately, I fell in love with watercolours so that’s the technique I’ll be doing today.
    I’ve started with two coats of China Glaze Snap My Dragon and one coat of OPI Matte Top Coat. Then I’ve diluted white watercolour paint and started to draw four-leaf flowers.

    Then I’ve continued to paint the rest of the flowers. This is how it looked before topcoat – lovely matte finish!

    I was curious as to what the design will look like glossy so I’ve applied one coat of Seche Vite top coat

    TwitterBloglovin’Tumblr

    Share:
    Galaxy, Glitter, Uncategorised

    White Space

    Back again with the galaxy nails! These were hugely inspired by Kaitlin at the Daily Polish’s Tumblr Nails. As we know, galaxy nails are this week’s obsession and I knew I just had to try it with the white space after seeing Kaitlin’s creation.

    I have a few little snippets of news to share today. Tomorrow marks the first day of my summer holiday but fear not, there will be plenty of new stuff for you to read on this blog whilst I’m gone. I’ve lined up a couple of guest posts from some very talented bloggers while I’m away and I can’t wait for you to see all the amazing nail art they’ve created!

    I’m also very excited to tell you that this blog has been nominated for best established beauty blog in this year’s Cosmo Blog Awards! It’s such an honour to be nominated again and your votes are very, very much appreciated. If you’d like to vote, just click here to go to the voting page and you’ll find me in the first category!


    1. I started with a base colour of Barry M White and topped it off with No7 Stay Perfect Top Coat.
    2. Once my base was dry, I used scotch tape to mark off the sections where I wanted to keep the white showing.
    3. One nail at a time I created the galaxy look by sponging on NYC MoMaNYC Lavender Cupcake and NYC Raindrop (tutorial here). I topped the galaxy off with Calvin Klein Blue Wants to be a Millionaire which is a blue tinted holographic polish which works well as a holographic top coat.
    4. As soon as I was done with the galaxy on each nail, I peeled off the tape and added the star details.
    5. Finally, I added two coats of No7 Stay Perfect Top Coat to smooth things over and keep it shiny!


    TwitterBloglovin’Tumblr

    Share:
    Galaxy, Tutorial, Uncategorised

    Galaxy Nail Art Tutorial

    Since you guys loved my Pastel Galaxy Nails so much I thought I’d make a tutorial to show you my process. There are a few different ways to do it but this is my method of choice!

    I’m using mostly pastel polishes for this look. From left to right, the pastel polishes I used are Sally Hansen Green Tea, NYC Raindrop, China Glaze Tart-y for the Party and NYC Lexington Yellow.

    Next up are the shimmers, Essence Choose Me and Essence Irreplaceable. I think that a bit of sparkle is really important to get the nebula look. Holographic polishes, very fine glitters and shimmery polishes all make great additions to galaxy nails.

    NYC Matte Me Crazy is my matte top coat of choice at the moment.

    You’ll also need a make-up sponge and a pair of tweezers. And the things I forgot to photograph (doh!)… white nail polish or acrylic paint, a nail art brush and a dotting tool.

    Start by painting on your base coat and letting it dry completely.

    Tear off a small piece of the sponge and grip it in the tweezers.

    I dab out my colours on to a sheet of plastic and dip the sponge in but if you prefer you can paint the polish straight from the bottle on to the sponge. You only need a small amount on the sponge, it’s best to build up the colour than to splat on too much straight away!
    Use a fresh piece of sponge for each colour.

    Start adding your colours by dabbing the sponge on to your nail in random patterns. I started with NYC Lexington Yellow.
    Next up is NYC Raindrop.
    And the last creme, China Glaze Tart-y for the Party. I sometimes go through my selection of colours twice to make sure I get a really good mix of them on the nail.

    Add just a little bit of shimmer here and there.

    I do the shiny stars by painting on a little cross, then joining up all 4 points with a curve.

    Using a dotting tool, add some smaller stars of different sizes.

    I always use a fast drying top coat to smooth everything over and make the whole thing dry. At the moment my favourite is No7 Stay Perfect Top Coat.
    I clean up the messy bits around my cuticles using a nail art brush dipped in acetone.

    Finally I added a coat of NYC Matte Me Crazy

    TwitterBloglovin’Tumblr

    Share:
    Galaxy, Uncategorised

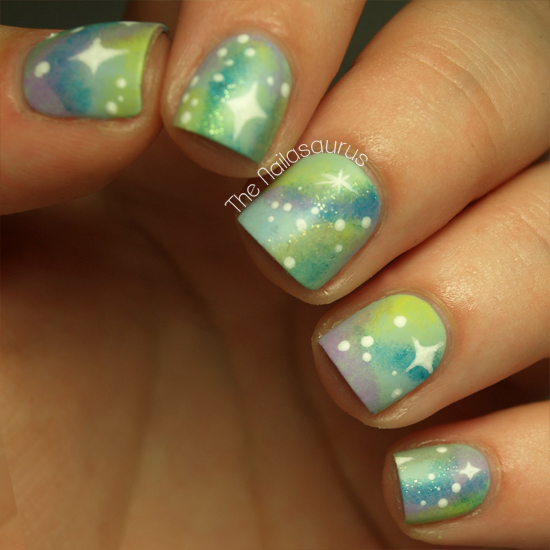
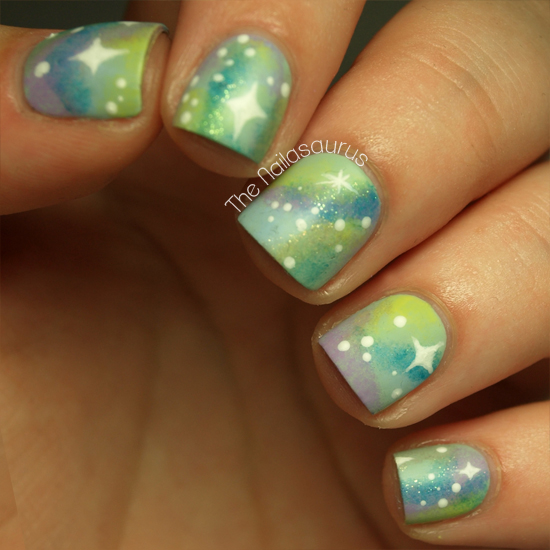
    Pastel Planets: Matte Nebula Nails!

    Pastel galaxy nails have been on my to-do list for the longest time. Why it took me so long to do them… who knows?! I think I was sceptical that it wouldn’t work without a dark polish underneath but I proved myself wrong there. I ♥ these nails so much… a new obsession has definitely been sparked here!


    1. I started with a base of Sally Hansen Green Tea.
    2. Using small pieces of sponge, I dabbed on China Glaze Tart-y For The Party (pastel purple), NYC Raindrop (pastel blue), Essence Choose Me (blue shimmer) and Essence Irreplaceable (nude shimmer) to create the nebula effect.
    3. I used White Acrylic Paint with a dotting tool and nail art brush to create the stars.
    4. I used a coat of No7 Stay Perfect Top Coat to dry it all through and then topped it with NYC Matte Me Crazy for the matte finish.

    Here’s the look before the matte top coat. I definitely prefer the matte version, what do you guys think?

    TwitterBloglovin’Tumblr

    Share:
    Studs, Uncategorised

    Fresh Lookin’ Studs

    Yesterday you guys provided me with inspiration by the bucket load when I asked on Facebook and Instagram which colours you thought I should use with these new mint studs from Born Pretty. The ideas that popped up time and again were purple, green and brown (to make mint choc chip!). I tried the brown idea because it sounded very appetising but I couldn’t make it work so I moved on to option two… something with purple and green.


    The studs are the new 2mm coloured ones from Born Pretty Store and it’s $3.59 for a pack of 200 studs. There are 11 colours ranging from pastels to bright. It’s been a while since I had a good browse of Born Pretty so I’ve been surprised to see the amazing new items they have on offer. I’ve already placed two orders with them this week so I’ve got some square pastel studs on their way too. I can’t wait to play with them!

    1. For the nail art I used a base coat of Barry M White then topped it off with a coat of No7 Stay Perfect Top Coat.
    2. Once that was dry, I placed on two strips of striping tape where I wanted the white to show through.
    3. Using the brushes straight from the bottle I very carefully painted on NYC Water Street Blue and Lavender Cupcake between the lines of tape. I removed the tape immediately.
    4. I used a nail art brush to dot a tiny bit of clear nail polish on to my nail where I wanted to stick the studs. I picked up the studs using the same brush while it was sticky and pressed the studs down in to the polish to make them really stick (video here).
    5. The colour on my other fingers is Sally Hansen Green Tea.
    6. I topped it all off with a coat of No7 Stay Perfect Top Coat.

    TwitterBloglovin’Tumblr

    Share: