Follow:
Browsing Tag:

Pastel

    Nail Art

    Rimmel Sweetie Heart Collection Nail Art

    The Nailasaurus Pastel Nail Art

    Rimmel Sweetie Heart Velvet Matte Pastels Collection | The Nailasaurus

    One of Rimmel’s latest releases is a set of 5 Matte Pastel shades otherwise know as the Sweetie Heart Velvet Matte Pastels collection. Now that spring has officially sprung, it feels like a good time to be showcasing these pretty pastels.

    I’m a huge fan of the matte look and I often go through phases of mattifying everything with a top coat although I’m not big on matte polishes. It’s only because I have an unbreakable top coat habit and it just feels unnatural for me to paint on two coats of colour and call it a day. When I wear matte shades, I’ll often apply a shiny top coat, and then add a matte top coat to take it back to how it was intended. Call me crazy, but there’s a method in this madness… somewhere! Read more

    Share:
    Nail Art, Uncategorised

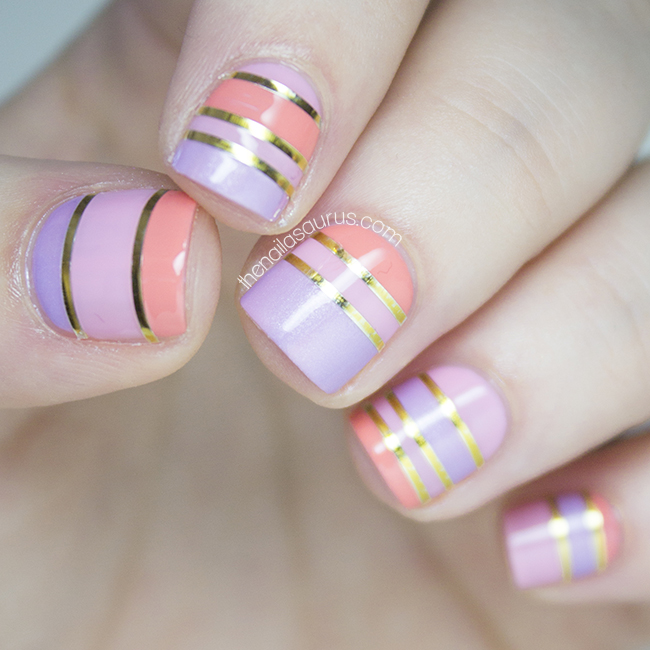
    Sorbet Stripes

    I wanted to do something fun and flirty today so I picked out a few sorbet colours, grabbed the gold striping tape and set about creating this banded nail art. The striping tape is holding up well so far – no peeling but there has been a bit of colour leakage! The gold seems to have seeped out of a few pieces leaving me with silver but that’s not so bad.
    I recently purchased the Straight Stencils from She Sells Seashells which save me so much time that used to be spent fussing around cutting scotch tape in to thin strips whenever I did a manicure like this with lots of straight lines!

    1. For this nail art, I used a base coat of Nicole by OPI At Least I Pink So on all nails followed by a thin coat of Glisten & Glow HK Girl.
    2. I waited 10 minutes for it to dry completely.
    3. Next, I placed some straight vinyl stencils randomly over my nails and filled in some of the gaps with NYC Peach Popsicles and Sally Hansen Lady Lavender. I removed the vinyls as soon as I was done painting on each nail.
    4. Once everything was mostly dry, I applied the striping tape using nail art tweezers. Instead of trying to guess how long my strips should be, I made sure each strip was too long and then trimmed each edge with cuticle nippers once it was already placed on my nail.
    5. Finally, I used two coats of Glisten & Glow HK Girl to smooth it all over.
    Share:
    Glitter, Uncategorised

    Nice But Naughty

    Pastel Geometric Nail Art | The Nailasaurus | UK Nail Art Blog
    I was jonesing for a pastel mani today but I didn’t want to get too girly with it. As the title suggests, I went for something nice and sweet but equally naughty at the same time. I remembered this Hex nail charm and knew it would be perfect to add a touch of class badass to my nails.
    Pastel Geometric Nail Art | The Nailasaurus | UK Nail Art Blog
    The base colour for the nail charm is Barry M Heather and the Fuck You charm is from Hex Nail Jewelry.

    For the negative space cross on my ring finger, I used Striping Tape to mark off the cross on my bare nail, then painted over it with Maybelline Ceramic Blue.

    The colour block nails are a base of Delush Make Me Blush. I applied a thin coat of HK Girl and waited ten minutes for it to dry. Next I placed a strip of scotch tape over the top portion of my nail and painted over it with Sally Hansen Green Tea. Finally for those nails, I added a thin white line using the White Liner Polish from Born Pretty Store.

    The pink glitter is Sally Hansen Razzle Dazzler.

    It’s all topped off with two coats of HK Girl.

    Pastel Geometric Nail Art | The Nailasaurus | UK Nail Art Blog
    Pastel Geometric Nail Art | The Nailasaurus | UK Nail Art Blog
    Pastel Geometric Nail Art | The Nailasaurus | UK Nail Art Blog
    Share:
    Uncategorised

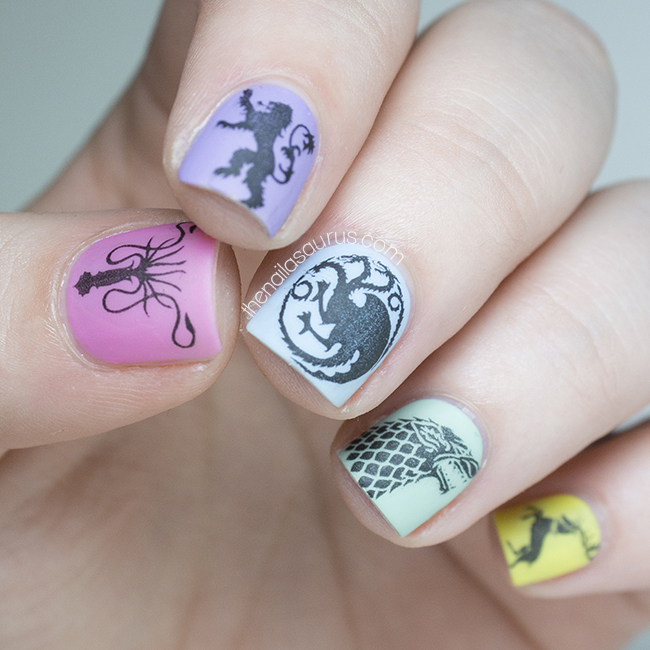
    Game of Girly Thrones

    It feels like we’ve been waiting an age for Game of Thrones to come back and now it’s so close I can almost taste it! A thoughtful friend got me these House Sigil water decals from Tentacle Studios on Etsy for my birthday last week and I don’t think there will ever be a more perfect time to wear them. I did try to match the colours up to the real thing but because the decals are all black, it was kind of tricky so instead, I turned the whole thing topsy-turvy and went for a girly skittle colour scheme.

    My base colours are Barry M Dragon Fruit (which, in hindsight, would have been the perfect colour for the Targaryen Sigil!), China Glaze Tart-y For The Party, NYC Raindrop, Sally Hansen Green Tea and NYC Lexington Yellow.
    The decals are from Tentacle Studios on Etsy.
    I finished it with a top coat of Glisten and Glow HK Girl and then a coat of Rimmel Matte Finish.

    Share:
    Freehand, Glitter, Uncategorised

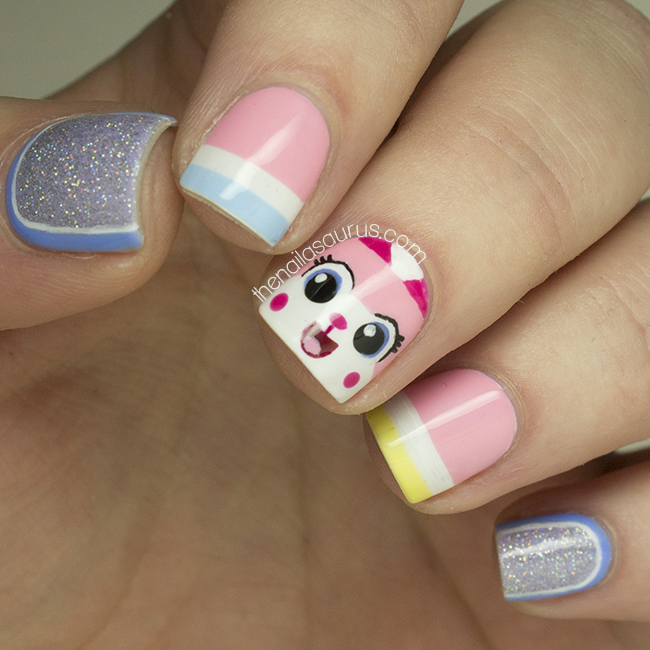
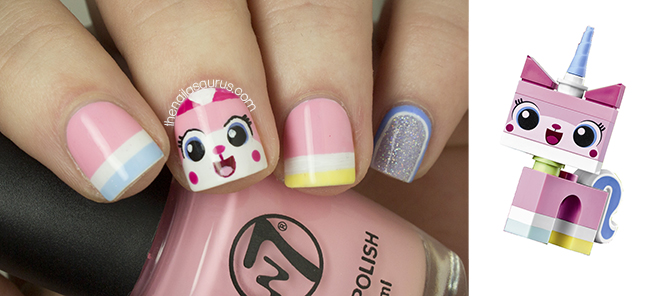
    Unikitty Lego Nail Art!

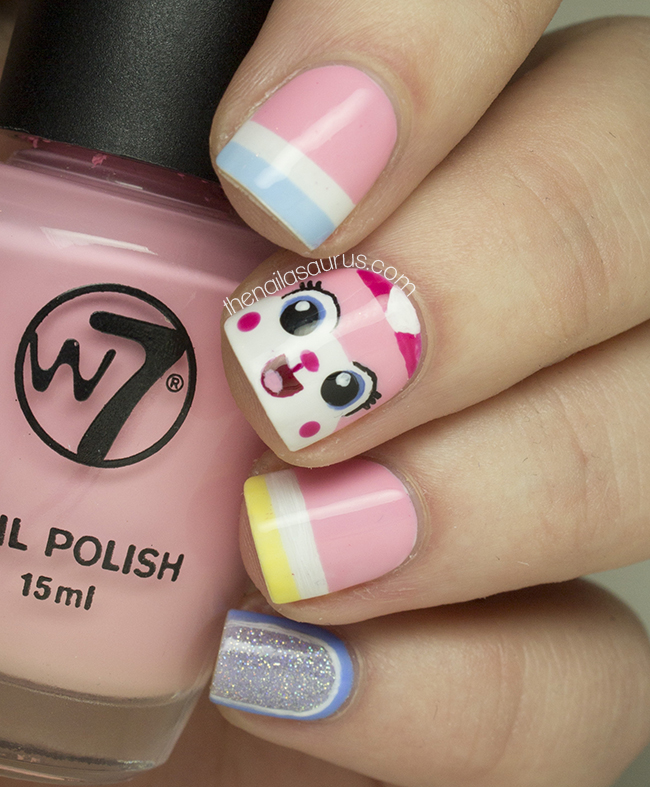
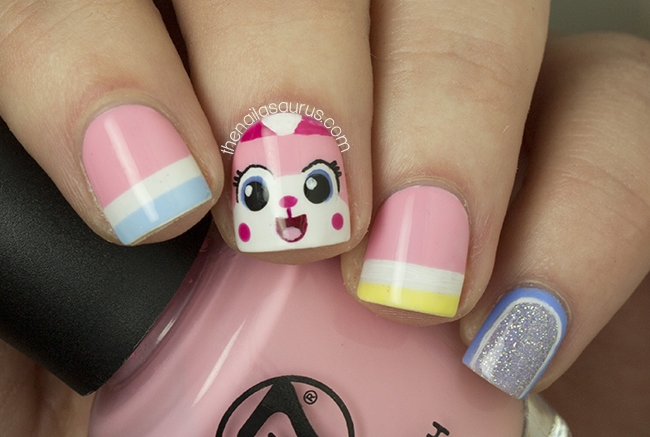
    My Lego Movie nail art was such a huge hit with you guys and I’m so glad you liked it! I’m back today on the same vein with some Unikitty nail art. She was one of my favourite characters in the movie thanks to her (mostly!) positive outlook and amazing Alison Brie voice.

    I used Barry M White as my base colour for the three middle fingers. Using a nail art brush, I painted on the details using black and white acrylic paint, W7 Baby Pink and NYC MoMa. I also used a dotting tool for the black parts of the eyes.
    Using scotch tape, a marked off the tip of each nail and painted the bottom half pink. Then I used a smaller strip of tape to mark off the white stripe and painted the tipes using NYC Raindrop and Lexington Yellow (which I mixed with some white to make it pastel).
    My pinkie and thumb are two coats of Claire’s Silver Holographic over Barry M Prickly Pear. I outlined them using Barry M Blueberry and added a thin line of white acrylic paint.
    It’s all topped off with two coats of KBShimmer Clearly on Top.

    Share:
    Studs, Uncategorised, Waterfall

    Pastel Waterfall

    Before Google Reader closed down I imported all my subscriptions in to Bloglovin’ and yesterday I finally got round to sitting down and looking through every single blog I’ve followed over the last three years. I lost track of time but I know it took at least 2 hours! I must have unfollowed hundreds of blogs – just the ones that haven’t posted for 2 months or longer, some hadn’t even posted since 2011 – and I got a bit nostalgic whenever I came across a blog that I once loved but is now retired. I even shed a tear when I read Gilded Nails’ last post and it made me realise how lucky I am that I’ve been able to continue blogging all this time.
    Anyway, enough of the soppy stuff! The point is that I’m so glad to have an organised dash where I can now start to really keep up with my favourite blogs and hopefully plenty of new ones!
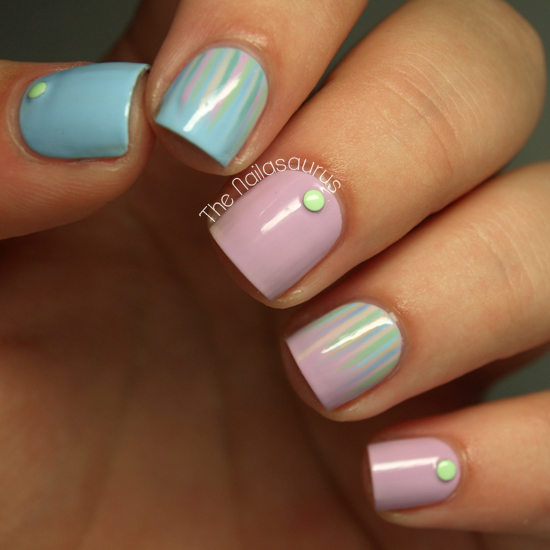
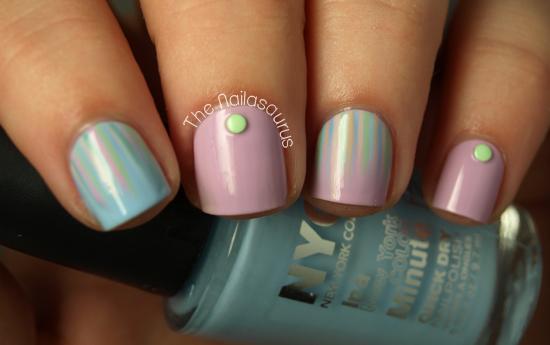
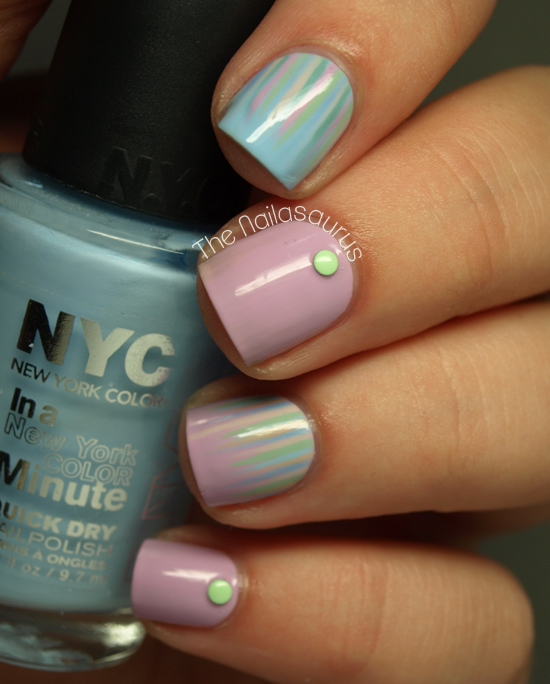
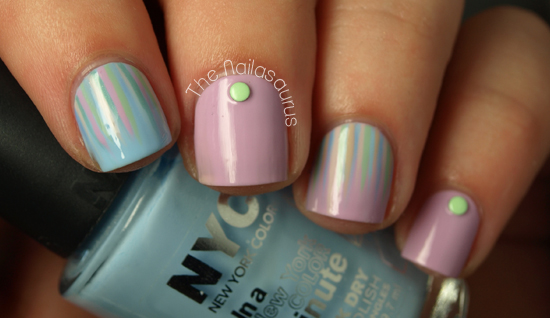
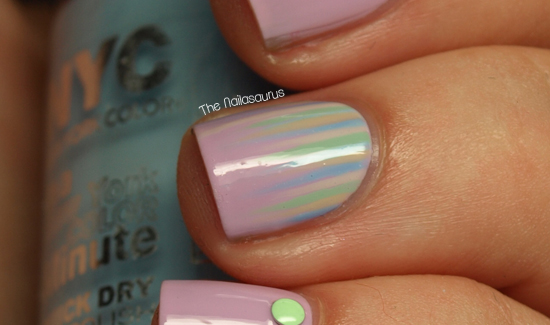
    I’m still loving pastels and I find myself reaching for them constantly. There is a waterfall in here somewhere but I used pastel colours and the look is very subtle!

    My base colours are NYC Raindrop and Lavender Cupcake. For the waterfall design, I used Sally Hansen Green Tea, Models Own Utopia, Barry M Lychee, Essie Bikini So Teeny and the two base colours (tutorial here). The green studs are from Born Pretty Store and you can now get them in a wheel with a range of colours and square ones in the mix too. It’s all finished off with No7 Stay Perfect Top Coat.

    TwitterBloglovin’Tumblr

    Share:
    Galaxy, Tutorial, Uncategorised

    Galaxy Nail Art Tutorial

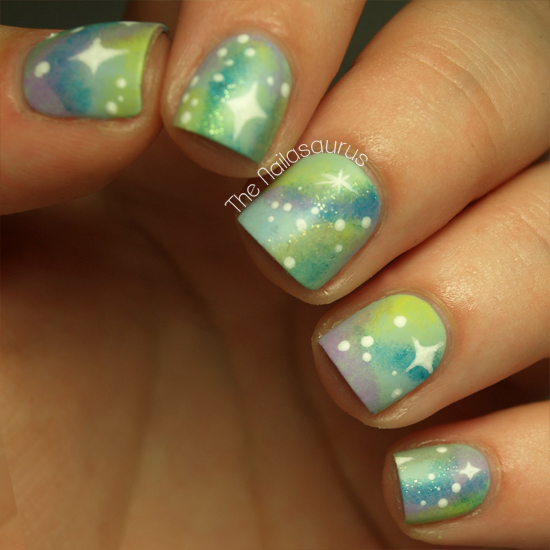
    Since you guys loved my Pastel Galaxy Nails so much I thought I’d make a tutorial to show you my process. There are a few different ways to do it but this is my method of choice!

    I’m using mostly pastel polishes for this look. From left to right, the pastel polishes I used are Sally Hansen Green Tea, NYC Raindrop, China Glaze Tart-y for the Party and NYC Lexington Yellow.

    Next up are the shimmers, Essence Choose Me and Essence Irreplaceable. I think that a bit of sparkle is really important to get the nebula look. Holographic polishes, very fine glitters and shimmery polishes all make great additions to galaxy nails.

    NYC Matte Me Crazy is my matte top coat of choice at the moment.

    You’ll also need a make-up sponge and a pair of tweezers. And the things I forgot to photograph (doh!)… white nail polish or acrylic paint, a nail art brush and a dotting tool.

    Start by painting on your base coat and letting it dry completely.

    Tear off a small piece of the sponge and grip it in the tweezers.

    I dab out my colours on to a sheet of plastic and dip the sponge in but if you prefer you can paint the polish straight from the bottle on to the sponge. You only need a small amount on the sponge, it’s best to build up the colour than to splat on too much straight away!
    Use a fresh piece of sponge for each colour.

    Start adding your colours by dabbing the sponge on to your nail in random patterns. I started with NYC Lexington Yellow.
    Next up is NYC Raindrop.
    And the last creme, China Glaze Tart-y for the Party. I sometimes go through my selection of colours twice to make sure I get a really good mix of them on the nail.

    Add just a little bit of shimmer here and there.

    I do the shiny stars by painting on a little cross, then joining up all 4 points with a curve.

    Using a dotting tool, add some smaller stars of different sizes.

    I always use a fast drying top coat to smooth everything over and make the whole thing dry. At the moment my favourite is No7 Stay Perfect Top Coat.
    I clean up the messy bits around my cuticles using a nail art brush dipped in acetone.

    Finally I added a coat of NYC Matte Me Crazy

    TwitterBloglovin’Tumblr

    Share: