Follow:
Browsing Tag:

Nails Inc

    Freehand, Uncategorised, Waterfall

    Blue Waterfall Nail Art

    This nail art builds on one of my manis from last week – Getting Skirty. That mani was so simple, I absolutely loved wearing it and was left wanting more. I thought I’d try it again this week but build on it a little and this was the result!
    Honestly, I am head over heels, pure in love with this style! I can’t wait to try out some more colour combinations. I think the complimentary colours look nice but it would look really edgy with clashing colours. If there are any colour combos you’d like to see let me know because you’re definitely going to be seeing a few more of these manis from me.

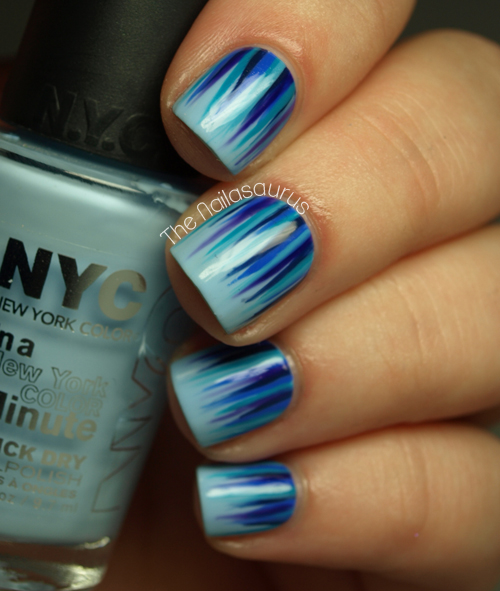
    I used NYC Raindrop as my base colour and then took a striping brush to paint on all the different colours from the cuticles upwards towards the tip.
    The colours included in the ‘waterfall’ are Barry M Blue Grape, Sally Hansen Himalayan Blue, Sally Hansen Pacific Blue, Nails Inc Belgrave Place and NYC Water Street Blue.
    It’s all finished off with two coats of No7 Stay Perfect Top Coat.

    TwitterBloglovin’Tumblr

    Share:
    Glitter, Studs, Uncategorised

    Dressed To Kill, You Look So Right

    If you don’t think Black and Gold is one of the top 5 colour combinations known to mankind, we’re gonna have a problem! This gold glitter is another one from Poundland and getting it to cover my whole nail like that was not easy. I started off using a sponge to dab it on, then resorted to a toothpick to place more glitter in the gaps. The end result was worth it and a two coats of Seche Vite glazed it nicely.

    Nails Inc Leather Effect
    Chit Chat Gold Glitter

      Studs/Bullion/Caviar from NPW
    Kiss Gold Glitter Striper

    TwitterBloglovin’Tumblr

    Share:
    Studs, Swatch, Uncategorised

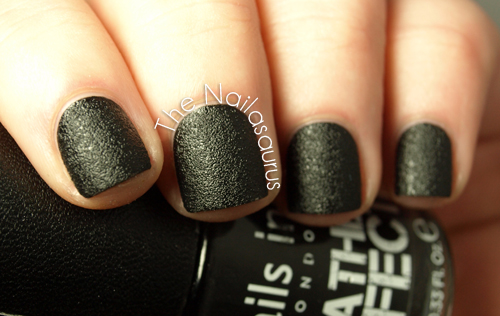
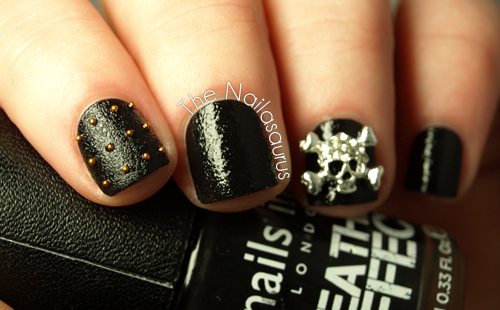
    Nails Inc Leather Effect (Noho) Swatch, Skulls and Studs

    Today I have another textured polish on my nails and it’s perhaps the first one that caused a lot of buzz among nail polish fans… Nails Inc’s Black Leather Effect*.
    As a nail crazed lover of anything black and leather, this is one that I couldn’t wait to get my hands on. Or should I say on my hands?! I was sceptical about whether it would actually look like leather on the nails since I never trust promo shots but the more I look at it, the more I believe I’m wearing leather on my fingers.

    I’m so impressed with the consistency of this polish, there was no gloopiness and it just swiped on perfectly in two coats. It dries to a matte finish and it’s recommended that you don’t use a top coat but of course I had to try… for review purposes of course, not just because I felt rebellious!
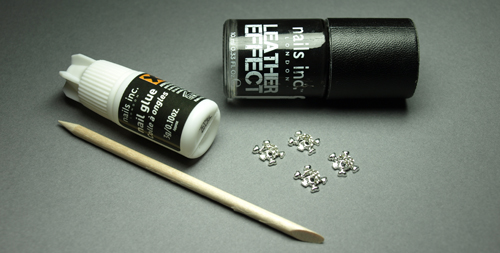
    The polish comes in a kit with nail glue, an orange stick and 4 embellished skulls (which can be reused if you clean them carefully with a little bit of acetone).
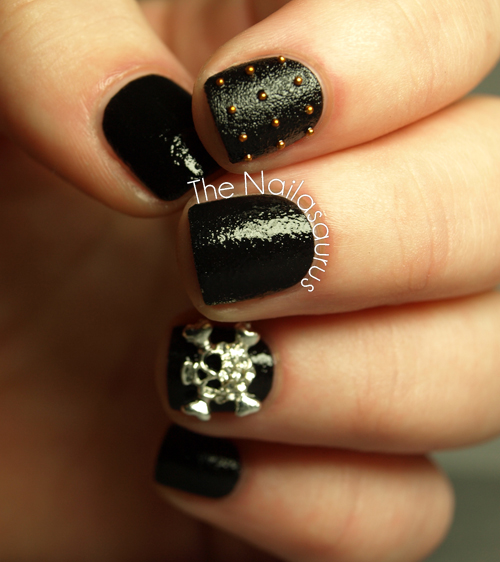
    I applied a top coat of Seche Vite to every nail except for my pointer finger which has kind of glossed them over and made them lose most of the leathery effect. I definitely prefer it without. 
    On my pointer, I used one coat of NYC In A New York Minute to attach the studs. This top coat is much thinner than the Seche Vite so it sank in to the Leather Effect pretty well.
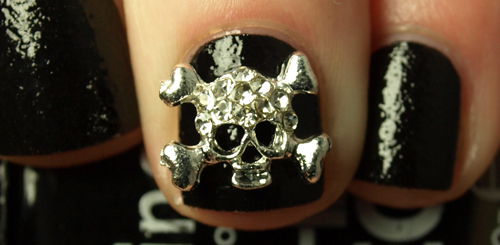
    I attached the skull using tweezers and a little bit of nail glue on the back of his head and chin. The skulls are not something I’d wear day-to-day but next time there’s a special occasion, you can bet I’ll be rocking one of these bad boys on each hand!
    This polish is only available in the ‘Bling It On’ set and the retail price seems to float somewhere around £20/$25. 
    After a bit of searching, the cheapest price I’ve found here in the UK is £19 at Very. It’s also available from Littlewoods who I was amazed to find have a brilliant selection of nail polish including OPI and Butter London.
    Share:
    Uncategorised

    Pink Wednesday: Biker Barbie

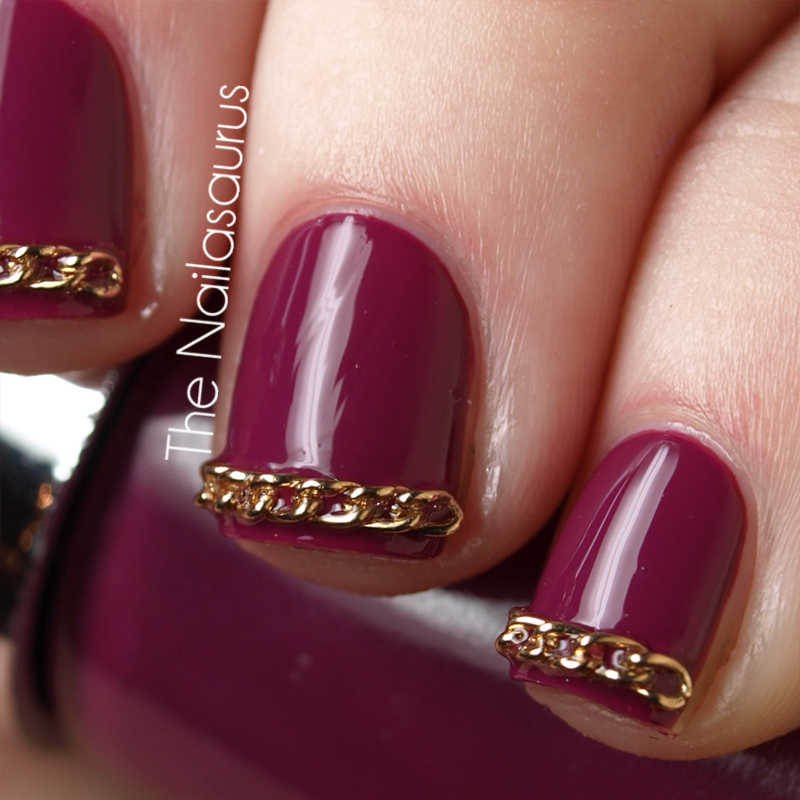
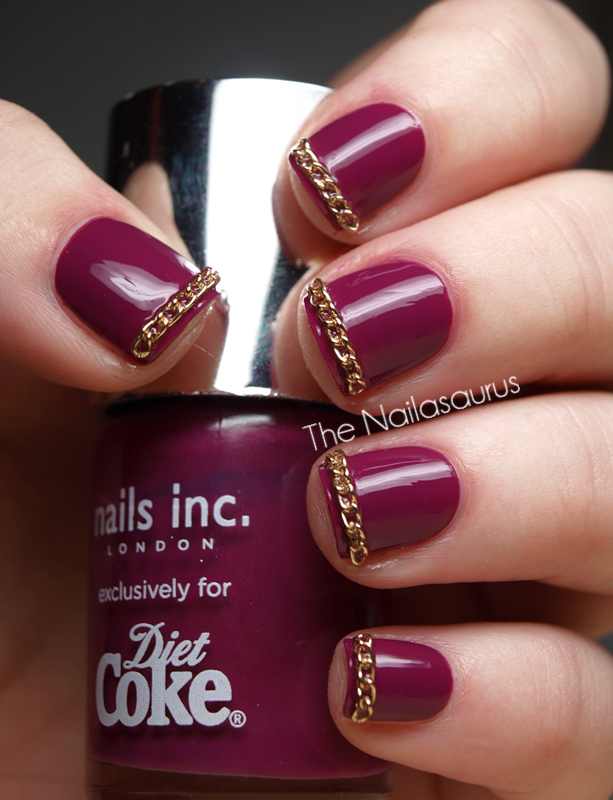
    It may be quite obvious to you by now that I’m going through a phase of decorating my nails with metal! Using chains is an idea I’ve had for a while but I didn’t know where to get my hands on a chain small and light enough that I could stick to my nails. I looked on a few nail art supply sites but the only ‘chains’ I could find were not really very chainy – more like wire with small intermittent balls.
    So I’d almost given up on that idea when a package from BuyInCoins.com (such an amazing site you should really check it out) fell through my front door.
    I’d ordered this necklace but the pendant was a bit malformed though I wasn’t too worried because it was an absolute bargain at less than $1. Then I had a brainwave, the chain was the perfect size for adorning my nails. So here we are!
    Before I even started with any polish, I measured out the chains by holding the necklace up to my nail and counting how many links each nail needed. I cut off what I needed using wire cutters/pliers and laid them out  on the desk in order.
    My base colour is two coats of Nails Inc Paris (for Diet Coke). I waited for this to dry then slicked on a coat of NYC In A New York Minute. I waited a few seconds for this to get tacky and used the Mash Tweezers to carefully place the chain along the tip of my nail.
    When everything was dry and securely in place, I added another top coat of NYC In A New York Minute.

    TwitterBloglovin’Tumblr

    Share:
    Freehand, Uncategorised

    If You Like It You Should Probably Put A Frame On It

    I’ve had this idea in my head for a little while now. It’s not my idea – I’ve seen it floating around on Tumblr before but I’m not sure of the original source so if anyone knows the creator of this masterpiece, please let me know! So anyway, I was kind of hesitant to do this design because I thought I’d make a mess of it but it wasn’t as hard as I was expecting. I had to build up the outline a bit thicker than I originally planned because it kept going wobbly but I like the boldness of it!
    I used Barry M Bright Purple as the base colour and Nails Inc Victoria to paint on the frame with a nail art brush.

    TwitterBloglovin’Tumblr

    Share:
    31 Day Challenge, Uncategorised

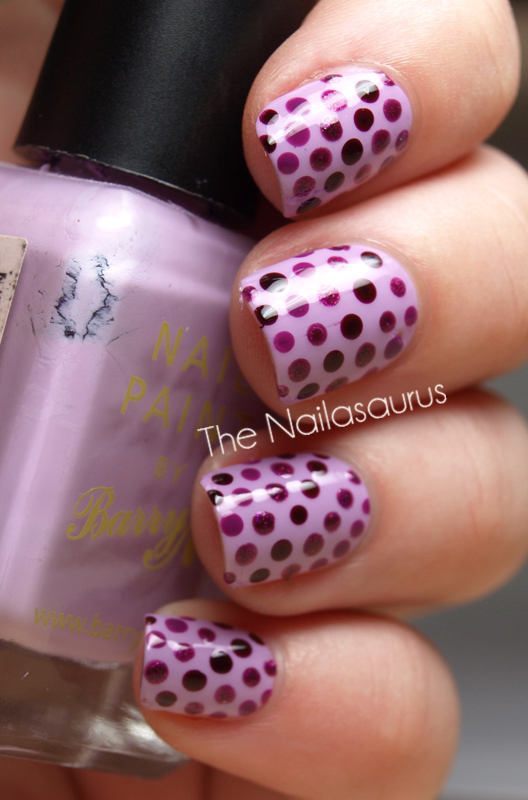
    Day 11: Polka Dot Nails

    Polka dots are so fun and easy and yet they make your nails look completely amazing!
    When I first got my dotting tools I hated using them and was just never happy with my results but after a bit of practice, I absolutely love them and they’re SO versatile. I use them for all kinds of nail art, not just dots.
    Today’s nails are in my favouritest colour ever – purple, purple and more purple!
    Head over to see Rie and Cristina‘s Polka Dots challenges too!

    Polishes used
    Base colour: Barry M Berry Ice Cream
    Dot Colours:
    Nails Inc Victoria
    Collection 2000 Minx
    Barry Bright Purple

    TwitterBloglovin’Tumblr

    Share:
    Stamping, Uncategorised

    Criss the Cross and Dot the Dot

    I have a little confession to make today. I’ve been sitting on this for a long time because I wasn’t really sure if it was a topic I wanted to talk about on the blog. I guess this has come up now because September has hit and everyone is back to the grind. School, work, whatever.
    Some of you may know, or be vaguely aware, that I was studying for a degree in Accounting and Finance and the academic year approaching would have been my final year. However, during my second year (the one just gone, 2010-11) I became really discouraged in school. I didn’t enjoy my subject any more, I couldn’t find any motivation to put effort in to my work and as a consequence, I failed the year. 
    So… I won’t be going back to University this year. I’ll really miss the people and the place but I’m so glad I don’t have the constant worry and stress hanging over my head all the time. I’m currently ‘temping’ in a little office where I get on with my co-worker and there’s little to no stress. All the while, searching for a permanent position to take up when this is finished.
    So for now, the only question playing on my mind is ‘What do I want to be when I grow up?’. Lots of people say I should study hair/nails/beauty but I don’t want to go back to school for a while and I also think that take all the fun out of my hobby. I would love to pursue a career in childcare but, again, that means going back to school. For now I just plan on finding a job that I enjoy (or at least don’t mind waking up for every day) and saving enough money to move in to a flat or house with my friends. I’m taking things one step at a time.

    Konad Plate: Bundle Monster BM203
    Base Colour: Rimmel – Electric
    Konad Colour: GOSH Metallic Purple
    Nails Inc – Paris
    Top Coat of NYC

    TwitterBloglovin’Tumblr

    Share: