Follow:
Browsing Tag:

Green

    Freehand, Uncategorised

    Happy Saint David’s Day!

    I have never been able to decide whether I’m English or Welsh as my family is English and I was born in England but I’ve lived my whole life in Wales, albeit very close to the border. I tend to float between the two and with my generic British accent, I can pull them both off pretty convincingly! Since it’s Saint David’s Day today, the mood is decidedly Welsh and I’ve created some nail art for the occasion.

    My first finger is the Welsh flag, or at least my simplified interpretation of it. I set down a base of Barry M White and freehanded on the Welsh Dragon using Rimmel Heart on Fire. I added the green in last using Sally Hansen Grass Slipper.
    On my ring finger, I’ve painted a Daffodil – the national flower of Wales. I used Barry M Mist as my base colour and freehanded on the flower using a nail art brush with NYC Lexington Yellow and Sally Hansen Sun Kissed.
    For the remaining fingers, I used Rimmel Heart on Fire, Barry M White and Sally Hansen Grass Slipper.
    It’s all topped off with a coat of Glisten and Glow HK Girl.

    Share:
    Stamping, Uncategorised

    Nailvengers Assemble: Mardi Gras Madness

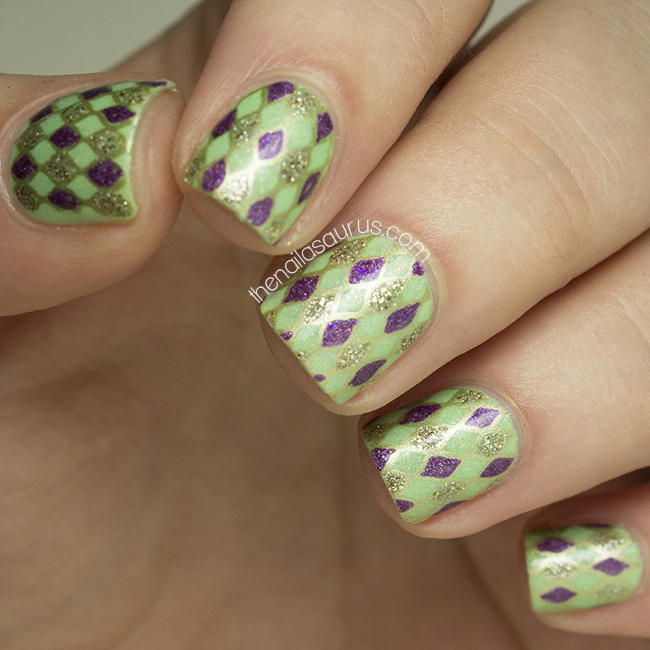
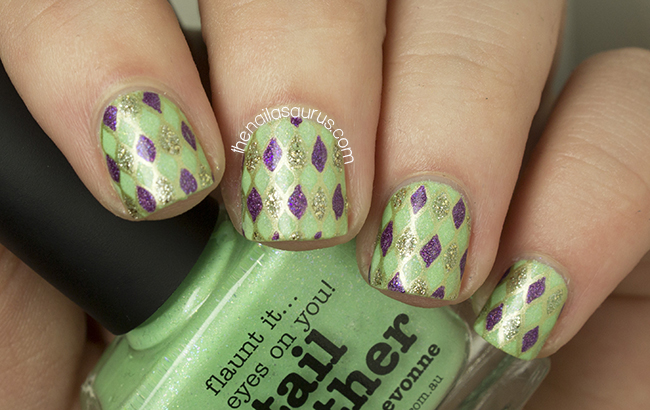
    With Mardi Gras coming up on March 4th, this month we decided to use the holiday as the inpiration for our Nailvengers Assemble challenge. After a failed attempt to create something with caviar (seriously, don’t even ask!), I decided to go for something simple using a few of the colours most often associated with Mardi Gras – purple, green and gold. 
    Don’t forget to check out my fellow Nailvengers’ Mardi Gras nail art- One Nail to Rule Them All, xAmeliax, Brit Nails and Lucy’s Stash!


    For this nail art, I used piCture pOlish Tail Feather as my base colour.

    I stamped on the fishnet design from Bundle Monster plate BM209 using Barry M Gold Foil.
    Using a nail art brush, I filled in some of the diamonds to create a harlequin look using piCture pOlish Hussy and Barry M Majesty.
    It’s all topped off with a coat of Glisten and Glow HK Girl.

    Share:
    Uncategorised

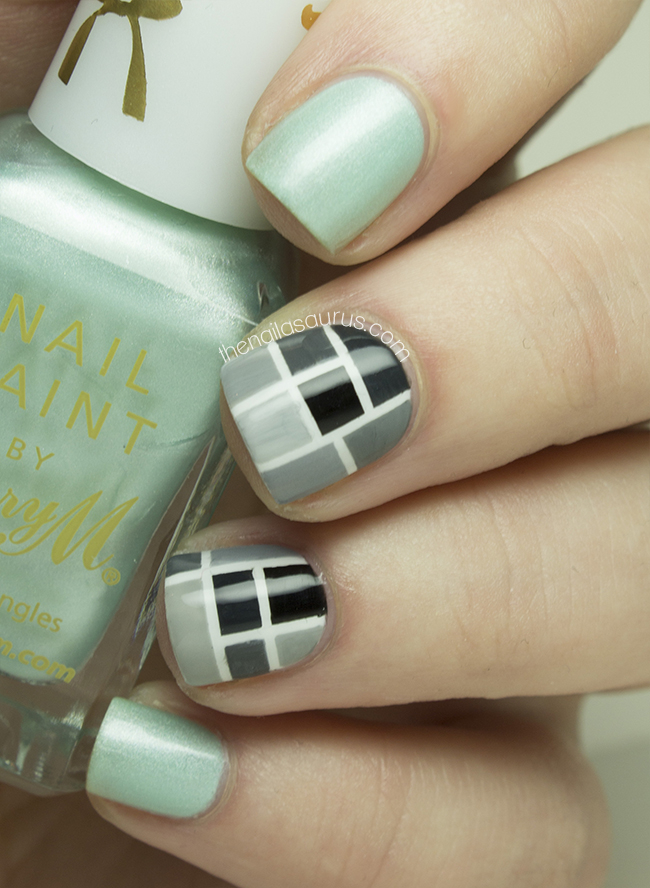
    LFW Inspired Nail Art: Louise Alsop

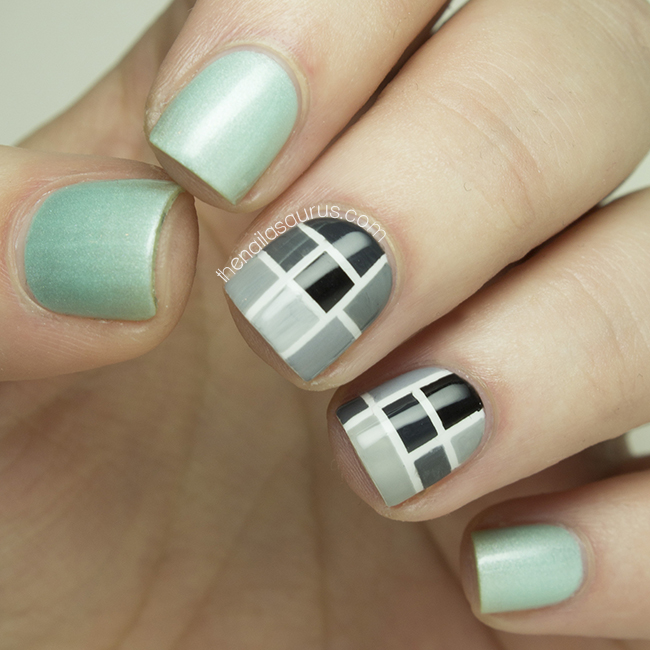
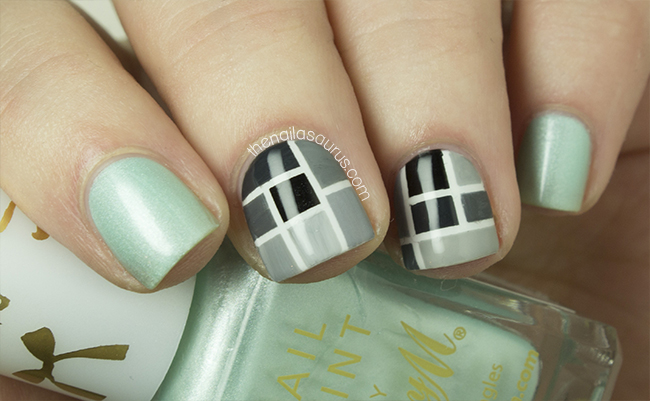
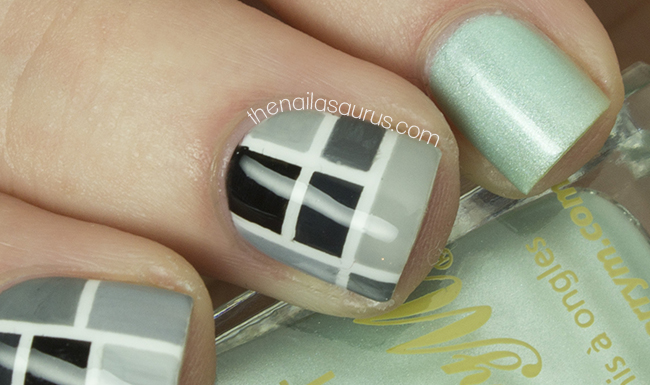
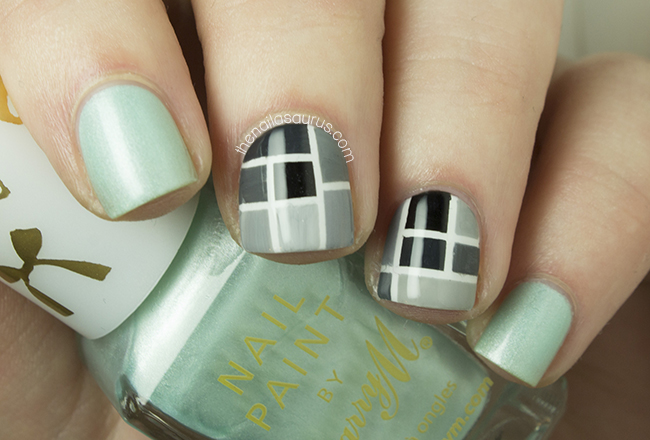
    Louise Alsop is a designer that’s pretty new to the scene and she had a slot at London Fashion Week in the Fashion East show. A few of her designs caught my eye as being perfect for a nail art adaptation. I really loved the effect of the grungy black and white, geometric patterns contrasted with the floaty mint green pieces.

    I used Barry M Meadow for the glimmery mint and set down Barry M White as the base for the nail art.
    To create the tiled effect, I placed striping tape where I wanted the white lines to show through.

    Using a nail art brush, I mixed Barry M White, Rimmel Grey Matter and W7 Black in varying quantities to create all the different shades of grey one shade at a time. I then used the nail art brush to paint each shade on to my nails, staying in the lines!

    As soon as I was done, I peeled off the tape to reveal the perfectly crisp lines underneath.

    It’s all finished with two coats of Glisten and Glow HK Girl.

    Photo credit: Vogue.co.uk

    Share:
    Freehand, Glitter, Uncategorised

    Criss Cross

    I’ve been so short on time over the last few weeks so I haven’t had a chance to do much nail art and I’ve been very short on ideas anyway. For this nail art I decided to rely on what I hope you’ll agree is a pretty colour combination and just do something simple!

    The criss cross nails are a base of piCture pOlish Mad Magenta with two diamonds of Nails Inc All Saints Row freehanded on with a nail art brush. I added a thick top coat and added some gold sliver while it was still tacky to accentuate the lines.

    The glitter polish on my accent nails is KBShimmer Totally Tubular.

    It’s all topped off with two coats of KBShimmer Clearly on Top.

    Recently I had a lot of fun putting together some gift guides for Divine Caroline. If you know a creative type, cocktail lover or nail fanatic and are looking for some gift ideas, hop over to Divine Caroline for some inspiration. You’ll also see my own personal wishlist up there if anyone wants to know what I asked Santa for this year!

    Share:
    Stamping, Uncategorised

    Honeycomb Hands

    I’ve been so bad at blogging this week and for that I apologise. I’ve had a strange couple of weeks where nothing much has happened but I’ve just been busy all the time! I’m actually starting a new job tomorrow which is very exciting but means that blog posts may still be scarce for a while. Although it’s not always obvious, my regular posting schedule is Tuesday, Thursday, Saturday and Sunday and often with extra posts scattered in when I have the time so that’s what I’m trying to get back to!

    I created the nimbus nails with a selection of pinks including piCture pOlish Mad Magenta and W7 Baby Pink. Click here for a nimbus tutorial.

    I’m also wearing Sally Hansen Green Tea and Barry M Prickly Pear.


    The honeycomb pattern is a stamp from Bundle Monster Plate BM422 and I used BK Matt White.

    It’s all topped off with two coats of KBShimmer Clearly on Top.

    Share:
    Gradient, Halloween, Uncategorised

    Halloween Grungy Gradient

    Here’s my second Halloween manicure of the day! I saw this look on Brit Nails last week and thought it was just perfect for the holiday. The technique for the distressed look comes from Chalkboard Nails so you can jump over there to read all about it. It was a bit trickier than it sounds – I messed up at first when I didn’t wipe the brush enough before painting on to my nail but I got the hang of it after a few tries.

    I sort of wish I’d used a more icky green than this but I still like it. Mint just isn’t as menacing as slime green!

    I used NYC Mint Macaroon as my base colour and created the gradient (tutorial here) using Collection 2000 Minx.

    For the distressed look I used A-England Dorian Gray and followed Chalkboard Nails’ instructions on the technique.

    Finally, I used two coats of Color Club Top Coat to smooth things over.

    Share:
    Uncategorised

    Green Nimbus Nail Art

    Betcha didn’t see this one coming! Today I tried out the Nimbus technique with a green and blue colour scheme. I really like the look of these as they’re more marbled than my previous attempt. I’m not sure whether this is because of the polishes I used or whether I’m just getting better at it!

    The colours I used here are:
    Sally Hansen Green Tea as the base colour
    Barry M Blue Grape
    Barry M Guava
    Rimmel Aqua Cool
    I used two coats of Revlon Quick Dry Top Coat over the top.

    Click here for a Nimbus nail art tutorial

    TwitterBloglovin’Tumblr

    Share: