Follow:
Browsing Tag:

China Glaze

    Nail Art, Uncategorised

    #guiltfreeze Colour Blocking + IBIZA!

    yoomoo have recently upped the stakes of their #guiltfreeze competition with the announcement of the grand prize… a trip to Ibiza for you and a friend!* The competition closes on July 13th so make sure you get your entries in as soon as you can! Don’t forget to keep up with yoomoo on Facebook to see when they post the next nail art tutorial.
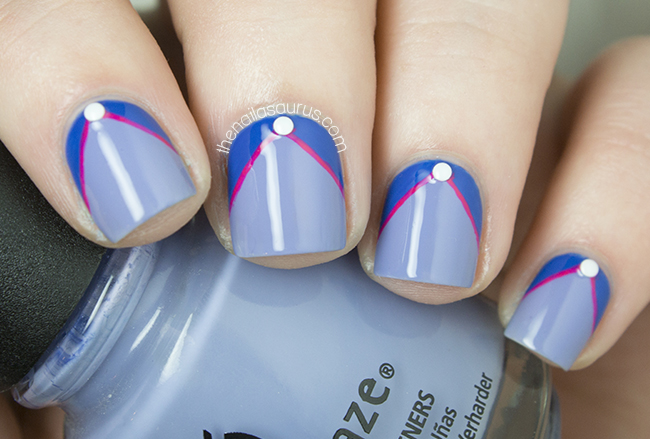
    The latest yoomoo x Nails Inc #guiltfreeze nail art tutorial is for this colour blocked nail art. I couldn’t resist trying it out for myself but I picked out a slightly different colour combination which I think works really well for summer – a good mix of soft and bright colours. I love minimal designs and colour blocking is one way to get away with minimal effort nail art that gives some stunning results. All you need is a killer combination and you’re good to go. If you’re stuck for colour ideas, Adobe Kuler is an amazing resource that I sometimes use when I need a dose of colour inspiration. The shades I used here are China Glaze Fade Into Hue, China Glaze Mimosa’s before Mani’s and the yoomoo exclusive Nails Inc Udderly Shocking Pink. You’ll find the video tutorial below.

    How to enter #guiltfreeze

    1. Pick up your money off voucher here and grab yourself a pot of yoomoo frozen yogurt
    2. Snap a picture of your yoomoo inspired nail art with your pot of yoomoo in hand
    3. Post your picture to Instagram with the hashtag #guiltfreeze to win a trip to Ibiza and exclusive Nails Inc prizes!
    *the prize for this competition is £1000 in Thomas Cook vouchers so you can plan your own dream Ibiza holiday for you and a friend!
    Share:
    Nail Art, Stamping, Uncategorised

    Short Circuit

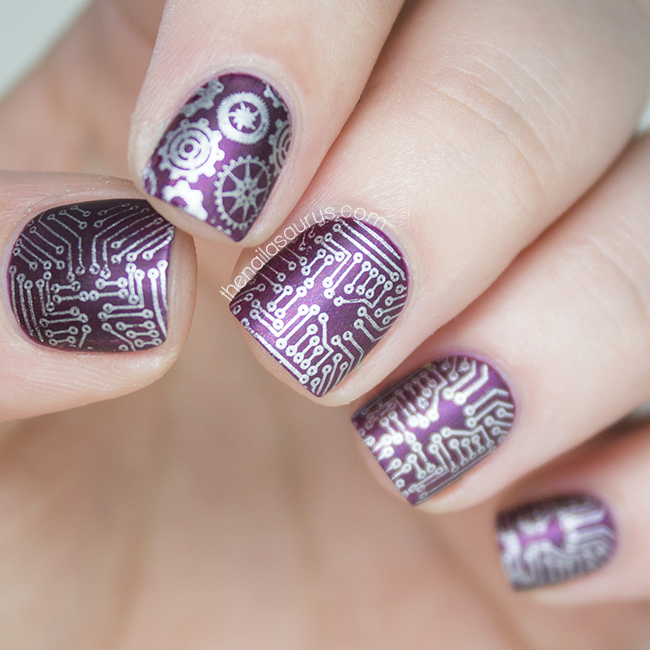
    I did these nails a little while ago when I was desperate to wear my favourite purple, China Glaze Cowgirl Up, and mattify it. To spice up the manicure a little, I added some stamping using A-England’s Excalibur Renaissance with Bundle Monster Plate BM415.

    Bit of a tangent but I feel compelled to mention that circuit is one of those words that doesn’t look like it should be a word (although I know this often comes down to opinion). A freak-of-language combination of letters that just isn’t very pleasing to the eye. I wonder how it came to be that circuit would be pronounced ser-kit? The mind boggles. Well, my mind at least!

    Share:
    Freehand, Studs, Uncategorised

    Curtain Call

    China Glaze Fade Into Hue with Nail Art
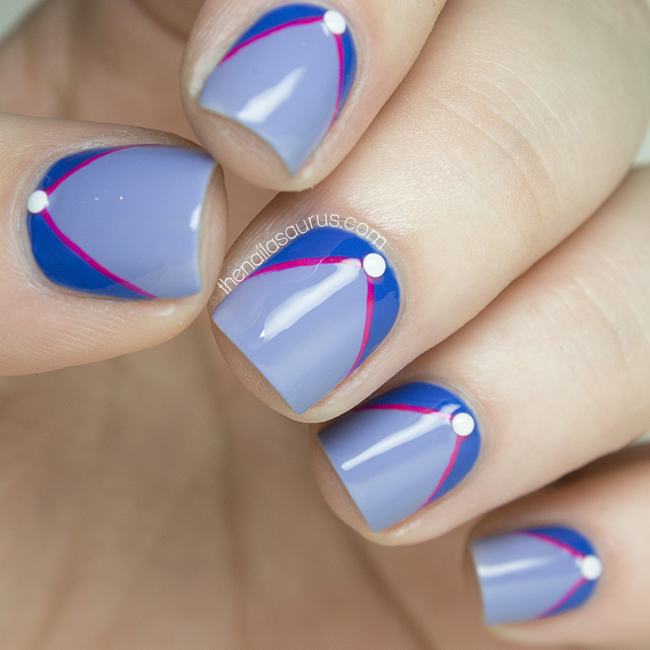
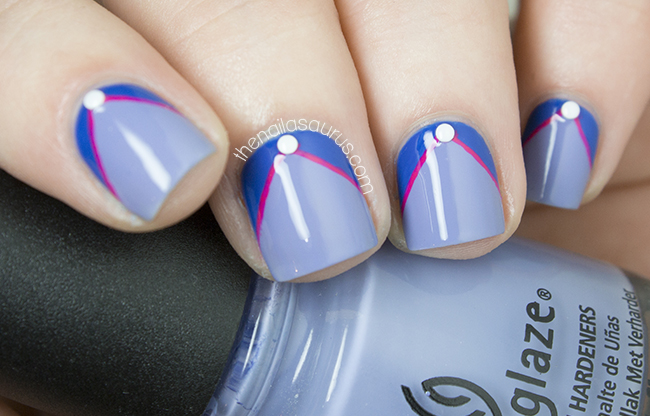
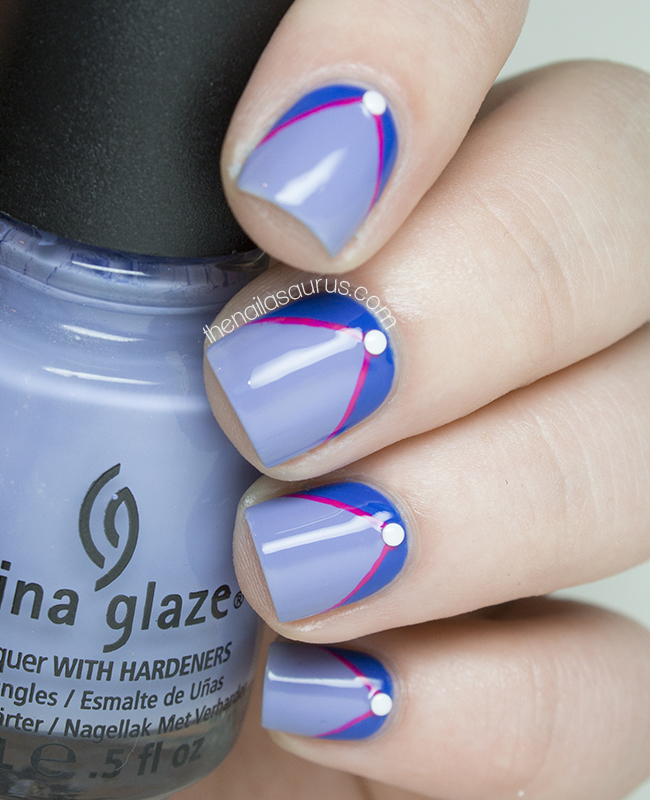
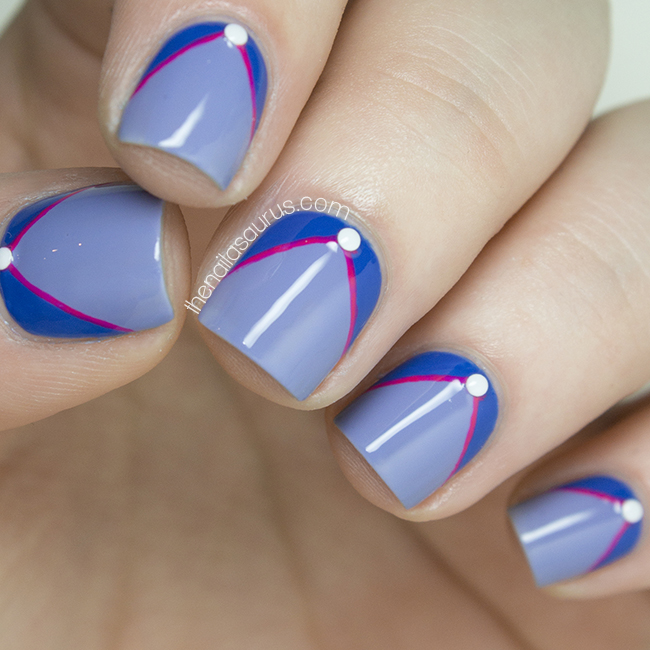
    I started this manicure with absolutely no idea where it was going. It’s one of those that just developed as I went along, all the while facing the very real risk of going completely overboard with colours, details and stick-ons but this one stayed on course and I really like the simple result. I just started with a general idea that I wanted to do something geometric and went from there. I’ve confessed before that my geometric nail art is not really A-game standard but it’s a style that I’m determined to practice and perfect this year!

    China Glaze Fade Into Hue with Nail Art
    1. I started with a base of China Glaze Fade Into Hue.
    2. Next, I used a striping brush to paint on the cobalt blue sections in Nails Inc All Saints Row.
    3. Using the same brush, I carefully went over the line with Models Own Bubblegum.
    4. I felt like it was missing something so I dug through all of my studs before deciding on some 1.5mm white studs which I attached using a drop of clear nail polish.
    5. Finally, I topped it all off with Color Club Top Coat.
    China Glaze Fade Into Hue with Nail Art
    China Glaze Fade Into Hue with Nail Art
    China Glaze Fade Into Hue with Nail Art
    Share:
    Glitter, Gradient, Uncategorised

    Kitty Cat

    This last week or so I’ve been completely obsessing over these cutie-pie cat nail decals from Born Pretty Store. I bought a bunch of designs with my fingers crossed that they would be the super bendable and sticky decals that I like and that actually work on my nails so I’m very happy that they are! When they first showed up I was a bit disappointed that they were covered with a holographic sheen as this wasn’t very clear in the photos. Once I saw past the sheen and realised how easy they are to apply, I grew to love them and I’m about to go back and order pretty much every design on the website. Oh, and they glow in the dark!
    I’m going through a bit of a dry spell with nail art at the moment which is a shame because I had a good blogging streak going. I need to snap out of the drought soon because I have The Lacquer Legion and Nailvengers both coming up this Friday. Better go now, I have some panicking to do!

    For the gradient nails I used Revlon Cloudy as my base colour and created the gradient using Rimmel Aqua Cool. There’s a gradient tutorial here.
    I topped the gradients with a coat of China Glaze Fairy Dust and finished with a coat of Glisten and Glow HK Girl.
    For the kitty cat nail, I used a base coat of Barry M White first as the decals are not completely opaque. I had to trim down the decal so that the whole cat face would fit on my tiny nails and then just placed it on and smoothed it down with a finger, tucking the edges under my cuticles with a toothpick. You can buy the decals from bornprettystore.com.

    Share:
    Glitter, Stamping, Uncategorised

    Nailvengers Assemble! New Year, New Technique

    Happy Friday everyone!! I don’t think I’ve ever been this happy to see the weekend. It’s been such a hectic week that I feel like I could sleep right through to Monday morning.
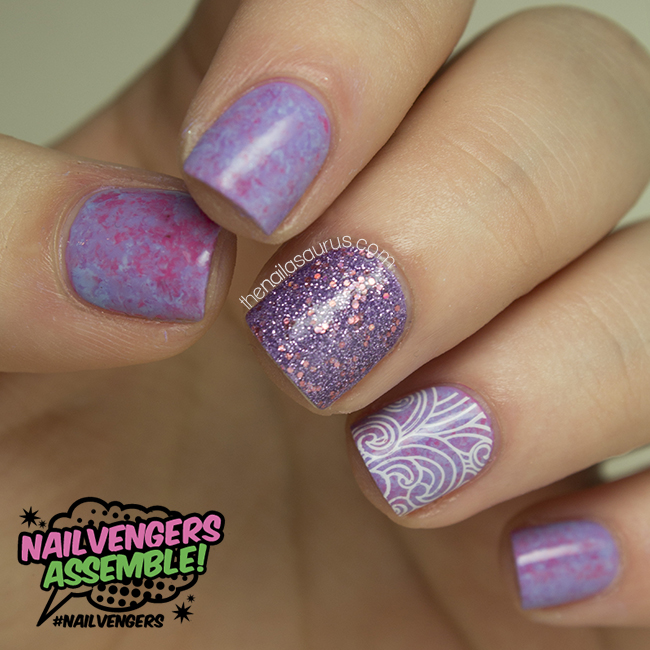
    I’m back today with another new project that I’m lucky enough to be a part of… Nailvengers Assemble! Myself and a few other British Nail Bloggers have gotten together to start a monthly challenge amongst ourselves and for January we’re going for New Year, New Technique which is fairly self-explanatory – pick something you’ve never tried before and do it!
    The ladies that will be joining me on this quest are the amazing bloggers behind One Nail to Rule Them All, Lucy’s Stash, xAmeliax and Brit Nails. We all met at the Cosmo Blog Awards back in October and have been in touch ever since. As inspiration and creativity was drying up for us towards the end of last year, we decided we should start setting ourselves a monthly prompt and work as a group to motivate each other and get those creative juices flowing again!
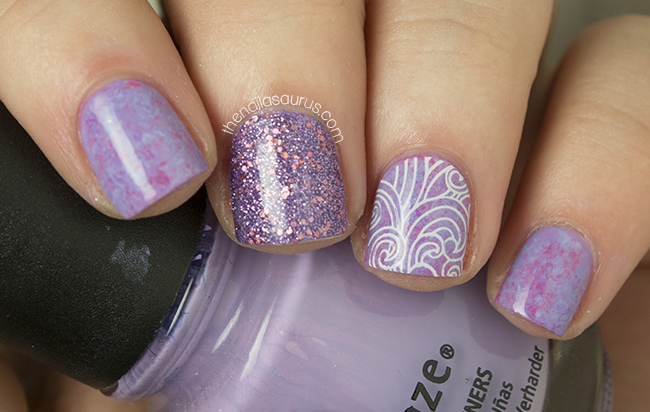
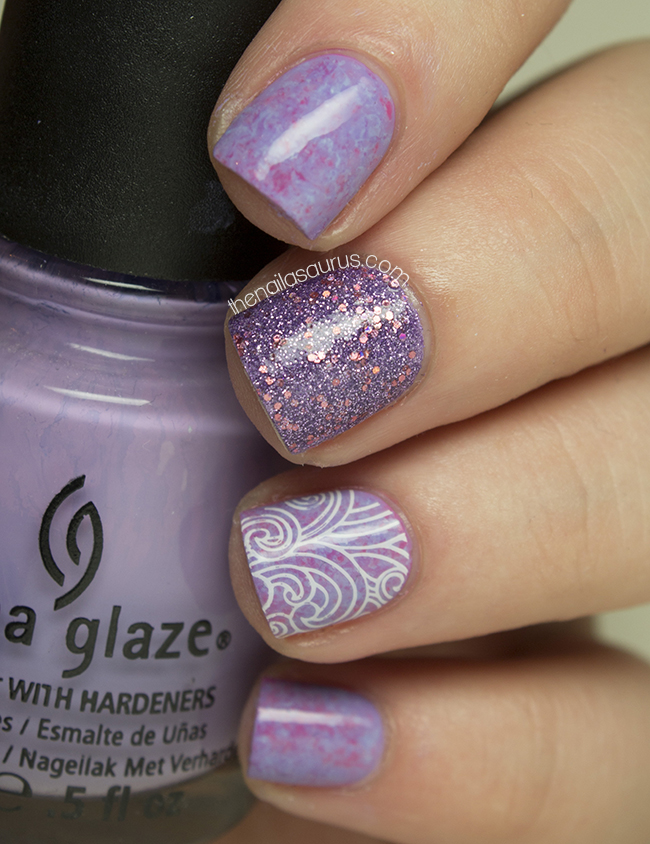
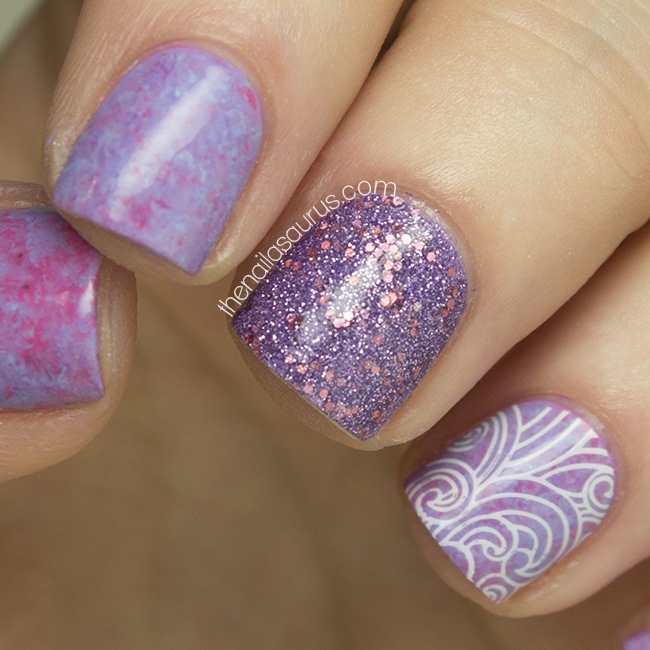
    For my New Technique, I’ve gone for Saran Wrap nails. It’s such a simple technique and you can achieve some amazing looks with it, yet I’ve never tried it before. I followed Amelia’s tutorial for this but with a pastel colour scheme and I really like the way they turned out. I couldn’t resist adding a bit of stamping over the top and a glitter accent too!

    I used China Glaze Tart-y For the Party as my base colour. Then I got down to the saran wrap-ing with Collection Think Pink and China Glaze Fade Into Hue. Check out the tutorial on xAmeliax’s YouTube Channel.
    The glitter on my middle finger is Sally Hansen Be-Jeweled and I stamped on the design from MoYou Fairytale Collection 02 plate using BK Matte White.
    It’s all topped off with two coats of Glisten and Glow HK Girl.
    Share:
    Freehand, Gradient, Uncategorised

    Miley Cyrus Bangerz Inspired Nail Art

    Say what you will about Miley Cyrus but the girl knows how to sell a few albums! I’ve always been a kind of fan of her music but I really like the new album, Bangerz. As soon as I saw the album cover with that gradient background, the thought occurred that it would make some great nail art. So when I was looking through my MoYou plates this week and found none other than Miley Cyrus’ face on one from the Rockstar collection, I knew it was meant to be!

    The Nailasaurus: Miley Cyrus Bangerz Inspired Nail Art

    For the gradient base I used W7 Baby Pink as the first colour, then created the gradient using China Glaze Fancy Pants. There’s a gradient nail tutorial here.
    I stamped on Miley’s face from MoYou London Rockstar 07 Plate using W7 Black.
    For the palm trees, I just used some black acrylic paint and freehanded them on with a nail art brush.
    It’s all topped with two coats of KBShimmer Clearly on Top.

    Miley Cyrus Bangerz Album Art

    The Nailasaurus: Miley Cyrus Bangerz Inspired Nail Art

    The Nailasaurus: Miley Cyrus Bangerz Inspired Nail Art

    The Nailasaurus: Miley Cyrus Bangerz Inspired Nail Art
    Share:
    Glitter, Gradient, Stamping, Uncategorised

    Pink and Purple Gradient with a Sprinkling of Fairy Dust

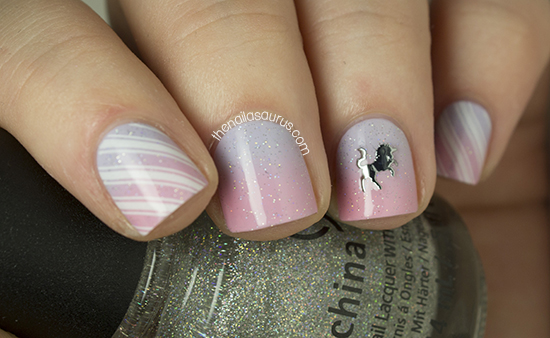
    Last week I was crazy excited about my incoming bottle of China Glaze Fairy Dust and now that I have it, I know it was completely justified! It’s everything I dreamed of! I’ve worn it a few times over a plain colour mani but I really think it looks best over nail art. I was so excited to try it over a gradient and I really don’t think I could have picked a better colour combo. The two shades I used are really awful polishes on their own – bad brushes and a watery formula – but those are always the ones that are perfect for gradients.

    Pink and Purple Gradient Nail Art with a Sprinkling of Fairy Dust

    Pink and Purple Gradient Nail Art with a Sprinkling of Fairy Dust
    I used Revlon Cloud as my base colour and created the gradient using W7 Baby Pink. Tutorial for that here!
    I topped the gradient with one coat of China Glaze Fairy Dust and added some stamping from Bundle Monster Plate BM423 using BK Matt White.
    The little unicorn is from She Sells Seashells but seems to be out of stock at the moment.
    Finally it’s all topped off with a two coats of Glisten and Glow HK Girl with a few extra coats on the unicorn to seal it in.

    Pink and Purple Gradient Nail Art with a Sprinkling of Fairy Dust

    Pink and Purple Gradient Nail Art with a Sprinkling of Fairy Dust

    Pink and Purple Gradient Nail Art with a Sprinkling of Fairy Dust

    Share: