Follow:
Browsing Tag:

Barry M

    Freehand, Uncategorised

    Whiteout

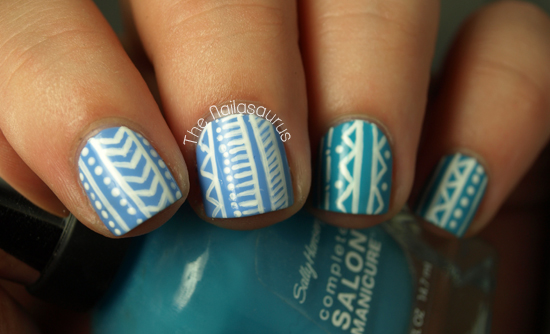
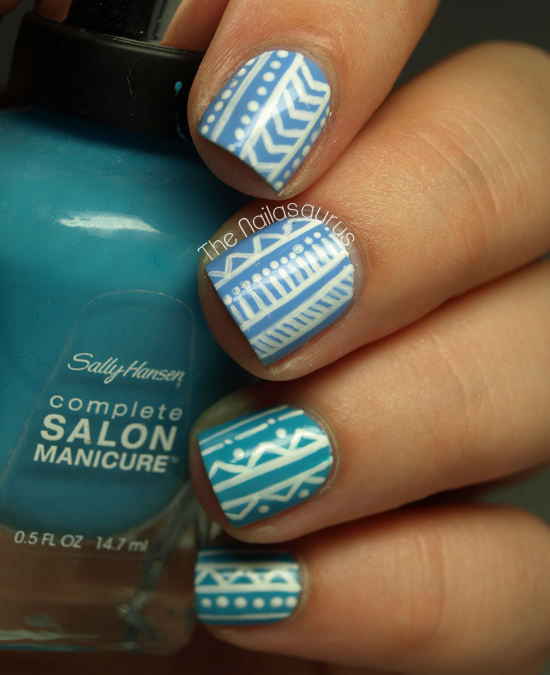
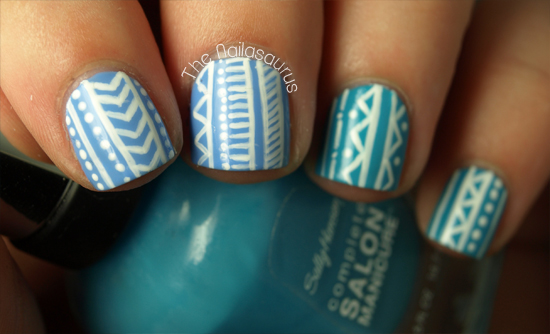
    I went a bit decal crazy this week so today I wanted to stretch my skills a bit today and venture in to a full on freehanded manicure. This is an idea I’ve been holding on to for a while – I wasn’t sure if I could do a whole tribal manicure in one colour without running out of juice but I did it! I love a bit of white on blue action!

    I used Barry M Blueberry and Sally Hansen Water Color as my base colours and freehanded on the tribal print using a nail art brush. It’s all finished with two coats of No7 Stay Perfect Top Coat.

    TwitterBloglovin’Tumblr

    Share:
    Freehand, Studs, Uncategorised

    What’s in a Name?

    Bit of a late post today because I’ve been out all day hunting giant Gromits in and around Bristol as part of Gromit Unleashed! It’s a trail of Gromits scattered across the city all decorated by different artists including Cath Kidston, Quentin Blake and Zayn Malik. Yes, that’s Zayn from One Direction! It was a super fun day out except for the crazy rain that struck just after lunch time. Boooo!
    I loved Will Paint Nails For Food’s Fractal design so much that I wanted to have a go myself. It took absolutely ages and made my eyes hurt but it was totally worth it. I’m also showing off the last of my new Born Pretty goodies today. I’m rocking a Rose Water Decal and some of their new, colourful 2mm studs.

    1. My base colours are Barry M Prickly Pear and Sally Hansen Crinolin.
    2. I applied the studs using a dot of clear polish and then a top coat over the top.
    3. The water decal is pretty self explanatory. Drop it in some water, wait 10 seconds, peel off the decal and place it on the nail.
    4. I used Barry M Plum and a small nail art brush to create the fractal design on my ring finger.
    5. It’s all topped with a coat of No7 Stay Perfect Top Coat.

    TwitterBloglovin’Tumblr

    Share:
    Freehand, Uncategorised, Waterfall

    Monochrome Waterfall

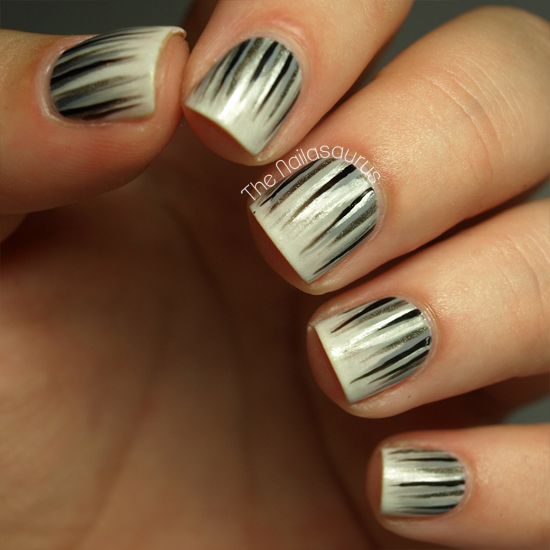
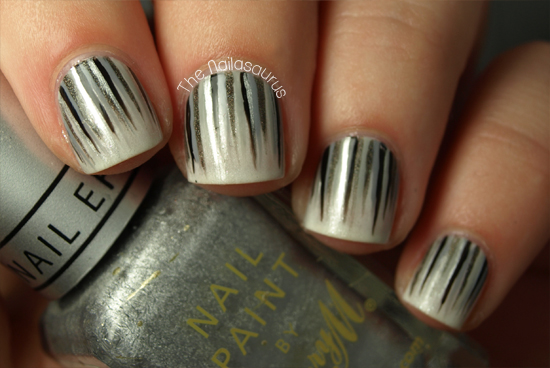
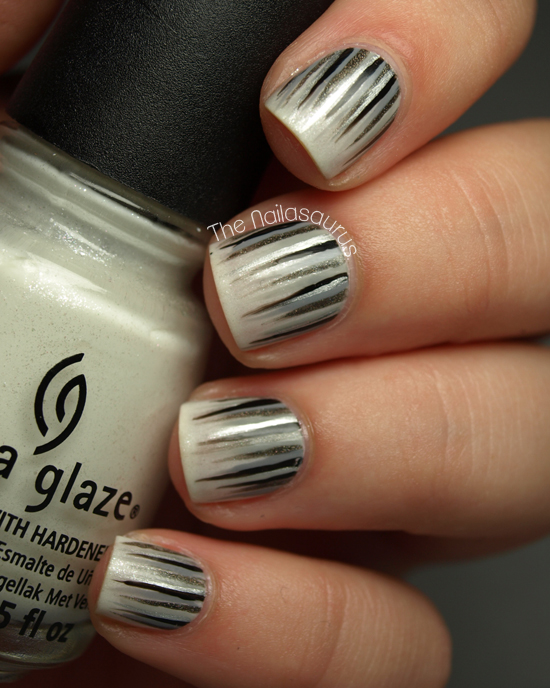
    The last thing on my list of must-do waterfall manis was a monochrome creation. This was suggested in the comments on the first ever waterfall mani I posted and I finally got round to it this week! 

    My base colour is China Glaze Dandy Lyin’ Around which is a shimmery creamish white. I thought I’d step away from the Barry M White on this one as it seems I’m using it in almost every manicure recently!
    For the details, I used Rimmel Grey Matter, Sally Hansen Dorian Grey, No7 Just Black and A-England Fated Prince. There’s a tutorial for the waterfall look here.
    I finished it all off with a coat of No7 Stay Perfect Top Coat and then one coat of Essence Better Than Gel Nails Top Sealer.

    Friendly reminder that my blog is shortlisted in the Established Beauty Blog category at this year’s Cosmo Blog Awards and you can vote for me here.
    Share:
    Uncategorised

    Nautical But Nice

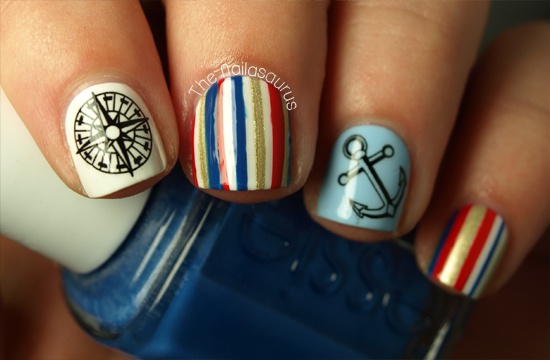
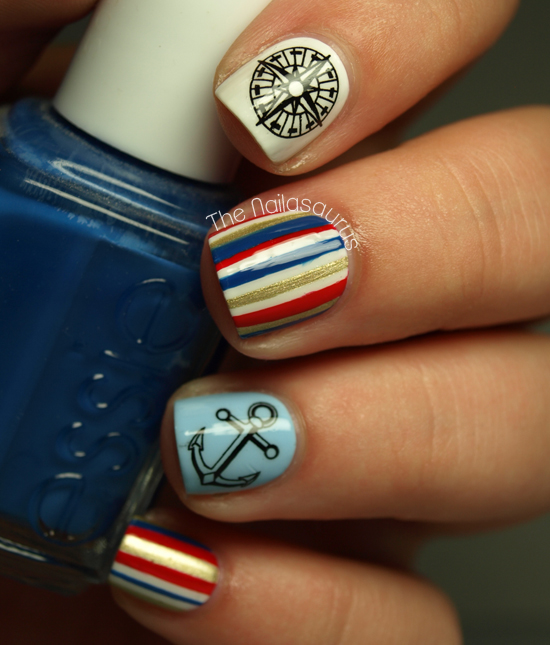
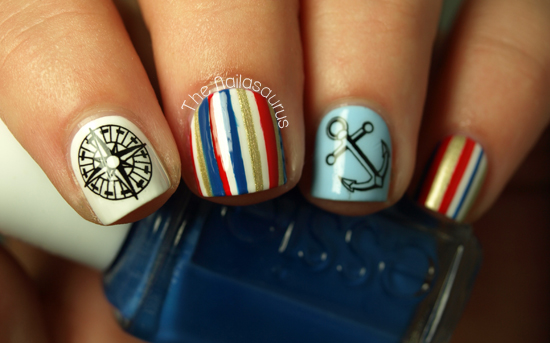
    I really love nautical nails. There’s something about wearing the scheme of red, blue, white and gold in the summer that just makes you feel very sophisticated; like you’re always ready at the drop of a (captain’s) hat to hop on to the yacht and sail around Europe!
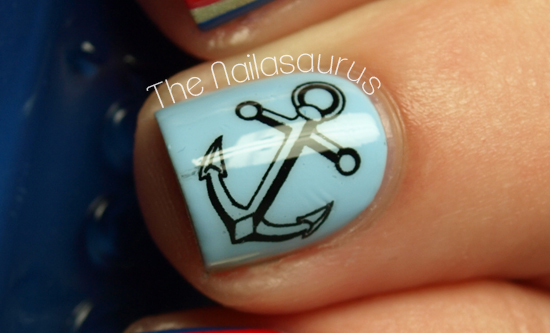
    I spotted these water decals at Born Pretty Store and fell in love immediately! The pack is $2.86 (approx £1.90) and you get a selection of 20 decals in compass and anchor designs. I’m beyond impressed with these. As you can see, they’re the kind that are really thin so as long as you apply them carefully and give them a good smooth over, you can’t even tell they’re decals. Although this does mean they’re very delicate so you have to be light handed when applying them!

    1. My base colours are Barry M White and NYC Raindrop on my index finger.
    2. I applied the nautical themed water decals using a pair of tweezers.
    3. Using striping tape, I marked off some stripes on the other fingers and used a nail art brush to fill in the gaps with Barry M Gold Foil, Essie Mezmerised and Rimmel Heart on Fire.
    4. I finished it all off with two coats of No7 Stay Perfect Top Coat.

    TwitterBloglovin’Tumblr

    Share:
    Glitter, Tutorial, Uncategorised

    piCture pOlish Blog Fest 2013

    Press Sample


    – Celebrating the Year of the Blogger –

    I’ve been absent for a bit longer than planned since my holiday but I’m back with a bang today as it’s piCture pOlish’s Blog Fest! This will be the second year that piCture pOlish have held Blog Fest which involves dozens (maybe even hundreds) of nail bloggers worldwide. We’re all posting our nail art creations today and 3 of us will be chosen to create a collaboration shade with piCture pOlish. One will be voted for by you guys on Pinterest, one by the participants and the final one will be chosen by the girls at piCture pOlish!

    If you want to vote, you can check out all the entries on the Pinterest Board and submit your favourite on the piCture pOlish website!

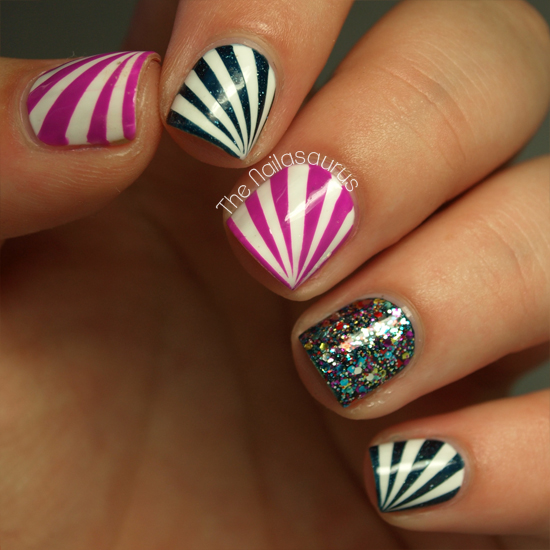
    I was sent three piCture pOlish shades to work with; Blogger, Hope and Mad Magenta. I decided to create this starburst design using scotch tape with an accent nail of two coats of Blogger over two coats of Hope. Cutting the tape is definitely the trickiest part of this nail art! At first it’s difficult to get such tiny strips but once you get the hang of it, it’s comes easy.
    Step 1: Start with a base coat of white nail polish, I used Barry M White, and apply a fast drying top coat. 

    Step 2: Cut some very thin triangles out of scotch tape. Aim for about 4-5 triangles per nail.

    Step 3: When your base colour is completely dry, use tweezers to place the triangles on to your nail working from one corner outwards. Make sure there’s a bit of overhang by the cuticles so you can easily grab it to remove.
    Step 4: Paint your second colour over the tape.
    Step 5: As soon as possible, carefully remove the strips of tape.
    Step 6: Finally, add a top coat and use a nail art brush dipped in acetone to clean up any mess around your cuticles.

    piCture pOlish ship worldwide from their website but you can also click here to find piCture pOlish stockists in your country. Make sure you check out there Everyday Deals page before you order so you’re not missing out on any offers!
    Where to find piCture pOlish
    Share:
    Glitter, Gradient, Uncategorised

    Pink Lemonade from One Nail To Rule Them All

    One Nail To Rule Them All is a blog written by a lovely young lady called Alice who is bringing you today’s post. When it comes to nail art, I really don’t think there’s anything Alice can’t do! She excels at pretty much everything but her intricate freehanded patterns are a particular favourite of mine so I was psyched when I saw what she’d created for her guest post!

    Where to find One Nail To Rule Them All
    Blog – Facebook – Twitter – Instagram – Tumblr
    ——————————————————————————————-

    Hey everyone! First off I just want to say that I’m absolutely honoured that Sammy chose me to do a guest post for her. Sammy’s blog is by far my favourite nail blog out there and I still can’t quite believe that I’m posting on it! The design I chose is one that I knew would suit Sammy’s blog, because we all know that she is the queen of gradients. In fact it was her tutorial that finally helped me to master them, and her tutorial that was used in order to create these nails. So this design is definitely well suited to her corner of the internet.


    To do these I started with a base of Models Own – Strawberry Tart, from the recent Fruit Pastel Collection, and sponged on Barry M – Passionfruit. For the tribal design I used the black Barry M nail art pen, and the glitter is Nubar Black Polka Dot. I then topped it off with a coat of Seche Vite.

    Thank you so much to Sammy for having me, and thank you all for reading. If you’d like to see more of me then you can find me on my blogTwitter, Instagram, Facebook and Tumblr. I hope to see you all around!

    Share:
    Uncategorised

    Stripes and a Feather from Brit Nails

    Allie from Brit Nails is bringing you today’s nail art. Allie has some of the most beautifully manicured nail beds I’ve ever seen and I just can’t get enough of her amazing photos. As an appreciator of minimalist design, I jump for joy when one of Allie’s nail art posts shows up on my dash. If you’re one for amazingly detailed swatches and understated nail art, make sure you go and follow Allie’s blog!

    Where to find Brit Nails
    Blog – FacebookTwitterInstagram
    ——————————————————————————————-

    Hi! I’m really happy to be doing a guest post on The Nailasaurus as it’s one of the blogs that has inspired me from the start, so it’s quite exciting! I knew I wanted to do something using shades of blue, so I just sat at my desk and this is what I came up with.

    I started with a base of Illamasqua Caress. I added a stripe of Illamasqua Cameo over half of my nail, and then a stripe of Barry M Turquoise down the middle. I used a small striping brush to paint the dividing lines on, using Barry M Cyan Blue and piCture pOlish Ocean
    I didn’t want to do a whole manicure of stripes, so I decided to bust open my packet of craft feathers! I started with a base of Barry M Cyan Blue. I added some top coat and then stuck the feather down and trimmed the edges to fit using a cuticle trimmer. There is a great tutorial for using feathers right here on The Nailasaurus! 
    Thank you Sammy for asking me to do a post! I hope everyone likes it! – Allie x
    Share: