Follow:
    Stamping, Uncategorised

    Easter Nail Art (Sort of)

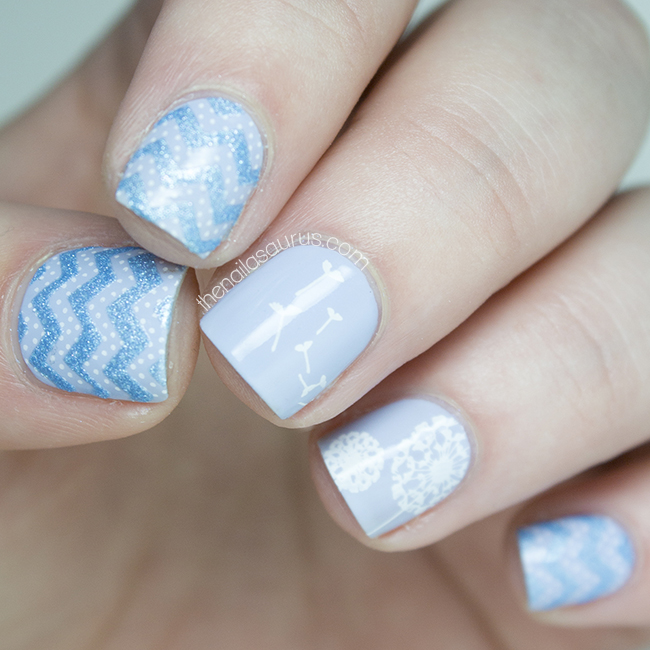
    I realised today that it’s Easter tomorrow and I haven’t done a single piece of Easter themed nail art! I haven’t really been feeling the Easter vibes this year so even when I sat down to do something Easter-y, this is what came out… absolutely nothing to do with the holiday! It’s more of a general spring mani but I think it’s the closest to Easter I’m gonna get this year!

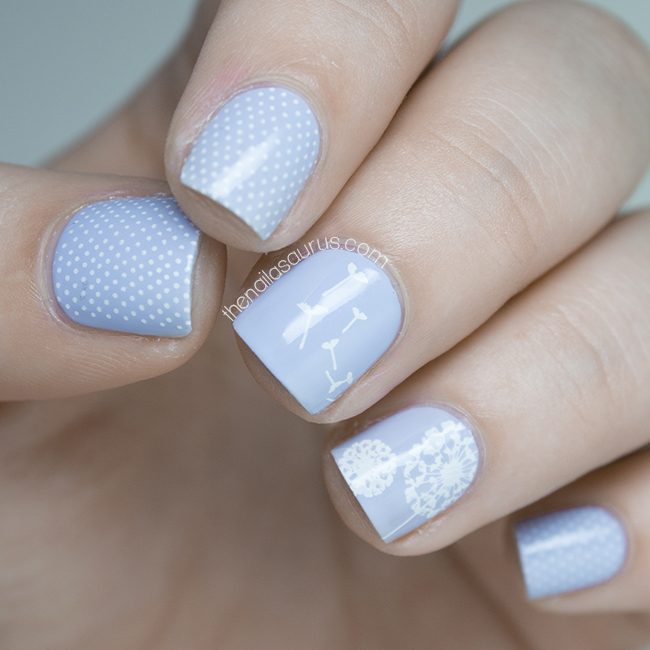
    My base colour for this nail art is Maybelline Ceramic Blue. 
    I used BK Matt White to stamp on the dandelion designs from MoYou London Plate Pro 04 and the tiny polka dots from Pro 10.
    I applied a coat of Cult Nails Wicked Fast and let everything dry.
    Finally, I added the chevron details using Nail Vinyls Mini Chevrons and Rimmel Blueberry Whizz.

    Share:
    Uncategorised

    Instagram Nail Art Accounts You Need to Follow #1: The Shorties

    Instagram Nail Art Accounts You Need to Follow #1: The Shorties


    Instagram has become one of my go-to destinations for nail art inspiration. About 95% of the accounts I follow on IG are nail accounts and I can lose myself for hours scrolling through my feed drooling over all of the amazing nail art. To honour the nail artists that work so hard to make Instagram a prettier place, every few weeks I’ll be showcasing five of my favourite Instagram accounts to follow for beautiful nail art.
    Since I sport short nails myself and have always been an advocate of nubbins, I thought there was no better place to start than with my favourite short-nailed sisters.

    @wondrouslypolished

    Instagram: @wondrouslypolished
    Blog: Wondrously Polished
    Follow Lindsey for: Perfect geometrics coupled with intricate patterns and prints

    @lethal_lacquer

    Instagram: @lethal_lacquer
    Blog: Lethal Lacquer
    Follow Sarah for: Indie swatches that will make you weak at the knees and very cute nail art

    @jauntyjuli

    Instagram: @jauntyjuli
    YouTube: JauntyJuli
    Follow Juli for: Delicate patterns and amazing YouTube tutorials

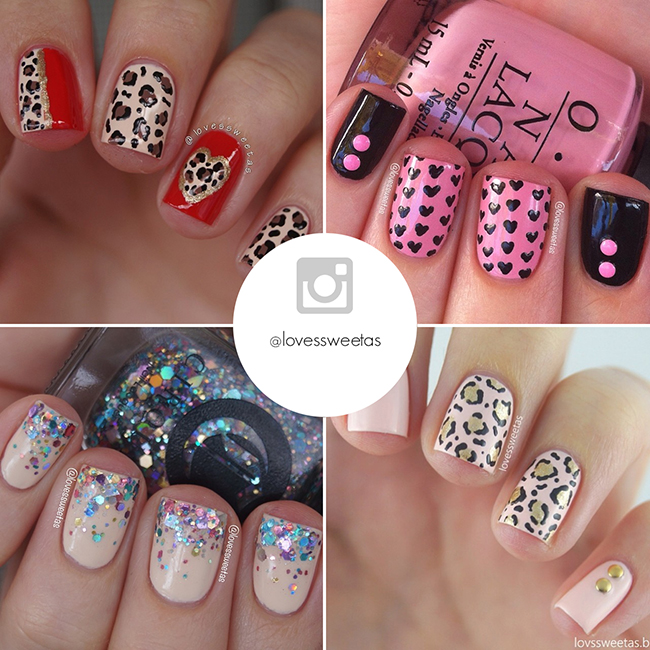
    @lovessweetas

    Instagram: @lovessweetas
    Blog: Love’s Sweet As
    Follow Astrid for: Her edgy style and magical colour combinations
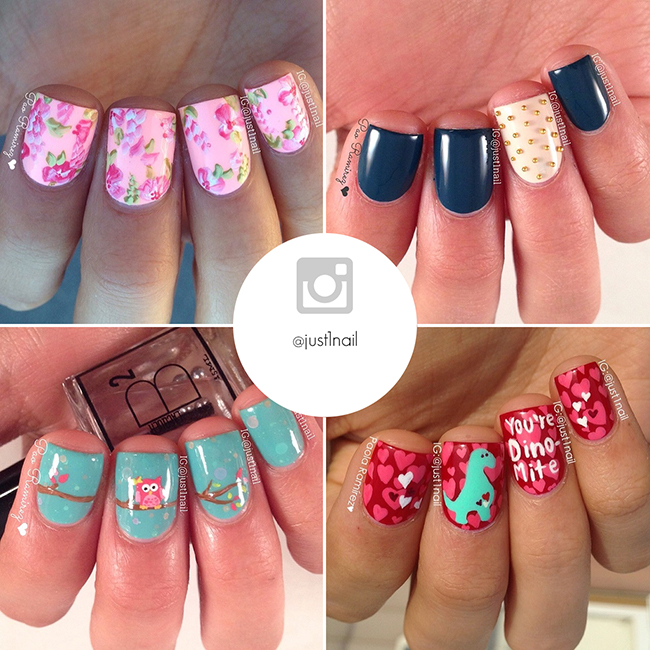
    @just1nail

    Instagram: @just1nail
    Follow her for: Some of the cutest animal nail art I’ve ever seen and her intricate freehanded florals
    View this post on Instagram

    (for easy following if you’re on a device)
    Share:
    Uncategorised

    Pink Acid Wash Nail Art Inspired by Asos

    ASOS Denim Jacket in Pink Mottled Wash – asos.com
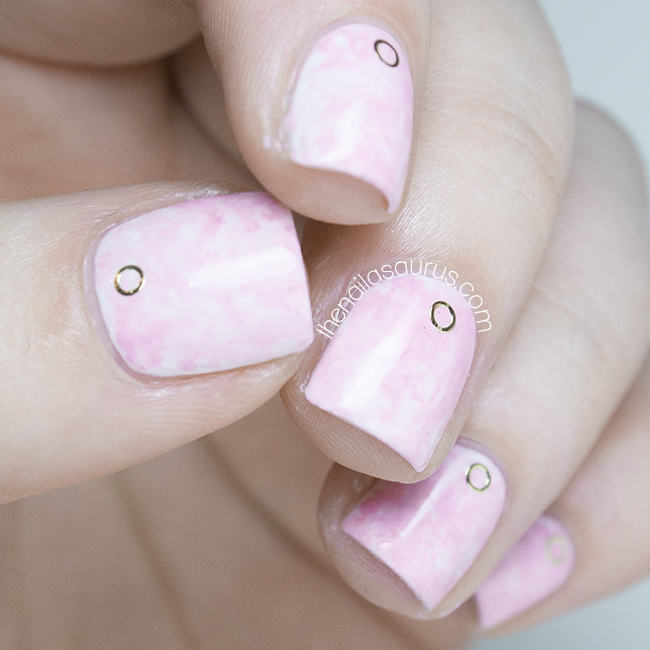
    A little while ago, I was flicking through this month’s Asos magazine and I cam across this pink mottled jacket that was the perfect inspiration for some nail art. In all my excitement I got started on the nail art right away, not realising that the jacket wasn’t even online yet! I wanted to wait for the jacket to appear on the website before posting the nail art so you could see my inspiration.
    I achieved this look using saran wrap / cling film but I do it in a weird way! I splodged out my three colours on to a sheet of plastic, dabbed on a piece of crinkled cling film and transferred it to my nails.

    For this look, I used Barry M White as my base colour.
    I used scrunched up cling film to transfer the mottled pattern which I made using Barry M White, W7 Baby Pink and Collection Think Pink.
    The circle stud details are from Born Pretty Store (style #123).
    It’s all finished with a top coat of Cult Nails Wicked Fast.
    Share:
    Gradient, Tutorial, Uncategorised, Video

    Gradient Nail Art Tutorial Video and FAQ

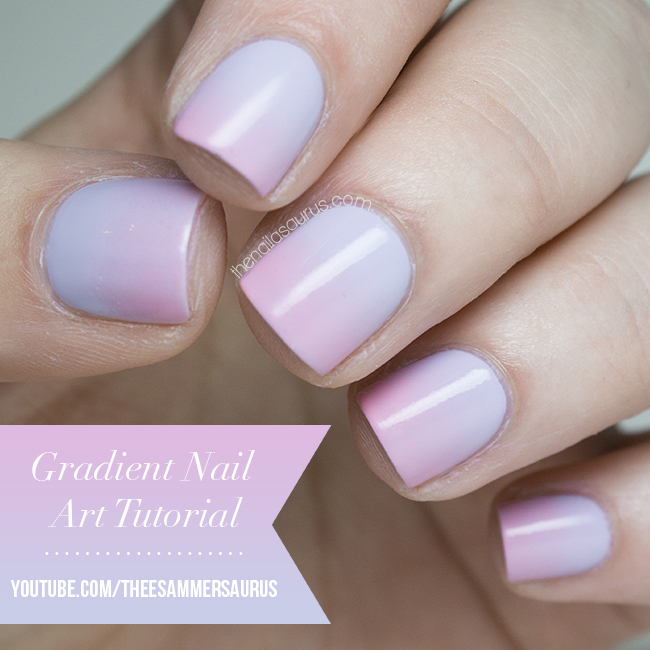
    Gradient Nail Art Video Tutorial

    When I ventured back in to making videos recently, it seemed inevitable that I’d be making a gradient nail art video since my picture version was quite a success and many people have asked to see me do it in a video. This mani does take a while but most of that time is spent waiting for polish to dry. Once you get the hang of it, sponging on the gradient is easy!
    While we’re here, I also thought it would be a great opportunity to answer some of the questions I get asked most frequently about this technique. Over time I’ve learnt a lot more about the process and how to overcome a few of the difficulties that you might come across on your first couple of tries.
    What polishes work best for gradients?
    You can’t go wrong with creme polishes that are quite runny. They don’t have to be very opaque either, streaky polishes often work best for gradients.
    How do you avoid bits coming off the sponge and sticking to your nail?
    I don’t think there’s any way to avoid this. If you see little flecks of sponge breaking off and sticking to your nail, just pick up a new sponge and continue where you left off.
    You can use tweezers to pick these flecks out of your mani but if they’re only small, usually your top coat will hide them!
    Should you wet the sponge first?
    Personally I never use water but I know others that use a damp sponge with amazing results. Try both ways and see what works for you!
    How do you clean the sponge after?
    I don’t bother trying to clean the sponges. I just throw them away and use a fresh one the next time.
    Any other tips?
    It’s super important to wait for your polish to dry in between layers. If you try to sponge over wet polish, you’ll just start picking up the polish that’s already there and it’ll be a gloopy mess. Watch a movie while you’re doing it to avoid boredom!

    If you try this mani yourself, don’t forget to use #looknailasaurus on Instagram so I can see your results!

    Share:
    Glitter, Uncategorised

    Negative Triangles with NYC Lavender Blossom

    NYC Lavender Blossom
    For the longest time, my nails were quite seriously stained (yellow) from years of abuse at the hands of nail polish, so I made an effort steer clear of negative space nails because the stains would show through and throw the whole thing off. Whenever I did attempt some negative space, I’d use a jelly nude as a base to give the illusion of normal coloured nails!
    Recently I’ve had much less time to paint my nails so they’ve been completely naked a lot of the time except for a coat or two of my trusty OPI Nail Envy. This has given them a chance to recover and with just a little light buffing, my nails are a healthy hue again so I’m venturing in to negative space!

    1. To create the negative space accents, I attached the triangles first by sticking them in to my base coat. The triangles are from She Sells Seashells but unfortunately are no longer in stock. You could use triangle studs or any other kind of embellishment you fancy. 
    2. Once that was dry, I lined up a piece of striping tape against two sides of the triangle to make sure I’d be painting exactly parallel to the triangles!
    3. I painted from the striping tape upwards using two coats of NYC Lavender Blossom (available from May 7th) and immediately removed the tape.
    4. For the glitter nails, I used two coats of Jindie Nails Love Me over one coat of the NYC Lavender Blossom.
    5. It’s all topped off with two coats of Cult Nails Wicked Fast.
    Share:
    Glitter, Tutorial, Uncategorised

    Faviana Prom Dress Nail Art Tutorial

    For today’s post I’ve teamed up with Faviana, to bring you a nail art tutorial inspired by one of their designer prom dresses. The website is chock full with a good mix of short and flirty, insanely glamorous and classical formal dresses and the one that inspired this nail art is somewhere in between all of them. I picked Faviana Style 7364 which is cheeky with a hint of glamour and completely perfect for any formal occasion.
    With prom season coming up, I know a lot of you will be matching your nail art to your prom dress and you can keep it simple by painting your nails a perfectly complimentary or contrasting colour or go all out and take elements from the dress like I have!

    Tutorial Equipment

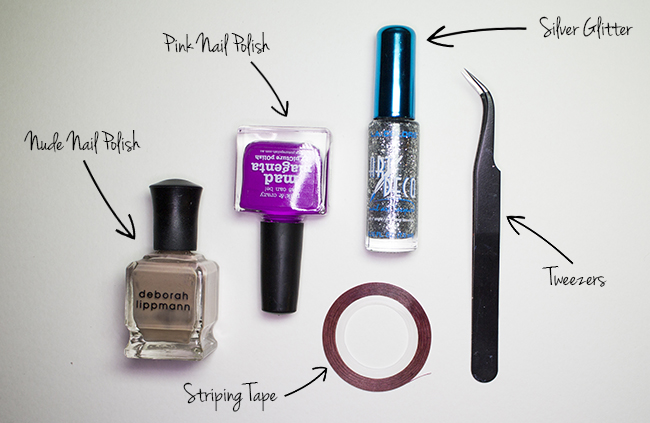
    Before you start, make sure you have everything you need. I’m using Deborah Lippmann Fashion and piCture pOlish Mad Magenta as my main colours along with a LA Colors silver striper. You’ll also need some striping tape – in a pinch, you can cut up scotch tape in to very thin strips. The tweezers are an optional extra but I’d suggest keeping a pair on standby if you can!

    1. Start with a nail polish that matches your skin tone and let it dry completely. You can add a fast drying top coat like Seche Vite to speed up the process.
    Tip: You can completely skip the first step and do this on naked nails for a negative space manicure.
    2. Place striping tape on the nails where you want the base colour to show through. I’ve marked off a triangle at the base of my nail and then a few strips at the sides. I used a pair of tweezers to place the tape on my nail.
    3. Using your pink polish, paint over the tape taking care to avoid the triangle near the base of your nail. You can cover the triangle with a piece of scotch tape if you want to be sure you won’t paint over it.
    4. While the polish is still wet, remove the striping tape. Again, I always use a pair of tweezers to do this because it’s a really fiddly job.
    5. This is what your nails should look like once your tape’s removed.
    6. Take your glitter polish and add a healthy amount over the sections at each side.
    7. Finally, add your favourite top coat and sweep around the edges with a clean-up brush dipped in acetone to get rid of any mishaps.
    faviana-nail-art-tutorial
    faviana-nail-art-tutorial-01
    Make sure you stop by faviana.com for more prom nail art inspiration and any last minute dress shopping!
    Share: