Follow:
Browsing Category:

Stamping

    Stamping, Uncategorised

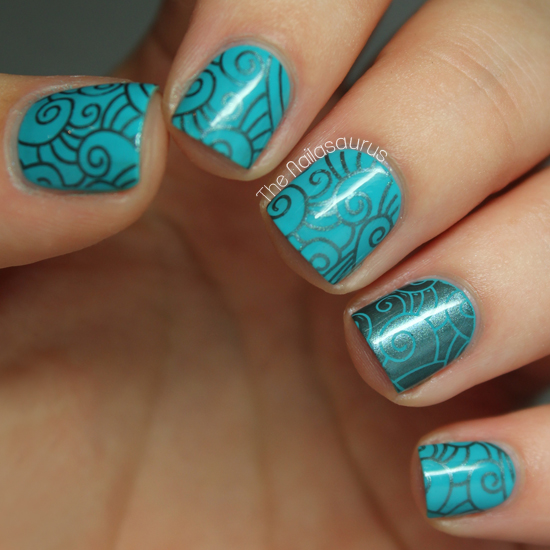
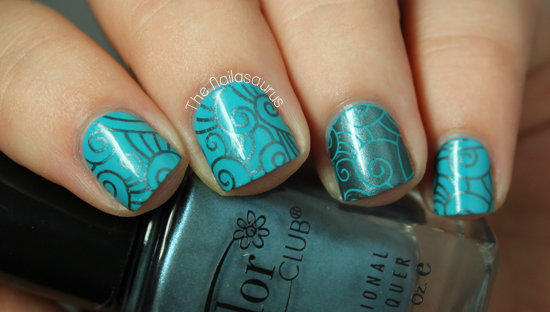
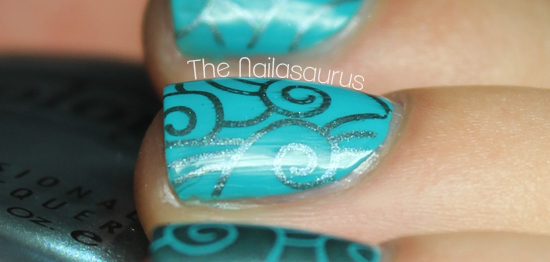
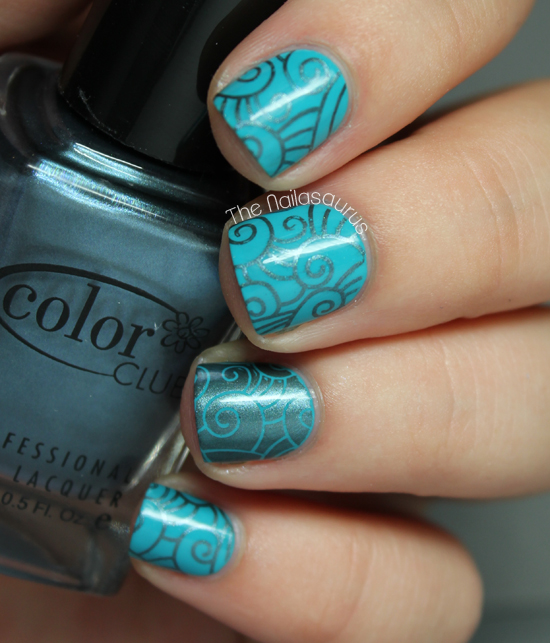
    Swirly Stamping

    Well today has been eventful. My Sundays always seem, through a series of unexpected events, to become the most news-worthy day of the week! First I got in a big panic over the state of my blog when I thought myself a clever-clogs and decided to mess with my domain settings whilst trying to figure out subdomains. I couldn’t see my blog at all for close to an hour but luckily it didn’t seem to affect any of you guys. Next thing, I find out that I was on the Tumblr Radar which was just incredible! Did you have a good weekend?

    My base colour for this mani is Barry M Guava and I used Nailz Craze Plate NC02 to stamp on the swirly patterns. The polish I used to stamp is a dusty chrome blue from Color Club but there’s no name on the bottle. This is actually one of my first ever Color Club polishes. They’re not easy to get hold of in the UK. I picked up a (generally disappointing) set of 6 shades plus a topcoat from TK Maxx for £7.99 recently. Despite the disappointment, which was mostly due to my bad choices, I think I’ll be back there to pick up a set of cremes very soon.

    TwitterBloglovin’Tumblr

    Share:
    Stamping, Uncategorised

    White (and Blue) Russian

    So I mentioned a while ago that I’d ordered a few Nailz Craze plates which were Tattoo, Magical and Russian and this is the first manicure I’m posted using them! This pretty pattern is from NC03, the Russian plate. I really only bought that one for the amazing argyle pattern which I’m saving for Christmas (which is less than 5 months away by the way, how fast has this year gone?!) but I think I’ll get a lot of use out of this pattern too.
    I’ve tried Natalie’s tutorial for creating coloured decals out of stamping designs a few times but I always fail when it comes time to apply it to the nail. I’m determined to master it because I love what she did with the tattoo plate!

    I used Essie Bikini So Teeny as my base colour and then stamped on the design from Nailz Craze NC03 using Born Pretty Matte White. It’s all topped with a coat of No7 Stay Perfect Top Coat.

    TwitterBloglovin’Tumblr

    Share:
    Nail Art, Stamping, Uncategorised

    Welcome to The Circus from Nailz Craze

    A couple of months back, I came across Nailz Craze on Etsy when I was searching for some new stamping plates to add to my collection. A few weeks later, I came across a blog by the same name and got to wondering if there was a connection between the two. There was!! I found out that Natalie, the creator of the Nailz Craze plates, is also an insanely talented nail artist and blogger!
    I recently ordered a few of Natalie’s nail plates for myself and I can’t wait to try them out. When I asked her to guest post for me I was really hoping she’d create something with her own plates and I wasn’t disappointed!

    Where to find Nailz Craze
    Blog – Facebook – Instagram – Etsy Store
    ——————————————————————————————-

    Hello there, dear Nailasaurus fans!
    I have to start this post by telling you how excited and honored I am to be here and share with you my design. Samantha’s blog was one of the first I’ve followed and was inspired by, so it’s really a great honor to be featured at her awesome blog. Thank you Samantha!
    Today I have a festive and special design to share with you, It’s the first design I’ve made with one of the new Nailz Craze plates I’ve created and released at my store this month. To those of you who are not familiar with Nailz Craze yet, it’s a small indie stamping plate brand I own, where you can find themed plates with my original illustrations and designs.

    This manicure was created with the Nailz Craze NC05 Circus plate, and even though you might think it’s a difficult design to create at first look, you will be surprised it’s actually quite easy. Here’s how I created this design:
    I started with two coats of China Glaze Ruby Pumps, my all-time favorite red glitter. It’s a fantastic polish with a great formula, I really love it and if you don’t have it in your collection yet, you totally should get it!
    The first design I applied over the red base was the radial stripes, I used Konad’s White stamping polish for it. After applying this design to my nails, I waited a bit and for it to dry.
    On top of the radial stripes I decided to apply different circus elements such as a circus manager, a seal, an elephant, an acrobat and a star. For the elephant, seal and the acrobat I just stamped the designs with Konad’s Black polish straight on the nail. With the circus manager and the star I decided to fill the stamped design (face and inner star) with a different color to make them stand out better on top of the striped background.  You can see how it’s done at this stamping decal tutorial at my blog, but basically you transfer the image to the stamper as usual, and then before applying it to the nail, you fill the parts you like with another polish and let it dry, then apply it to a tacky nail polish on your nail. And that’s about it.

    I waited for the stamped designs to dry on my nails for a while, and then applied a generous coat of Poshe Top Coat, pulling it lightly on the nail to prevent smearing (which can be a quite stressful part, since smearing the designs after working so hard on it can be a nightmare).
    The finished result is before you, I think it turned out quite festive and sparkly, and I was pretty pleased with the result. I was very happy to make it for you and I hope you will like this design as well. 
    Thank you for reading and have a lovely weekend!
    Xoxo
    Natalie

    Share:
    Stamping, Studs, Uncategorised

    Snippet: Blue Grey

    My base colours are Sally Hansen Gray by Gray, Sally Hansen Thinking of Blue and Sally Hansen Ion. Gray by Gray and Ion are currently available for £1.50 from Fragrance Direct which is quickly becoming my favourite place to shop for polish online! 
    All three of the stamped designs are from Bundle Monster Plate BM315 and I used Barry M Gold Foil
    I attached the studs by painting on a top coat and applying them while it was still wet. The studs on my pointer can be found here and the square studs here, both from Born Pretty Store. 
    It’s all finished off with a coat of No7 Stay Perfect Top Coat except for on the nails with studs as top coat tends to make the colour run.

    TwitterBloglovin’Tumblr

    Share:
    Glitter, Stamping, Uncategorised

    Banish the Blues: Mint Chevrons

    I’m on such a chevron kick recently and although using tape and craft scissors is great because I get to choose exactly where each zig zag goes, the chevron plate from Bundle Monster’s 25pc set gives super crisp results when I don’t have the time or spare energy to use the tape method!

    I used a base colour of Essie Navigate Her and stamped on the chevron design from Bundle Monster Plate BM201 using Born Pretty’s Matt White Polish (SUCH a good stamping polish!). I used 1 coat of Sonnetarium Snowfall on my ring finger and topped it all off with a coat of No7 Stay Perfect Top Coat.

    TwitterBloglovin’Tumblr

    Share:
    Glitter, Stamping, Uncategorised

    Raindrop Blue Me Away

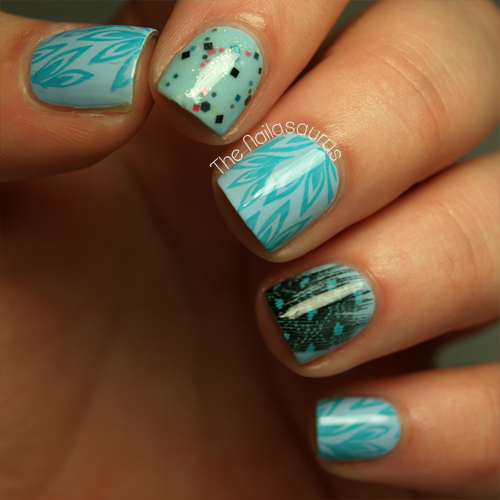
    On the weekend I had a good streak of nail shopping luck. As you may have seen, I already have some neutral coloured feathers but I’ve been on the lookout for some coloured ones for a very, very long time. I checked in every single craft shop I passed but to no avail. So I was amazed to find a packet of all shapes and colours in Ryman the stationers! 
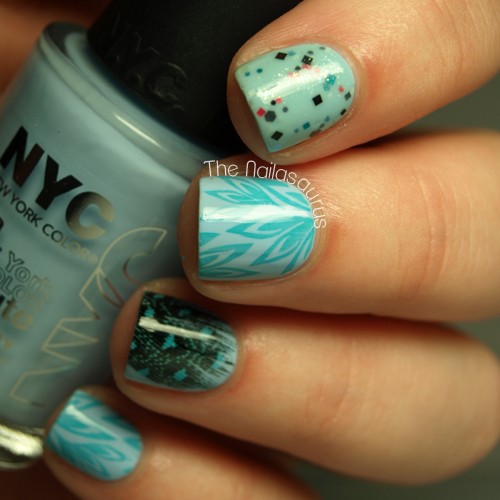
    I also spotted the new NYC Foil polishes so I picked up a few from the stand. I knew the foils would be ideal for stamping so I got the Enchanting Fire and Power of Elements foils plus this amazing minted pastel blue called Raindrop. I was immediately drawn to it and I dropped it in to my basket without hesitating! I know a lot of people have complaints about the lasting power of NYC polishes but it’s one of my favourite ranges on the high street. Whenever I see new colours on the stand my eyes nearly pop right out of my skull and for the bargain price, I don’t think there’s much wiggle room for complaints.

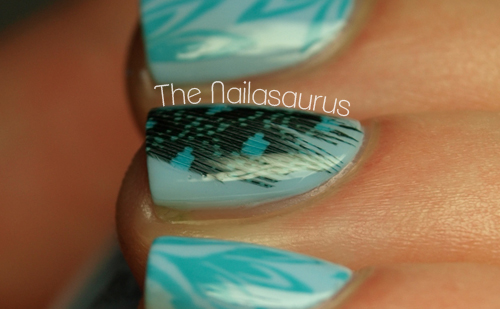
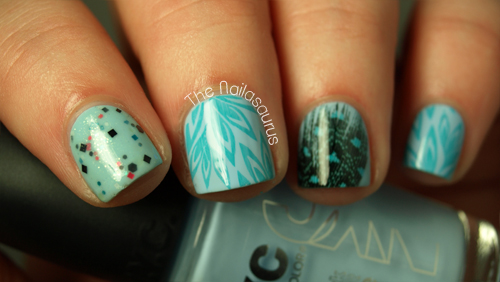
    I used two coats of NYC Raindrop as my base colour on every nail and added the blue feather to my ring finger following this tutorial. I stamped on the feathers from Bundle Monster Plate BM210 using Barry M Guava. The glitter on my first finger is two coats of Black Cat Lacquer’s minty shimmer We Can Pickle That (over NYC Raindrop).
    I finished it all off with a coat of Essence Better Than Gel Nails.

    TwitterBloglovin’Tumblr

    Share:
    Glitter, Stamping, Uncategorised

    Roundquins?!

    It’s been a while since I wore any glequins and it’s been playing on my mind so I decided to dig out some of the little things and get busy. When I dove in to my supplies to pick out some colours, I spotted these round versions of my hexagonal favourite which I’ve never tried out. I couldn’t quite believe it myself.
    These, um… round-quins are from Born Pretty Store (betcha didn’t see that one coming huh?) and they come in a pack of 12 colours. 9 out of the 12 are iridescent and I must say I’m not a fan of those, but there are holographic gold, silver and black ones which are just beautiful.

    The main purple colour on show here is China Glaze Tart-y for the Party, the glitter on my pointer is La Femme Purple Glitter and the round glequins are from Born Pretty Store. On my thumb and pinky, I stamped a design from Winstonia plate W111 using A-England Bridal Veil. My middle finger is a base of Bridal Veil and I used the striping tape technique with a top colour of CG Tart-y for the Party. It’s all topped off with two coats of Sally Hansen Dries Instantly.

    TwitterBloglovin’Tumblr

    Share: