Follow:
Browsing Category:

Nail Art

    Nail Art, Stamping, Uncategorised

    Fair Isle Nail Art, New eBay Collection and a Giveaway


    Fair Isle Nail Art


    eBay Autumn Collection Inspiration

    My Inspiration

    Winter is coming so it’s officially acceptable to crack out the chunky knit jumpers and your sparkliest nail polish. While I’m not a big fan of the chill or inevitable British rain, I’ve always been a night owl so I do really love when the dark nights start closing in. I’m more than happy to spend the evenings snuggled up under my favourite fluffy blanket with a hot chocolate and my Kobo or couple episodes of Grey’s Anatomy.

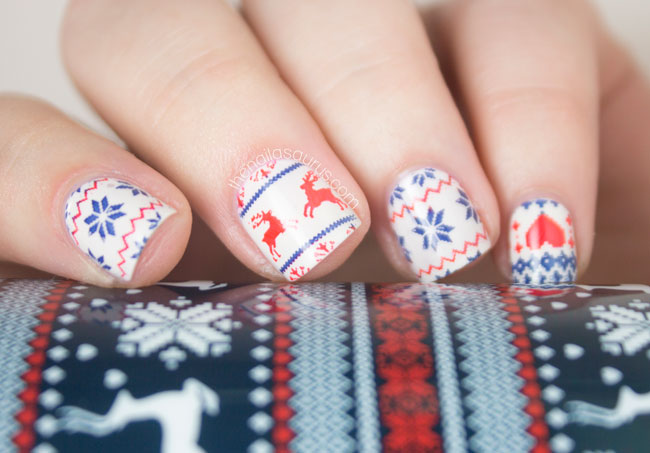
    I’ve been pretty much inseparable from my thermal cup recently (although less because I need the thermal properties, more because I’m a huge klutz and the sippy cup is essential!) and I’ve teamed up with eBay to create a collection around this image. If you follow me elsewhere, you may have already spotted the inspiration pic. It looks so cozy and warm so I thought it would be perfect for some autumn inspiration.

    My new collection features some of my Autumn Essentials when it comes to nail art and I’m still adding to it. Let me know if you think I’ve missed anything!

    The Nail Art

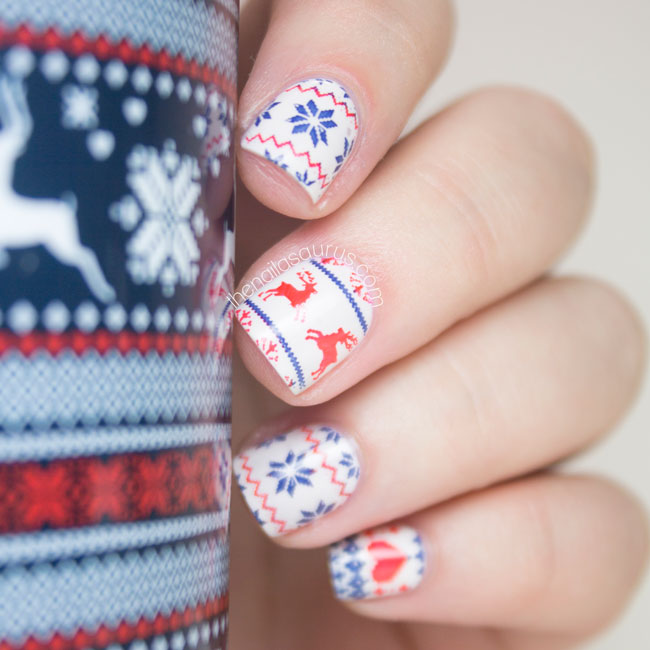
    For this nail art, I used Barry M Coconut as my base colour. I stamped on the design using the most perfect winter stamping plate, MoYou Festive 06, with Sally Hansen So-nata Problem and Rimmel Rock N Roll. In order to get the two colours on one stamp, I had to carefully paint the design on the plate first and scrape very carefully to leave the colours where I wanted them. It’s all topped with one coat of Glisten & Glow HK Girl.

    Giveaway

    For the chance to win a £20 eBay Gift Voucher all you have to do is hop over to my ‘Autumn Essentials‘ collection and give it a follow. It really is as simple as it sounds:

    • Click here to go to the Collection
    • If you like what you see, use the ‘Follow’ button in the top right of the page (just make sure you’re logged in to eBay)
    • eBay will contact the winner at the end of the competition (more details to follow)

    Christmas Nail Art

    Christmas Jumper Nail Art

    eBay Collections Autumn Nail Art


    This content was created in partnership with eBay UK
    Share:
    Freehand, Nail Art, Uncategorised

    Popping Tribal Nail Art

    Tribal Nail Art // Freehand

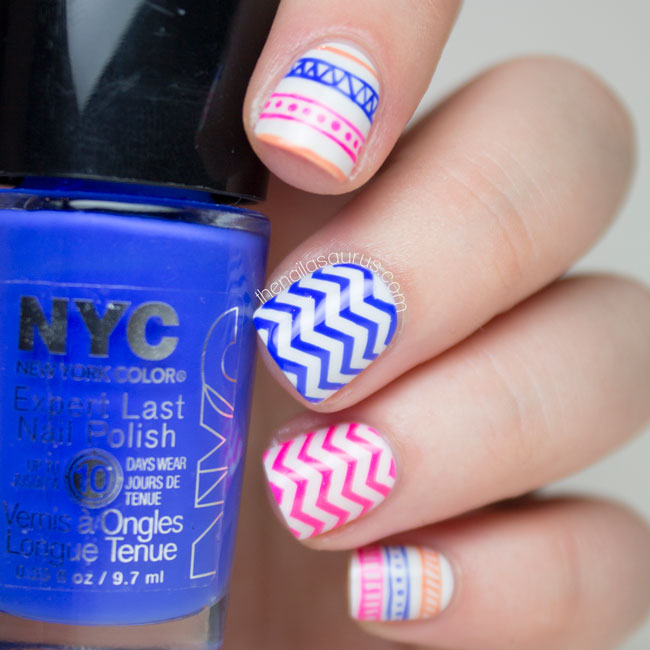
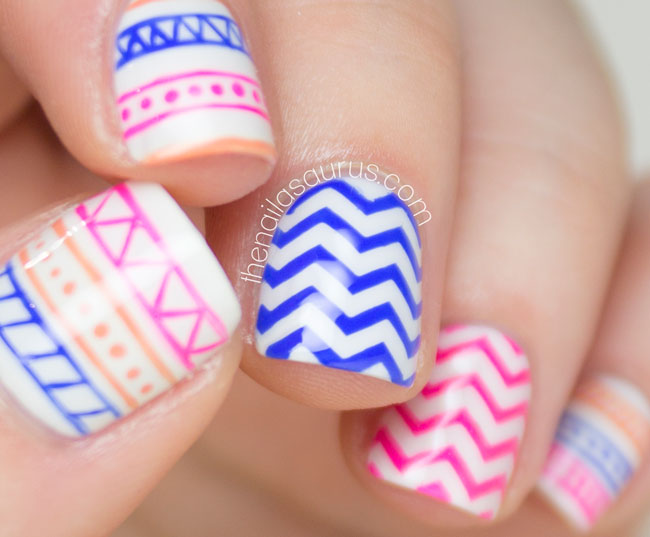
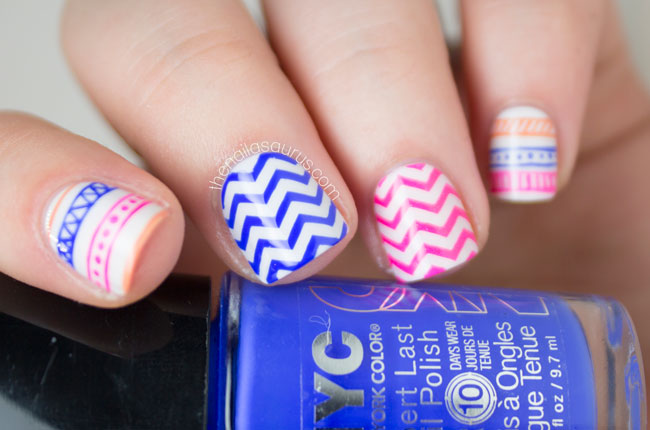
    When I saw that Hannah from The Dalai Lama’s Nails listed Winstonia Store’s brushes in her ‘Can’t Live Without’ products in this month’s Nail It! magazine, I knew I had to get my hands on some. I went for the 5-piece set (recommended by Hannah) and also the 1.4cm and 1.65cm stripers. All the brushes are really amazing but you can’t beat a strong, skinny striper for some tribal nail art.

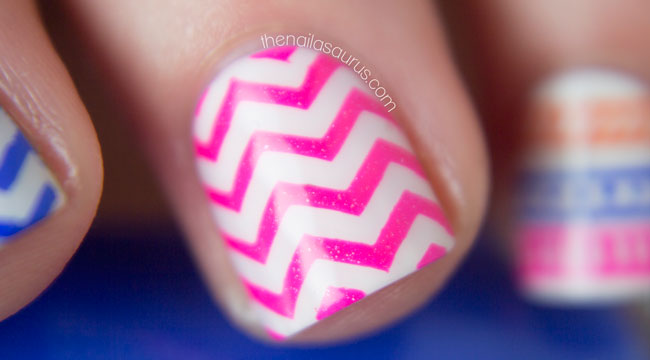
    I also have to give a shout out to these Skinny Chevron Guides by What’s Up Nails. I threw them in to my Winstonia basket along with the brushes, but they also have their own site where you can buy too (and you can get 10% off all vinyl products with the What’s Up Nails code: NAILASAURUS10). All the chevron decals/guides/stickers/vinyls I’ve used in the past have been bigger and I can never fit all that many on my nails but the skinny size works so well on my tiny little nail beds. Can’t wait to try more things with these!

    Tomorrow, I’m off to Nail Harmony HQ to spend the day mastering Gelish. It’s very exciting since I’ve never (EVER!) used gel polish before but I really want to learn more. Gels are such a huge thing now, even some of my friends who normally show little interest in nails have been asking me for advice about which techniques and products are best. They get a bit of a surprise when I sit there quietly and tell them I have no idea! Normally you can’t shut me up when someone asks anything vaguely nail related! It should be a fun day and I can’t wait to meet some new bloggers. As always, you can follow me on Twitter for updates on the day (and maybe a selfie or two!).

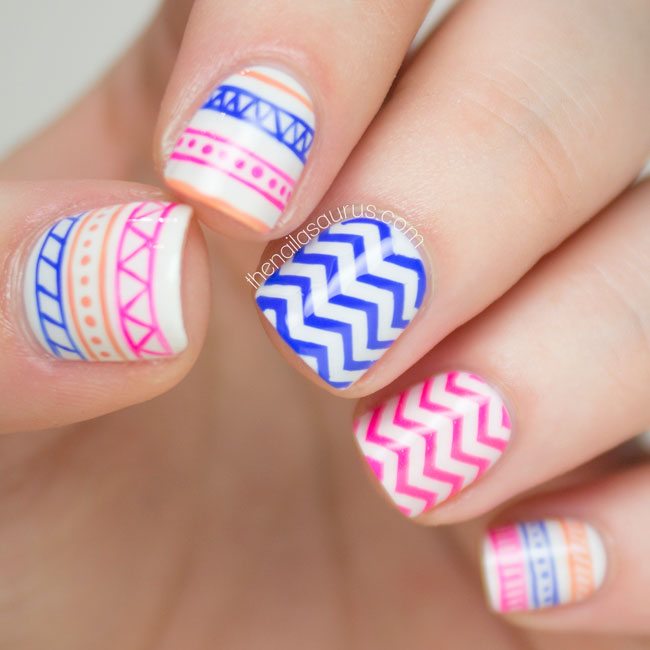
    For this nail art, I used a base of Barry M Coconut and topped it with a thin coat of Glisten & Glow HK Girl.

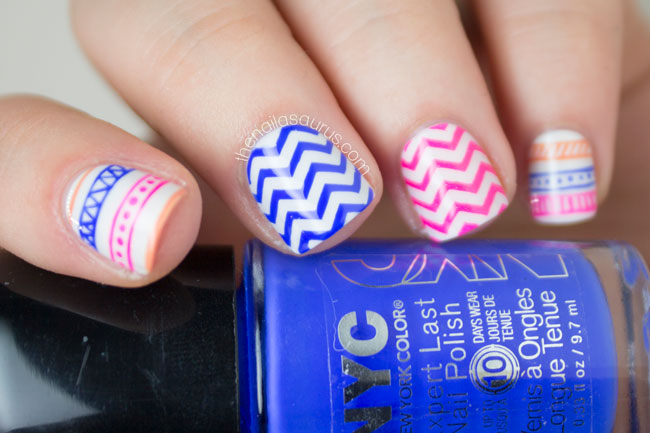
    For the chevron nails, I used What’s Up Nails Skinny Zig Zag Guides with piCture pOlish Sizzle and NYC Hudson Breeze.

    I freehanded all the tribal details using the 1.4cm striper from Winstonia. The colours are NYC Hudson Breeze, piCture pOlish Sizzle and Sally Hansen Tahitian Sunset.

    It’s all topped with two coats of HK Girl.

    What's Up Nails Skinny Chevrons

    Chevron Nail Art with piCture pOlish Sizzle

    Blue Chevron Nail Art

    Tribal Nail Art

    piCture pOlish Sizzle

    Share:
    Freehand, Glitter, Halloween, Nail Art, Uncategorised

    Nailvengers Assemble: Halloween Nail Art

    Halloween Nail Art // The Nailasaurus

    Happy Halloween all! I’ve teamed up with the Nailvengers (Amelia, Allie, Alice and Lucie) today for my first and final Halloween look. I’m sorry if you might have been expecting something a bit more adventurous considering I had 18 designs to choose from, but I was in a bit of a rush and blood drips are always going to be my go-to Halloween design! This time around, I tried to 3D-ify the drips with some highlighting and contouring with moderate success!

    This glitter polish caught my eye half way through the paint job. It’s an untried that’s been sat on my desk just waiting to be used. My eyes skimmed over it and just thought ‘the is PERFECT for Halloween!’, so I removed the polish that was already there and applied the glitter instead!

    For the blood drips, I painted a base colour of Barry M Lychee, then freehanded on the drips using Rimmel Heart on Fire with a nail art brush.

    I mixed a little bit of black polish in with the red to paint the shadows, then mixed a little bit of red with white for the highlights/reflections.

    The glitter is W7 Lava Flow. I used about four (really thin) coats to get full opacity but you could just apply two over white for a similar effect.

    It’s all topped off with two coats of Glisten & Glow HK Girl.

    Halloween Nail Art // The Nailasaurus

    W7 Lava Flow Halloween Nails // The Nailasaurus

    Halloween Nail Art // The Nailasaurus

    Halloween Nail Art // The Nailasaurus

    Share:
    Gradient, Nail Art, Stamping, Uncategorised

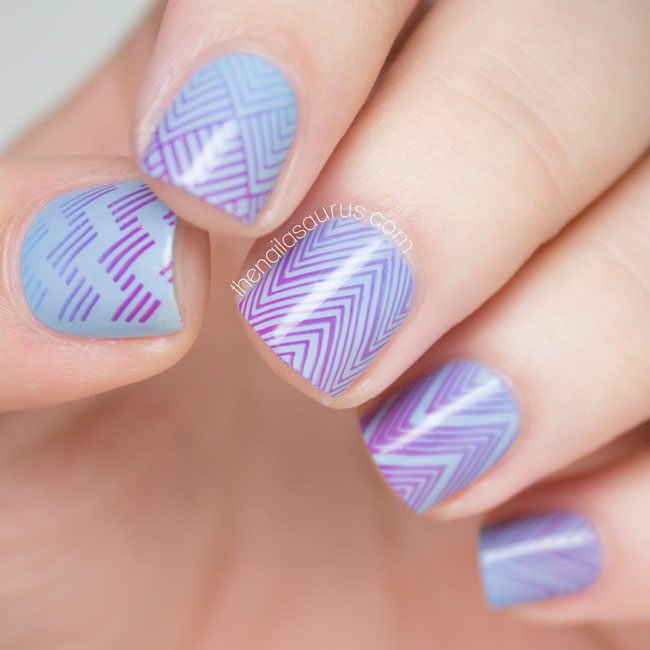
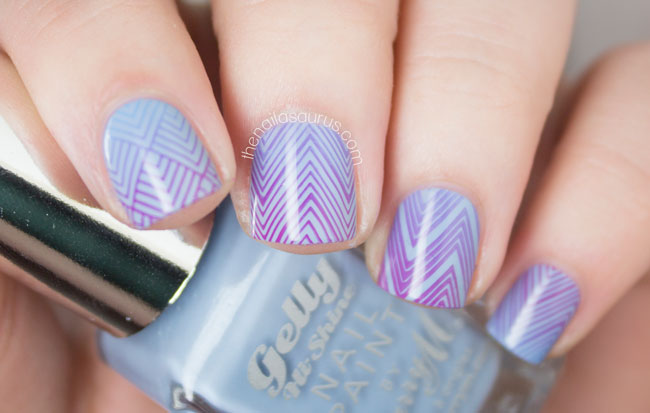
    Gradient Stamping with MoYou Fashionista Collection

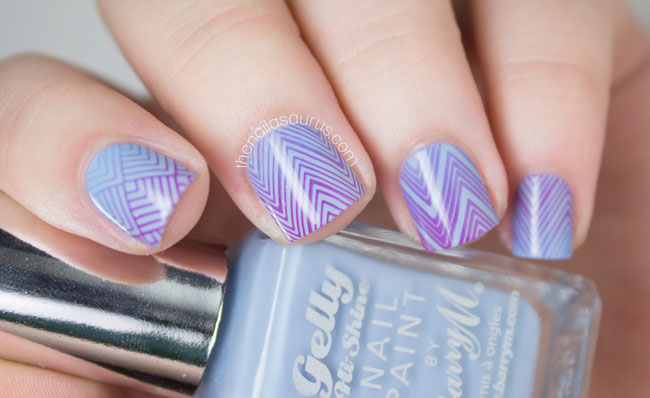
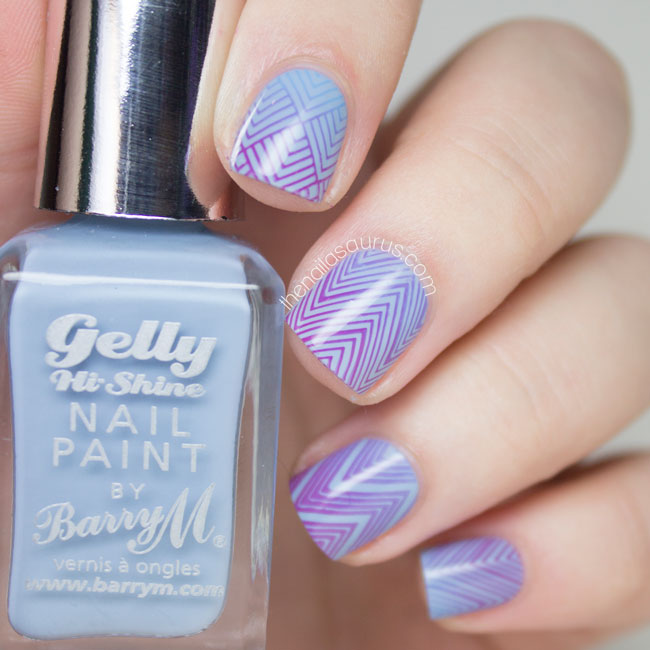
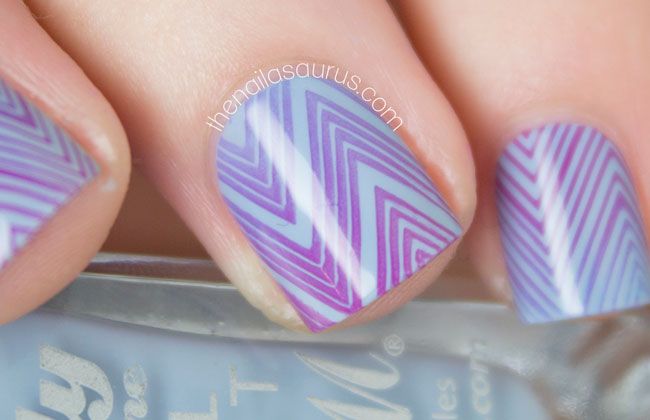
    Gradient Stamping Nail Art

    I did a spot of MoYou shopping last weekend because I’ve had my eye on a few of the Fashionista plates since they dropped in to my inbox a while back. I’m showing off one of the Fashionista plates today – SO MANY CHEVRONS! I also did some quick thinking while I was there and picked up the Festive Collection 06 plate (the one with all the cute fair isle patterns) since it sold out last year before I had the chance to snap it up! Looks like I did the right thing because it seems to be sold out already. It’ll be here when it comes back in stock.

    I’m having a lot of fun experimenting with stamping on gradients. It’s a good alternative for stamping over a gradient since it requires considerably less time and skill than creating the traditional gradient with a sponge. This time I used a bright blue and bright pink for the stamping and they’ve mixed nicely to create a purple fade through the middle.

    A video tutorial for this technique is on my to-do list, and has been for a while. I’m completely swamped with other projects at the moment – all very exciting stuff but very time consuming – so I just haven’t had enough time to sit down and film it. I just wish I had a camera-person to do the filming for me because I love the editing process and can just get lost in it for hours… maybe one day! In the meantime, my YouTube channel is here if you want to catch up on some of my older tutorials.

    1. I painted on a base of Barry M Elderberry.
    2. Using MoYou Fashionista 05 Stamping Plate, I painted on the two colours next to each other and mixed them together as I swiped to create the gradient effect. The shades I used are Barry M Rhossili and Sally Hansen Himalayan Blue.
    3. Finally, I topped it off with a coat of Glisten & Glow HK Girl.

    The Nailasaurus

    MoYou Fashionista 05

    Barry M Elderberry

    Share:
    Halloween, Nail Art, Uncategorised

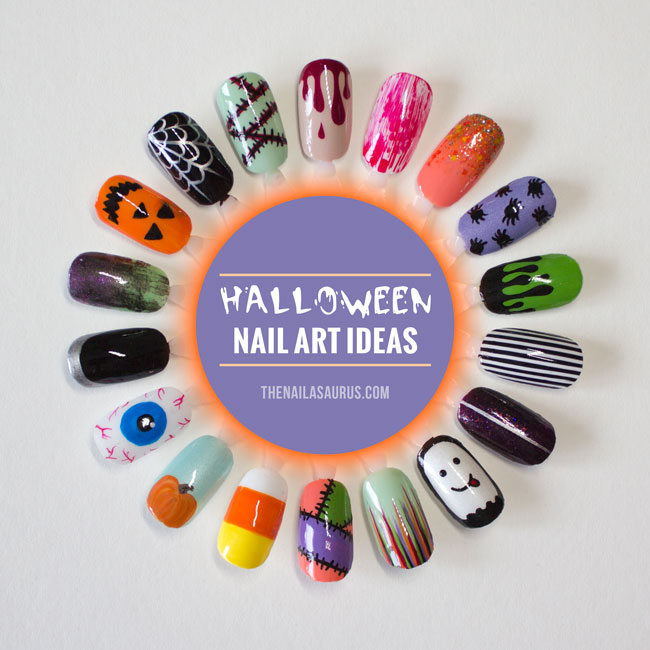
    18 Easy Nail Art Ideas for Halloween

    Easy Halloween Nail Art

    October has completely flown by and I can’t believe Halloween is less than a week away! I haven’t posted a single Halloween nail design yet this year so I wanted to round up a couple of easy designs that anyone can do for the holiday.

    I started on this nail art wheel last week and just had a few details to finish off last night, when I spilled a whole lot of nail polish remover over the whole thing. Despite my best efforts, I couldn’t rescue it so I had to start over! I think the second attempt is better than the first anyway since I knew exactly what I was doing this time around. I also made my way through 5 episodes of Once Upon a Time while doing it so it wasn’t a complete disaster!

    Don’t forget to tag me @thesammersaurus and use the hashtag #looknailasaurus if you recreate any of these designs so I can see!

    Easy Halloween Nail Art

    No Nail Care

    Start with a base coat that matches your skin tone or even leave your nails bare. Use a deep red to give the effect that you’re bleeding straight out of your cuticles.
    Polishes Used: Barry M Lychee, Revlon Bordeaux

    Frankenscars

    Over a green base, paint some red lines using a nail art brush, then add the stitching using black paint or polish.
    Polishes used: Nicole by OPI I Shop Mintage, Barry M Red, Black Acrylic Paint

    Catching Flies

    Paint a few silver lines coming out from the corner of your nail. Connect them up with some ‘dips’ to create a cobweb.
    Polishes Used: W7 Black, A-England Excalibur Renaissance

    Halloween Nail Art For Beginners

    Happy Jack

    Paint your nails with a bright orange polish and add details
    Polishes Used: Essie Fear & Desire, Black Acrylic Paint

    Distressed Gradient

    There’s a tutorial for the distressed look at Chalkboard Nails.
    Polishes Used: piCture pOlish Tail Feather, piCture pOlish Hussy, A-England Dorian Gray

    Morticia

    Named so because it’s exactly what Morticia Addams would be rocking on her nails! Start with a black base coat and freehand on the ruffian edge with a silver chrome polish.
    Polishes Used: W7 Black, A-England Excalibur Renaissance

    Easy Halloween Nail Art Ideas

    Eye See You

    I believe this design is originally by Wah! Nails. Over a white base colour, start with the largest blue circle as the pupil. Draw a smaller black circle inside it as the iris and add a small whit dot just to the edge of the iris. Using a thin brush, add some wiggly veins creeping in from the edges.
    Polishes Used: Graffiti Nails Ice White, Barry M Malibu, W7 Black, Barry M Red

    Pumpkin Patch

    Over a light base colour, paint on a pumpkin shape at the very base of your nail in orange polish. Mix the orange polish with a little bit of yellow to add some highlights.
    Polishes used: Barry M Meadow, Essie Fear & Desire, NYC Lexington Yellow

    Candy Corn

    Paint your nails white and wait for it to dry. You can either freehand on the blocks of yellow and orange or use scotch tape to mark off each section as you go for a super crisp edge.
    Polishes Used: Graffiti Nails Ice White, Essie Fear & Desire, NYC Lexington Yellow

    Halloween Nail Ideas

    Patchwork

    Tutorial here
    Polishes used: China Glaze Mimosa’s Before Mani’s, Rimmel Keep Calm and Party, Sally Hansen Grass Slipper

    Halloween Waterfall

    Tutorial here
    Polishes Used: Nicole by OPI I Shop Mintage, Revlon Bordeaux, Essie Fear & Desire, W7 Black, Rimmel Keep Calm and Party

    Goofy Ghost

    Start with your white base colour and paint a black frame around your nail using a nail art brush. Near the cuticle, add a wavy line and fill in any gaps. To finish up, add some dots for eyes and and pokey tongue.

    Polishes Used: Barry M Pearl, W7 Black

    Halloween Nail Art

    Hallowen Glitter

    If you’re in a rush, a spooky glitter will do the job! Add some simple details using silver polish.
    Polishes Used: China Glaze Cowgirl Up, Orly Fowl Play, A-England Excalibur Renaissance

    Pinstripes

    Paint a white base colour and add a top coat to speed up drying time. Use striping tape to mark off your pinstripes, paint over everything in black and immediately remove the tape. Perfect pinstripes every time!
    Polishes Used: Graffiti Nails Ice White, W7 Black,

    Toxic Waste

    Start with your slimy green base coat and paint on the drips using a small nail art brush.
    Polishes Used: Sally Hansen Grass Slipper, Black Acrylic Paint

    Halloween Nail Art

    Crawlers

    Use a large dotting tool to create the ‘bodies’ and add the 8 legs to each using a little nail art brush.
    Polishes Used: piCture pOlish Eerie, W7 Black.

    GlitterBomb

    Just go nuts with glitter! Use a make-up sponge to create the gradient effect.
    Polishes Used: Barry M Papaya, Sally Hansen Sparktacular, Lac Attack Weasley’s Wizard Wheezes

    Dexter’s Lab

    This was a bit of a fluke! I used the distressed technique with red over white and got this amazing streaky look. I don’t know if it was the brush or polish but my gosh, it works!
    Polishes Used: Graffiti Nails Ice White, Barry M Red

    Share:
    Glitter, Nail Art, Uncategorised

    Side Frenchy with Il Etait Un Vernis

    Il Etait Un Vernis Live, Love, Laugh

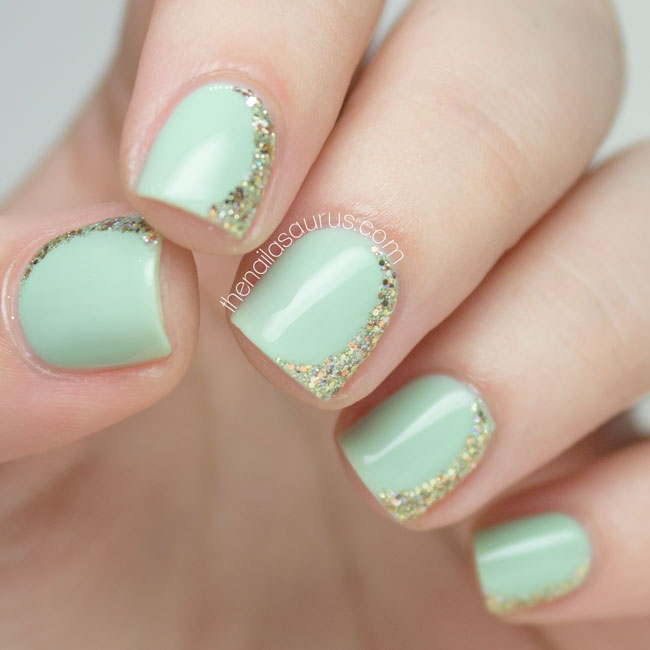
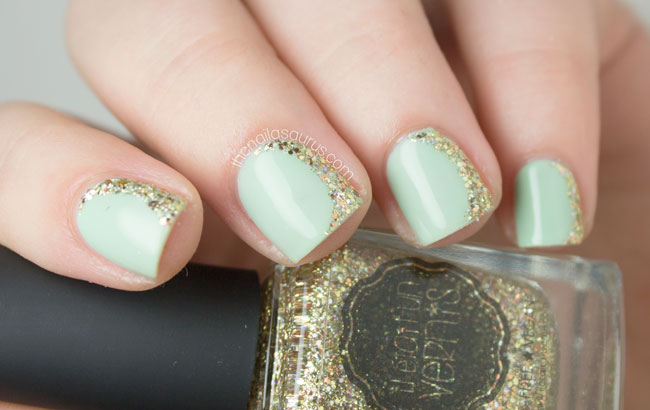
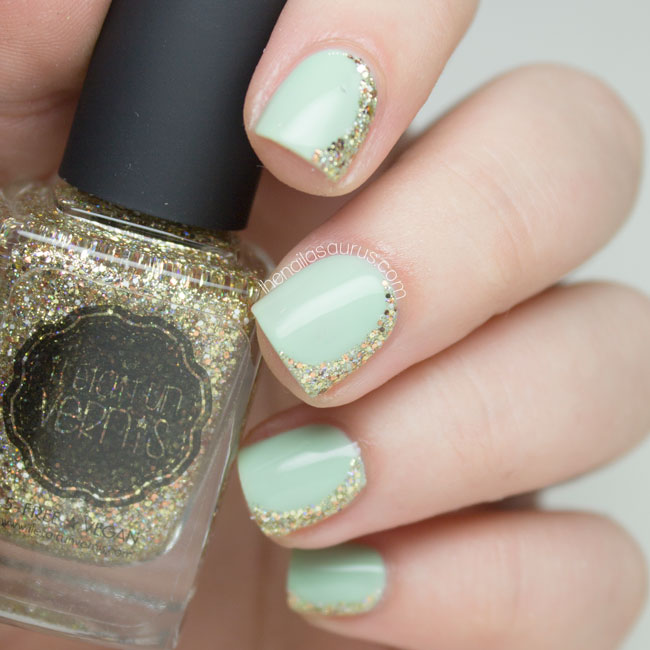
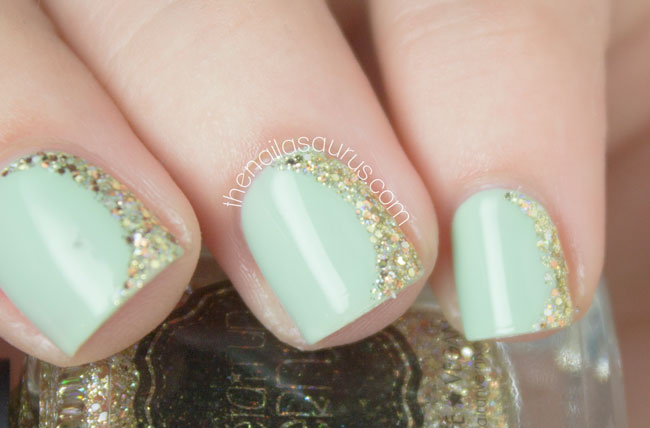
    I’ve seen this look around a lot recently and I’m not sure of the proper name but it’s like a french manicure tipped 90 degrees so the curve sit down one edge of your nail instead of along the tip. We all know how much I love a simple yet sophisticated manicure so I couldn’t resist trying it out myself.

    I must admit,  I don’t know who did this first to make it take off this year, but I would just like to mention that I posted a ‘Side Frenchy‘ years back (and I’m even linking back to a truly cringe worthy blog post to prove it!) so I call dibs on the name! I actually think ‘Drunk French Manicure’ would be a better name for it. You know, like ‘Go home, French. You’re drunk’ – falling all over the place and sitting there all sideways like that!

    You may have seen me Instagram the debut collection from Il Etait Un Vernis with the cute little tote bag it comes in over the weekend. I’m working my way through full swatches of the collection but I just had to add the gold holographic glitter to this mint mani. More info coming soon, but I can tell you now it’s a real winner!

    For this nail art, I painted on the glitter – Live, Laugh, Love by Il Etait Un Vernis – using a small nail art brush over a base of Nicole by OPI I Shop Mintage.

    Il Etait Un Vernis Live, Love, Laugh

    Il Etait Un Vernis Live, Love, Laugh

    Il Etait Un Vernis Live, Love, Laugh

    Il Etait Un Vernis Live, Love, Laugh

    Share: