Follow:
Browsing Category:

Nail Art

    Gradient, Nail Art, Uncategorised

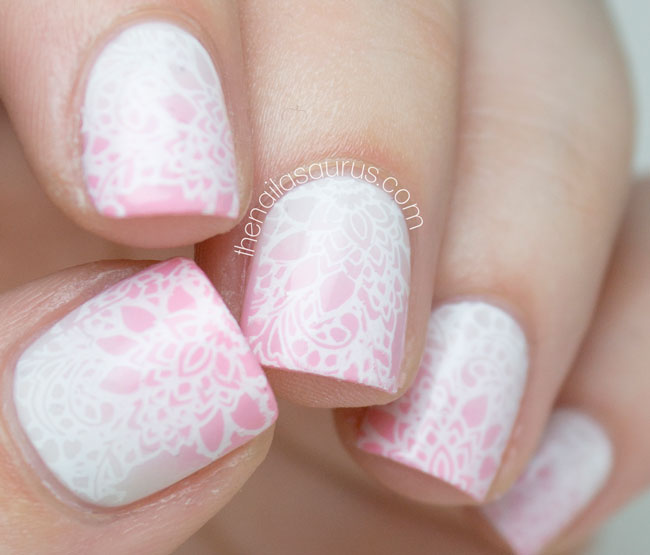
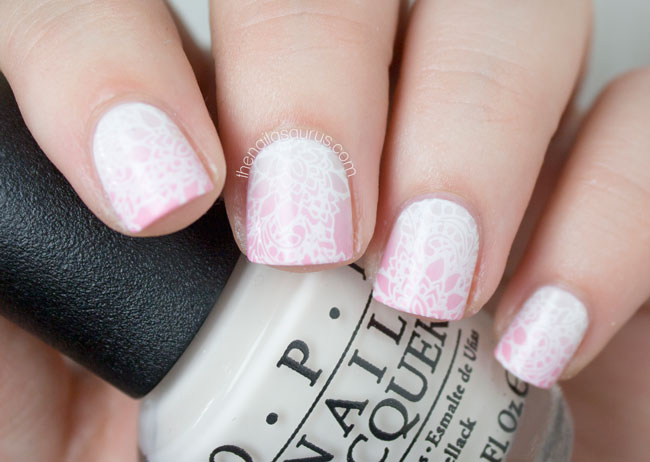
    Soft Gradient Nail Art with Some Stamping

    Nail Art Stamping | MoYou Bridal 06

    My OPI collection is growing little by little and the latest addition is the slightly off-white shade you can see as the base here – Cream in my Coffee. I love the look of white nails but I think pure, brilliant white is a little bit much sometimes. I’ve been looking for a softer, creamy white for a while and this one ticked all the boxes.

    The only beef I have with OPI is that their light shades always need quite a lot of coats for opacity as the polish is very thin. Although they make up for it by never seeming to thicken and wearing for days without chipping. This shade needs three to four coats if you want to wear it alone but I used two and then topped it up by sponging on a few layers of gradient.

    How To

    I used two coats of OPI Cream in My Coffee then used it with W7 Baby Pink to create the gradient.

    I stamped on the lace design from MoYou Stamping Plate Bridal Collection 06 using BK Matte White polish.

    It’s all topped with a coat of Glisten & Glow HK Girl.

    Pink to White Gradient Nail Art

    The Nailasaurus

    MoYou Bridal Collection 06

    Lace Nail Art Stamping

    Share:
    Freehand, Nail Art, Uncategorised

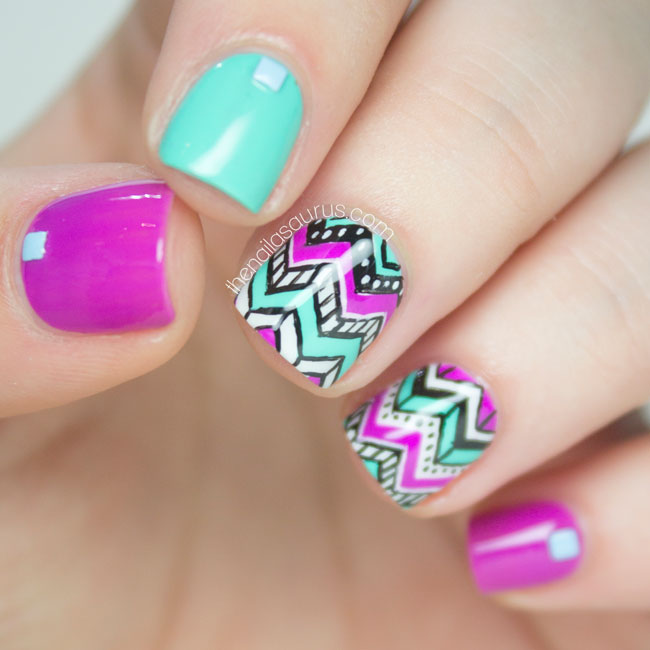
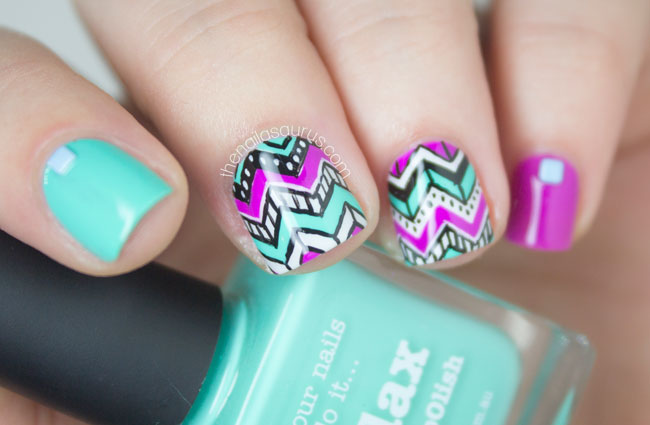
    Hugs For Emily: Chevron Tribal Nail Art


    Our friend Emily is something of an exceptional character in so many ways. I’ll try not to get too soppy here but she’s one of the first people I met through blogging and I’ll always count her as one of my best ‘internet friends’! She’s always there to offer advice and recommend a good TV Show. If it weren’t for her, I would still be stuck in a pretty awful place with my photography. What can I say? I owe her a lot! If you haven’t seen Emily’s blog, make sure you check it out here.

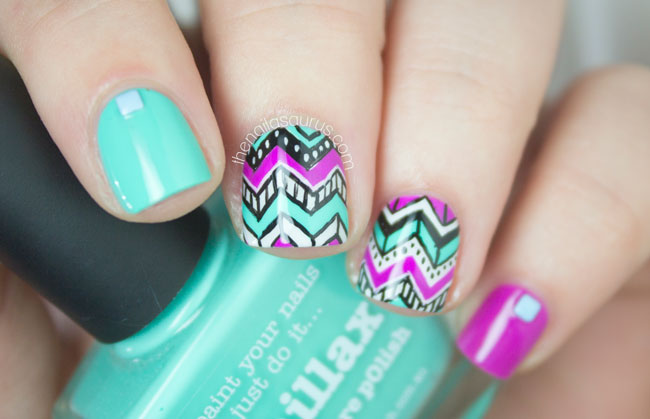
    She’s going through a bumpy patch at the moment so I’ve joined forces with a few more of Emily’s friends to dedicate a day of blogging to her. Just so she knows we’ve all got her back! We’re all taking inspiration from one of Emily’s past nail designs. I’ve gone with her recent piCture pOlish Blog Fest chevron design. Like really gone with it! I have the exact same polishes in my stash so I tried to copy it down to the last detail. I didn’t know if I’d be able to squeeze all the details on to my nubbins but I just about made it!

    For this nail art, I used Barry M White as the base colour where I was going to be painting the chevrons with a thin coat of Glisten & Glow HK Girl Top Coat to dry them hard and fast.

    I applied Hex’s Chevron Decals and painted each chevron individually using piCture pOlish Chillax and Mad Magenta. I also painted the ‘leftover’ fingers using these shades.

    I painted all the details using black and white acrylic paint with a skinny nail brush.

    Finally I added a few small pastel studs and topped everything with a coat of HK Girl.

    Click to see more Hugs For Emily: Paulina’s PassionsWondrously Polished, The Nail Polish Challenge, Love. Varnish, chocolate, and more…, One Nail To Rule Them All, Nail Polish SocietyThe Lacquerologist, Lucy’s Stash and Chalkboard Nails who we have to thank for organising the day!


    Share:
    31 Day Challenge, Nail Art

    31 Day Challenge: Roundup and Final Thoughts

    Time to round up all 31 manicures from the 31 Day Challenge. After an all consuming month of nail art and blogging, it’s fantastic to see the fruits of my labour all in one place. Even though I took a few extra days to finish the challenge at my own pace, I’m still incredibly proud of myself and anyone else who managed to see it right through to the end. It’s certainly called a ‘challenge’ for good reason!

    There are quite a few manicures here that I think stand out from the rest but if I really have to narrow it down to just a few, my personal favourites are the polka dot confetti, ‘Love on a Wire‘, the real marble effect nails and the artwork inspired watercolour gradient.

    I’m slightly disappointed in myself for not stretching my skills or imagination as much as I could have this year although I think that was mostly down to time constraints. I mentioned on the very first day that I was only tentatively accepting the challenge since I didn’t know if I’d have enough time to do a fresh design every day. Given that I took 6 extra days to complete it, I was obviously right! Having said that, I’m a crazy perfectionist so I could have dedicated 10 hours a day to the challenge and still feel like I didn’t quite do my very best. For me, there will always be room for innovation and improvement in my nail art so I have to remember not to be too hard on myself, there’s plenty of great material here!

    Click on any picture below to go to the original post and let me know what your favourites are!

    31 Day Challenge: Red

    31 Day Challenge: Orange

    31 Day Challenge: Yellow

    31DC2014: Green

    31DC2014: Blue

    31DC2014: Violet

    31DC2014: Black and White

    31DC2014: Metallic

    31DC2014: Rainbow

    31DC2014: Gradient

    31DC2014: Polka Dot

    31DC2014: Stripes

    31DC2014: Animal Print

    31DC2014: Flowers

    31DC2014: Delicate Print

    31DC2014: Geometric

    31DC2014: Glitter

    31DC2014: Half Moons

    31 Day Challenge: Galaxies

    31 Day Challenge: Water Marble

    31 Day Challenge: Inspired by a Color

    31 Day Challenge: Inspired by a Song

    31 Day Challenge: Inspired by a Movie

    31 Day Challenge: Inspired by a Book

    31 Day Challenge: Inspired by Fashion

    31 Day Challenge: Inspired by a Pattern

    31 Day Challenge: Inspired by Artwork

    31DC2014: Inspired by a Flag

    31DC2014: Inspired by the Supernatural

    31DC2014: Inspired by a Tutorial

    31DC2014: Honor Nails You ♥

    Share:
    31 Day Challenge, Glitter, Nail Art, Uncategorised

    31 Day Challenge: Honor Nails You Love


    Better late than never! I’m here at the finish line of the 31 Day Challenge and amazingly only a few days late. For the very final day of the challenge (oh god, it feels so good to say that!), I have to Honour Nails I ♥ so I’ve selected a design by one of my favourite nail artists – Paulina’s Passions. Paulina was actually inspired by Very Emily – another one of my favourite nail ladies so this mani has given me the chance to pay tribute to two talented artists that I admire!

    As you may know, I’m in the running for the Best Established Beauty Blog award at the Cosmo Blog Awards and the ceremony is tomorrow. I’ve had a busy evening spent packing and I’ve managed to get everything I need in to a reasonably sized duffle bag so I’m feeling like a packing pro right now! This is the third year I’ve been nominated but only the second time I’ll be going to the ceremony. Last year was amazing fun and I’m sure this year will be another night to remember. I’ll be meeting up with Lucie and Alice in London and we’ll be representing the nail blogs this year! If you want to follow any of the action, keep up with me on Twitter and Instagram.

    For this nail art, I put down my base colours: Barry M White, Essie Go Ginza and Barry M Majesty.

    For the patterned nails, I used striping tape to mark off where I wanted the white to show through. I created a textured saran wrap pattern over the top using Nicole by OPI LeaPink for Joy, Sally Hansen Himalayan Blue and Essie Go Ginza and removed the striping tape immediately. There’s a tutorial for the textured saran wrap technique here.

    It’s all topped off with two coats of Glisten & Glow HK Girl.

    Share:
    31 Day Challenge, Freehand, Gradient, Nail Art, Uncategorised

    31 Day Challenge: Inspired by a Tutorial


    There’s a tutorial that keeps popping up in my Pinterest feed by Hannah Rox Nails for LuLu’s Blog and every time I see it, I promise myself I will try it out one day. Well today is that day! This was the first tutorial my mind jumped to for the penultimate day of the 31 Day Challenge. It looks so beautifully intricate but there are only two really simple steps to achieve it – a gradient and some squiggly freehanding! See the original tutorial for this nail art here.

    1. I used Barry M Pearl as my base colour again today, then created the gradient using Rimmel Mind The Gap, Victoria (tutorial here).
    2. The detail is freehanded with a nail art brush using Graffiti Nails Ice White.
    3. Finally, I topped it off with Glisten & Glow HK Girl.

    Share:
    31 Day Challenge, Freehand, Nail Art, Uncategorised

    31 Day Challenge: Inspired by The Supernatural


    If I undertake the 31 Day Challenge again in the future, I’m going to take a stand and switch out Inspired by the Supernatural to Inspired by Legend (or something of the sort) because each and every year, I get stuck on ghosts! This time, I’ve gone for a more abstract take on the challenge with ghosty silhouettes. Pac Man style!

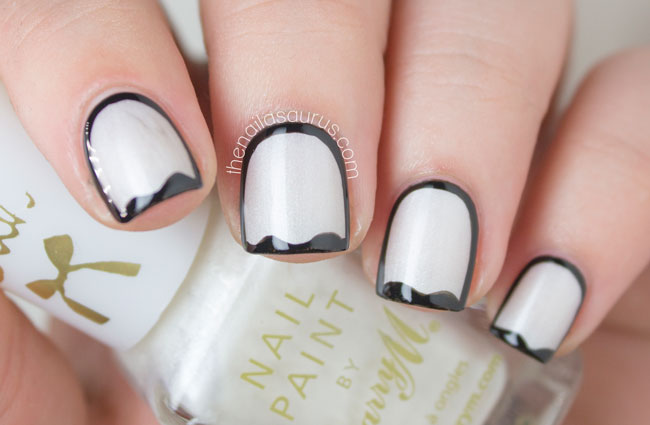
    I used a base of Barry M Pearl and painted on a frame with a wavy tip using No7 Just Black and a nail art brush. It’s all topped with two coats of Glisten & Glow HK Girl.

    Share:
    31 Day Challenge, Nail Art, Uncategorised

    31 Day Challenge: Inspired by a Flag

    Genovia Flag Nail Art


    I’m so close to the finish line, I can almost taste it! Must admit I’m a little envious of all the dedicated ladies who are finishing up the challenge today and returning to sweet, sweet freedom. Although, as much as I always grumble about the challenge towards the end nothing beats that feeling of smug satisfaction you get once you’ve completed it!

    For today’s ‘Inspired by a Flag’ challenge, I’ve opted for a fictional flag again. From a movie… again! This year, it’s the flag of Genovia as seen in The Princess Diaries. I was really young when I first saw the movie and refused to accept that Genovia wasn’t a real place no matter how much my parents insisted! The real (fake) flag doesn’t have the gold stripes but I didn’t feel like braving a coat of arms design so I made a tactical substitution by adding the gold accents.

    1. I started with a base of Barry M Matte White then added a coat of Glisten & Glow HK Girl to dry it off.
    2. I covered the centre of each nail with a strip of scotch tape, then painted on either side with piCture pOlish Chillax and piCture pOlish Swagger.
    3. I added the golld accents with Barry M Gold Foil, then topped it all with another coat of HK Girl.

    31DC2014
    Princess Diaries Genovia Flag
    Genovia Flag // The Nailasaurus
    Share: