Follow:
Browsing Tag:

W7

    Glitter, Gradient, Stamping, Uncategorised

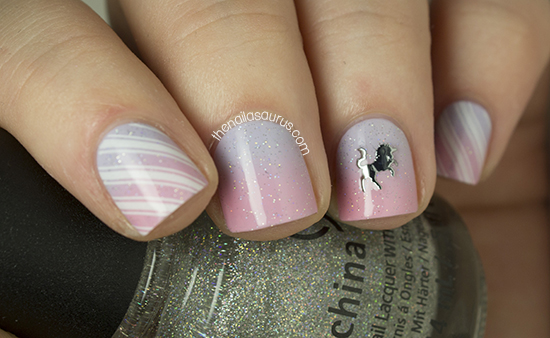
    Pink and Purple Gradient with a Sprinkling of Fairy Dust

    Last week I was crazy excited about my incoming bottle of China Glaze Fairy Dust and now that I have it, I know it was completely justified! It’s everything I dreamed of! I’ve worn it a few times over a plain colour mani but I really think it looks best over nail art. I was so excited to try it over a gradient and I really don’t think I could have picked a better colour combo. The two shades I used are really awful polishes on their own – bad brushes and a watery formula – but those are always the ones that are perfect for gradients.

    Pink and Purple Gradient Nail Art with a Sprinkling of Fairy Dust

    Pink and Purple Gradient Nail Art with a Sprinkling of Fairy Dust
    I used Revlon Cloud as my base colour and created the gradient using W7 Baby Pink. Tutorial for that here!
    I topped the gradient with one coat of China Glaze Fairy Dust and added some stamping from Bundle Monster Plate BM423 using BK Matt White.
    The little unicorn is from She Sells Seashells but seems to be out of stock at the moment.
    Finally it’s all topped off with a two coats of Glisten and Glow HK Girl with a few extra coats on the unicorn to seal it in.

    Pink and Purple Gradient Nail Art with a Sprinkling of Fairy Dust

    Pink and Purple Gradient Nail Art with a Sprinkling of Fairy Dust

    Pink and Purple Gradient Nail Art with a Sprinkling of Fairy Dust

    Share:
    Christmas, Glitter, Stamping, Uncategorised

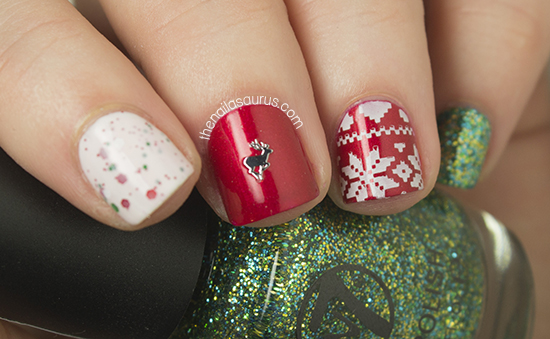
    My First Christmas Nail Art of 2013

    I know that today is Thanksgiving but I don’t have any thanksgiving themed nail art for you. Being that I don’t celebrate it here in the UK and I’m painfully jealous of everyone feasting on turkey dinners today, I thought I’d kick of some Christmas festivities to remind me that I have a delicious roast dinner coming to my dining table soon enough!

    This year I really feel like everything’s been done when it comes to Christmas nail art but I’m determined to come up with something at least semi-original before the 25th. If you want to see the Christmas designs I’ve done in the past, you can flick through the archives here!

    Christmas Nail Art with Essie Jag-U-Are

    Christmas Nail Art with Essie Jag-U-Are

    For starters I used Essie Jag-U-Are (which is the metallic red) and stamped on a fair isle design from Nailz Craze Plate NC03 using BK Matt White. The snowflakes on my thumb are from MoYou London Kitty Plate 09 and the crazy cute decal on my middle finger is from She Sells Seashells. It’s a deer but I think it can pass as a reindeer!

    The milky white polish with the green and red glitter is Sonnetarium Peppermint Kiss over one coat of Barry M White. The green and gold mix on my pinkie is W7 Cosmic Green over one coat of Ulta3 Mermaid Green.

    Finally, I topped it all off with two coats of KBShimmer Clearly on Top.

    Christmas Nail Art with Essie Jag-U-Are

    Christmas Nail Art with Essie Jag-U-Are

    Christmas Nail Art with Essie Jag-U-Are
    Share:
    Freehand, Gradient, Stamping, Uncategorised

    Hunger Games: Catching Fire Inspired Nail Art

    I’m a huge Hunger Games fan so of course, going to see Catching Fire was on the top of my to-do list last weekend! The second book is my favourite from the trilogy and the film very nearly lives up to the magic of the book.

    Throughout the film I kept getting distracted by the outfits that the tributes wear in the arena. The honeycomb pattern, that was most noticeable on the shoulders, with the gradient effect in all those different shades of grey was just calling to me and I kept thinking that it looked identical to one of the designs in the new Bundle Monster set. Before I even left the cinema, I knew exactly how I’d be paying tribute to the movie! This isn’t the most exciting Hunger Games nail art that I’ve created but it’s one of my favourites.

    I started with a base of Barry M White. I covered my cuticles with Liquid Palisade to protect them from any mess and created a gradient using Rimmel Grey Matter. There’s a gradient tutorial here.

    I added the honeycomb pattern using Rimmel Grey Matter with Bundle Monster Plate BM422.


    It’s all topped off with two coats of KBShimmer Clearly on Top.

    Previously:
    May the Odds be Ever in Your Favour
    Nails on Fire

    Share:
    Freehand, Glitter, Uncategorised

    Nail Art for Breast Cancer Awareness Month

    As I’m sure many of you know, October is Breast Cancer Awareness month and I wanted to help spread the awareness in a little way by creating some pink nail art! I never know how to write posts like this as Cancer is a topic that hits close to home for so many of us, myself included, and affects a lot of people in different ways so I’ll keep it short and sweet.
    The most shocking statistic I’ve read is the fact that someone is diagnosed with Breast Cancer every 10 minutes. I think this really helps put things in to perspective. Just in the time it took me to put this post together, 3 people have been given news that will change their lives. I must admit, I’m not the best at checking myself but this month I must have copped a feel more than once a week thanks to everyone spreading awareness of the disease!

    I used Sally Hansen Crinolin and W7 Baby Pink as my base colours.
    The glitter is Sally Hansen Razzle Dazzle and I freehanded on the ribbon using Models Own Bubblegum and a nail art brush.
    It’s all topped off with two coats of Revlon Quick Dry Top Coat.

    TwitterBloglovin’Tumblr

    Share:
    Glitter, Stamping, Uncategorised

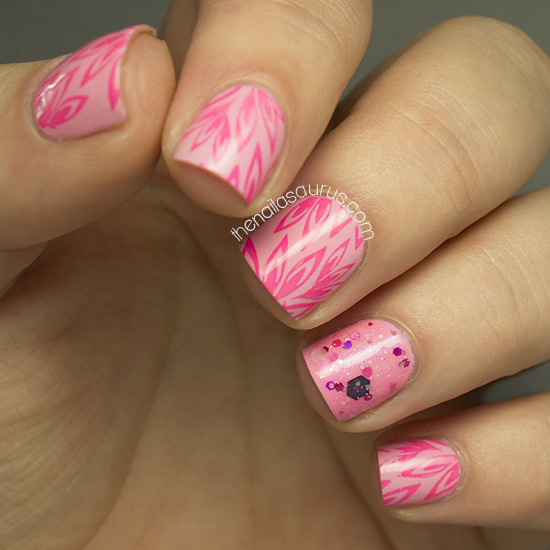
    Bubblegum Pink Stamping

    Back at the start of September, I did some stamping using one of the Models Own Ice Neon polishes and I was surprised at how well the neon worked for stamping. I wanted to try with another from the collection today so I went with the bright pink – Bubblegum!
    Once again, this polish exceeded my expectations and I’m really happy with this girly mani. I had to add some glitter to make it super girly!

    My base colour is W7 Baby Pink and I stamped on the design from Bundle Monster Plate BM210 using Models Own Bubblegum.
    The glitter on my ring finger is Aphrodite Lacquers Flirty and I topped it all with a coat of No7 Stay Perfect Top Coat.

    TwitterBloglovin’Tumblr

    Share:
    31 Day Challenge, Uncategorised

    31DC2013 Day 31: Honour Nails You Love

    So here we are! The 31st and final day of the challenge. I definitely enjoyed it more this time around than I did in previous years. I know that because not once did I consider giving up part way through! It’s always so satisfying when you get to the end of a big task like this that you commit yourself to and see through to the very end. I’m not ashamed to say that I’m very proud of myself right now!

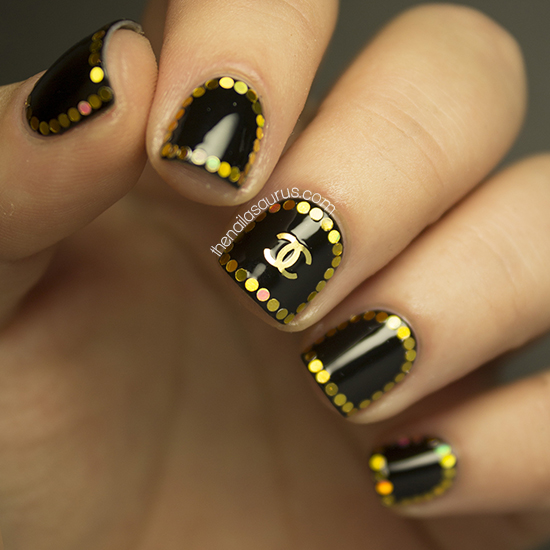
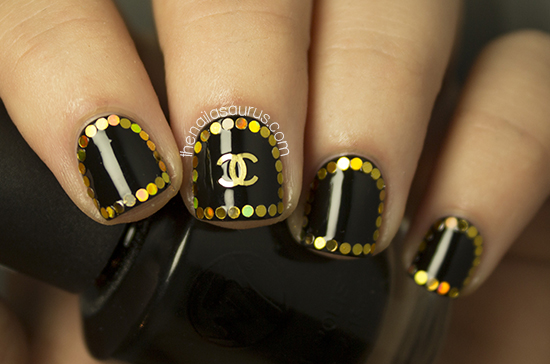
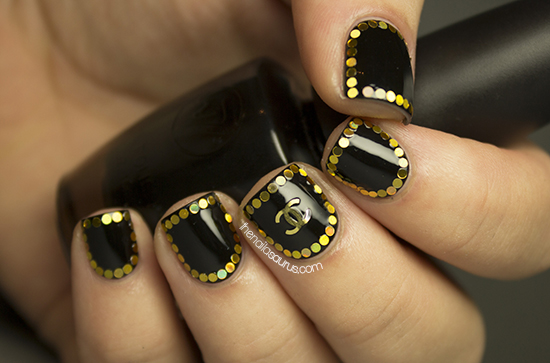
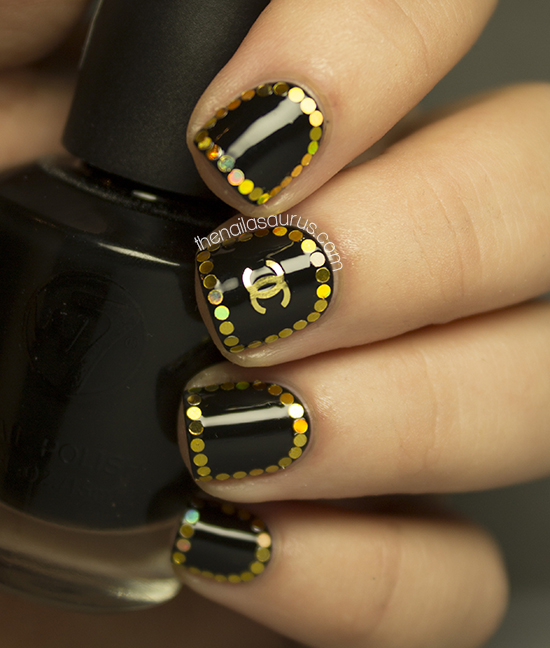
    For the last prompt of the challenge, we have to honour nails we love. There’s one manicure that I’ve loved since the moment I saw it and it’s by Deniz, a now-retired nail blogger, at Emerald Sparkled. This particular manicure is titled Look Rich, Be Cheap and since I first saw it back on that day in February 2012, it’s been burned in to my memory. I have a long standing love of glequins and I think I can pinpoint Deniz’s mani as the one that sparked it! Black and gold is a favourite of mine and I think Deniz’s design is so timeless. It’s jazzy but very elegant at the same time.

    I used W7 Black as my base colour and used round glequins from Born Pretty Store to frame my nails. (Video tutorial here)
    The Chanel decal is also from Born Pretty but they don’t seem to be selling them any more.
    I topped it all off with two coats of No7 Stay Perfect Top Coat.

    In other news, I’m headed to London tomorrow for the Cosmopolitan Blog Awards where I’m nominated in the Best Established Beauty Blog category. I’ll be teaming up with AllieLucie and Alice; all my fellow nail blogger nominees and I’m so excited to get there and meet everyone but very nervous at the same time. I’m still at a loss for something to wear on my nails and I only have the rest of the evening to decide! Can you say #nailbloggerproblems?
    Day 31: 2012 (Part 1) (Part 2
    Day 31: 2011
    Catch up with the 31 Day Challenge on Pinterest!

    TwitterBloglovin’Tumblr

    Share: