Follow:
Browsing Tag:

Thnks Fr Th Mmrs

    Freehand, Gradient, Uncategorised

    Thnks Fr Th Mmrs: Gradient Nails

    I really enjoyed putting together a Thnks Fr Th Mmrs post earlier this month so I think I’m going to make it a regular feature around here if that’s okay with you!
    Today is the one year anniversary of my Gradient Nails Tutorial and just I knew I had to mark the occasion with a little homage. That tutorial is the most visited page on my blog… by miles and miles and lightyears even to this day. 
    I think it really took off because everyone was having the same problem as me. They were seeing pictures of pretty gradient nails on the internet and wanted to do it themselves, but there wasn’t an easy DIY tutorial out there yet until the one that I wrote came along to fill that gap.
    As you can see, my gradient skills have improved immensely since then which is a good testament to my motto, ‘Practice makes perfect’ or as Macklemore more eloquently put it, ‘The greats weren’t great because at birth they could paint, the greats were great because they’d paint a lot’. 
    No one gets it perfect first time and you pick up tricks as you go; the little things which can’t be taught that you just have to learn from your own experience. For example, the sponge that I was using at first wasn’t ideal and now I’ve learned to use much ‘finer’ sponges… make up wedges are the best! Gradient nails… thanks for the memories!
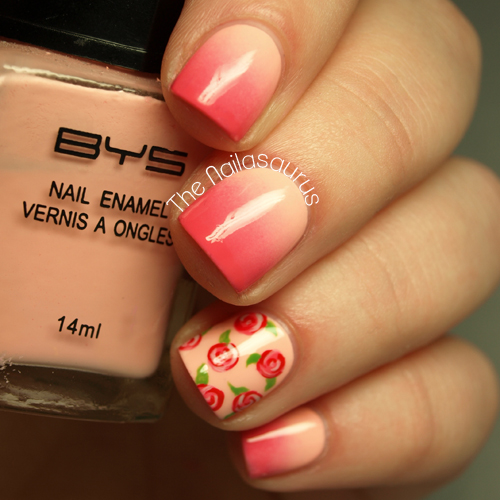
    I used the same base colour, BYS Pretty as a Peach, as I did last year but unfortunately the darker of the two colours has long since dried up so I replaced it with NYC Bubblegum Pink which I think is a pretty good match.
    I couldn’t resist adding some roses for an accent finger. For those I used the NYC Bubblegum Pink again, Rimmel Heart on Fire, Models Own Utopia and NYC High Line Green with a nail art brush.
    It’s all topped off with a coat of of Sally Hansen Dries Instantly.

    TwitterBloglovin’Tumblr

    Share:
    Studs, Uncategorised

    Thnks Fr Th Mmrs: Studded Nails

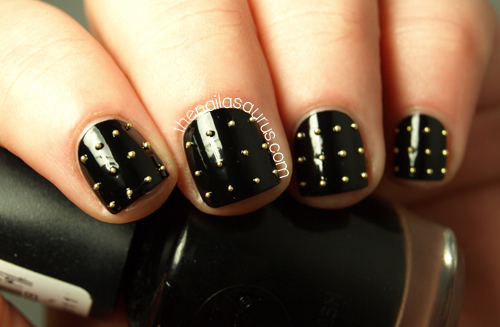
    Sticking with the reminiscent theme this week I’ve recreated another mani from the archives. I can still remember the day I posted this mani first time round in great detail. Like, crazy amounts of tiny details! It was November 3rd, I was in the middle of the 31 Day challenge and I was behind schedule. I didn’t have a post ready for that day which was ‘Day 25: Inspired by Fashion‘ and I had plans for the day so I had to wake up super early and start scouring the web for inspiration. I came across a studded Michael Kors dress and the rest is history. You can see the original post here
    What I thought was just another 31 Day Challenge post blew up bigger than I could have imagined, it just exploded! If people ask me whether I can pinpoint a particular moment when my blog went to ‘the next level’, I tell them it was this manicure on November 3rd 2011. I guess it was something that a lot of people hadn’t ever seen before and that’s what made it special and worth sharing. It was even shared on Michael Kors’ official Facebook and Twitter a few days later. I was crying tears of joy and disbelief at that point. Studded nails… thanks for the memories!
    To this day, it remains the second most viewed post on my blog (after the gradient tutorial). Were any of you guys reading way back when I posted this in 2011?

     I was rocking the longer nails back then. I loved them at the time but nowadays I wear my shorties like a badge of honour! I’ve gone for less studs and a slightly different arrangement but I think the rock chick vibe still comes across. I used the same base colour, W7 Black, although this is a different bottle. I get through black nail polish like it’s going out of fashion and I always end up repurchasing the W7.

    In the original photo I used a top coat over the studs and amazingly, the colour stayed on the studs! This time around, I skipped the top coat before the pictures because I was scared of the gold colour running and I was right to do so. When I applied a top coat after the pictures, the studs turned silver.

    If you’re gonna try studs, I’d recommend the ones from Viva La Nails. They’re the only ones I’ve ever used that don’t lose their colour with a top coat.

    TwitterBloglovin’Tumblr

    Share: