Follow:
Browsing Tag:

Textured

    Swatch, Uncategorised

    Nicole by OPI Roughles Collection Swatches

    Roughles (genius name!) is an upcoming collection from Nicole by OPI that consists of 4 textured polishes. They’re all pastels with a twist and the speckled effect is spot on. It adds that little extra that makes these polishes truly unique.
    All of these swatches are two coats with no top coat and I was really impressed with the drying time on these. You don’t have to wait very long for them to dry down to the textured matte effect they’re built for.

    The interesting combination blue and burnt purple (almost red) speckle make I’m Stucco on You a stand out for me and it’s my favourite from the collection.
    Nicole by OPI I'm Stucco on You Swatch
    Nicole by OPI On What Grounds Swatch
    On What Grounds reminds me of mint choc chip ice cream! The base is a turquoise with a hint of mint and the speckles are mostly blue with a few brown sprinkled in.
    Nicole by OPI On What Grounds Swatch
    Nicole by OPI Rock the Look Swatch
    Rock the Look is a perfect combination of sorbet shades. Past the pink base, there are a few shades of orange and some dark purple.
    Nicole by OPI Rock the Look Swatch
    Nicole by OPI Sand in My Shoe Swatch
    I have to give Sand in my Shoe props for being a yellow polish that doesn’t apply like a yellow polish (i.e. all streaky and thin). Application was a breeze – it only needed two coats like all the others – and it remains beautifully bright and sunny even with the matte finish.
    Nicole by OPI Sand in My Shoe Swatch

    Where to buy Nicole by OPI Roughles

    In the UK, Roughles will be available from July 30th in Superdrug stores and online. RRP £7.99.
    Roughles is already available to purchase in the US. Check Nicole by OPI’s stockist information for more info.
    Share:
    Uncategorised

    Baby Blue Quilted Nail Art

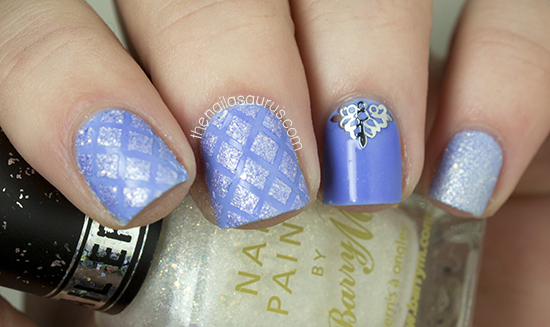
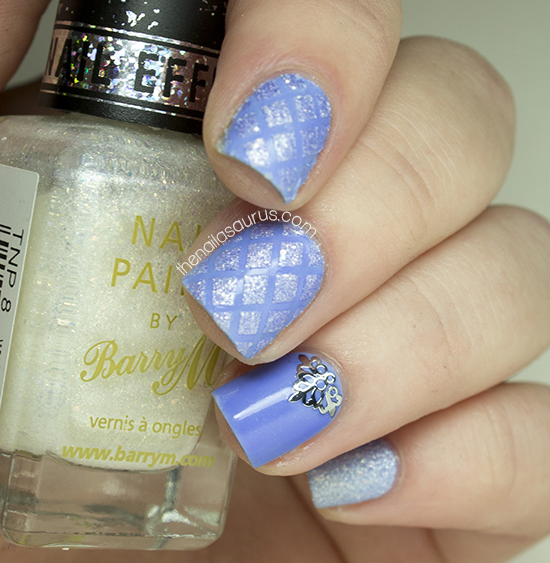
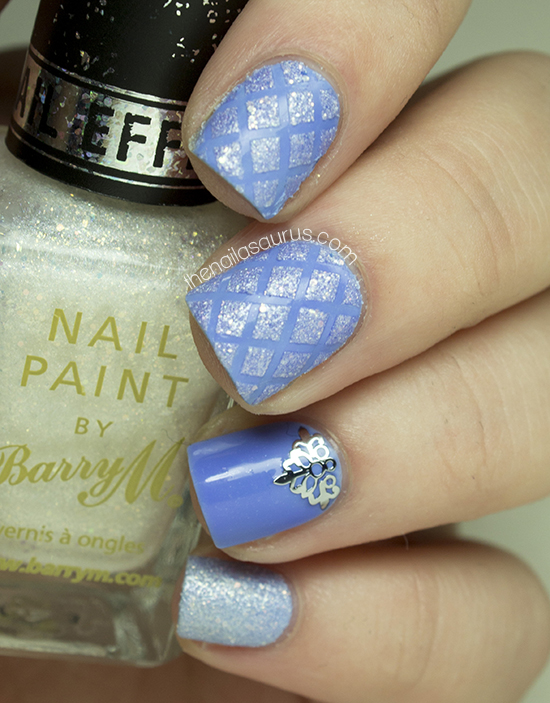
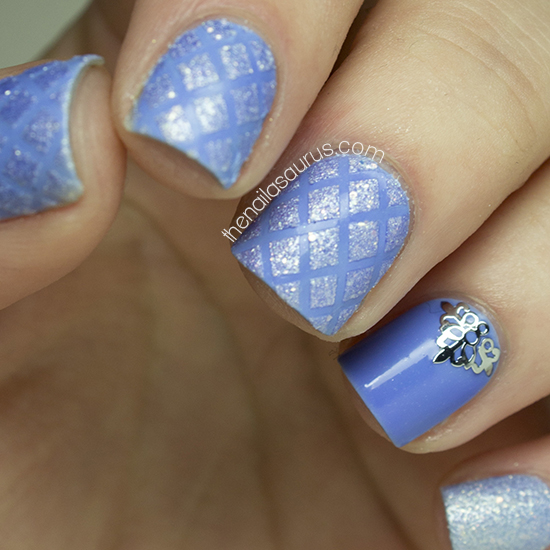
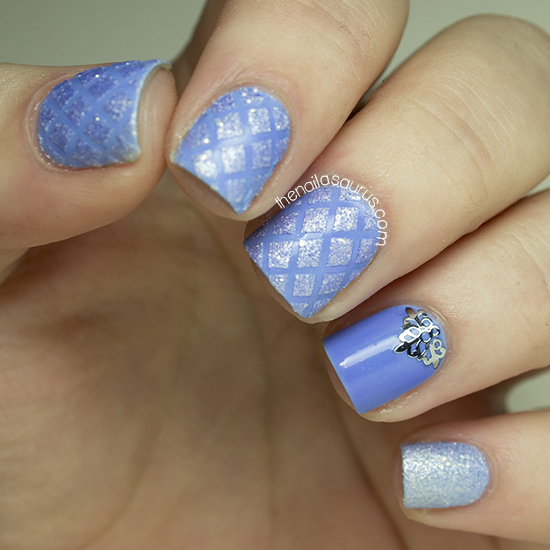
    Yesterday I asked what nail art I should do next on Facebook and one of the suggestions was a Quilted Nail Art. I’ve only done this kind of nail art once before and I totally defeated the object when I put a top coat over it! It smoothed over the quilted effect so it just looked like a diamond pattern on my nails.
    This time around, I used a textured polish and skipped the top coat to get a very nice, 3D quilted effect!

    I started with a base of Essie Bikini So Teeny and used a coat of HK Girl to dry it nice and quickly on the nails where I was planning to do the quilting.

    I used striping tape to mark off a criss cross pattern on my nails. Next I painted two coats of Barry M Pearl Lady over the top.and removed the tape while that was still wet.

    The swirly decal is from Born Pretty Store and I just attached that with some clear polish and added two top coats to seal it in. And finally I painted two coats of Barry M Pearl Lady over Bikini So Teeny on my pinky finger.

    Share:
    Glitter, Studs, Uncategorised

    So Long and Thanks For All The Likes

    This week was very exciting! The page that I run to accompany this blog reached 1,000,000 likes on Facebook. I thought I’d mention it here as I feel like this is one to write home about and feel very proud of! I haven’t mentioned it on the blog but the number has been increasing steadily over the last few months although I never, ever thought it would reach 1 million. So I just want to say a huge thank you to anyone reading this that likes the page!

    As a little celebration, I’m running a discount code in The Nailasaurus Emporium through until midnight on Monday (Dec 2nd). It’ll give you 30% off all orders over £10 and you just have to enter ‘millionaire‘ at the checkout. THANK YOU SO MUCH!

    For this nail art I created the Nimbus Nail Art over a base of white using Barry M White using Sally Hansen Coral Reef, China Glaze Tart-y For The Party, Models Own Bubblegum and China Glaze Pink-ie Promise.

    I added some gold triangle studs from The Nailasaurus Emporium right at the base of the nimbus nails.

    The textured glitter on my accent fingers is Barry M Countess from the new(ish) Royal Glitters collection.


    It’s all topped off with a coat of KBShimmer Clearly On Top

    Share:
    Stamping, Uncategorised

    Pearly Whites


    This textured white polish from Barry M is one that I featured in my top 3 holiday nail shades this week on Divine Caroline. I wasn’t a huge fan of it at first but now that the winter and festive season are closing in, I have a new appreciation for the effect it creates. It looks just like freshly fallen snow, with a bit of extra glitter!

    I used a coat of China Glaze Dandy Lyin’ Around followed by two coats of Barry M White Pearl for the white accents.

    The pink is China Glaze Pink-ie Promise. I added a few 1mm pearls and some stamping from MoYou Sailor Collection 05 plate with BK Matte White polish.

    Share:
    31 Day Challenge, Freehand, Uncategorised

    31DC2013 Day 13: Animal Print


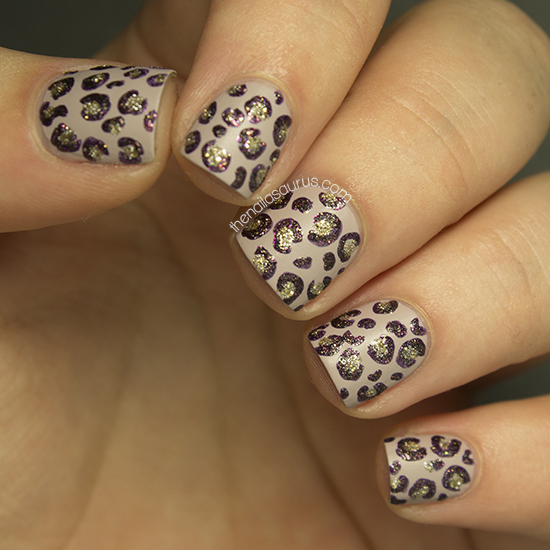
    Last year I got really creative for Day 13 of the challenge with some real feather nail art but this year I couldn’t come up with anything half as exciting so I’ve played it safe with some classic leopard print nails!

    All the polishes I used in this mani are from Barry M’s upcoming Autumn/Winter releases. There are 12 new polishes launching including some mattes, textured glittery polishes, a new creme and a crystal topper. I haven’t had a chance to try them all yet so I thought I’d smash a few bottles with one stone as it were, and mix them up in some nail art to get a feel for the new offerings.

    I used Barry M Matte Vanilla as my base colour and then took a nail art brush to freehand on the leopard print in Barry M Countess and Majesty which are both textured polishes. I can already tell that Countess is gonna be my favourite of the textured polishes – it’s very dark and mysterious with a plum base and hidden gold flecks. Just my type!

    Barry M’s Autumn/Winter collection is launching on September 25th in Superdrug and exactly one week later on October 2nd in Boots.

    TwitterBloglovin’Tumblr

    Share:
    Freehand, Uncategorised

    Happy Easter!

    Happy Easter weekend everyone, I hope you’re all having yourself a great one. I think four days off work was just what the blog doctor ordered for me. I’ve given my room a good spring clean, finally got around to designing and ordering the business cards that have been on my to-do list for two months and, best of all, I’ve had some time to sit down and do some real nail art!
    As much as I love pretty patterns and gradients and glitter, that stuff can get boring and my real love when it comes to nail art is themed freehand stuff like this and I think you’d all probably agree with me on this one!

    My base colours (from thumb to pinky) are 
    Barry M Textured in Atlantic Road
    Barry Textured in Station Road
    Sally Hansen Crinoline
    Barry M Textured in Ridley Road
    NYC Expert Last in Lavender Cupcake
    Other colours I used include Born Pretty Sky Blue and Matt White, Barry M Dragon, Rimmel Grey Matter, NYC Water Street Blue and NYC Wild With Passion.
    Finally I added a top coat of Seche Vite, which is available from Beauty Encounter, followed by a coat of Rimmel Matte Finish. This  has had an interesting effect on the textured polishes, they still look kind of textured but the effect isn’t as pronounced.

    TwitterBloglovin’Tumblr

    Share:
    Studs, Swatch, Uncategorised

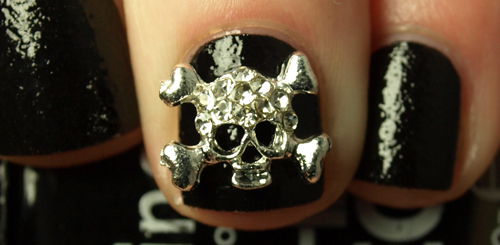
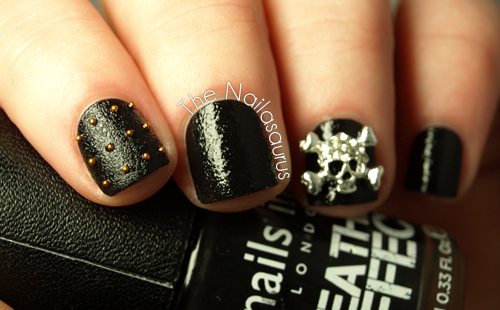
    Nails Inc Leather Effect (Noho) Swatch, Skulls and Studs

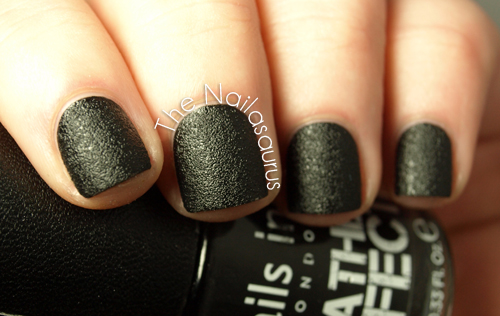
    Today I have another textured polish on my nails and it’s perhaps the first one that caused a lot of buzz among nail polish fans… Nails Inc’s Black Leather Effect*.
    As a nail crazed lover of anything black and leather, this is one that I couldn’t wait to get my hands on. Or should I say on my hands?! I was sceptical about whether it would actually look like leather on the nails since I never trust promo shots but the more I look at it, the more I believe I’m wearing leather on my fingers.

    I’m so impressed with the consistency of this polish, there was no gloopiness and it just swiped on perfectly in two coats. It dries to a matte finish and it’s recommended that you don’t use a top coat but of course I had to try… for review purposes of course, not just because I felt rebellious!
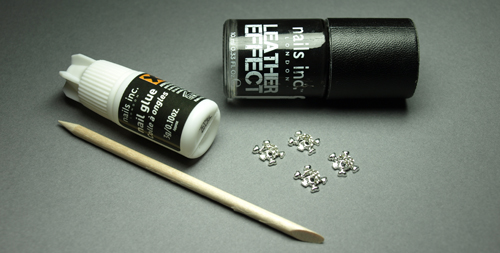
    The polish comes in a kit with nail glue, an orange stick and 4 embellished skulls (which can be reused if you clean them carefully with a little bit of acetone).
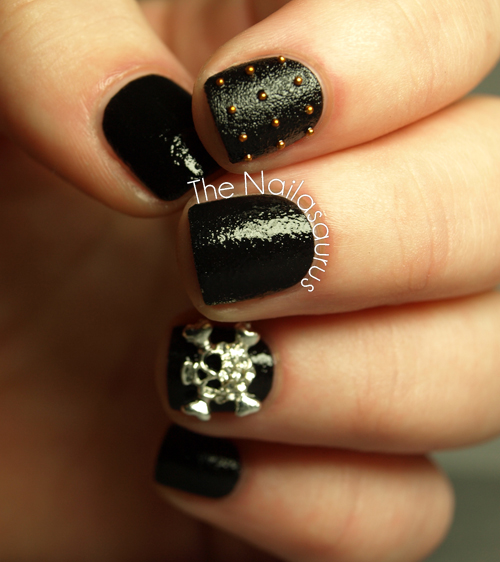
    I applied a top coat of Seche Vite to every nail except for my pointer finger which has kind of glossed them over and made them lose most of the leathery effect. I definitely prefer it without. 
    On my pointer, I used one coat of NYC In A New York Minute to attach the studs. This top coat is much thinner than the Seche Vite so it sank in to the Leather Effect pretty well.
    I attached the skull using tweezers and a little bit of nail glue on the back of his head and chin. The skulls are not something I’d wear day-to-day but next time there’s a special occasion, you can bet I’ll be rocking one of these bad boys on each hand!
    This polish is only available in the ‘Bling It On’ set and the retail price seems to float somewhere around £20/$25. 
    After a bit of searching, the cheapest price I’ve found here in the UK is £19 at Very. It’s also available from Littlewoods who I was amazed to find have a brilliant selection of nail polish including OPI and Butter London.
    Share: