Follow:
Browsing Tag:

Stick Ons

    Uncategorised

    She Wears Blue Velvet All The Time

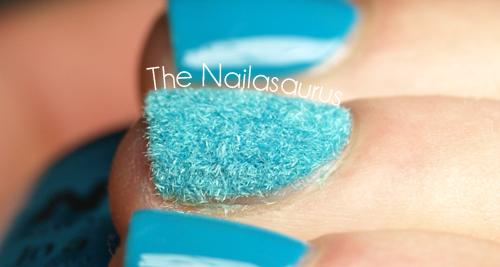
    Quite a simple mani for you today. I really love this flocking powder and I’ve been using it quite often as an accent. Last time I posted this and when I posted it on Instagram earlier today, I had loads of really good questions from you guys so I’ll just talk about the powder for a bit and hopefully answer them.
    Most people want to know what happens when you wash your hands with this stuff on. Well it absorbs a bit of moisture and looks kind of dead for a bit but then it just dries out and goes back to normal. It lasts about 24 hours during which time it gradually rubs off and starts looking grubby. If you left this on for more than 24 hours I would judge you… it really looks gross!
    The flocking powder is from Born Pretty Store and it comes in loads of colours. The one I have is Sky Blue and I’ll definitely be buying some more colours. It’s really easy to apply, you just paint on a coat or two of polish and press your nail in to the pot of powder while it’s still wet, then use a brush to swipe away the excess. Job done! 
    I also want to give a shout out to these Chanel decals while we’re here. Again, they’re from Born Pretty Store and I’m always using them to spice up a plain (between nail arts) mani. They’re actually metal, not stickers and they come completely flat. So before I apply one, I bend it around a pen to give it a slight curve so the edges don’t stick up and catch on everything. Then I slather it in top coat! I think it looks the bomb.
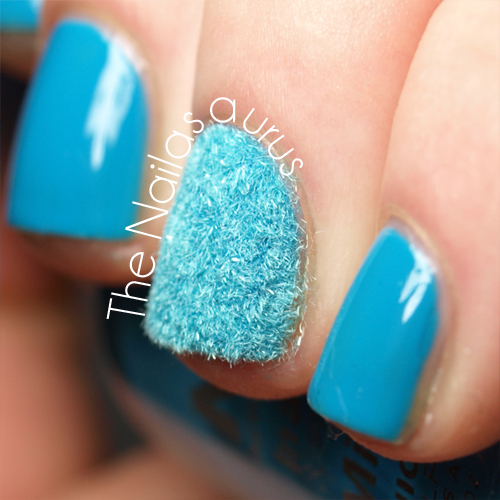
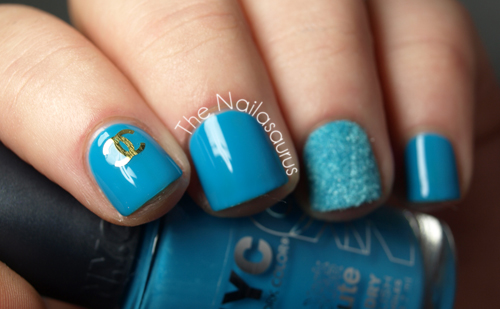
    The base colour I’ve used here is NYC Water Street Blue* which is absolutely gorgeous and probably my favourite blue right now. The only downside is it stains like a bish so do not skip your base coat if you wear this! You can get the flocking powder (velvet) here and the Chanel Decals here. My top coat is Seche Vite.
    P.S. If you order anything from the Born Pretty Website, you can use this code to get 10% off!

    TwitterBloglovin’Tumblr

    Share:
    31 Day Challenge, Uncategorised

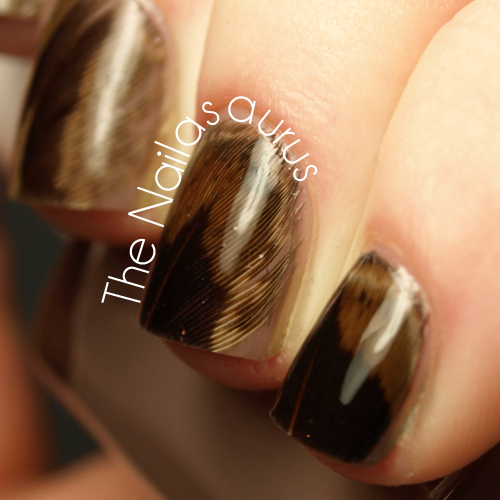
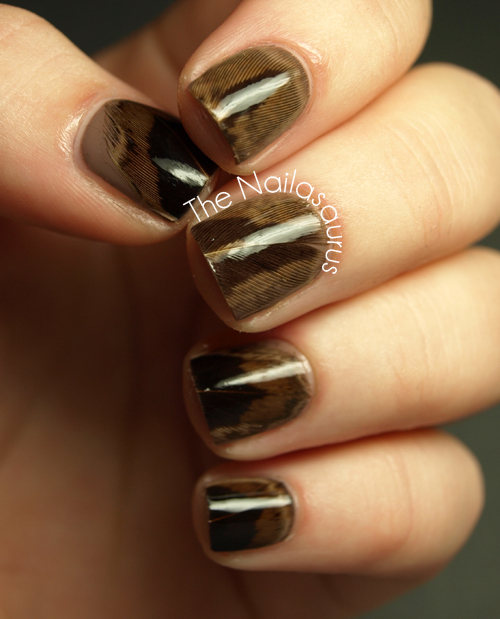
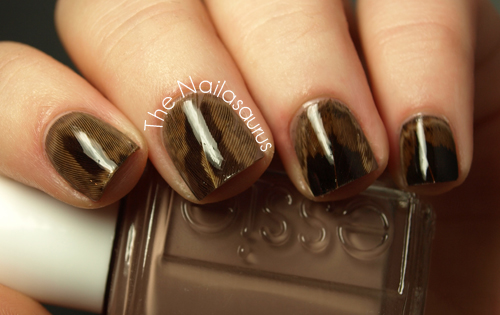
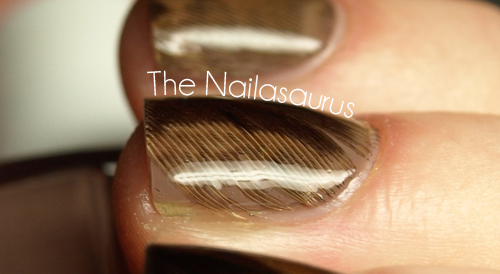
    31DC2012: Day 13 Animal Print REAL FEATHERS!

    I’ve been burning the candle at both ends this week and as a result I’ve either been too busy or too tired to blog. So this is actually Thursday’s post, just super late!
    I’ve been looking forward to this day since before the challenge started. I bought these feathers in Hobbycraft weeks ago and I knew they’d be my animal print mani. I’m in huuuge love with this nail art but, being a picker, it didn’t last more than a day before I pulled the feathers off! 
    You can see Cris’s animal print mani here and Rie’s right about here.

    It’s so hard to explain how I did this, but I’ll try anyway! I painted on two coats of Essie Glamour Purse and let it dry completely. I picked out feathers that were already the right size for my nail and just cut off a bit more than I needed to cover my nail.
    Next I added a thick coat of top coat and placed the end of the feather on my nail. I licked my finger and used it to gently push the feathers in to the clear polish. At this point there is still feather hanging off the end of my nail that I’ll cut off later. 
    After doing that on every finger and letting it dry a bit, I added about 3 coats of Seche Vite to every nail to smooth it over. Finally, I used some scissors to cut the feathers at the end and then a nail file to file the leftovers right down to my own nail.

    TwitterBloglovin’Tumblr

    Share:
    Uncategorised

    MUA Nail Constellation in Scorpio

    I took a trip to Superdrug today and was greeted at the door by a new, huge spinning MUA display that was surprisingly well stocked and up to date. They’ve recently released their Nail Constellations which are a £3 version of Ciate’s Caviar manicure. It’s really just a pot of mixed bullion with a pourer on the top and although I have tons of the stuff lying around, I couldn’t resist picking up one of these bottles. This particular set is called Scorpio.
    The bottle is quite clever as it only allows you to pour out a tiny bit at a time so you aren’t going end up spilling tiny beads everywhere. The only thing that bugs me is that I couldn’t find any way to get wastage back in to the bottle. I didn’t have to throw away too much of the product but I only did one nail* (see bottom of post). Ah well, for the price, I’m not gonna cry about it!

    My base colour is Rimmel Desire and I used Barry M Gold Foil for the ruffian accents. For my accent nail, I poured over the beads while my second coat of colour was still wet, then patted them down gently to really stick them in to the polish. I’ve got a top coat of Sally Hansen Advanced Hard as Nails on all but the accent finger.

    *I’ve since been told that the lid can be removed and even doubles as a funnel for pouring the beads back in to the bottle. See here. I did originally try to remove the lid but wasn’t rough enough. Be careful though, because if you slip in the process, your carpet will look like a constellation!

    TwitterBloglovin’Tumblr

    Share:
    Stamping, Uncategorised

    Feather Nails… Finally!

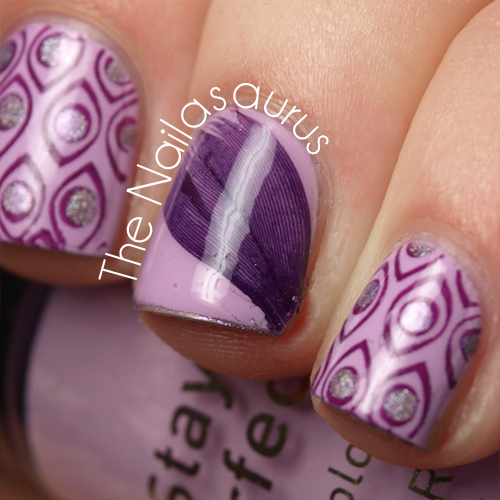
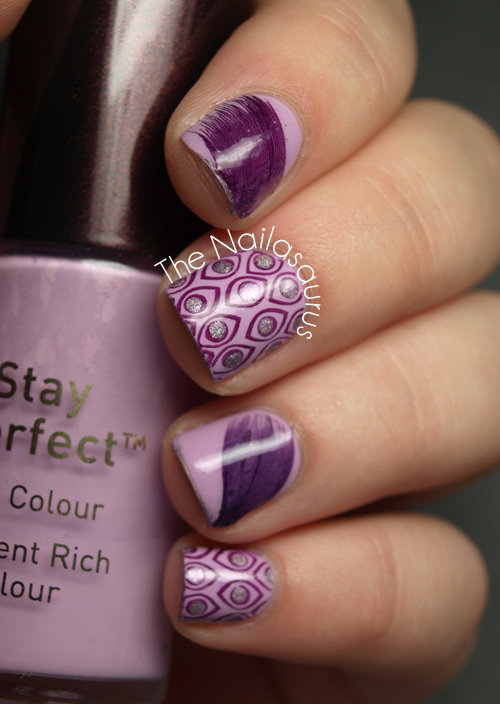
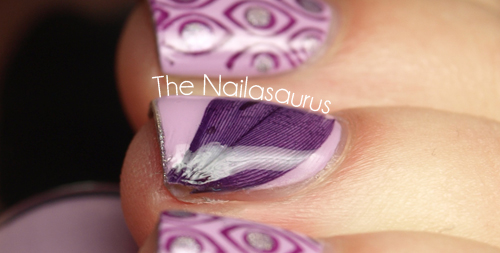
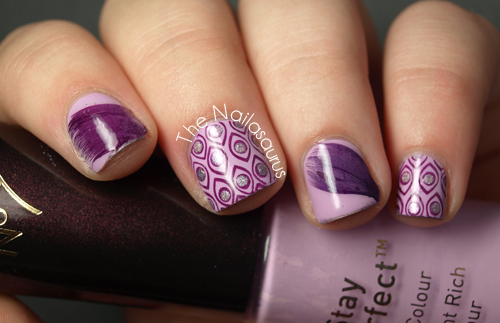
    I’ve been in love with feather nails ever since I saw them on Chloe’s Nails over a year ago! I’ve tried many many times since then to recreate something similar but always failed miserably. Well when I was in the craft aisle at my favourite junk shop recently searching for anything I could stick to my nails, I spotted these purple feathers and knew I’d be attempting the ‘feather nail’ again.
    This time I finally succeeded and now all I want is MORE FEATHERS! It is very tricky to get a feather stuck to your nail but once it’s there you’ll never want to take it off. 

    Erika has a great method for feather nails that involves glue which you can see here. It’s kind of hard to explain how I did this myself. I painted on the base colour of No7 Lucky Lilac and let it dry completely, then I used one coat of clear polish and stuck the feather on to that. Once the clear polish was dry and the feather stuck quite well, I painted on another coat of clear polish following the flow of the fibres to smooth it down. I just kept adding layers of top coat and gently pressing down the feather with a toothpick until I was happy!
    The rest of the nails are stamped with Bundle Monster Plate BM-212 and Cult Nails Vicious. I used a dotting tool to add accents of A-England Princess Tears and finished it off with a top coat of Sally Hansen Hard as Nails.

    TwitterBloglovin’Tumblr

    Share:
    Uncategorised

    The Poor Woman’s Velvet Manicure

    We probably all remember Ciate’s last great invention, the Caviar Manicure and Imma try really hard not to bang on about those emails and that drama. Well they’re back again with the Velvet Manicure and I’m sure we’re all familiar with Ciate’s MO of taking something that has been done before, packaging it in a pretty bottle with a bow on top and selling it at 9250% the price of the exact same thing bought elsewhere. I actually did the maths on that one! So you won’t be shocked to hear that you can get the Velvet look for a teeny fraction of the price at home.

    In all fairness, I watched Ciate’s Velvet Nails tutorial video and it does look like their product is finer and more like a powder than the Flock I bought from Goldleaf Craft Supplies on eBay, but I doubt that anyone will be looking close enough to tell.

    I used Models Own Purple Grey as a base colour. For the accent nail, I painted on my second coat of colour and let it dry a little before pressing the Flock on with my fingers. I didn’t get great coverage around the edges and I think that’s because I let it dry for too long so there wasn’t enough wet polish there for the Flock to stick to. I used a Fan Brush to swipe away all the excess, although as you can see, I missed a few bits!

    This is Burgundy Flock from Goldleaf Craft Supplies on eBay and it cost me £2.89 including shipping for 75ml/10g.

    And here are the maths behind my 9250% claim. It is based on my best guess at how much Velvet comes in the kit as I couldn’t find that information anywhere on the internet! I hope it’s clear enough but to sum up, if you were to purchase 75ml of flock (that I paid £2.89 for) at Ciate price, you’d pay £49.95 for it. Ouch.
    *£9.00 is half the full price of the Velvet Manicure kit. 13.5ml is the capacity of a Ciate Bottle, I do not know exactly how much Velvet comes in the kit.

    TwitterBloglovin’Tumblr

    Share:
    Gradient, Uncategorised

    Cult Nails Vicious Skittle Art

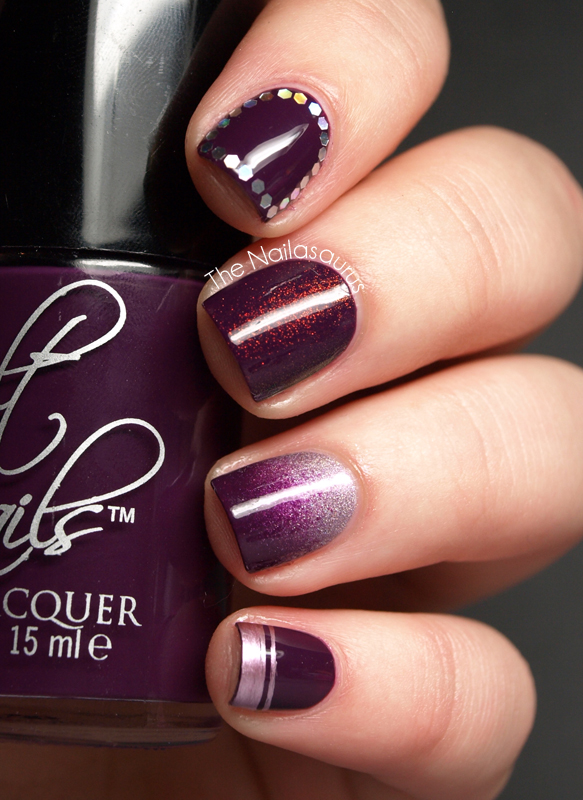
    I think I know why I’ve been completely obsessed with mix and matching my manis recently. I realised it’s just an excuse for every nail to be an accent nail! I like to just paint on a base colour and rummage through my supplies until I get ideas. Today’s center piece is Cult Nails Vicious which is one of my absolute favourite purple polishes. 
    Purple Skittle Mani by The Nailasaurus

    Purple Skittle Mani by The Nailasaurus

    Top to bottom:
    Holographic Glequins from Born Pretty Store
    Max Factor Fantasy Fire
    Gradient Nail with A-England Princess Tears (tutorial here)
    Double french tip with GOSH Metallic Purple

    Purple Skittle Mani by The Nailasaurus

    Here’s a close up of the Max Factor Fantasy Fire with the light coming from two different angles. You can see the way it flashes from gold-red to copper-green. Gooorgeous!

    Purple Skittle Mani by The Nailasaurus

    Here’s my best Chalkboard Nails pose! Can I pull it off with Sarah’s prowess or shall I stick to the bottle poses?
    Purple Skittle Mani by The Nailasaurus

    TwitterBloglovin’Tumblr

    Share:
    Freehand, Uncategorised

    Diamond Jubilee Nail Art!

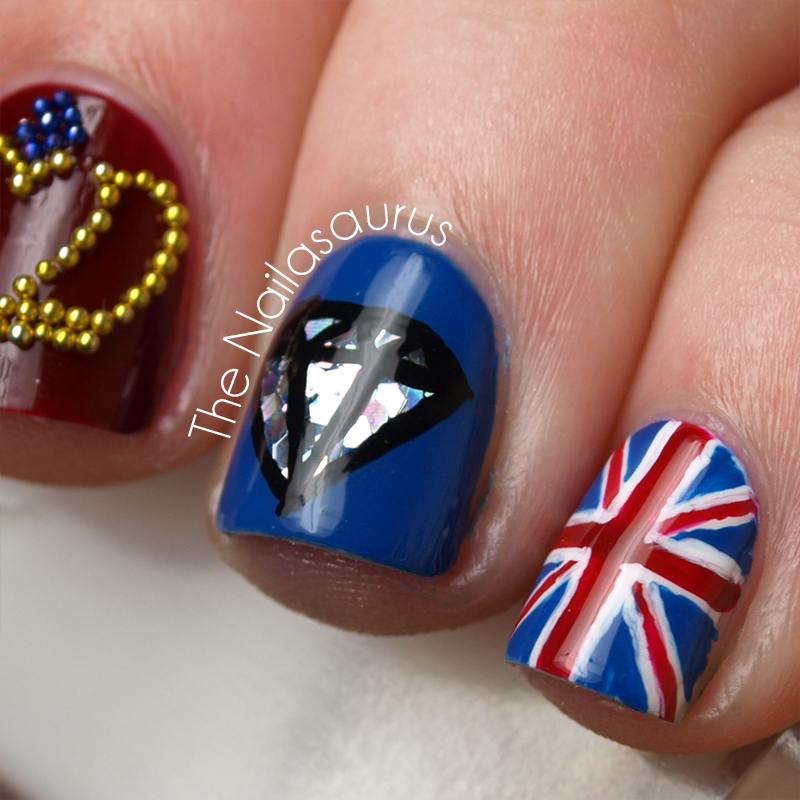
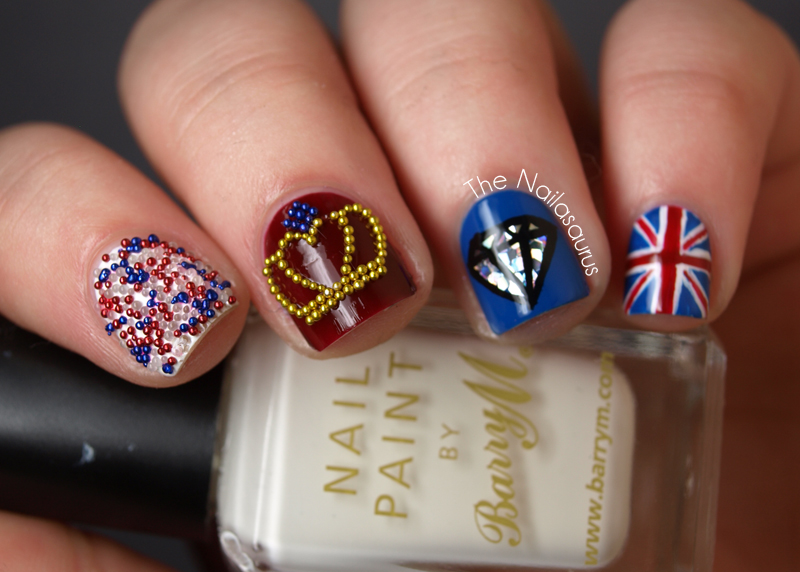
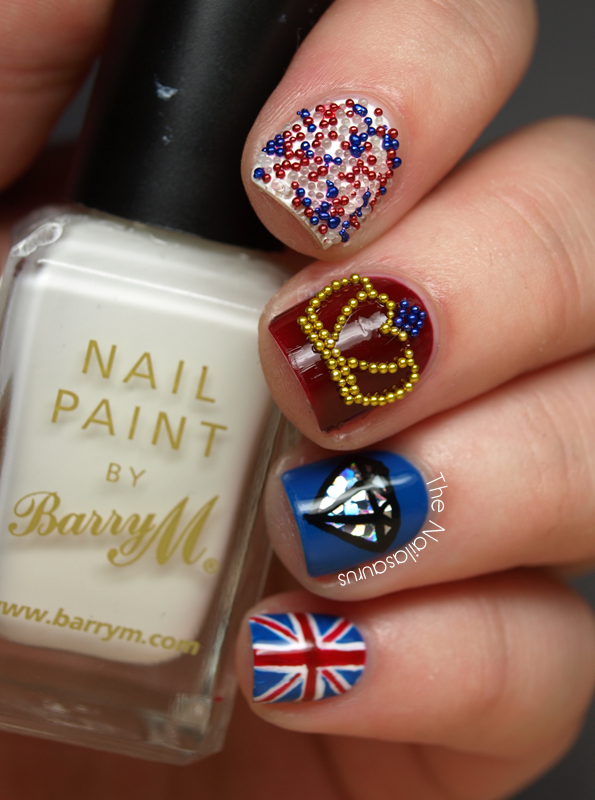
    In the UK this weekend, we’re celebrating the Queen’s Diamond Jubilee! This is only the second Diamond Jubilee in British history so I think Elizabeth deserves a good party. Today, the 2nd of June, marks exactly 60 years since she was crowned Monarch in 1953 but the celebrations are going on right through to Tuesday with a long bank holiday weekend. This does nothing but enforce stereotype that Brits are obsessed with royalty and the Queen. But hey, it’s all good fun if you ask me! I hope everyone has a great weekend, whatever you’re up to!
    I spent way too long on this manicure. It took at least two hours because I kept making mistakes and having to restart nails so by the time I’d finished, I felt like my back had been snapped in half!
    Diamond Jubilee Nails

    Diamond Jubilee Nails
    Red, White and Blue Caviar; Crown Jewels; Glequin Diamond; Union Jack.
    If anyone wants to know what polishes I used or where I got all the bits, just ask in the comments. There’s way too much going on here for me to link it all up!

    Diamond Jubilee Nails

    Diamond Jubilee Nails

    Diamond Jubilee Nails

    TwitterBloglovin’Tumblr

    Share: