Follow:
Browsing Tag:

Nimbus

    Glitter, Studs, Uncategorised

    So Long and Thanks For All The Likes

    This week was very exciting! The page that I run to accompany this blog reached 1,000,000 likes on Facebook. I thought I’d mention it here as I feel like this is one to write home about and feel very proud of! I haven’t mentioned it on the blog but the number has been increasing steadily over the last few months although I never, ever thought it would reach 1 million. So I just want to say a huge thank you to anyone reading this that likes the page!

    As a little celebration, I’m running a discount code in The Nailasaurus Emporium through until midnight on Monday (Dec 2nd). It’ll give you 30% off all orders over £10 and you just have to enter ‘millionaire‘ at the checkout. THANK YOU SO MUCH!

    For this nail art I created the Nimbus Nail Art over a base of white using Barry M White using Sally Hansen Coral Reef, China Glaze Tart-y For The Party, Models Own Bubblegum and China Glaze Pink-ie Promise.

    I added some gold triangle studs from The Nailasaurus Emporium right at the base of the nimbus nails.

    The textured glitter on my accent fingers is Barry M Countess from the new(ish) Royal Glitters collection.


    It’s all topped off with a coat of KBShimmer Clearly On Top

    Share:
    Uncategorised

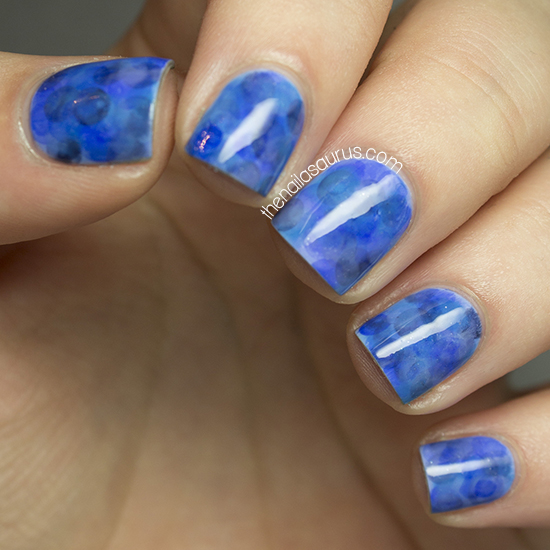
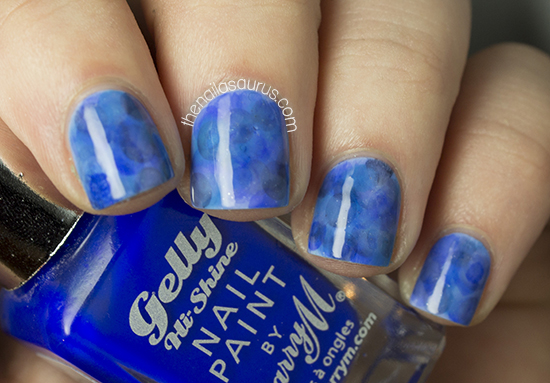
    Blue Nimbus Nails

    Another day, another Nimbus manicure! I created this blue nimbus as a base for some white stamping as blue and white is one of my favourite colour combos. The plan was to stamp on some chevrons but I messed up that part so you don’t get to see it! Why is it that whenever you spend a long time on nail art, it gets messed up at the last opportunity… after all your hard work! Why couldn’t I have made a mess in the beginning and put the finishing touch on just perfectly?!

    For this manicure, I used NYC Raindrop as my base colour and created the nimbus effect using NYC Water Street Blue, Barry M Blue Grape and H+M Midnight Mystery. See here for a tutorial.
    It’s all topped off with two coats of Color Club Top Coat.

    Share:
    Uncategorised

    Green Nimbus Nail Art

    Betcha didn’t see this one coming! Today I tried out the Nimbus technique with a green and blue colour scheme. I really like the look of these as they’re more marbled than my previous attempt. I’m not sure whether this is because of the polishes I used or whether I’m just getting better at it!

    The colours I used here are:
    Sally Hansen Green Tea as the base colour
    Barry M Blue Grape
    Barry M Guava
    Rimmel Aqua Cool
    I used two coats of Revlon Quick Dry Top Coat over the top.

    Click here for a Nimbus nail art tutorial

    TwitterBloglovin’Tumblr

    Share:
    Tutorial, Uncategorised

    Nimbus Nail Art Tutorial

    As I promised, today’s post is a tutorial for the nail art I posted yesterday. As many of you guessed – I did indeed use a q-tip/cotton bud! I really love this nail art so no doubt I’ll be posting a lot of these in the coming weeks. It also makes a great base for stamping and other nail art so stay tuned for that!
    I had mentioned that I didn’t know what to call this style, but Laura’s suggestion of ‘Halo’ was spot on. Thank you Laura! I decided on Nimbus (which is another word for Halo according to thesaurus.com!) to avoid any confusion with video game themed nail art. Nimbus nail art also rolls off the tongue quite nicely and it makes me think of Harry Potter! Win, win!
    Nimbus Nail Art Tutorial by The Nailasaurus

    Nimbus Nail Art Tutorial by The Nailasaurus
    All you need for this nail art is:
    Cotton Buds
    Acetone – You can get acetone from most beauty supply stores and most pharmacies. I did try this with nail polish remover but it wasn’t as effective. You can also use polish thinner, but that could get pricey as you need to use a fair amount.
    A white nail polish for your base

    A selection of 3-4 colours – I’m using Barry M Plum, Prickly Pear and Bright Purple and H+M Midnight Mystery.
    Top coat
    Start by painting all of your nails white, or another very light shade and letting it dry. Using a light base will make the colours much more vibrant when you add them over the top.
    Nimbus Nail Art Tutorial by The Nailasaurus
    This is the important part! Lay out some nail polish on a sheet of plastic or foil and pour out some acetone. If you don’t have a suitable container, just use the lid of the bottle.
    Touch a cotton bud to the surface of the acetone and let it soak up in to the cotton.
    Start thinning out the polish using the acetone soaked cotton bud by working it in a circular motion.

    Nimbus Nail Art Tutorial by The Nailasaurus
    Test the consistency by blotting the cotton bud on to the plastic. You want it to be watery but still pigmented.

    Nimbus Nail Art Tutorial by The Nailasaurus
    When you’re happy with the consistency, blot the cotton bud randomly on to your nail. I like to start with the darkest colour and work my way towards the lightest.

    Nimbus Nail Art Tutorial by The Nailasaurus
    Pick up a fresh cotton bud and repeat with your second colour.

    And the third! If you want to get the colour right up to the edges of your nails, it will start pooling in your cuticles. Don’t worry about it too much yet, it can easily be cleaned up when you’re done.

    Nimbus Nail Art Tutorial by The Nailasaurus

    Blot on a layer of your lightest colour to blend everything together nicely.

    Nimbus Nail Art Tutorial by The Nailasaurus
    Because the layers of colour are so thin, you can keep adding colours until you’re happy. Just make sure you give it time to dry in between colours otherwise the acetone can start removing the layers underneath.

    Nimbus Nail Art Tutorial by The Nailasaurus
    Once you’re finished, add a top coat and wait for everything to dry. Clean up around the edges using a clean-up brush and you’re done!
    A few tips
    – Your cotton bud should be saturated with acetone, but not dripping with it!
    – If at any point your cotton bud starts deteriorating – stray fibres etc – just pick up a new one.
    – If any little bits of cotton do get on to your nail, you can remove them with a pair of tweezers.
    I want to see your take on this technique so I’d love if you tag #looknailasaurus if you post your mani on Instagram, Twitter or Tumblr!

    Nimbus Nail Art Tutorial by The Nailasaurus

    TwitterBloglovin’Tumblr

    Share:
    Uncategorised

    The Manicure of my Dreams

    For a very long time, I’ve had an image of some nail art in my head. I don’t know if it’s something I’ve seen before or a complete fabrication but this week I finally figured out how to make it real! The look I pictured was a marble-like mash up of colours that all blend together and look dreamy on the nails. 
    In my quest to figure this out, I tried a couple of things including the saran wrap and watercolour tecniques. The watercolor came closest but I still wasn’t happy so I set out on my own and tried a few new things. Eventually I found the perfect tool and technique and I’m so in love with this style of nail art. Now I’m not going to ruin a perfectly good chance at a guessing game by telling you the tool that I used – you guys have to guess! All I will say is that it’s an every day item (or items) that you would normally find in the bathroom. Any ideas?
    All will be revealed tomorrow when I post a tutorial for this look. I haven’t quite settled on a name for it yet so suggestions are appreciated!

    For this manicure I used a lot of Barry M Polishes: WhitePlum, Prickly Pear and Bright Purple all feature as well as H+M Midnight Mystery. I used Color Club’s Top Coat.

    TwitterBloglovin’Tumblr

    Share: