Follow:
Browsing Tag:

Nailvengers Assemble

    Freehand, Glitter, Halloween, Nail Art, Uncategorised

    Nailvengers Assemble: Halloween Nail Art

    Halloween Nail Art // The Nailasaurus

    Happy Halloween all! I’ve teamed up with the Nailvengers (Amelia, Allie, Alice and Lucie) today for my first and final Halloween look. I’m sorry if you might have been expecting something a bit more adventurous considering I had 18 designs to choose from, but I was in a bit of a rush and blood drips are always going to be my go-to Halloween design! This time around, I tried to 3D-ify the drips with some highlighting and contouring with moderate success!

    This glitter polish caught my eye half way through the paint job. It’s an untried that’s been sat on my desk just waiting to be used. My eyes skimmed over it and just thought ‘the is PERFECT for Halloween!’, so I removed the polish that was already there and applied the glitter instead!

    For the blood drips, I painted a base colour of Barry M Lychee, then freehanded on the drips using Rimmel Heart on Fire with a nail art brush.

    I mixed a little bit of black polish in with the red to paint the shadows, then mixed a little bit of red with white for the highlights/reflections.

    The glitter is W7 Lava Flow. I used about four (really thin) coats to get full opacity but you could just apply two over white for a similar effect.

    It’s all topped off with two coats of Glisten & Glow HK Girl.

    Halloween Nail Art // The Nailasaurus

    W7 Lava Flow Halloween Nails // The Nailasaurus

    Halloween Nail Art // The Nailasaurus

    Halloween Nail Art // The Nailasaurus

    Share:
    Glitter, Nail Art, Uncategorised

    Nailvengers Assemble: Glitter Placement

    For July’s Nailvengers challenge, we’ve decided to jump in to glitter placement. We’re all of differing abilities when it comes to this style so you’ll see a really wide range of designs when you visit Brit Nails, Lucy’s Stash, and xAmeliax to see what they came up with for the challenge today. I’ve had these round glitter pieces sitting in my ‘to try’ pile for a while now so I thought today would be the perfect day to debut them.
    I started out just placing the dots on randomly with all the colours mixed together but after one nail, I decided I’d rather group them together in combinations of three to four colours so each nail looked different from the next. My favourite is the index finger – a surprisingly compatible combination of blue, purple and coral!

    What You’re Looking At

    Barry M Coconut
    Glisten & Glow HK Girl Top Coat
    Rose Gold Zodiac Midi Ring from Astrid & Miyu

    Share:
    Freehand, Nail Art, Uncategorised

    Nailvengers Assemble: Summer Treats

    Strawberries and Cream Nail Art | The Nailasaurus
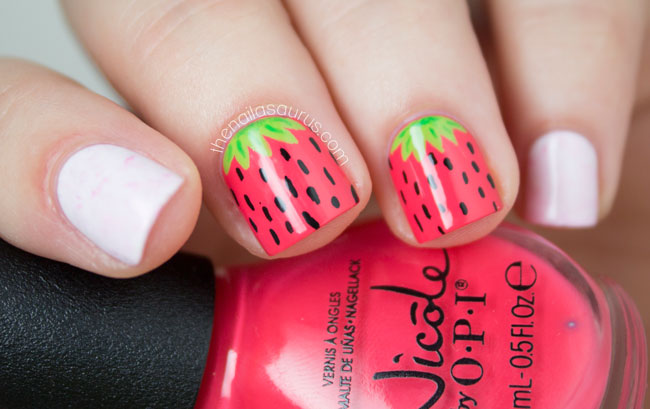
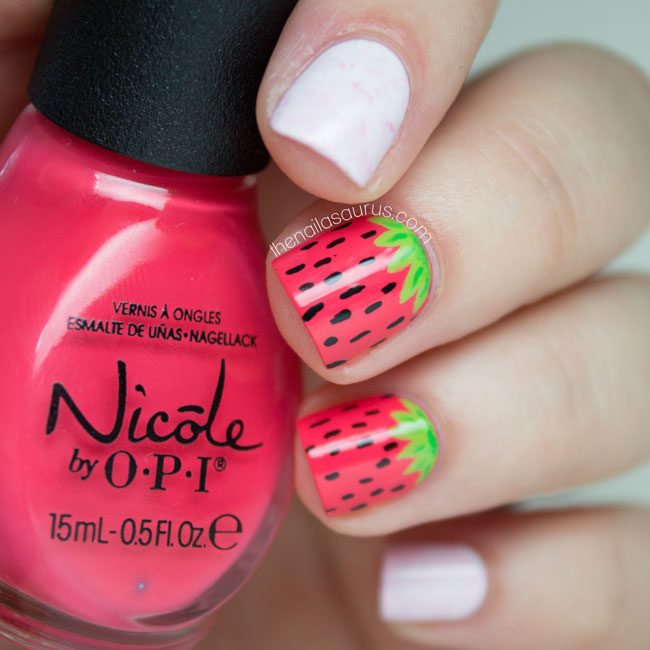
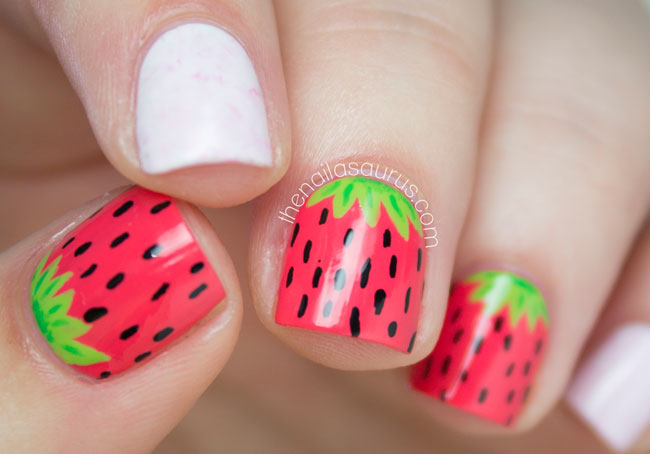
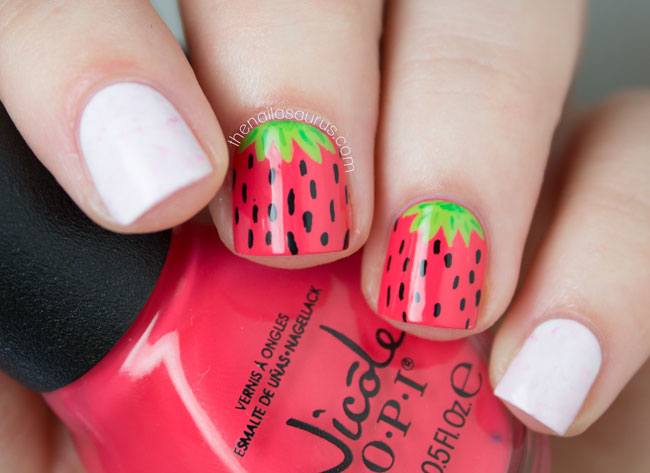
    June’s Nailvengers theme is ‘Summer Treats’ so with Wimbledon coming up, I decided to so some Strawberries and Cream nail art. 
    For the strawberries, I used Nicole by OPI The Coral of the Story as my base colour with Barry M Key Lime for the green. I added the details using black acrylic paint and Barry M Spring Green.
    For the creamy nails, I used Graffiti Nails Ice White as my base, then the Saran Wrap technique with a tiny bit of Barry M Rose Hip and Nicole by OPI The Coral of the Story.
    Strawberries and Cream Nail Art | The Nailasaurus
    Strawberries and Cream Nail Art | The Nailasaurus
    Strawberries and Cream Nail Art | The Nailasaurus
    Strawberries and Cream Nail Art | The Nailasaurus

    Share:
    Uncategorised

    Nailvengers Assemble: Florals

    Nailvengers Assemble: Florals | The Nailasaurus | UK Nail Art Blog
    In typical fashion, I prepared this mani weeks ago but I still managed to be a few hours late with my Nailvengers post! It’s just been one of those days. It took a few unexpected turns but I’ve finally made it home and I’ll be going to bed as soon as I press publish!

    For this nail art, I used Barry M Rose Hip as my base colour then painted on some really skinny pin stripes using Sweet Color White Liner Polish.
    I painted on the roses using a nail art brush with NYC Peach Popsicles and contouring with NYC Rooftop Party Berry (there’s a tutorial for the roses here). 
    Next I painted the leaves around the roses with piCture pOlish Chillax.
    My ring and pinky finger were painted with Barry M White and then I applied some nail wraps from Born Pretty Store over the top. I don’t think they match the rest of the mani at all but I couldn’t resist wearing them!
    Nailvengers Assemble: Florals | The Nailasaurus | UK Nail Art Blog
    Nailvengers Assemble: Florals | The Nailasaurus | UK Nail Art Blog
    Nailvengers Assemble: Florals | The Nailasaurus | UK Nail Art Blog
    Nailvengers Assemble: Florals | The Nailasaurus | UK Nail Art Blog

    Share:
    Uncategorised, Waterfall

    Nailvengers Assemble: Untried Polishes

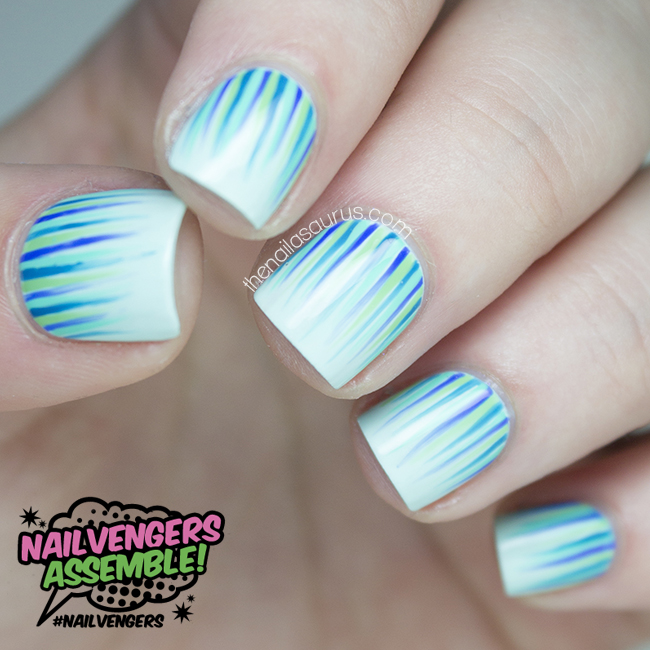
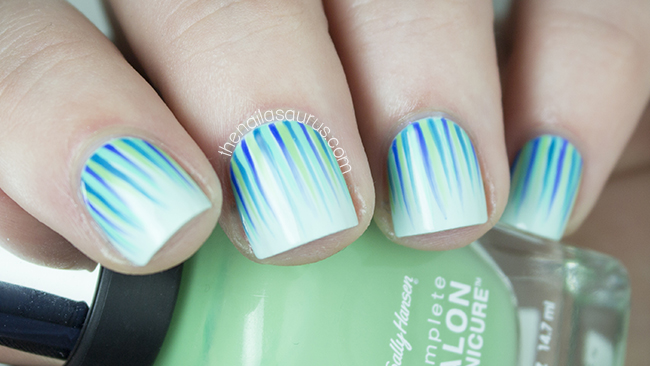
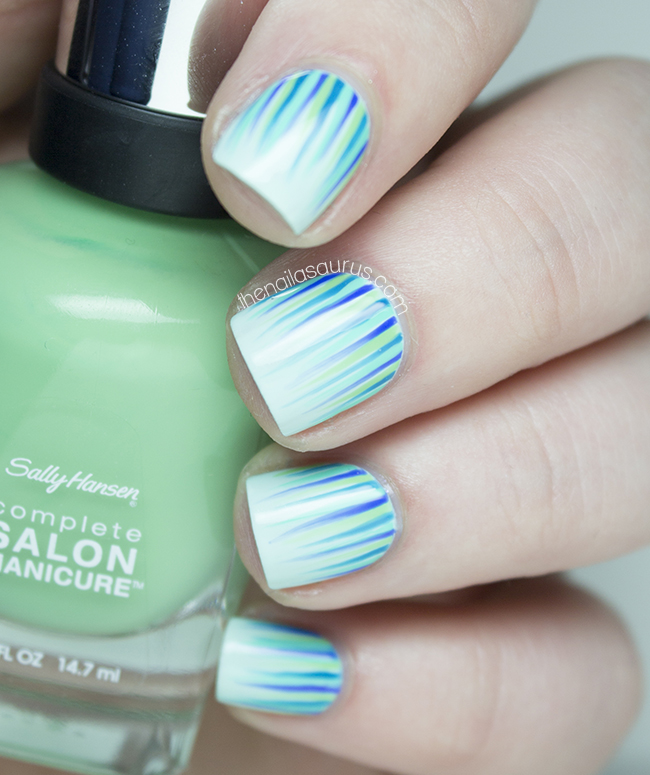
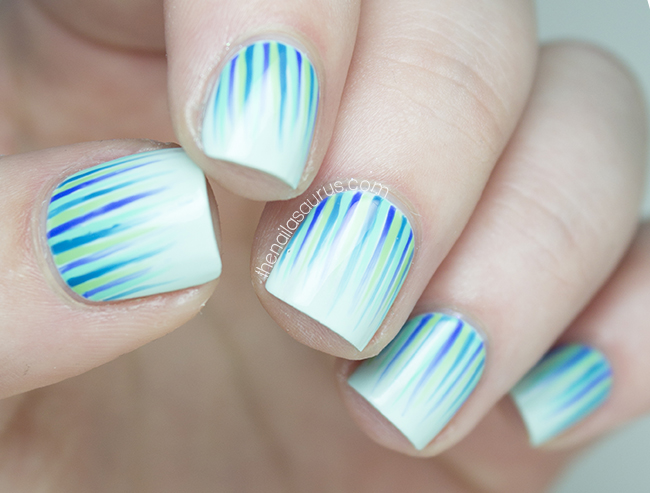
    Mint Green Waterfall Nail Art | Nailvengers | The Nailasaurus UK  Nail Art Blog

    This month’s mission is to use at least 3 untried polishes from our stash. I’m pretty good at using polishes soon after I buy them because I tend to purchase in small bundles of 3-4 polishes and get very excited to use them. I did find a few stragglers that were perfect for a mint themed waterfall manicure. It’s been a while since I dedicated a whole hand to the waterfall and I really love the colour theme in this one so I’m very happy about today’s post!

    Mint Green Waterfall Nail Art | Nailvengers | The Nailasaurus UK  Nail Art Blog
    The base colour on this one is Rimmel Breakfast in Bed
    I used Sally Hansen Mojito, Rimmel Britpop, NYC Hudson Breeze and piCture pOlish Chillax in the waterfall. There’s a waterfall tutorial here.
    It’s all topped off with one coat of HK Girl.

    Mint Green Waterfall Nail Art | Nailvengers | The Nailasaurus UK  Nail Art Blog

    Mint Green Waterfall Nail Art | Nailvengers | The Nailasaurus UK  Nail Art Blog

    Don’t forget to stop by the other ladies’ blogs to see what they dug out for the Untrieds challenge.

    Share:
    Stamping, Uncategorised

    Nailvengers Assemble: Mardi Gras Madness

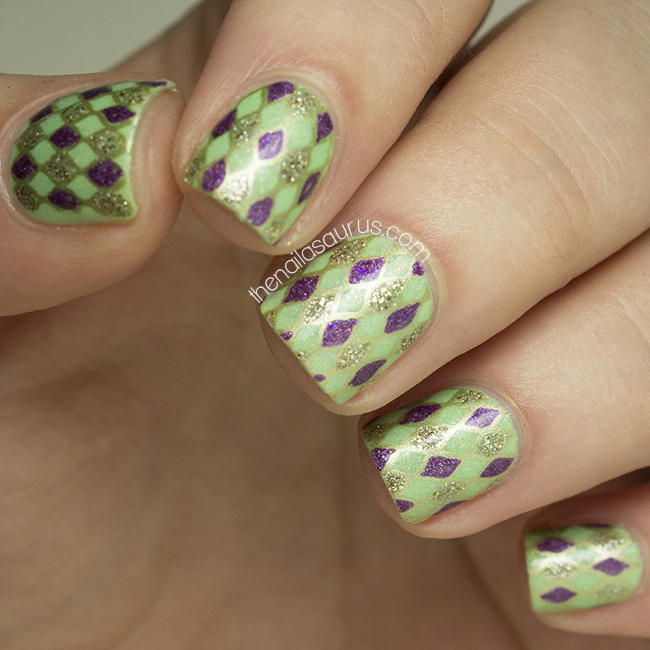
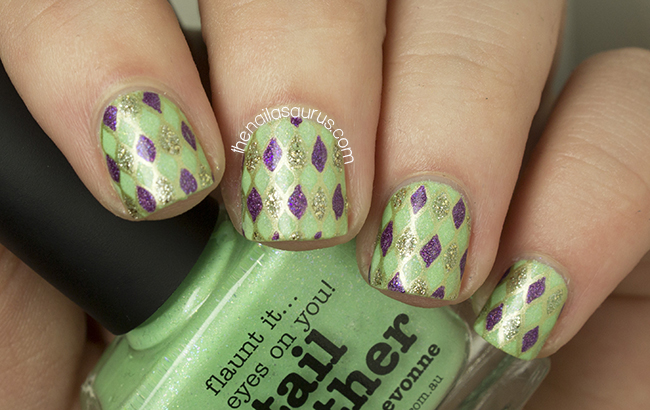
    With Mardi Gras coming up on March 4th, this month we decided to use the holiday as the inpiration for our Nailvengers Assemble challenge. After a failed attempt to create something with caviar (seriously, don’t even ask!), I decided to go for something simple using a few of the colours most often associated with Mardi Gras – purple, green and gold. 
    Don’t forget to check out my fellow Nailvengers’ Mardi Gras nail art- One Nail to Rule Them All, xAmeliax, Brit Nails and Lucy’s Stash!


    For this nail art, I used piCture pOlish Tail Feather as my base colour.

    I stamped on the fishnet design from Bundle Monster plate BM209 using Barry M Gold Foil.
    Using a nail art brush, I filled in some of the diamonds to create a harlequin look using piCture pOlish Hussy and Barry M Majesty.
    It’s all topped off with a coat of Glisten and Glow HK Girl.

    Share:
    Glitter, Stamping, Uncategorised

    Nailvengers Assemble! New Year, New Technique

    Happy Friday everyone!! I don’t think I’ve ever been this happy to see the weekend. It’s been such a hectic week that I feel like I could sleep right through to Monday morning.
    I’m back today with another new project that I’m lucky enough to be a part of… Nailvengers Assemble! Myself and a few other British Nail Bloggers have gotten together to start a monthly challenge amongst ourselves and for January we’re going for New Year, New Technique which is fairly self-explanatory – pick something you’ve never tried before and do it!
    The ladies that will be joining me on this quest are the amazing bloggers behind One Nail to Rule Them All, Lucy’s Stash, xAmeliax and Brit Nails. We all met at the Cosmo Blog Awards back in October and have been in touch ever since. As inspiration and creativity was drying up for us towards the end of last year, we decided we should start setting ourselves a monthly prompt and work as a group to motivate each other and get those creative juices flowing again!
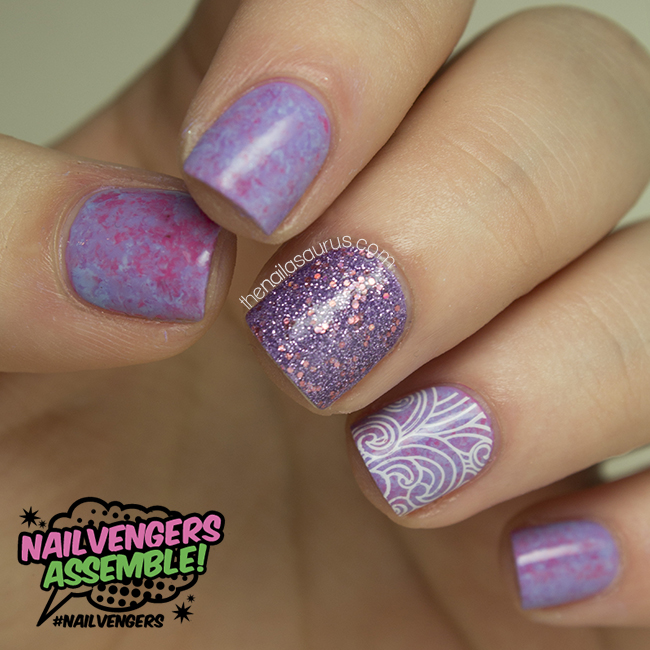
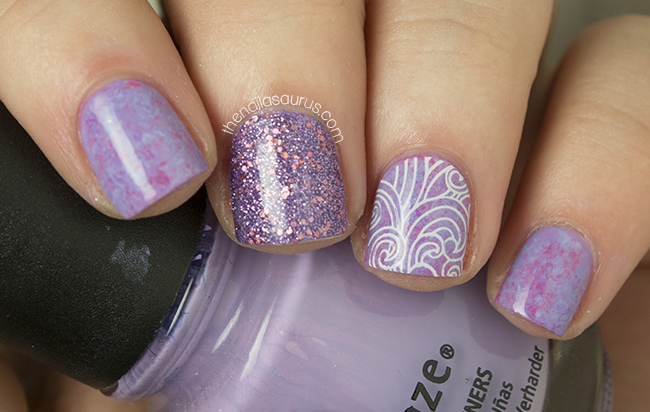
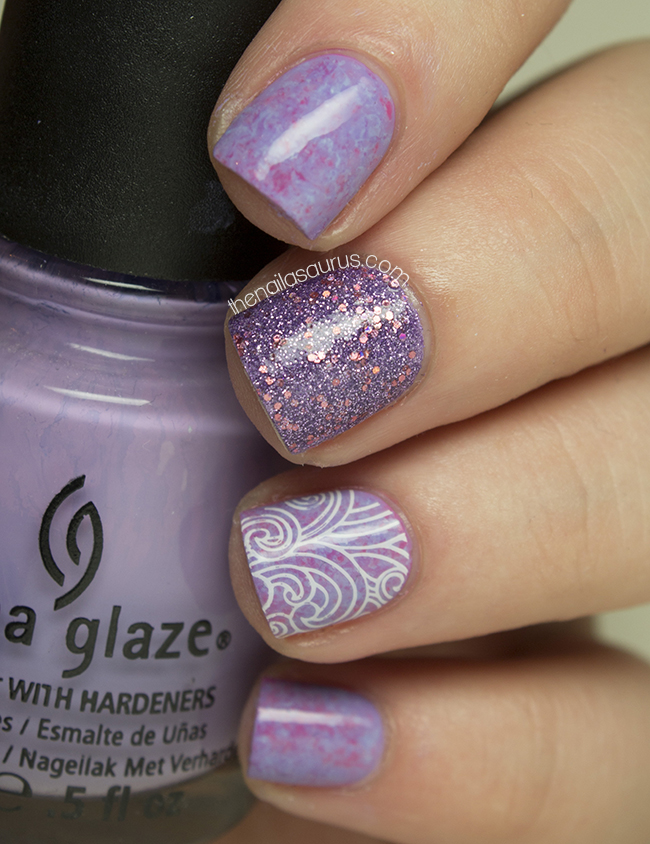
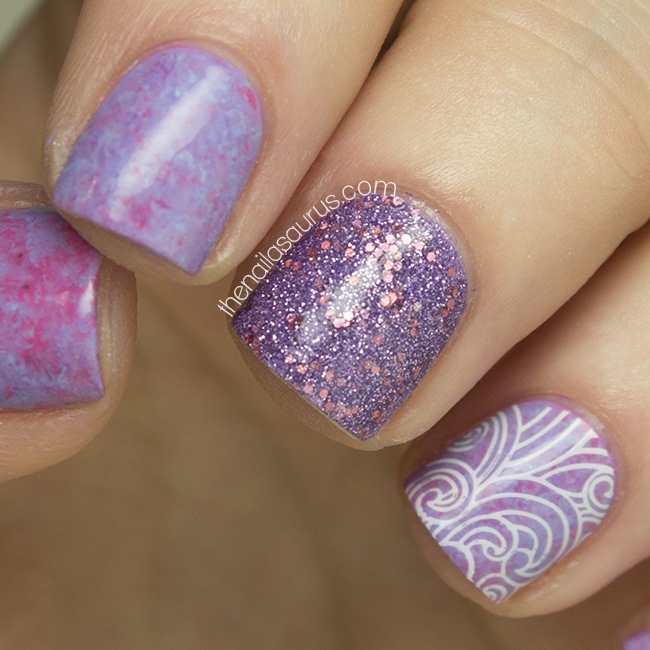
    For my New Technique, I’ve gone for Saran Wrap nails. It’s such a simple technique and you can achieve some amazing looks with it, yet I’ve never tried it before. I followed Amelia’s tutorial for this but with a pastel colour scheme and I really like the way they turned out. I couldn’t resist adding a bit of stamping over the top and a glitter accent too!

    I used China Glaze Tart-y For the Party as my base colour. Then I got down to the saran wrap-ing with Collection Think Pink and China Glaze Fade Into Hue. Check out the tutorial on xAmeliax’s YouTube Channel.
    The glitter on my middle finger is Sally Hansen Be-Jeweled and I stamped on the design from MoYou Fairytale Collection 02 plate using BK Matte White.
    It’s all topped off with two coats of Glisten and Glow HK Girl.
    Share: