Follow:
Browsing Tag:

I ♥ Nail Art

    Tutorial, Uncategorised

    Sally Hansen Textured Nail Art Tutorial: Sugar Spun Nail Art

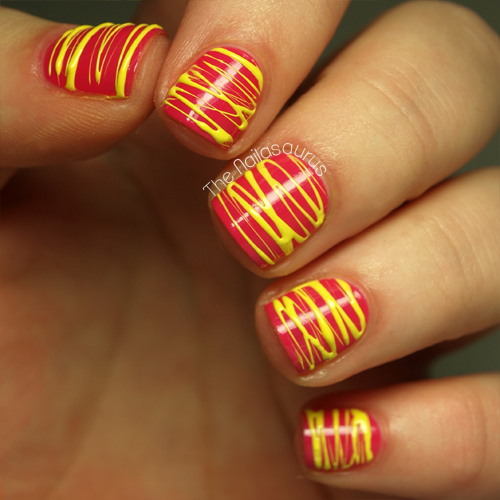
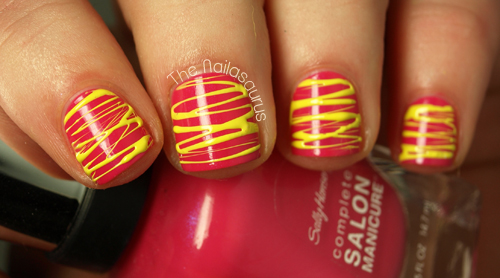
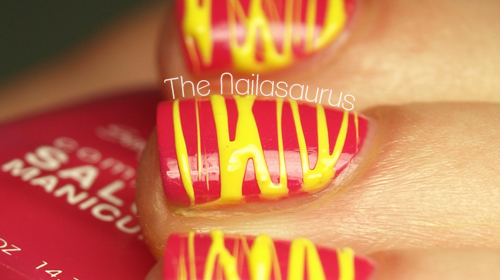
    June is the last month for you guys to enter Sally Hansen’s I ♥ Nail Art competition over on their Facebook page so I’m here with some inspiration for this month’s theme… Textured Nail Art! I’ve gone for the sugar spun look because whenever I wear this design, I find myself constantly running my fingers over the textured surface. The process is a bit messy but I think it’s worth it for the finished look!
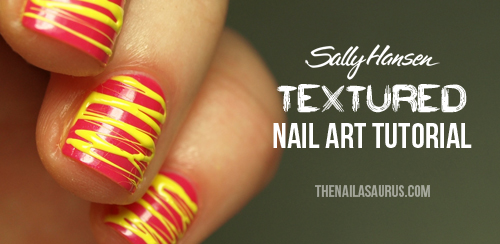
    For this design I’m using Sally Hansen Xtreme Wear Mellow Yellow and Sally Hansen Complete Salon Manicure Back to the Fuschia. You’ll also need some toothpicks and a top coat. My favourite is Sally Hansen Dries Instantly. 
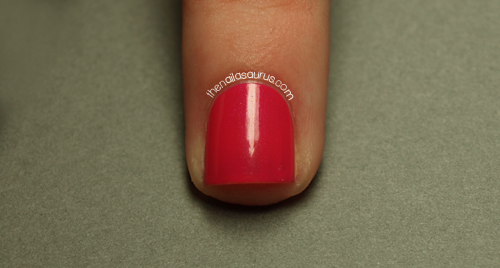
    Start by painting your nails with Back to the Fuschia and applying a top coat of Dries Instantly. Wait for them all to dry and then move on to the next step.
    Lay out a sheet of plastic, baking paper or something similar and make a little puddle of Mellow Yellow. Leave it for a few minutes then start to stir it with a toothpick. You’ll notice it getting thick and stickier but try to keep the consistency regular by working it with the toothpick. When the polish is making strings like you see in the picture, you’re ready to move on.
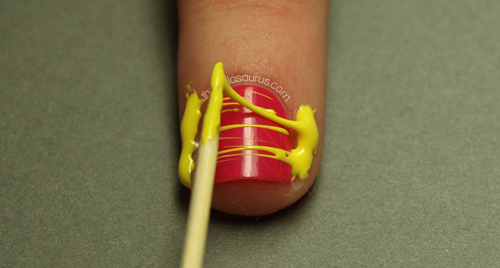
    This is where things get messy and a little more tricky! Get a little blob of Mellow Yellow on the end of your toothpick and dab it on the skin at one side of your nail, then quickly move it over to the other side stretching the polish as you go. 
    You could use a product like Liquid Palisade around your nails before you start to make cleaning up the mess a little easier.
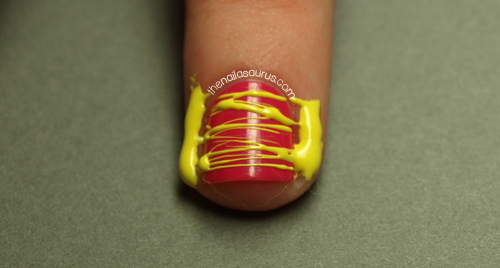
    Once you’re happy with your sugar, wait for it to dry completely.
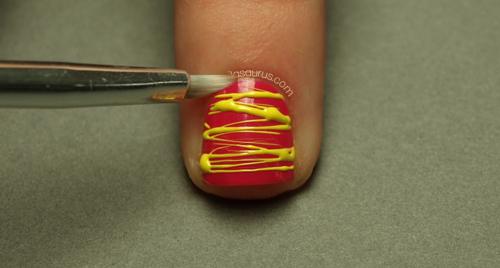
    Using a small nail art brush dipped in acetone, clean up around the edges of your nails. I choose not to apply a top coat on top of the design to keep as much texture as possible.
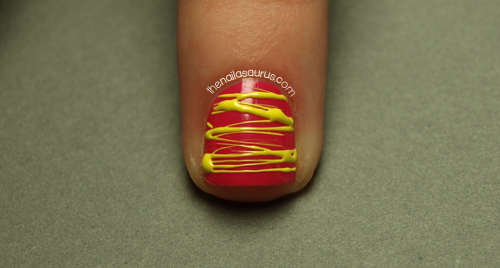
    All done! Don’t forget to enter your own Textured Nail Art looks in to Sally Hansen’s I ♥ Nail Art competition on Facebook for the chance to win $500 and a trip to NYC!

    Share:
    Studs, Tutorial, Uncategorised

    Sally Hansen Street Style Tutorial: Studs n’ Chains

    This month, Sally Hansen’s I ♥ Nail Art theme is Street Style and the call for inspiration is ‘heavy metal, pop art and graffiti glam’. I stopped reading at heavy metal… it’s got to be the studs for me!

    Before you start make sure you’ve got everything you need. The only polishes I’m using for this are Sally Hansen Black Out and Dries Instantly.
    I’m using some gold bullion for the studs, an old necklace for the chains, a pair of pointy tweezers, a nail art brush and a few toothpicks.

    I’ve got a selection of chains which I’ve collected just for nail art purposes! Some of them are necklaces I’ve tired of and instead of throwing them out I’ve done a bit of upcycling and started wearing them on my nails. Others are ones I’ve picked up in the cheap in stores. If you need a chain, just pop in to places like Claire’s to see if there are any chains thin enough for your nails.

    To avoid any smudges on your polish, before you even paint on the base colour measure and cut off a piece of chain for each of your nails. Just rest it across to get an idea of how much you need, then snip it off with scissors, wire cutters or anything else that will do the job!

    Start with a base of Sally Hansen Black Out and let it dry.

    Using the nail art brush, paint on a line of clear nail polish where you want to stick the chain and move swiftly on to the next step…

    Place the chain across your nail and pat it down in to the polish to make sure it’s really stuck there!

    I always use a toothpick to place the studs. I dip the end in a bit of clear nail polish to make it sticky and use it to pick up the fiddly little beads.

    Add a coat of Dries Instantly and place the studs on to your nail while it’s still wet.

    Finally, when everything is completely dry, dip a small paintbrush in acetone and sweep it along your cuticle line for a nice clean finish.
    Don’t forget to enter your own Street Style looks over at Sally Hansen’s Facebook Page. As always, there’s $500 and a trip to NYC up for grabs. I’d also love it if you tag me on Twitter or Instagram (@thesammersaurus) so I can see your entries too!

    Twitter ♥ Bloglovin’ ♥ Tumblr

    Share:
    Tutorial, Uncategorised

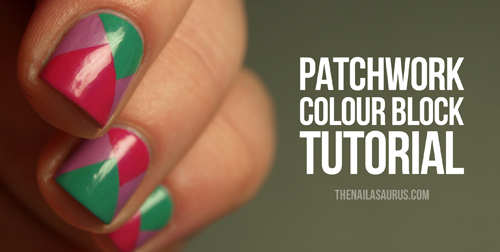
    Patchwork Colour Block Tutorial

    A little while ago, Sally Hansen got in touch to see if I’d like to be a Nail Art Ambassador for their I ♥ Nail Art campaign. As you’ll know if you’ve been reading for a while, my undying love for Sally Hansen is no big secret around here so of course I was more than happy to get involved!

    Each month there’s a new theme and you can submit your nail creations for the chance to win amazing prizes. I’ll be bringing you two tutorials every month and for the month of April, the theme is Colour Blocking!

    Before you start, make sure you have everything you need:
    Three (or more!) colours. I’m using Back to the Fuschia (what an amazing name!), Lively Lilac and Mint Sprint.
    A quick drying top coat. I’ve picked Dries Instantly for this one.
    Some Scotch tape, or anything similar. I decided to invest in one of those nifty gadgets which slides over your knuckles and dispenses it in little strips. If you’re cutting from the roll it’s a good idea to snip off some little strips before getting stuck in to the painting.
    Start by painting on your base colour, this is the colour that will show at the sides. At this point I apply a top coat to make it dry nice and quickly. 
    Sticking scotch tape to wet nails is a big no no so wait until it’s completely dry before moving on. I normally give it about 15-30 minutes just to be sure.

    Apply one piece of scotch tape diagonally across your nail…

    … and then another at a right angle to that piece. You want to be able to see an exposed patch in an off centre triangle shape at the bas of your nail.
    Make sure your tape is pressed down firmly so that absolutely no polish seeps underneath. You can use a pair of tweezers to make things a bit easier.

    Paint your second colour on to the exposed triangle and immediately peel off the tape… very slowly and carefully!
    Once that patch is mostly dry, I apply another top coat to speed up the drying but still wait about 15-20 minutes before applying any more tape.

    Apply the second batch of tape in the same way. First with a strip diagonally across your nail (this time you can use the patch that’s already there as a guide), then another headed towards the tip of your nail.

    Paint on colour number 3 and peel off the tape.

    Finally, add one last top coat and use a small paintbrush dipped in acetone to clean up any mess around your cuticles!
    You can enter your own colour blocking manis in to Sally Hansen’s I ♥ Nail Art competition and check out the gallery for plenty more inspiration here.
    Although I kept the base coat the same on every nail, I alternated the colours I used to paint on my patches. There are so many ways to make this mani your own. Your can mix up your base colours, try out some different patches and even experiment with the angles!

    Twitter ♥ Bloglovin’ ♥ Tumblr

    Share: