Follow:
Browsing Category:

Waterfall

    31 Day Challenge, Freehand, Uncategorised, Waterfall

    31DC2013 Day 9: Rainbow Nails

    For Day 8’s nails I created a rainbow waterfall mani! It seems crazy that I got this far in to the challenge without doing a waterfall so while today is potentially the last day I will have the freedom to do one, it’s also an idea I’ve been holding on to for a while so it feels good to get it out and on to my nails! I used 20 different shades of nail polish in this nail art. Most of the time spent on this mani was just screwing and unscrewing the bottles!
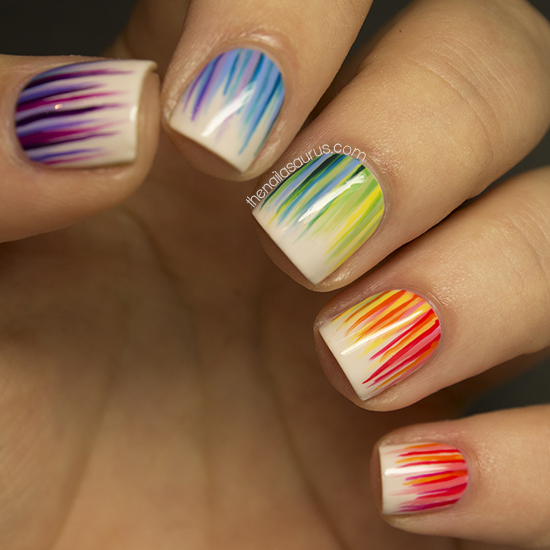
    My base colour is Sally Hansen Crinolin and I used a selection of colours for the rainbow effect, too many to list here! There’s a tutorial for the waterfall technique right here if you fancy it yourself!
    And as always, it’s topped off with a coat of Sally Hansen Dries Instantly.

    TwitterBloglovin’Tumblr

    Share:
    Freehand, Gradient, Uncategorised, Waterfall

    High Contrast

    Where I mixed the two colours for this gradient in the middle, they swirled together and created a purple section in the middle. This has never happened to me before! I don’t know why I’m so excited about this snippet of basic colour science but I thought it was cool!
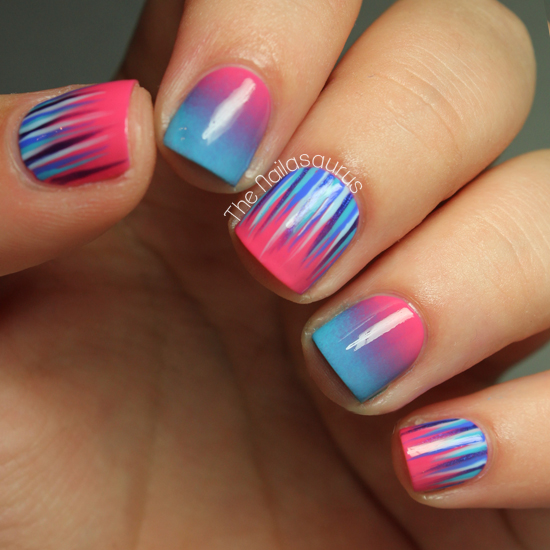
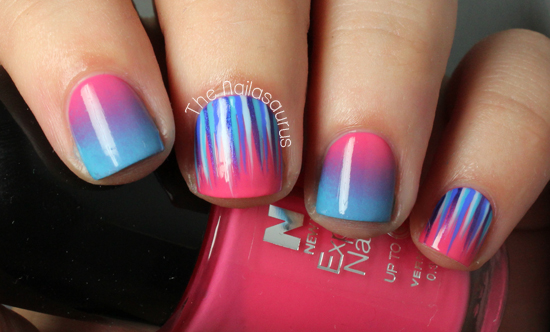
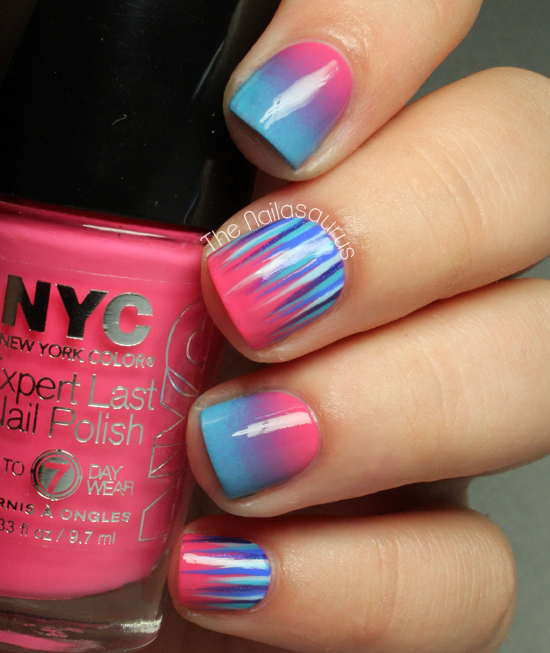
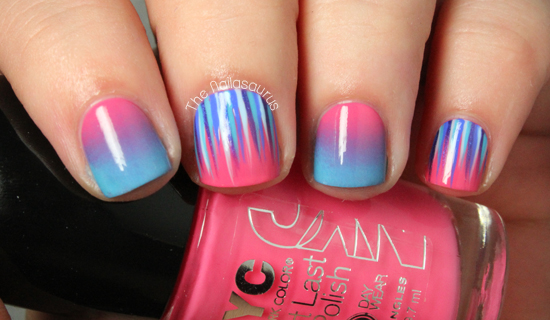
    All my waterfalls so far have been fairly subtle, at least compared to this one. I always tried to keeps the base colour and waterfall colours in the same scheme so today I wanted to try something with a bit more contrast that would really stand out. And I like it!

    My base colour is NYC Bubblegum Pink and I created the gradient using a make up sponge and Sally Hansen Himalayan Blue. There’s a tutorial for that here.

    For the waterfall nails, my colours were NYC Pier 17NYC RaindropSally Hansen Pacific Blue and Sally Hansen Himalayan Blue. You’ll find that tutorial here!
    It’s all topped off with two coats of No7 Stay Perfect Top Coat.

    Share:
    Studs, Uncategorised, Waterfall

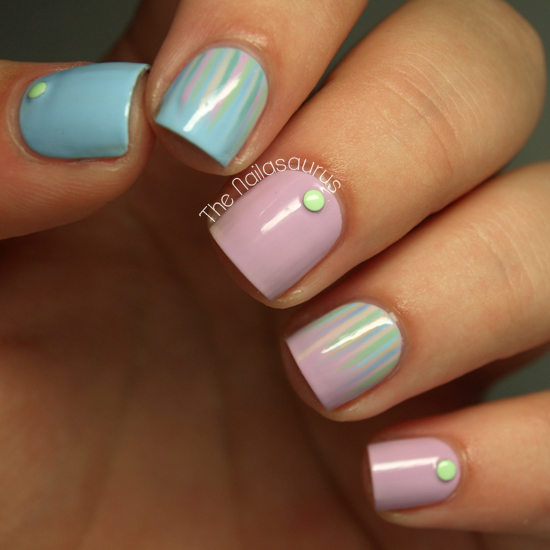
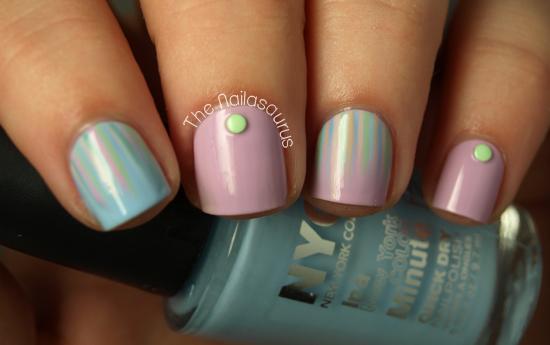
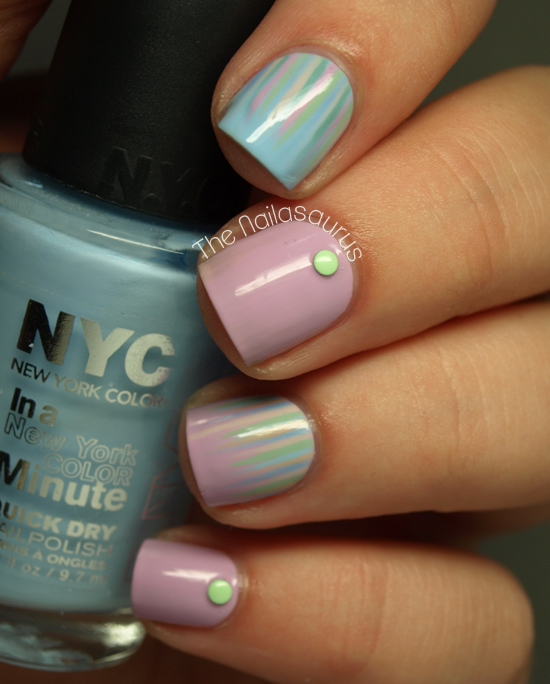
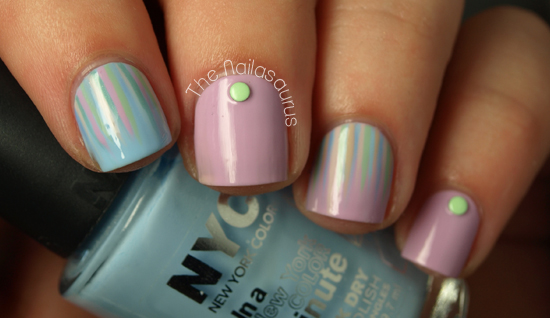
    Pastel Waterfall

    Before Google Reader closed down I imported all my subscriptions in to Bloglovin’ and yesterday I finally got round to sitting down and looking through every single blog I’ve followed over the last three years. I lost track of time but I know it took at least 2 hours! I must have unfollowed hundreds of blogs – just the ones that haven’t posted for 2 months or longer, some hadn’t even posted since 2011 – and I got a bit nostalgic whenever I came across a blog that I once loved but is now retired. I even shed a tear when I read Gilded Nails’ last post and it made me realise how lucky I am that I’ve been able to continue blogging all this time.
    Anyway, enough of the soppy stuff! The point is that I’m so glad to have an organised dash where I can now start to really keep up with my favourite blogs and hopefully plenty of new ones!
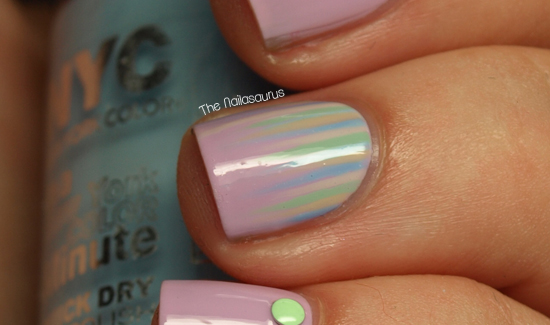
    I’m still loving pastels and I find myself reaching for them constantly. There is a waterfall in here somewhere but I used pastel colours and the look is very subtle!

    My base colours are NYC Raindrop and Lavender Cupcake. For the waterfall design, I used Sally Hansen Green Tea, Models Own Utopia, Barry M Lychee, Essie Bikini So Teeny and the two base colours (tutorial here). The green studs are from Born Pretty Store and you can now get them in a wheel with a range of colours and square ones in the mix too. It’s all finished off with No7 Stay Perfect Top Coat.

    TwitterBloglovin’Tumblr

    Share:
    Freehand, Uncategorised, Waterfall

    Monochrome Waterfall

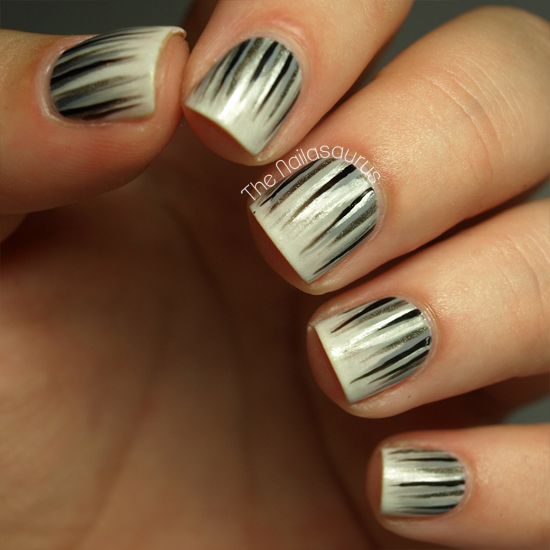
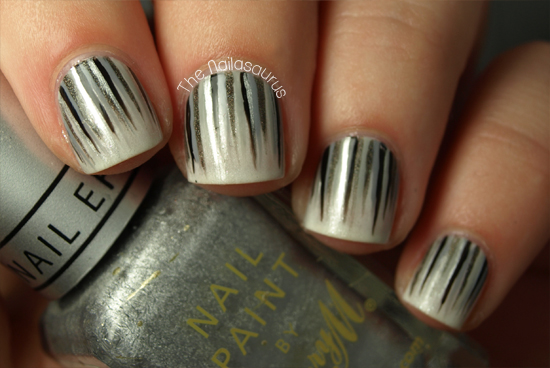
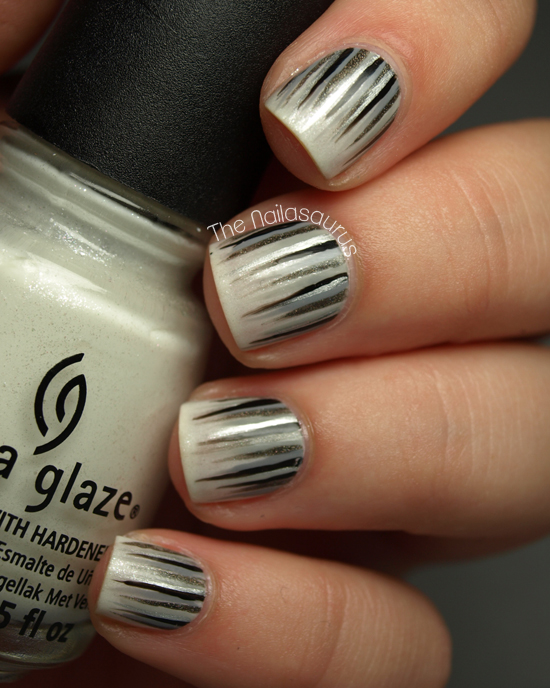
    The last thing on my list of must-do waterfall manis was a monochrome creation. This was suggested in the comments on the first ever waterfall mani I posted and I finally got round to it this week! 

    My base colour is China Glaze Dandy Lyin’ Around which is a shimmery creamish white. I thought I’d step away from the Barry M White on this one as it seems I’m using it in almost every manicure recently!
    For the details, I used Rimmel Grey Matter, Sally Hansen Dorian Grey, No7 Just Black and A-England Fated Prince. There’s a tutorial for the waterfall look here.
    I finished it all off with a coat of No7 Stay Perfect Top Coat and then one coat of Essence Better Than Gel Nails Top Sealer.

    Friendly reminder that my blog is shortlisted in the Established Beauty Blog category at this year’s Cosmo Blog Awards and you can vote for me here.
    Share:
    Freehand, Tutorial, Uncategorised, Waterfall

    Waterfall Nail Art Tutorial

    Since you guys love the waterfall looks as much as me, here’s a tutorial detailing how I do it! It’s a really simple process that I’ve explained as best I can in my previous posts but I know pictorials always shed a lot of light when it comes to nail art so I hope you enjoy it! If you only want to see the video, just scroll down to the end of the post.
    Waterfall Nail Art Tutorial


    Waterfall Nail Art Tutorial

    For this nail art, all you need is:
    – A base colour and a selection of others for the waterfall. I’d say about 4-6 is a good number but it’s entirely up to you!
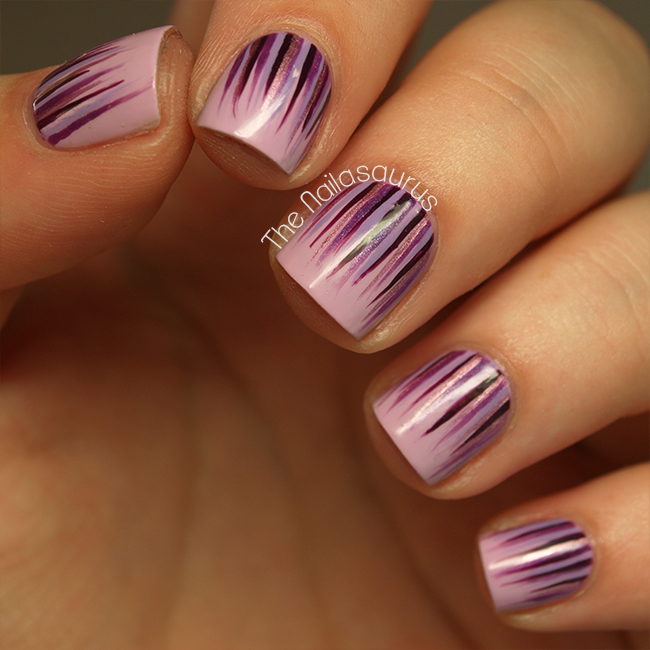
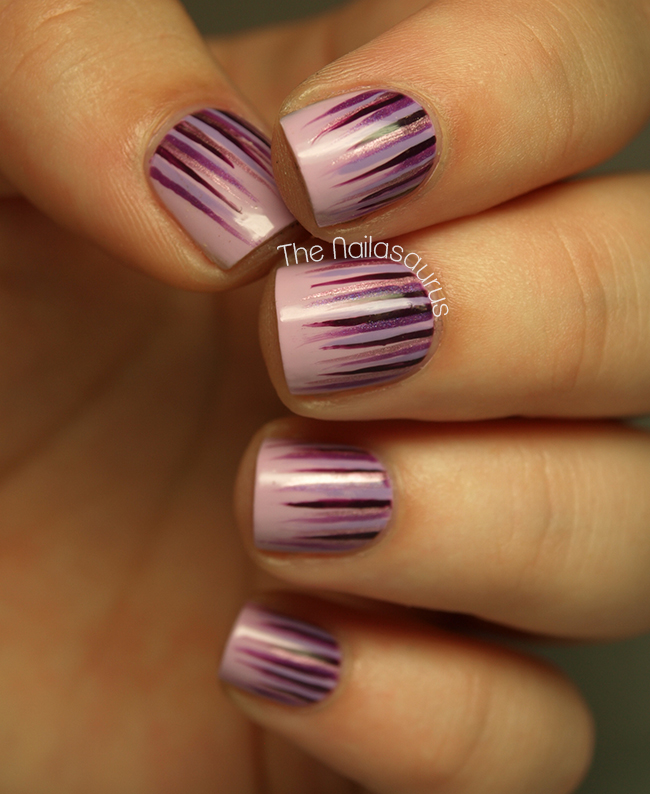
    For this tutorial, I used NYC Lavender Cupcake as my base colour and Sally Hansen Plum Luck, Rimmel Purple Reign, NYC Power of Elements and China Glaze Tart-y for the Party as my waterfall colours.
    – A top coat of your choosing. My current favourite is No7 Stay Perfect.
    – Acetone (not pictured) for cleaning your brush and cleaning up at the end.
    – A nail art brush…

    Waterfall Nail Art Tutorial
    …the brush is a very important ingredient for this style of nail art. You’ll need one that’s thin, at least 10mm long and that tapers off at the tip. You can get these in a set from eBay.

    Start by painting on your base coat and letting it dry.

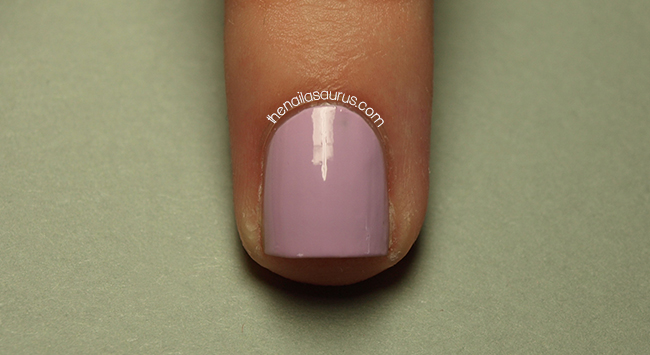
    Waterfall Nail Art TutorialUsing your nail art brush and Colour #1, paint on a few staggered lines starting just over the edge of the polish at your cuticle and working towards the tip of your nail. Vary the length of the lines too.
    As you get to the end, lift the brush tip slightly away from the nail to get the tapered point on each line.

    Take Colour #2 and paint more lines just to the side of Colour #1.

    Waterfall Nail Art Tutorial
    Colour #3 goes to the side of Colour #2…

    Waterfall Nail Art Tutorial
    …and so on!

    Waterfall Nail Art Tutorial
    Finally, add a top coat and use a nail art brush dipped in acetone to clean up around your cuticle line.
    Waterfall Nail Art Tutorial

    Waterfall Nail Art Tutorial

    Waterfall Nail Art Tutorial

    Waterfall Nail Art Tutorial

    Waterfall Nail Art Tutorial

    Update

    Now there’s a video tutorial too!

    TwitterBloglovin’Tumblr

    Share:
    Freehand, Uncategorised, Waterfall

    Neon Waterfall Nail Art

    Are you bored of these yet? Good, because neither am I! I asked you guys for colour combination requests on my first Waterfall Mani post and by far the most popular suggestions were neons on a pale base and a monochrome scheme (stay tuned for that one). The neons were a brilliant idea – thanks to everyone that came up with that one… it reminds me of streamers, parties and carnivals!

    I used a base of Barry M Lychee and painted on the waterfall using a long, thin nail art brush and the Models Own Ice Neon collection. It’s all topped off with a coat of No7 Stay Perfect Top Coat.

    TwitterBloglovin’Tumblr

    Share:
    Freehand, Uncategorised, Waterfall

    Fiery Waterfall

    So it seems you guys like the waterfall mani as much as I do! Thank you for letting me know your amazing ideas for colours. I’ve noted them all down and will be trying them out asap!
    The weather today has been insane. I’ve spent half the day moving around at quarter speed and the other half laid down completely still with a fan pointed at me trying to cool off! I’m really not one for this scorching heat… when it gets to May I’m always like, ‘Hmmm this isn’t too bad. Maybe I like summer now’, but as soon as July hits I remember the torture and start counting down the days to October!

    For this nail art I used Sally Hansen Crinolin, a super pale pink, as my base colour then painted on streaks of Barry M Papaya, Essie Lollipop, NYC Lexington Yellow and NYC Full Metal Jacket.
    I topped it with two coats of No7 Stay Perfect Top Coat.

    TwitterBloglovin’Tumblr

    Share: