Follow:
Browsing Category:

Nail Art

    Stamping, Uncategorised

    Saint George the Stamper

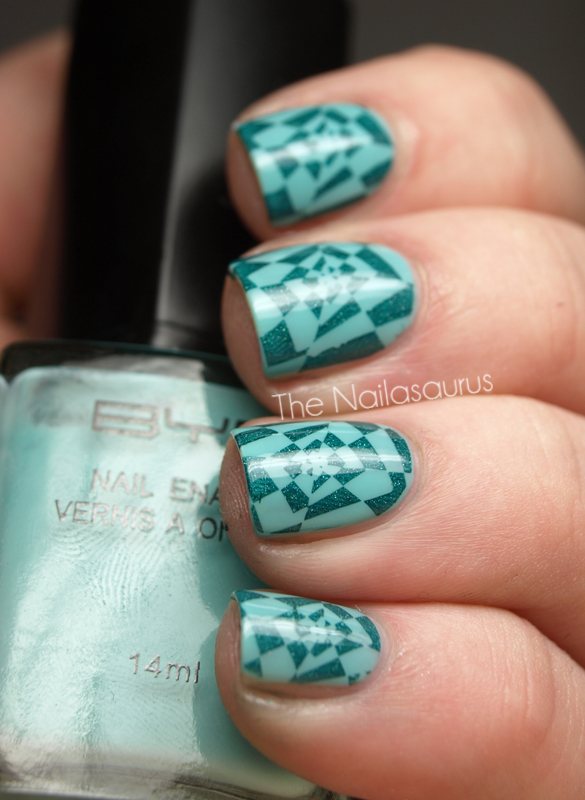
    It seems that I’m using the same couple of colours for stamping these days. If it’s not silver or gold, it’s black or white. I think I need to rummage in my stash and start experimenting with some new colours to see if they work for stamping.
    I wouldn’t normally choose a design with so many edges! My pattern choices most days are very organic and swirly so I thought I’d try something geometric and I love the way it looks. Very funky.

    Stamping Plate: Red Angel RA114
    Base Colour: BYS Kung Fu Blue
    Stamping Colour: A-England Saint George*.
    Top Coat of NYC

    TwitterBloglovin’Tumblr

    Share:
    Freehand, Tutorial, Uncategorised

    Spider-Man Nail Art Tutorial

    Today I have a tutorial for the Amazing Spider-man nail art I created a few weeks ago. You can see the original post here.
    This is the first tutorial I’ve made for a very long time! I normally procrastinate on them and then give up hope altogether because I’ve failed quite badly at making them in the past but I actually had a really good time making this one. I hope you enjoy it!
    Step by step instructions after the jump!

    You will need Red Blue and Silver polishes but you could also use black in place of the silver.

    I’m using Cult Nails Quench, Cult Nails Time Traveler and Barry M Silver Foil (which is currently on sale at asos.com!).

    I’m also using a small liner brush from eBay. Details here.

     
    1. Paint on your red base coat. 
    2. Use a nail art brush to paint on a blue tip with a scalloped edge. Aim for 4 or 5 ‘waves’.
    3. Using a nail art brush and silver polish, define the wavy line between the red and blue sections.
    4. Draw lines from your cuticle to the tip ensuring that they cross through the points of the wavy line. In the blue section, link these lines to make it look like a web.

    5. In the red section, draw a few more lines from your cuticle to the wavy silver line from step 3.

    6. Join up all the lines with more wavy web like lines, add your top coat and you’re all done!

    The accent finger is easy to create than it looks. I drew on the eyes first, then the webs using the same principle shown above and finished by outlining the eyes using black acrylic paint.

    TwitterBloglovin’Tumblr

    Share:
    Glitter, Gradient, Swatch, Uncategorised

    Give ‘Em The Old Razzle Dazzle

    I’ve been digitally absent for a few days bar the occasional tweet and it was nice to have a little break from my online commitments but I’m back with a vengeance and I have so many new polishes to show you.
    It’s a Wednesday which of course means pink!! This pretty pink glitter is Pam of Girly Bits‘ creation. Pam started out as a nail blogger and has taken her hobby one step further and set about mixing all the colours she’d been dreaming of owning but couldn’t find on the shelves. 
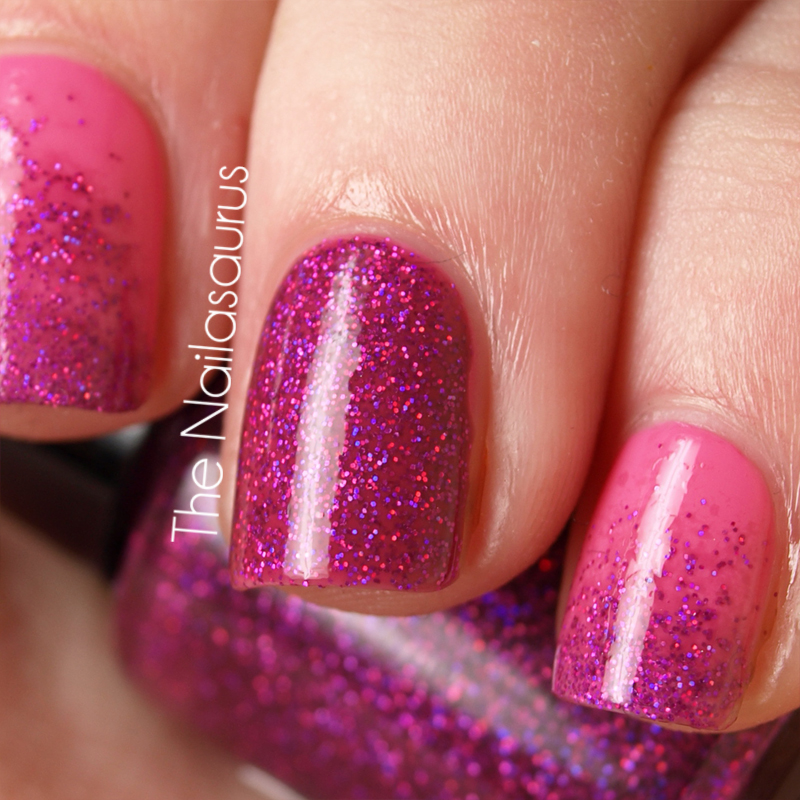
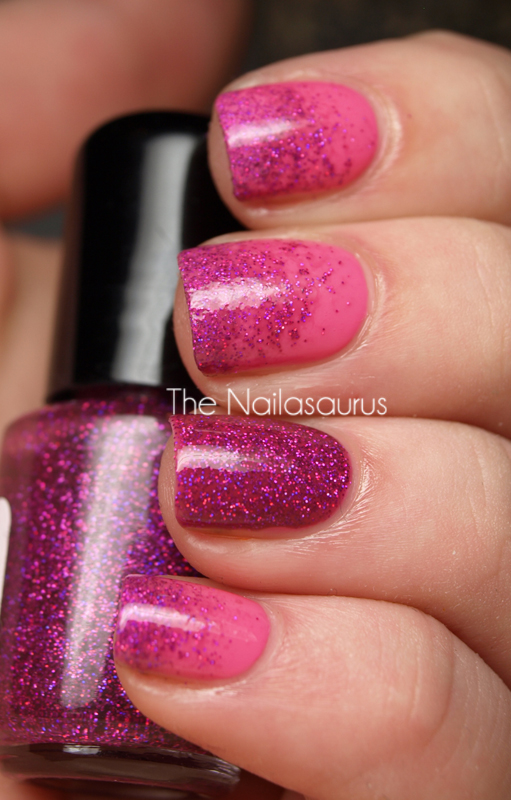
    The polish I’m using today is called Razzle Dazzle and it’s a pink jelly filled with pink and purple glitter. It works best for layering but three coats gives good enough coverage to wear it on its own.
    Ring finger: BYS Tickle Me Pink and two coats of Girly Bits Razzle Dazzle*
    Other fingers: BYS Tickle Me Pink and Girly Bits Razzle Dazzle* sponged on to the tips

    Pam’s shop will be reopening on February 25th with her new collection and all previously available polishes will also be for sale. You can order them directly from Pam, all the information is here.
    *Product was sent for consideration. For more information, see my disclaimer.

    TwitterBloglovin’Tumblr

    Share:
    Freehand, Uncategorised

    Nineteen With Nail Tatz

    Since I created this nail set, I’ve been desperate to try something similar on my own nails but I was very doubtful about whether I’d be able to paint such intricate details using my left hand. And omg I actually did it. By no means am I ambidextrous but wow, I completely surprised myself. 
    I’ll definitely be doing this kind of thing again with different words and colours. It’s such a cool twist on knuckle tatz without the whole lifelong commitment thing!

    The base colour is Models Own Utopia
    I used black acrylic paint for all the detail with a nail art brush.
    On the thumbs I used W7 Cosmic Mauve (glitter) on the tips.
    All coated with a few top coats of NYC.

    TwitterBloglovin’Tumblr

    Share:
    Freehand, Uncategorised

    Valentine’s Nails Take Two

    I’m such a Valentine’s Day cynic. There’s no real reason this day has to exist but we all go along with it anyway. I won’t go in to it too much because you’ll all think I’m a crazy spinster! 
    I already posted a Valentine’s manicure but this one’s for you guys… I love every single one of you for reading this blog! Happy Valentine’s Day!

    The base colour is Cult Nails Quench. I used Sally Hansen Chrome Anemone for the lettering and the stamp from Bundle Monster plate BM02. The pink heart is Kriston 16 and I used Barry M Silver Foil for the accents.

    TwitterBloglovin’Tumblr

    Share:
    Freehand, Uncategorised

    Can a Nail Artist Get Some?

    Some of you might know that I have a YouTube channel and anyone that’s visited it will know that it’s a lame excuse for a channel by any standards! As it stands, I only have 4 complete videos uploaded and quite a lot of failed attempts under my belt. The reason for this is the ancient camcorder I’ve been borrowing from my parents. It’s very old and I’ve had a lot of problems getting the recorded footage to work with my computer. I’ve tried everything I can think of to get it working – different formats, new memory cards, new editing software – nothing works.

    I’ve been resting on my laurels in this department and making excuses for myself for a long time and the day has finally come when I’ve decided to step up and do something about it. Since I don’t have the funds at the moment (and it doesn’t look like I will do for a while), I’ve come up with a project in the hopes of raising enough money to buy a HD camcorder so I can finally make some new videos for your enjoyment!

    Here’s how it works
    I’ve been painting nail sets that I will be listing on Etsy. They’re all one-of a kind, hand painted by myself.
    If my calculations are correct (which they normally are!) I need to sell roundabout 13 sets to cover the cost of a camera, a memory card and the selling/paypal fees. Any money remaining from the proceeds of the first 13 nail sets sold will be donated to a charity of my choice.
    Today, I’ll be listing all the completed sets I have. There’s a lot of work in progress and plenty more ideas in the pipeline. As I list more sets, I’ll also post them here to keep you updated.

    If you’re interested in helping, please head over to my Etsy shop, have a browse and hopefully a buy!
    You can click on any picture to take you directly to that listing.
    Or click here to go to the shop front.

    THANK YOU

    I’m new to selling on Etsy so constructive criticism is welcome 🙂
    If you wanted a set but it’s already sold, be sure to click the ‘Request custom item’ link in the left sidebar in my Etsy shop so I can make you another!

    TwitterBloglovin’Tumblr

    Share: