Follow:
Browsing Category:

Halloween

    Glitter, Gradient, Halloween, Uncategorised

    Happy Halloween!

    I have two Halloween manicures that I never got around to posting this month so I thought I would smash them both out today while I still have the chance! The second look will be coming later today.
    I got a package from Harlow and Co this week and inside I found an amazing Halloween glitter – KBShimmer You Go Ghoul! It’s a black jelly with purple and orange glitter bits of all shapes and sizes. It’s a shade that you could wear all year round unlike some holiday polishes that are really only suitable for 3 weeks out of the year.
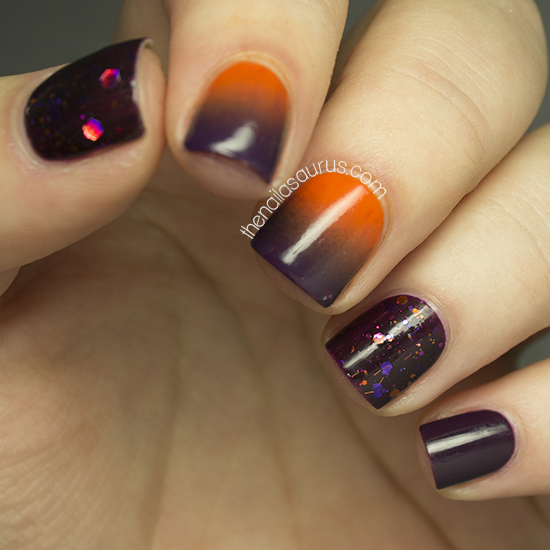
    I used two coats of  KBShimmer You Go Ghoul! over one of Barry M Plum for the accent nails.

    The gradient (tutorial here) was created with a base of Essie Fear and Desire and Barry M Plum. Clean up was a bitch on this one! I didn’t use my trusty liquid pallisade to protect my cuticles and the surrounding areas from the Orange polish which is why there’s a bit of staining there.

    I used two top coats of Rica Glossy Glam.

    Share:
    Halloween, Tutorial, Uncategorised

    Halloween Patchwork Nail Art Tutorial

    Here’s a tutorial for yesterday’s Halloween themed nail art. I mentioned that I freehanded the design but this time around I created the tutorial using scotch tape as I know straight lines can be hard to master with a brush.

    You’ll need:
    Orange Nail Polish – Essie Fear and Desire
    Purple Nail Polish – Models Own Pukka Purple
    Green Nail Polish – Sally Hansen Grass Slipper
    Black acrylic paint or nail polish
    Scotch Tape
    Top coat – preferably fast drying
    Start by painting on your base colour and topping it with a thin layer of your top coat. Wait 5-10 minutes, or until the polish is completely dry before moving on.

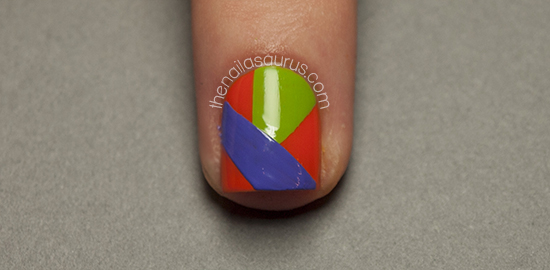
    Place two strips of tape on your nail to mark off your first patch – it can be absolutely any shape but I’ve gone with a triangle.

    Paint on your first colour and immediately remove the tape.

    Add another thin top coat to make it dry quickly.

    Once it’s dry, section off your next patch using tape. This time I’ve gone for a strip straight across my nail.

    Just like last time, paint straight over the tape and immediately remove the tape.

    Now you’ve got your patches! If you’re a whizz with a nail art brush, you could get to this point without using tape.

    For the stitching detail, take a nail art brush and first, outline the patches.

    Next, paint on the stitches.

    To finish up use a top coat or two and then clean up any mess around your cuticles using a clean-up brush dipped in pure acetone.

    And you’re done!
    I love to see your manis so if you try this look, don’t forget to tag #looknailasaurus if you post it Instagram or Twitter!

    TwitterBloglovin’Tumblr

    Share:
    Freehand, Halloween, Uncategorised

    Halloween Patchwork Nail Art

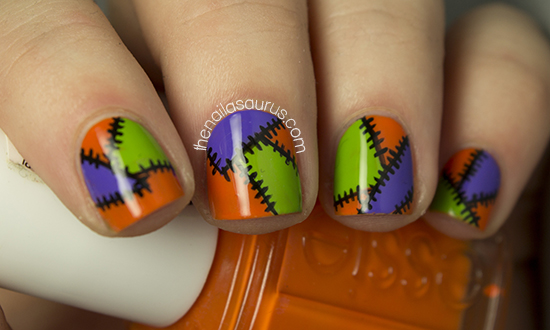
    With Halloween coming up I’ve been racking my brain for nail art ideas so I plucked the spookiest colours I own out of my stash and decided on a patchwork design. This is one of those designs that’s quite versatile and is completely changed by the colour selection. Imagine it in pastel colours with white stitching and tell me it wouldn’t be perfect wear for a baby shower!

    I used Essie Fear and Desire as my base colour and then freehanded on the colour blocks using a nail art brush with Sally Hansen Grass Slipper and Models Own Pukka Purple. If you’re not very confident with a brush, you could also use scotch tape to section off the squares and paint in the colour before peeling the tape away.

    For the stitching detail, I used Black Acrylic Paint and a nail art brush. I started by outlining the blocks of colour and then adding the little stitches.

    It’s all topped off with a coat of Color Club Top Coat.

    P.S. I did a tutorial for bloody drips, another look perfect for Halloween, over at Divine Caroline this week. See the full post here.

    TwitterBloglovin’Tumblr

    Share: