Follow:
Browsing Category:

Glitter

    Glitter, Swatch, Uncategorised

    Polish Me Silly Thermal Polishes: Get Breezy and Sizzling Sunset

    Polish Me Silly Thermal Color Changing Nail Polish Swatches // The Nailasaurus


    Polish Me Silly is an indie brand that’s been on my radar for a really long time but I’d never actually tried any of their polishes until recently. You may know them for their innovative use of neon glitter in their polishes and that’s exactly what I’m going to share with you today.

    I have swatches of two of their Thermal Color Changing polishes – Get Breezy and Sizzling Sunset – to share today. Each polish is packed with neon glitter and the colour of the base transforms dependent on whether the polish is warm or cold!

    If you have long nails that extend past the tip of your finger, you will get a ready made gradient effect where the polish is cooler on the tips and warm where it sits on your nail bed. On my short nails the polishes mostly stay in the ‘warm’ phase apart from at the very tips so I had to dunk them in ice water to get them to change colour. It’s a pretty cool party trick!
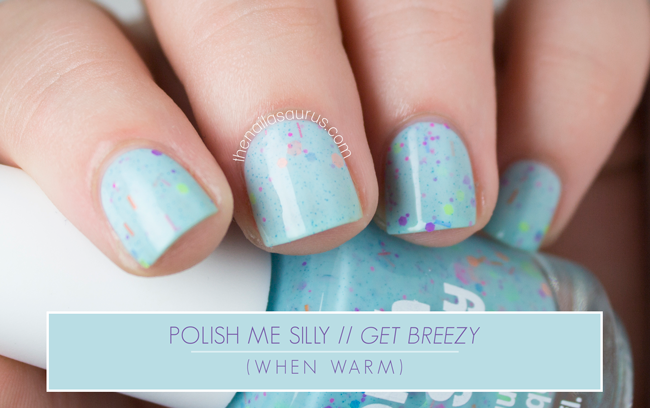
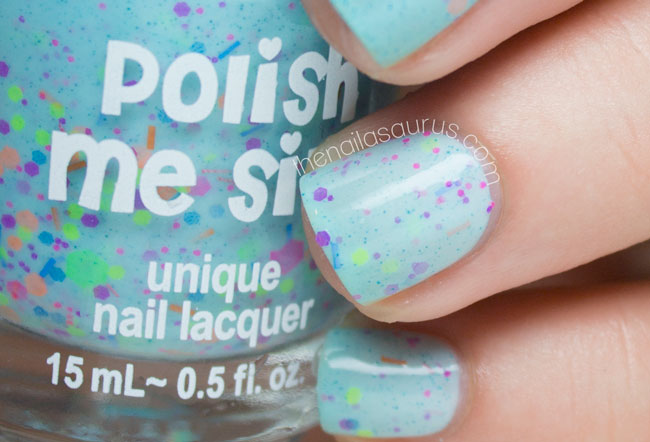
    In the bottle, Get Breezy is a lovely sky blue colour with lots of bright glitter pieces from purple, to orange to green and more. For this swatch I used 3 coats with top coat.
    The colour change from warm to cool on this polish is really subtle. It’s an almost white, icy blue when it’s warm but when cool, it gets a bit darker and turns to an aqua blue. A few pictures down, you can see the two right next to each other to really compare them and see how subtle the change is.
    Polish Me Silly Get Breezy swatch // The Nailasaurus
    Polish Me Silly Get Breezy cool and warm swatch // The Nailasaurus
    Cold on the left. Warm on the right.
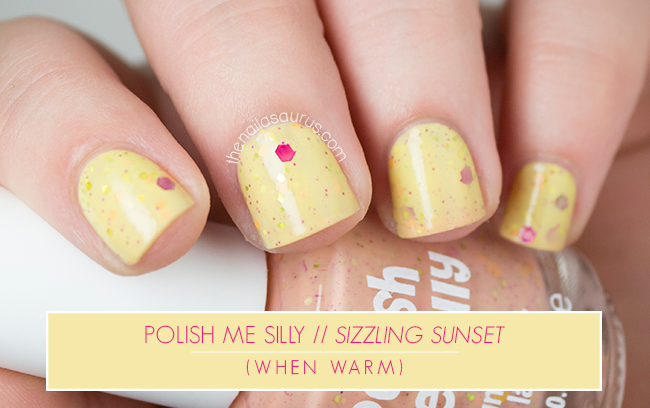
    Polish Me Silly Sizzling Sunset when warm swatch // The Nailasaurus
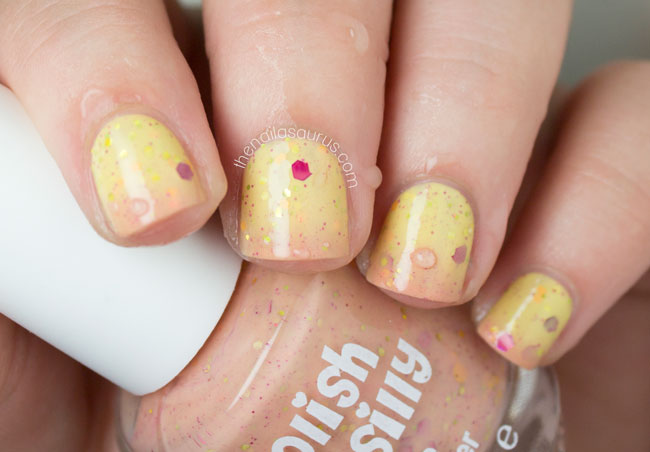
    The colour change in Sizzling Sunset is way more noticeable than in Get Breezy! It contains hexes and circle glitter of yellow and gold with some fuschia hexes thrown in. This swatch is 3 coats with top coat.
    It goes from a bright, sunny yellow when warm to creamy orange when cool. When I dipped my nails in cold water, the change was instantaneous and very obvious! We know that yellows are notoriously difficult polishes to work with but this one is as smooth as butter and is a really flattering tone to boot. When you see the gradient effect of half warm / half cool on this polish, you can see how it got its name.
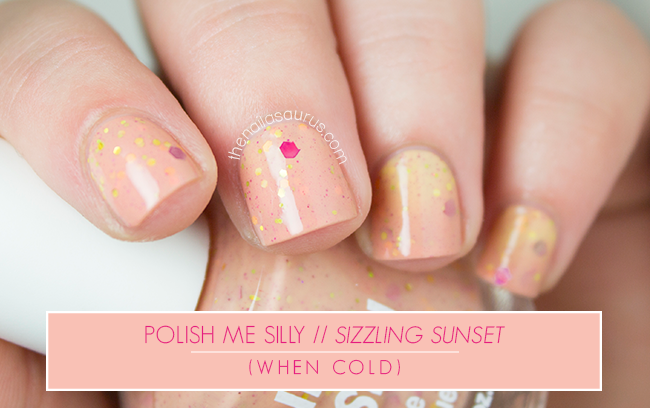
    Polish Me Silly Sizzling Sunset swatch // The Nailasaurus
    Polish Me Silly Sizzling Sunset gradient swatch // The Nailasaurus
    I was really impressed with these thermal polishes. They change instantly when exposed to a change in temperature and are incredibly easy to apply. It’s really hard to pick a favourite from the two. The colour change in Sizzling Sunset is so incredible but I have a weakness for Blue and Get Breezy has the more interesting mix of glitter. If I really have to pick just one, it’s gonna be Get Breezy!

    Where to buy Polish Me Silly

    Polish Me Silly nail polish is available from Polish Me Silly on Etsy with worldwide shipping available.
    Thermal Polishes RRP, $6.50.
    Share:
    Glitter, Nail Art, Uncategorised

    Nailvengers Assemble: Glitter Placement

    For July’s Nailvengers challenge, we’ve decided to jump in to glitter placement. We’re all of differing abilities when it comes to this style so you’ll see a really wide range of designs when you visit Brit Nails, Lucy’s Stash, and xAmeliax to see what they came up with for the challenge today. I’ve had these round glitter pieces sitting in my ‘to try’ pile for a while now so I thought today would be the perfect day to debut them.
    I started out just placing the dots on randomly with all the colours mixed together but after one nail, I decided I’d rather group them together in combinations of three to four colours so each nail looked different from the next. My favourite is the index finger – a surprisingly compatible combination of blue, purple and coral!

    What You’re Looking At

    Barry M Coconut
    Glisten & Glow HK Girl Top Coat
    Rose Gold Zodiac Midi Ring from Astrid & Miyu

    Share:
    Glitter, Uncategorised

    Spell Polish Pirate Swatch & Giveaway

    Spell Polish // Pirate Swatch

    Today’s post is quite an exciting one, I’ve got a swatch of Spell Polish Pirate and a great giveaway to go along with it. First thing’s first… Pirate!
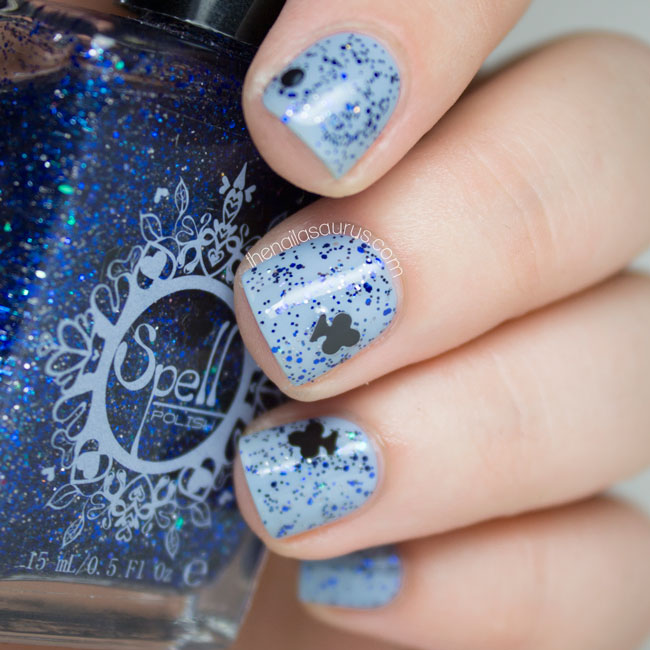
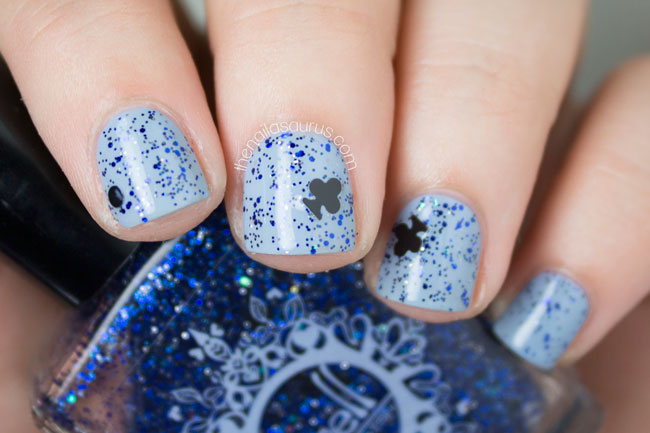
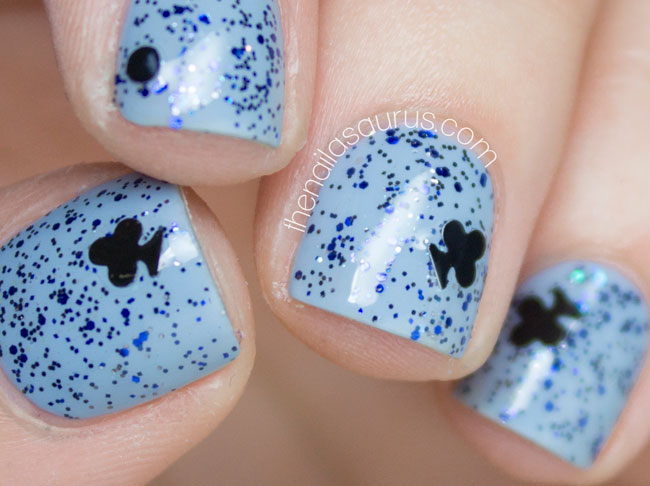
    Pirate is a glitter topper that’s right up my street with various sizes of blue hex and some silver micro glitter and green hexes. There are also larger ‘clubs’ and dots sprinkled through the bottle. For this swatch I used one coat of Pirate over Barry M Elderberry with top coat. 
    Glitter payoff is great and I’m really impressed at how evenly the glitter is distributed on the nails. There was no sign of clumping or bare patches that I had to go back and fix later, just a perfectly smooth application. Although it doesn’t bother me too much, it’s worth mentioning that the smell is on the strong side but Heather, Spell Polish’s creator, has let me know that the scent is being phased out for something a bit less pungent. 

    Where to buy Spell Polish

    Spell Polish is available from Spell Polish, The Nailista Shop and Norway Nails. RRP $17.00.

    Spell Polish Pirate // Indie Glitter Nail Polish Swatch

    Spell Polish Pirate // Indie Nail Polish Swatch

    Spell Polish // Indie Nail Polish Giveaway
    Heather has been kind enough to offer up a prize for one of my readers – 5 Spell Polish bottles of the winner’s choice. All you have to do to enter the giveaway and win your 5 favourite Spell Polish shades is fill out the Rafflecopter below! The giveaway is open internationally and will end on August 8th 2014.
    Share:
    DIY, Glitter, Uncategorised

    My De-Stashing Story: Nail Polish Keepsakes

    I think now would be a good time for me to confess to being a hoarder of sorts. I’m very attached to my nail polishes and the collective body of bottles that makes up my Stash of around 500. I guess the same could be said for any ‘collector’ – whether it’s of stamps, shoes or books – and perhaps that’s a kinder word to describe me. The only problem I’ve faced as a collector is that housing any collection can take up a lot of space and a little while ago I found myself running short on nail polish real estate.
    I have an Ikea Helmer (UK £25 / US $39.99) for storing my nail polish but bottles were beginning to spill over on to my work surface and even in boxes under the bed. I decided the best solution was a De-stash: a clear-out and simultaneous reorganisation to be carried out on the aforementioned Stash. During the De-stash I decided on around 100 polishes that would be rehomed to make space for the next generation and they were all weeded out using the following criteria:
    1. Is it still a fully functional nail polish i.e. paintable consistency, lid fused to bottle etc. 
    2. Have I worn it in the last 6 months? 
    3. Will I wear it in the next 6 months?
    4. Is it even really that pretty?
    If the answer to most of these questions was ‘No’, the polish had to go! Of course, there were other influential factors such as my sentimental attachment to each individual polish (yes, that happens) but I mostly went along with these four questions.
    Despite what I thought was a fool proof de-stashing strategy there were still a few among that final 100 that I really didn’t want to say goodbye to. They were mostly ones who received three No’s but a Yes to the final question – they were all hella pretty polishes.
    I held on to those special ones for a little while. I considered keeping them in a box in the attic to be dusted off and marvelled at once in a blue moon but I soon came up with a better solution that would allow me to 1. Display the pretty polish somewhere I can see it all the time, 2. Pass the polish along to my friends and family who would actually use it and 3. Have fun with a good DIY project.
    I decided I would decant a little bit of each polish in to those glass vials that you often get when you buy small nail art accessories. I got mine in Poundland (filled with Caviar beads) but you can also get them from lots of places online and in different sizes, and you may even already have some at home.
    After disposing of the Caviar, I just poured the polish straight from the bottle in to the little vial and capped the top. At the moment they’re all sitting pretty against the wall on top of a framed print. I know that if ever I decide I don’t want to display them anymore, I’ll easily find a spot for them in the Helmer after sealing the stoppers with a layer of glue.
    I wanted to share in case anyone found themselIf you recently had your own De-stash, how did you decide which polishes stayed and which had to go?
    Share:
    Glitter, Nail Art, Uncategorised, Waterfall

    Throw Some Glitter, Make it Rain

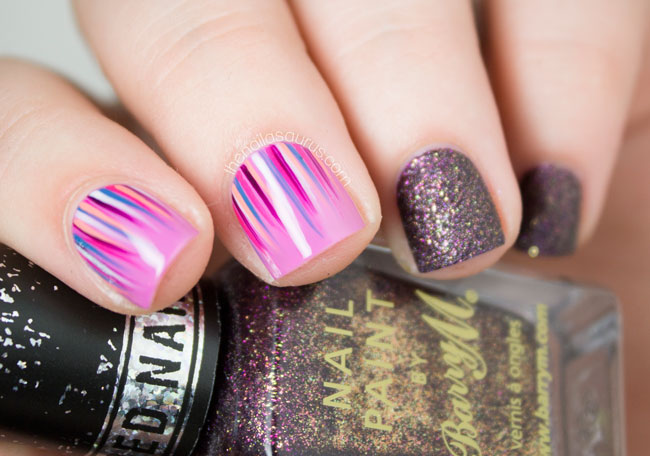
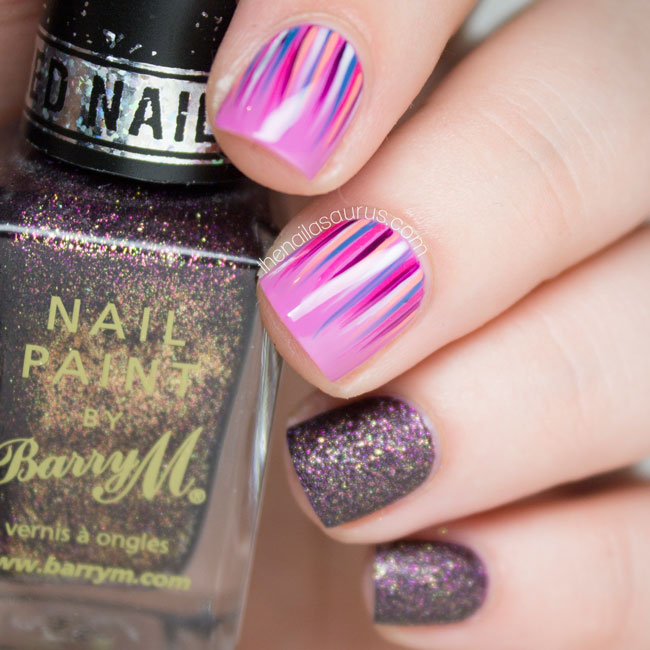
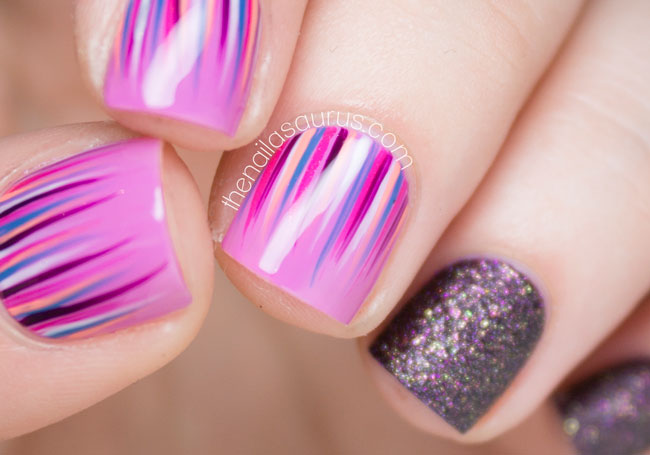
    Purple Waterfall Nail Art with Barry M Countess

    This mani is one I threw together in a bit of a rush last week when I was in a panic because I didn’t have anything to post. As it turned out, I did actually have a few interesting things to post so I haven’t needed to delve in to my emergency supply until today! Despite doing this in a bit of a rush, I don’t think it’s any ‘less’ than my other manis that I take my sweet time with. I think that’s the beauty of the waterfall – you don’t have to give it too much care or concentration.
    For the waterfall, my base colour is Sally Hansen Pinch of Punch but your guess is as good as mine when it comes to the other colours in the mix as I shuffled them back in to my Helmer before making a note. Doh! I think I see NYC Peach Popsicles in there, a plum, turquoise, pink and white.I topped it with Glisten & Glow HK Girl.
    The glitter is Barry M Countess, a textured polish and my favourite from their Royal Glitters collection. No top coat here!
    Purple Waterfall Nail Art with Barry M Countess
    Purple Waterfall Nail Art with Barry M Countess
    Purple Waterfall Nail Art with Barry M Countess
    Purple Waterfall Nail Art with Barry M Countess
    Share:
    Glitter, Uncategorised

    Pastel Jelly Sandwich

    Jelly Sandwich with Maybelline Acid Wash Top Splatter
    Jelly Sandwich Nails Recipe - The Nailasaurus
    With the rise of indie glitter polishes over the last few years, I feel like jelly sandwiches are becoming a thing of the past. So many indies are described as a ‘jelly sandwich in a bottle’ and it’s true, they absolutely are! Soon enough, Jelly Sandwiches will be to nail polish what the Game Boy is to gaming – a nostalgic piece of the not-so-distant past. Don’t get me wrong, I love the innovations that indie brands have brought to the table in the nail industry and I hope they’ll be changing the game for many more years but sometimes you can’t beat a good classic.
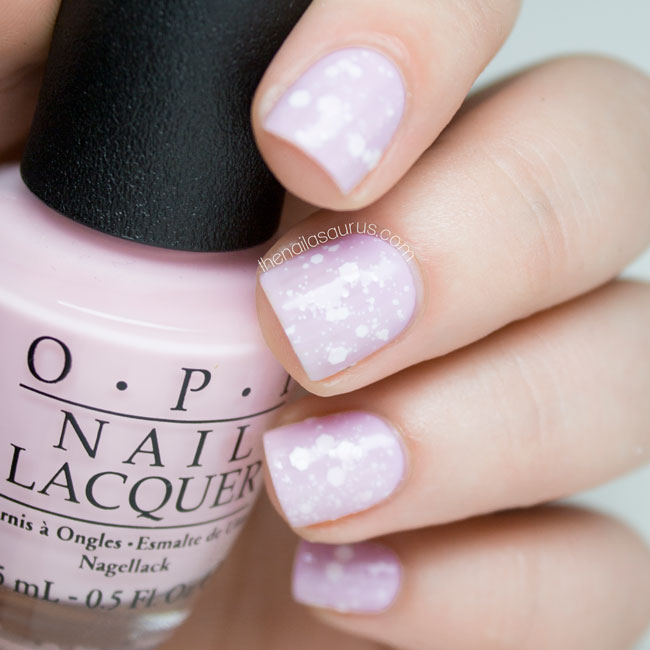
    It’s been years since I last wore a jelly sandwich and I’ve been meaning to revisit them since I got hold of the OPI Muppets Most Wanted collection. The nude and pink polishes in that collection are very sheer and although they’re not true jellies, they fit the role okay in a jelly sandwich.
    I tried out a few combinations yesterday but couldn’t decide which to actually put on my nails so I put it to a vote on Facebook and this combination came up trumps. I had to switch out the base colour for something a bit closer in tone to the jelly topping but I think it works nicely.

    The Recipe

    2 coats of NYC Lavender Cupcake
    1 coat of Maybelline Acid Wash Top Splatter
    1 coat of OPI I Love Applause
    1 coat of Glisten & Glow HK Girl (Top Coat)
    Jelly Sandwich with OPI I Love Applause
    Jelly Sandwich with NYC Lavender Cupcake
    Jelly Sandwich with White Glitter
    Jelly Sandwich Nails
    Share: