Follow:
Browsing Tag:

Viva La Nails

    Uncategorised

    25% off at Viva La Nails!

    I’ve heard legends of Black Friday but being in the UK, I’ve never had the chance to experience a Black Friday sale! Viva La Nails are running their own Black Friday sale this weekend and you can get 25% off everything, and that means EVERYTHING using the code BLACK

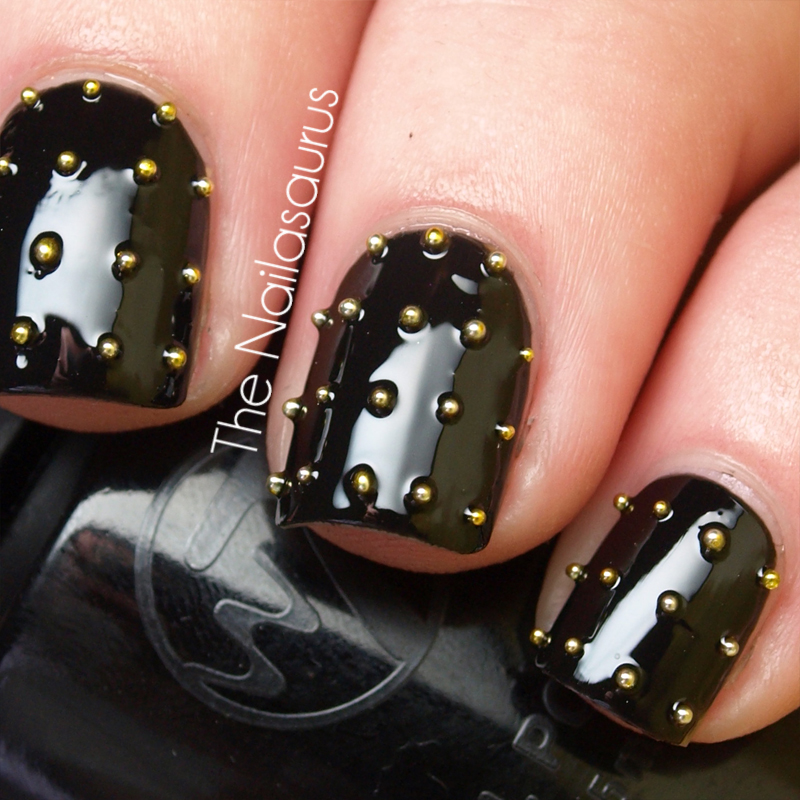
    I’ve lined up a few of my picks from their shop below. Viva La Nails is where I got the gold bullion used to create my now notorious studded manicure so if you’ve been thinking of recreating the look or have your own ideas for using those little bouncy balls, I’d snap up a pot or two today.
    Code: BLACK
    code valid Friday 25th November – Sunday 27th November 2011


    TwitterBloglovin’Tumblr

    Share:
    31 Day Challenge, Uncategorised

    Day 25: Inspired by Fashion

    I’ll be honest here – I’m not a very fashion conscious person. I’m not trying to sound conceited but I may come across like that anyway, but I believe personal style > fashion. So the first thing I did for researching today’s nails was to Google ‘Fashion’!
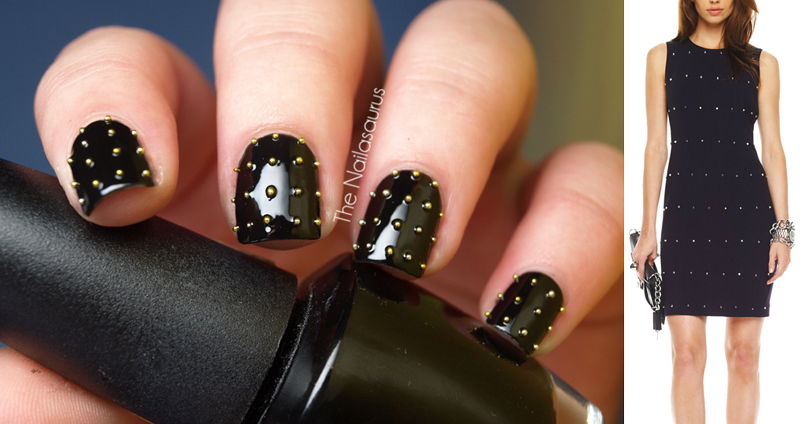
    After a bit of searching, I stumbled upon Michael Kors’ website and fell in love with the simplicity and elegance of his dress designs. I quickly chose this dress as my inspiration.

    Thankfully, Rie and Cris know a bit more than me about fashion. Head over to see their couture creations today.

    Studded Nails Original

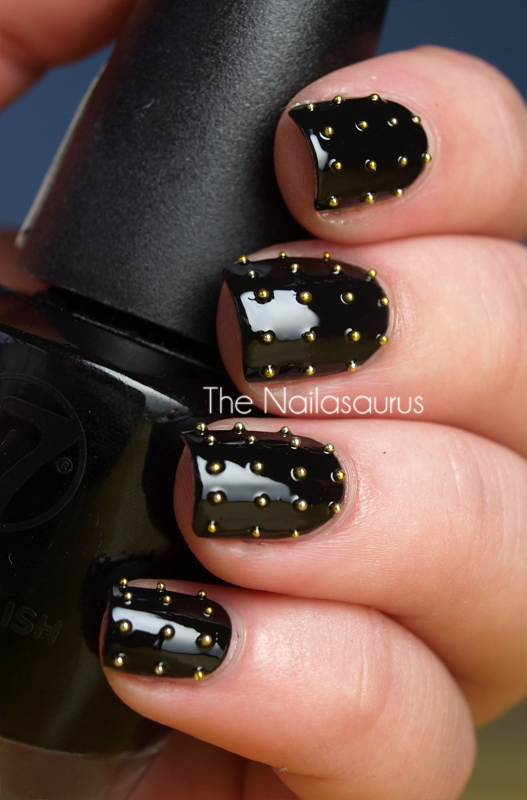
    I used W7 Black as a base colour then slicked on GOSH top coat and placed
    on the bullion before it dried.
    I used a top coat of NYC to seal it all in.

    Studded Nails Original

    This dress is so classic yet the studs give it that rock-chick rebel vibe. I love it! I feel like such a bad-ass wearing studded nails! I’ll be wearing my biker boots and leather jacket today.

    Studded Nails Original

    TwitterBloglovin’Tumblr

    Share:
    Uncategorised

    Out of the Ordinary

    Here are some more goodies from Viva La Nails, hopefully this will make a nice change from all the stamping. These are Water Decals and I’m gonna say again that they are great – so pretty and easy to apply. Enjoy all the pictures!

    The base colour is Barry M Berry Ice Cream.
    Share:
    Stamping, Uncategorised

    A Tragic Loss

    I got into a little skirmish with a shower curtain and the shower curtain won. And it took the tip of my thumbnail with it!
    This is a new polish that I found reduced in Tesco from the Barbara Daly Make-Up range. I haven’t captured it very well in the photo, but it’s a gorgeous, deep royal purple.
    Plate: Bundle Monster BM16
    Base Colour: Barbara Daly – Purplicious
    Stamp Colour: Miss Sporty – Zodiac
    Gold Bullion from Viva La Nails
    Top Coat of NYC
    Share:
    Stamping, Uncategorised

    Hulk Fail

    I was going for a Hulk look with this one. Anyone who is familiar with the comics or the films will know Bruce Banner wears his trademark purple shorts whenever he’s angry!

    The little pink bits you see are some weird tiny foil strips from Viva La Nails. It’s hard to come across ideas for using these.
    I tried to make a line with them but ended up just making a mess instead!

    Konad Plate: M57
    Base Colour: Claire’s Mood  – Peaceful/Confident
    Konad Colour: L’Oreal LaquiResist – Bebe Blue
    Purple: George @ Asda – Hoax
    Top Coat of NYC

    I’m staying away from home for a few days and trying to travel light which means I won’t be packing many nail supplies or my beast of a camera so I won’t be able to post anything for a while. I should be back on Friday.
    Share:
    Uncategorised

    More Stickers

    Here are some more nail stickers from Viva La Nails over Barry M Raspberry. There is a random sequin on my index finger there! It must have got stuck to my nails when I was rummaging round in my supplies.
    These stickers look amazing and I gave them a fairly good review a few weeks ago but I think I’ve changed my mind after wearing them.
    With these particular stickers, the silver wore off to reveal black underneath after just a few hours.
    They are also a nightmare to remove. They won’t come off in one piece once you’ve applied a top coat so you have to literally scratch them off in little pieces.
    I’ll be sticking to water decals in the future which remove easily with a bit of Nail Varnish Remover.
    Share:
    Tutorial, Uncategorised

    My First Tutorial: Water Decals

    Today I used some Water Decals from Viva La Nails. Since I have never used these before, I checked the website to see if there were instructions. Luckily, there is a video at the bottom of the page with details of how to apply the decals. I’m sure I could have guessed but I wanted to make sure I got it right. Here is how I applied my decals…
    1. 
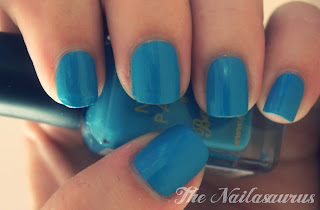
    Paint on your base colour and allow to dry thoroughly. I used Barry M Cyan Blue.
    2. 
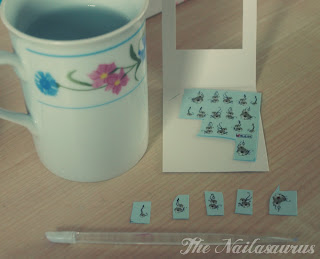
    Prepare everything you need:
    Cut out the decals you are going to use.
    Have a nail stick nearby, or any tool you prefer like tweezers.
    A cup or bowl of water, the website specifies warm. You can use cold but it takes much longer for the decals to come away from the paper.
    3. 
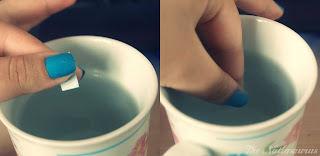
    Hold the decal between your thumb and first finger and plunge it in to the water.
    Leave it there for about 5 seconds, or longer if the water’s cold.
    You will feel the decal starting to slide around on the paper.
    4. 
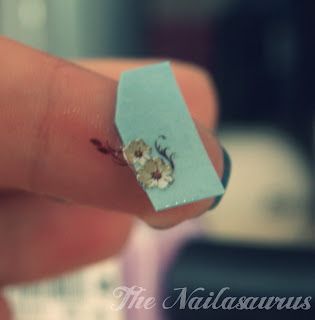
    Remove the decal from the water and slide it away from the paper by gently rubbing your two fingers together.
    It should come off easily. If it doesn’t, put it back into the water for another few seconds.

    5. 
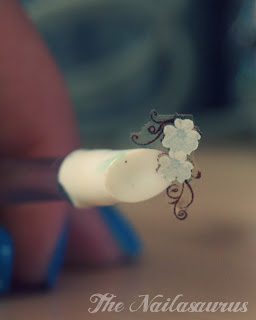
    The decals are fairly sturdy so you don’t need to be too careful when handling them, they can take a bit of rough and tumble.
    Get the decal onto your tool and prepare to transfer it to the nail.
    Fingers work just as well as any tool when using these decals.
    6. 
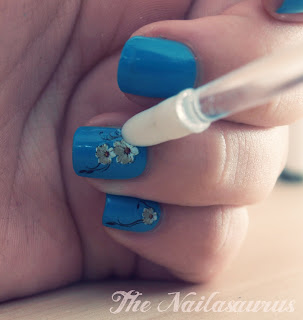
    Once it’s on the nail, you can move the decal around as it takes a while to dry. 
    If it dries and you don’t like the position you can dab some water on it to loosen it up and move it around again.
    7. 
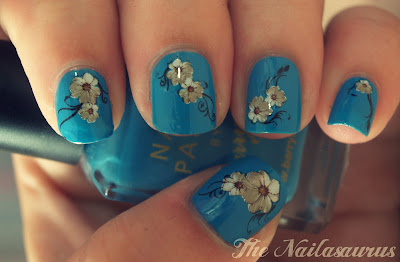
    Once the decals are dry and you’re happy with them, just add a top coat.
    The Verdict
    I really like these decals. Application was easier than I expected and the finish is brilliant. Unlike with stickers, the edges of the decals are undetectable once the top coat is on so there is no temptation to pick at them as well as the fact that it looks really professional.
    The only downside is that they take a while to dry, I would say close to ten minutes, so you have to be very careful until they do because they will slide around.


    Share: