Follow:
Browsing Tag:

Tips and Tricks

    How To

    My Photography Essentials: Equipment, Lighting and More

    When I started blogging I thought I was pretty hot stuff with a camera but in the time since, I’ve looked back at my teenage self and had a giggle at how little I really knew (I put it down to the Dunning-Kruger effect)!

    I’ve learned so much over the years and every day I pick up my camera, I feel a little more confident in my abilities. There’s still so much for me to learn but I feel like I’m in a good place with my photos at the moment. I’m not a professional by any standard and I think photography is a skill that you’re never done learning. It’s an art after all, so there’s always a new way to work if you’re adventurous enough to try it.

    I get a lot of questions about my camera, lighting, equipment etc. so I’ve pulled together a list of my personal photography must haves… Read more

    Share:
    Tutorial, Uncategorised

    OH SNAP: How I Take My Pictures

     As they say, ‘a picture speaks a thousand words’ so you want your blog pictures to make the right impression, especially to first time visitors.
    Back when I started out as a nail blogger, my photography skills left a lot to be desired and my photos were undoubtedly giving off a dull impression. Fortunately since then I’ve picked up little bits of photography knowledge here and there and today my photos are looking pretty fly if I do say so myself! I get a lot of questions about my camera, lighting, set-up etc. so today I’m going to share everything I can think of that contributes to the final images you see in my posts.

    Camera: Olympus E510 w/ 14-42mm lens
    Lamp: Plain old fluorescent desk lamp (£19.99 at Argos)
    Background: Grey mount board (sold as scraps at local craft store)
    I’ve got a very basic little setup going on at the end of my desk. For my background I use mount board, aka very thick card. I prop one piece of board up against the wall and set another on the surface. 
    My camera sits on its side (taking portrait photos) and I’ve found I get the best macro shots with the zoom at full and holding the camera further away. I normally rest the lamp on top of the lens.

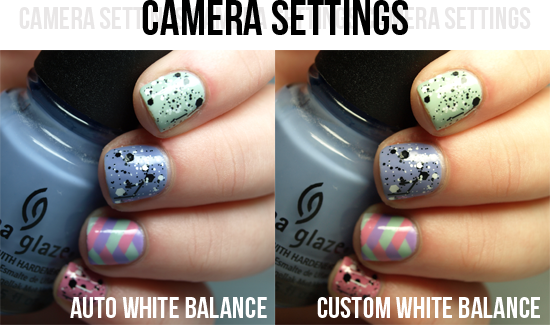
    I normally use my camera on the auto or macro setting but I always set the white balance.
    I don’t really know too much about the science behind this, I just know that setting the correct white balance will give you colours that are very true to real life which is obviously really important when swatching nail polish. If you want to read up, there’s a good article at Cambridge in Colour.
    The exact process varies depending on your camera but your instruction manual will tell you how to do it. You can either manually select your ‘colour temperature’ or set it according to your environment by pointing the camera at a sheet of white paper and letting the camera decide for you. Again, this is something to consult the manual about!
    You may have noticed that I have a couple of go to ‘hand poses’. I like to keep a bit of consistency running through my blog so I always aim to have 4-5 photos with the same set of poses in each nail art post. It’s not as easy as it sounds, it’s like yoga for your fingers! You have to practice to strike the same poses every time. This is why you don’t see my right hand very often – my fingers just aren’t as poseable on that hand!
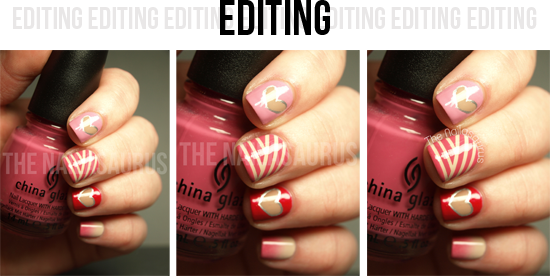
    At the moment, I’m using Adobe Photoshop CS5 to edit my photos and the process is very quick and simple. I just crop them down and add my watermark which I get to curve around my nail by using the ‘Path’ tool. There’s a good video tutorial for using that function here which explains the process really well.
    If you don’t have Photoshop, GIMP is the next best thing that you can get for free!
    Share:
    Freehand, Uncategorised

    My First Polish Days: The Polish Olympics!

    I’m very excited to bring you my first ever Polish Days um… day! If you haven’t heard of Polish Days it’s a great initiative organised by Hannah from Polly Polish. You can subscribe to the Polish Days emails and every month, Hannah comes up with a theme, gives us a date to publish and all the bloggers participating post their manis in sync. So you’ll probably be seeing a lot of these posts in your reader right now!
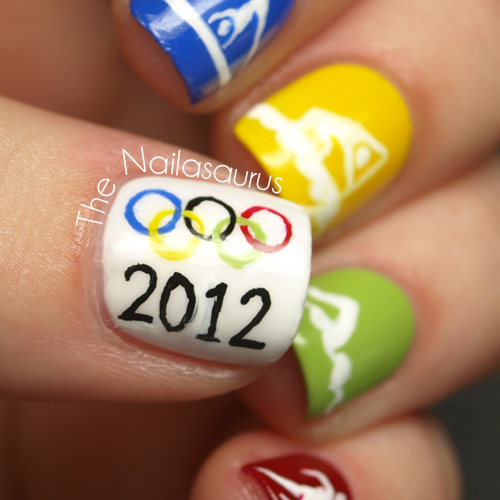
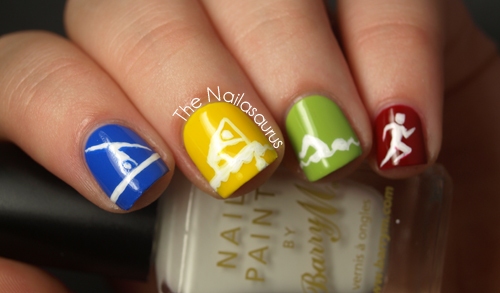
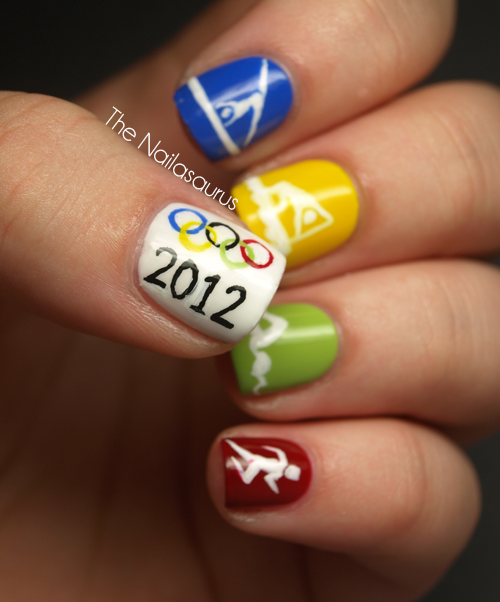
    Enough of the introductions, today’s theme is the Olympics. I already posted one Olympics mani so I was competing with myself to come up with a better mani for today. I think today’s mani steals the gold!

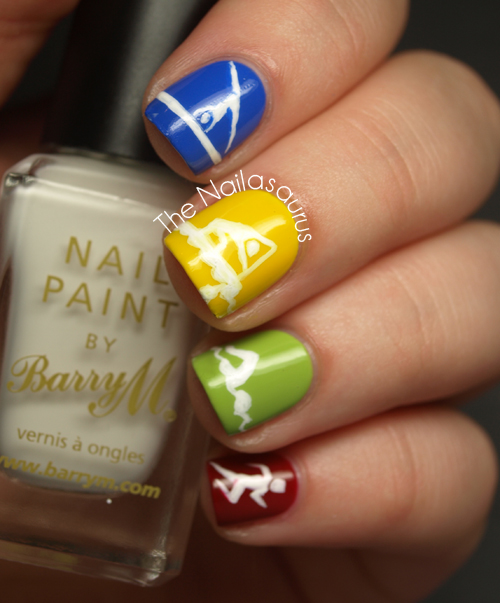
    I took the imagery from the official London 2012 website.
    Left to right, the events are:
    Gymnastics – Artistic
    Canoe Sprint
    Swimming
    Athletics
    I used Sally Hansen Xtreme wear in Pacific Blue and Green With Envy, George@Asda Buttercup and an unnamed L’Oreal Red. I used the same colours for the rings on my thumb, plus W7 Black.
    All the details were painted with a striping brush and Black and White Acrylic Paint.

    Here’s a full list of all the participating bloggers!

    Share:
    Uncategorised

    Tips and Tricks for Shiny Nails

    Some people have been enquiring about how I get my manis so shiny and the answer is lots of top coat!
    On a normal day when I’m just wearing one or two coats of colour, I’ll just use one coat but when I do lots of nail art on the nail, all the layers can create a bumpy manicure so I use two but there’s a secret coming up.
    My favourite top coat, and the one I use every day is called In A New York Minute from New York Color, or NYC. It’s not specified that it’s a top coat but it’s clear so I assume that’s what it’s meant to be used for and I’ve been using it as my top coat for years. Full review and better bottle picture here.
    In the picture below you’ll see two bottles of the same polish but they look kind of different right?
    The bottle on the left is a (nearly new) bottle and the polish is perfectly clear and a good consistency.
    The bottle on the right is an accumulation of leftovers that I collect when the bottles run down and become thick. You can see that it’s become cloudy although it’s still crystal clear when applied to the nail.
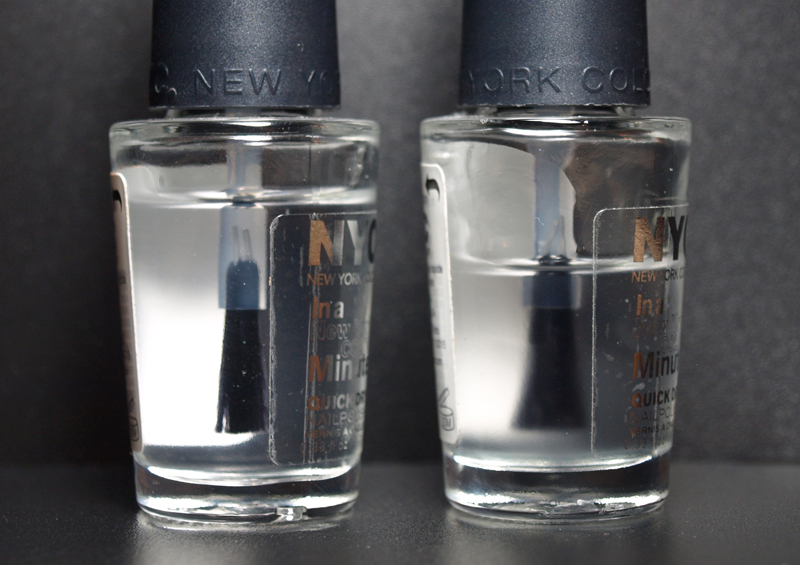
    Left: A nearly new bottle
    Right: Combined leftovers from a few old bottles

    As you can imagine, I get through a lot of this stuff and as the bottles begin to empty, the polish becomes thicker until it’s almost too thick to use. I used to throw away this waste until I realised that it’s great for ‘glazing’ my nails.

    The Trick
    Basically, I use one coat of the new stuff (on the left) which applies nicely and dries my nails quickly.
    Once that’s completely dry, I’ll apply a coat of the thicker leftovers (left) which is a bit more tricky to get even on the nail but it leaves my nails with a completely smooth surface because it doesn’t cling to any bumps left by nail art.
    Don’t be tempted skip the first step and go straight to the thick stuff because it will smudge any nail art you’ve taken the time to apply.
    Remember, I only use this technique when I’ve got lots of layers of nail art on my nails. On a normal day, one coat works just fine.
    So next time you’re tempted to throw away the gloopy remains of your favourite top coat, DON’T! Keep them for glazing 🙂

    Share:
    Tutorial, Uncategorised

    Tips and Tricks for Taking Pics

    I recently started using Google Analytics which gives me loads of useful information about The Nailasaurus’ audience. If you have a blog or website, I really recommend trying it out.
    One of the ‘keywords’, or searches that keeps popping up is ‘nailasaurus what camera do you use’ so I thought I’d share some of my tips for taking and editing pictures and run you through my… ‘process’, if you will!

    The main camera I use to take most of the pictures you see on this blog is an Olympus E510 with a 14-42mm lens.

    Recently, I have also started using this Panasonic Lumix FS30 which I got for Christmas. It has superior macro capabilities, but obviously doesn’t give the same quality or range of settings customization you get from a DSLR. I use this for really close-up pictures.

    How do I take my pictures?
    Positioning
    I photograph with my hand and camera both resting on a flat surface. This minimises the chances of blur from unsteady hands.
    Focus is important
    I think focus is the most important factor in photographing nails and nail art, where every tiny detail counts.
    I’ve found the best way to get sharp close-up pictures (with the DSLR) is to zoom in as far as I can and hold my hand a little further away from the camera as opposed to shoving my hand in to my camera’s face!
    Don’t worry if you can’t get in as close as you would like with your camera. Just make sure it’s in focus, then crop it later like I do.
    Set the white balance
    This just makes sure that you get colour-accurate pictures.
    All you need to do is find out how to set the white balance on your camera (however, not all cameras have this feature). It will normally tell you how to do this in the instruction manual, or if not I’m sure you can find some instructions online. It involves holding a white piece of paper in front of the lens and taking a dummy picture, the clever camera then decides the correct exposure and colour settings for your picture.
    Editing

    This is one of my pictures before any editing. You can see that my hand is resting on a flat surface (in this case, the floor!) as I mentioned above. I’m also resting the camera on the floor. This is the closest I can get my hand to the camera, if I move any closer, it won’t focus on my nails.
    The software I use for editing is Adobe Photoshop CS5 and this is my routine editing process. It’s quite basic really, I just rotate the image 90°, crop it down and then stamp on my watermark.
    Sometimes I also have a quick mess around with the contrast and colour settings if I don’t think the colours in the photo are true to real life in an attempt to match them up.
    Share: