Follow:
Browsing Tag:

Gold

    Nail Art, Uncategorised

    Sorbet Stripes

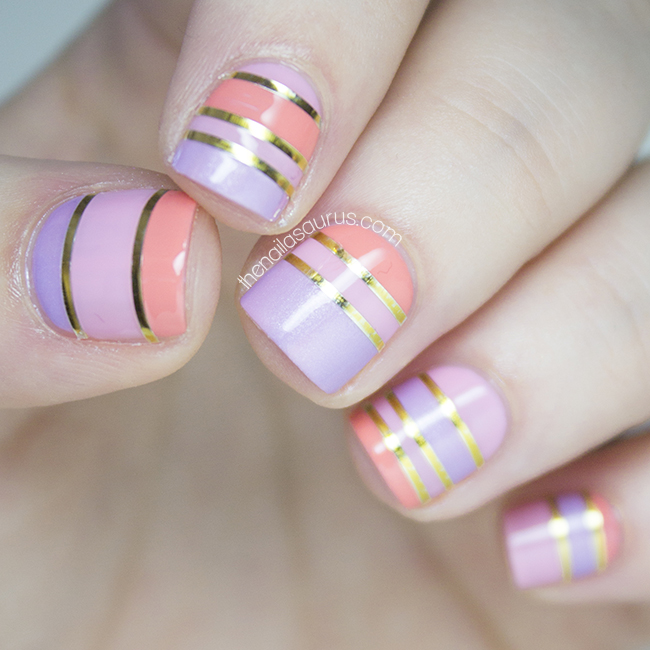
    I wanted to do something fun and flirty today so I picked out a few sorbet colours, grabbed the gold striping tape and set about creating this banded nail art. The striping tape is holding up well so far – no peeling but there has been a bit of colour leakage! The gold seems to have seeped out of a few pieces leaving me with silver but that’s not so bad.
    I recently purchased the Straight Stencils from She Sells Seashells which save me so much time that used to be spent fussing around cutting scotch tape in to thin strips whenever I did a manicure like this with lots of straight lines!

    1. For this nail art, I used a base coat of Nicole by OPI At Least I Pink So on all nails followed by a thin coat of Glisten & Glow HK Girl.
    2. I waited 10 minutes for it to dry completely.
    3. Next, I placed some straight vinyl stencils randomly over my nails and filled in some of the gaps with NYC Peach Popsicles and Sally Hansen Lady Lavender. I removed the vinyls as soon as I was done painting on each nail.
    4. Once everything was mostly dry, I applied the striping tape using nail art tweezers. Instead of trying to guess how long my strips should be, I made sure each strip was too long and then trimmed each edge with cuticle nippers once it was already placed on my nail.
    5. Finally, I used two coats of Glisten & Glow HK Girl to smooth it all over.
    Share:
    Freehand, Glitter, Uncategorised, Waterfall

    New Year’s Eve Nail Art

    These are the nails I’m wearing tonight for NYE! Black and Gold has been the party colour scheme this year and it’s always been a favourite of mine so I thought I’d polish off the year with a simple black and gold mani. Cirque Helios has become a staple for me this last month. It’s the perfect gold glitter for Christmas and turns out it’s a good sparkly addition to a party mani!

    Happy New Year everyone! I hope you have a great one!

    I started with my base colours of No7 Just Black and Nails Inc. Hampstead Gardens.
    The glitter accent is two coats of Cirque Helios. I freehanded the ‘2014’ using a nail art brush and NYC Full Metal Jacket.
    The waterfall nail art was created using NYC Full Metal Jacket, BeautyUK Olympic Bronze and A-England Dorian Gray.
    Finally, i topped it all off with two coats of Rica Glossy Glam.

    Share:
    Glitter, Uncategorised

    DIY Nails Christmas Water Decals Nail Art


    It’s beginning to feel a lot like Christmas around here. I finished most of my wrapping today but there are still a few gifts I’m waiting for in the post (can you say last minute?!) so I have my fingers crossed that they’re going to get here before Wednesday! These cute Christmas water decals are from DIY Nails and they’re a new contender for my Christmas Day mani. The Fair Isle pattern on this sheet is just too cute to ignore.

    I applied the DIY Nails Christmas water decals over the base of Barry M White.
    For the glitter nails, I applied two coats of Cirque Helios over one coat of Nails Inc Hampstead Gardens.
    It’s all topped off with two coats of Glisten and Glow HK Girl.

    Share:
    Review

    Revlon by Marchesa: Royal Burgundy Review


    I knew as soon as I saw these Revlon by Marchesa nail appliqués that they were something a bit special. So special in fact, that I’ve been holding on to them for a suitable occasion and now that party season is upon us I thought it would be the perfect to show them off.

    It seems that 2013 was the year of the nail wrap and I think the standard of these products has really stepped up across the board. Because my nails are very curved, any wraps that I wear have to be the thin stretchy kind or just insanely adhesive to have any chance at staying attached. These fit in to the second category!

    Revlon by Marchesa: Royal Burgundy

    These nail wraps are very sticky and thin enough to get a good purchase on your nails without too many crinkles. As with all wraps – the flatter your nail beds, the less chance of crinkling. As you can see in my pictures, there are few bumpy bits near the edges but they aren’t noticeable from a distance.
    These are applied by sticking them in place on your nail and then filing off any excess that extends past your nail tip. The mini nail files that came with the wraps for getting rid of the excess were very rough so I opted for my glass nail file instead which did the job with no unnecessary damage to my nails.

    The range contains 8 different and exquisitely crafted designs each inspired by a dress from Marchesa’s archives. The design I’m sporting is Royal Burgundy. Each pack contains 18 appliqués in a good range of sizes so you’re guaranteed to find a match for your nails and it comes in handy if you mess up a few! I have some left from this set which I’ll be saving to wear as accent nails on occasion.

    The sets run at £8.99 each which is a few pounds more than most nail wraps you’ll find on the high street but justified by the exceptional 3D designs. This is the kind of item that I would reserve for a special occasion where I’m going to get dressed up! I think they’d also be perfect for a bride on her wedding day. Silk Rosette (blue florals on clear) could be your something blue and Crown Jewels (gold details on clear) over a pale pink or shimmery white polish would look breathtaking.

    Revlon by Marchesa: Royal Burgundy

    I couldn’t resist added a gold spark to my usual make-up to match my nails!

    Revlon by Marcesha Appliqués are £8.99 from Boots.com and in selected Boots and Superdrug stores nationwide.
    Share:
    Stamping, Uncategorised

    Day of the Doctor Nail Art

    Back in the day, I used to be a big Doctor Who fan although I cannot claim to be a true Whovian. After Rose’s time on the show came to an end, I started watching it less often and still haven’t really come around to the idea of Matt Smith as The Doctor. Nevertheless, I’ll still be watching the 50th anniversary episode this evening! After all the best Doctor (don’t argue with me, you know it’s true), David Tennant is returning and I’m sure there will be more than a few familiar faces and other surprises along the way!


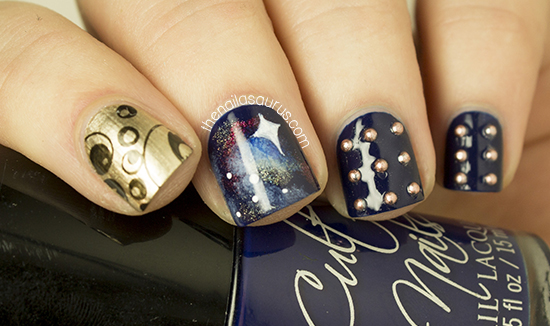
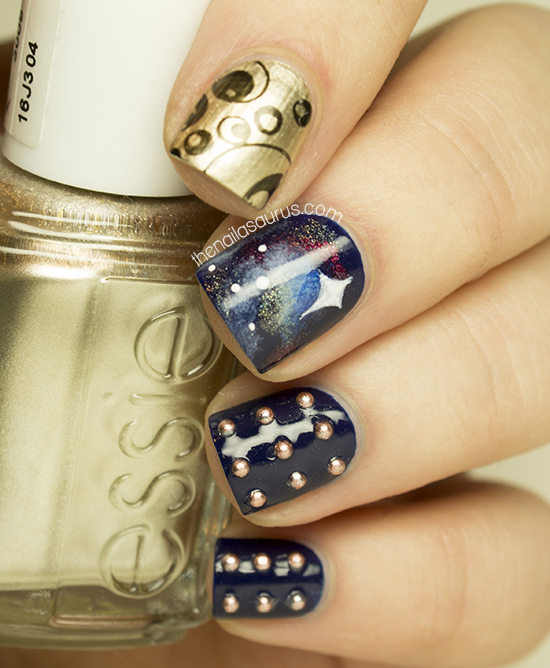
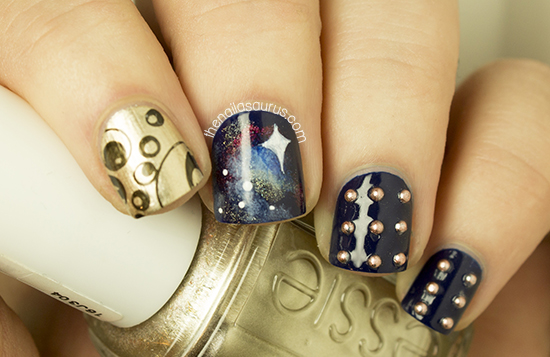
    For the base colour I chose a polish that fits the theme perfectly… Cult Nails Time Traveler – a polish named after the Doctor’s big blue box

    On my ring and pinky fingers, I stuck some 1 mm flat backed pearls and painted them copper to look a bit like Daleks!

    My index finger is painted with Essie As Gold as it Gets and stamped with W7 Black and a design from MoYou London Plate Pro Collection 10. This is meant to look a bit like The Master’s fob since this is a piece of imagery that really stood out to me back in the days when I used to watch the show. Wasn’t The Master a brilliant character?!

    The galaxy nails were created using a couple of polishes including the holographic polishes A-England Rose Bower and Princess Sabra.

    Finally, it’s all topped off with Cult Nails Get It On.

    Share:
    Snippet, Uncategorised

    Snippet: Prototypin’


    I used Deborah Lippmann Fashion as my base colour and once that was dry, I freehanded on the blocks of H+M Midnight Mystery on either side of each nail using a nail art brush
    I used one coat of KBShimmer Clearly On Top and while that was still wet, I carefully placed on these tiny gold strips (coming soon to The Nailasaurus Emporium).
    I added another two top coats to seal them in and once it was all dry, I filed off the excess gold that was hanging off the end of each nail.

    Share:
    31 Day Challenge, Uncategorised

    31DC2013 Day 31: Honour Nails You Love

    So here we are! The 31st and final day of the challenge. I definitely enjoyed it more this time around than I did in previous years. I know that because not once did I consider giving up part way through! It’s always so satisfying when you get to the end of a big task like this that you commit yourself to and see through to the very end. I’m not ashamed to say that I’m very proud of myself right now!

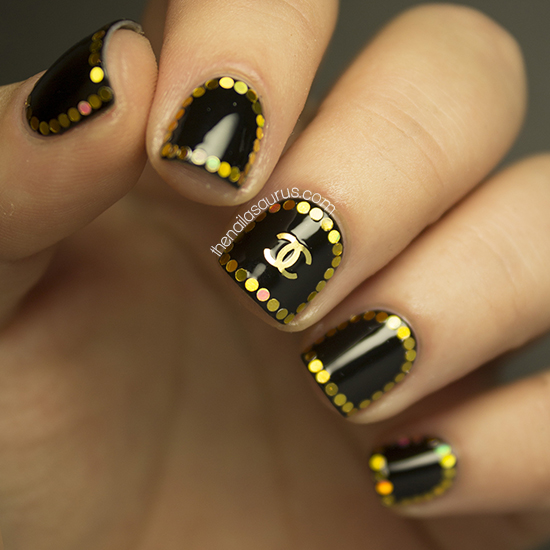
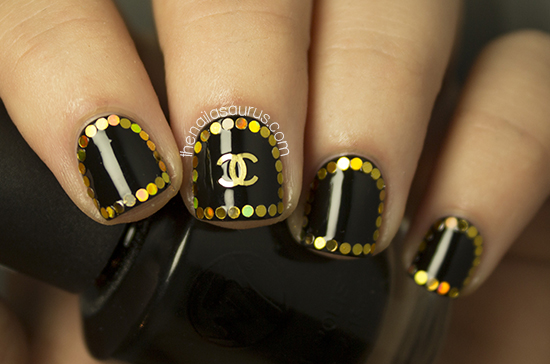
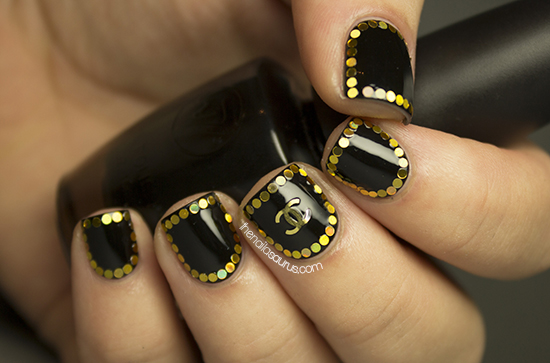
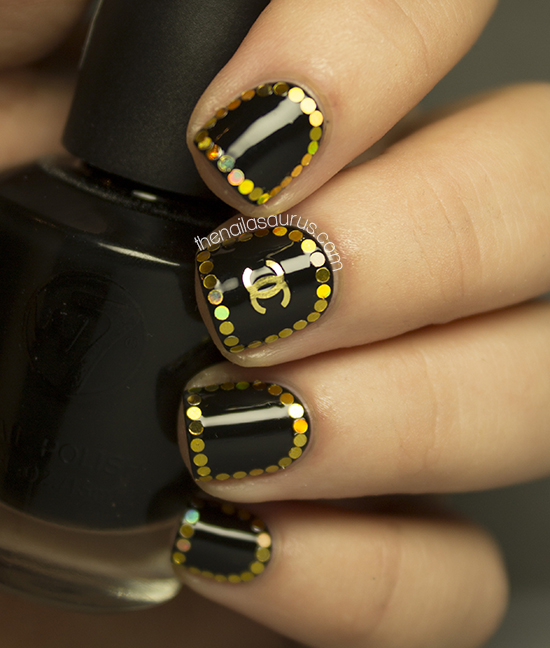
    For the last prompt of the challenge, we have to honour nails we love. There’s one manicure that I’ve loved since the moment I saw it and it’s by Deniz, a now-retired nail blogger, at Emerald Sparkled. This particular manicure is titled Look Rich, Be Cheap and since I first saw it back on that day in February 2012, it’s been burned in to my memory. I have a long standing love of glequins and I think I can pinpoint Deniz’s mani as the one that sparked it! Black and gold is a favourite of mine and I think Deniz’s design is so timeless. It’s jazzy but very elegant at the same time.

    I used W7 Black as my base colour and used round glequins from Born Pretty Store to frame my nails. (Video tutorial here)
    The Chanel decal is also from Born Pretty but they don’t seem to be selling them any more.
    I topped it all off with two coats of No7 Stay Perfect Top Coat.

    In other news, I’m headed to London tomorrow for the Cosmopolitan Blog Awards where I’m nominated in the Best Established Beauty Blog category. I’ll be teaming up with AllieLucie and Alice; all my fellow nail blogger nominees and I’m so excited to get there and meet everyone but very nervous at the same time. I’m still at a loss for something to wear on my nails and I only have the rest of the evening to decide! Can you say #nailbloggerproblems?
    Day 31: 2012 (Part 1) (Part 2
    Day 31: 2011
    Catch up with the 31 Day Challenge on Pinterest!

    TwitterBloglovin’Tumblr

    Share: