Follow:
    31 Day Challenge, Glitter, Nail Art, Uncategorised

    31 Day Challenge: Red

    Pahlish // Thunderous Sparks

    Today is the start of the #31DC2014 and until just a few hours ago, I was planning to sit this one out as I’ve just started a new job and and struggling to fit in time for blogging every 3 days, let alone every single day! In the early hours of this morning, I started contemplating it and I knew I’d be missing out if I didn’t even try to complete it again this year. In the end I decided to just dive in and take each day as it comes! If you want, you can catch up with my efforts from the challenge in 2011, 2012 and 2013.
    This year, I’m not going to commit myself to completing every single day but I’m going to try my damnedest to finish them all anyway! If I do have to sit out a day here or there, it’ll be very hard not to feel guilty about it!
    Big thanks to Chalkboard Nails for basically organising the annual gathering of 31 Day Challengers single-handedly. If you want to find out more about the challenge or even take part yourself, she wrote a great FAQ on her blog.
    We’re kicking off today with red. I’m going to be taking full advantage of the first 6 days where no nail art is required to ease myself in. It’ll also give me chance to use plenty of my glitter polishes that don’t get enough love. Today I’ve gone with a glittery jelly/topper from Pahlish over a few coats of my boldest red polish.

    Polishes Used

    Rimmel Raw as Night
    Pahlish Thunderous Sparks
    Pahlish // Thunderous Sparks
    The Nailasaurus #31DC2014
    The Nailasaurus #31DC2014 // Red Nails
    31 Day Challenge // The Nailasaurus
    Share:
    Glitter, Swatch, Uncategorised

    Polish Me Silly Clowning Around Swatch

    Polish Me Silly Clowning Around

    I would consider Clowning Around somewhat of a cult nail polish. I’m fairly certain that Polish Me Silly were the first brand to release a collection of neon glitter toppers – at least they were the first ones I remember ever setting eyes on anyway. I’m so ecstatic to finally have my own bottle because it’s just as amazing in person as it looks on a screen!
    Clowning Around has a clear base with a selection of neon glitter packed in. It’s recommended that you wear it over white or another light colour as the glitter is not 100% opaque so a light base colour will show it at its full vibrance. Experimenting with others is always fun but I haven’t found a better base then white just yet.
    For this swatch I used two coats of Clowning Around over Barry M Coconut (a very slightly off-white). with a top coat of Glisten & Glow HK Girl. I’d recommend a good amount of drying time between layers of Clowning Around so the glitter has a good chance to stick to your nail before you sweep on the next dose.
    If you like very interesting and ‘out-there’ polishes, this is a great one for your collection. It’s different without treading in to novelty territory and is a genuinely unique nail polish.

    Where to Buy Clowning Around

    Clowning Around is available from Polish Me Silly on Etsy. RRP $6.00.

    Polish Me Silly Clowning Around Swatch // The Nailasaurus
    Polish Me Silly Clowning Around Swatch // The NailasaurusPolish Me Silly Clowning Around // Neon Glitter Nail Polish
    Share:
    Gradient, Nail Art, Stamping, Uncategorised

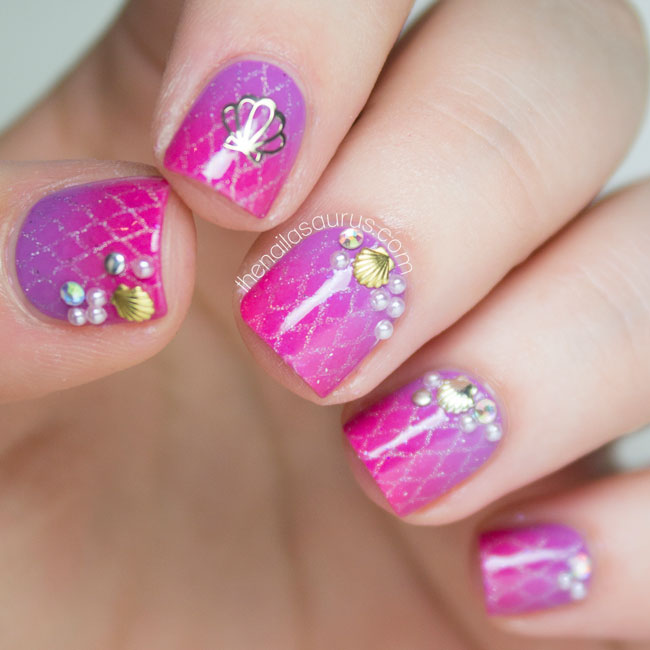
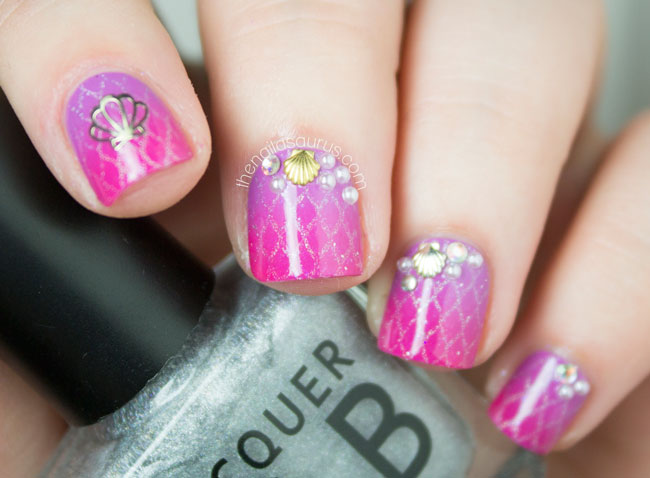
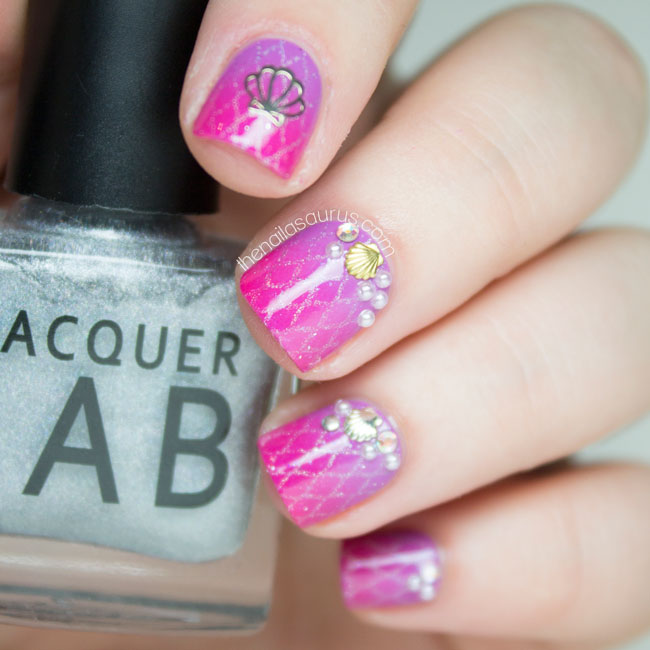
    Gradient Mermaid Nail Art

    Gradient Mermaid Nail Art // The Nailasaurus

    I’ve always been a strong believer in ‘less is more’ but sometimes you just gotta go for it. This mani has a little bit of everything – gradient, stamping and embellishments – but boy oh boy, does it work!

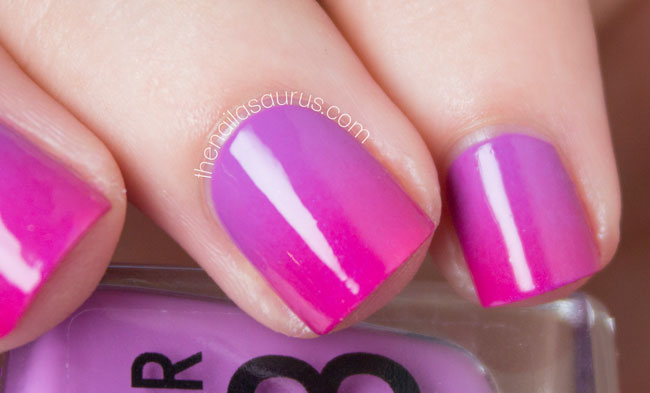
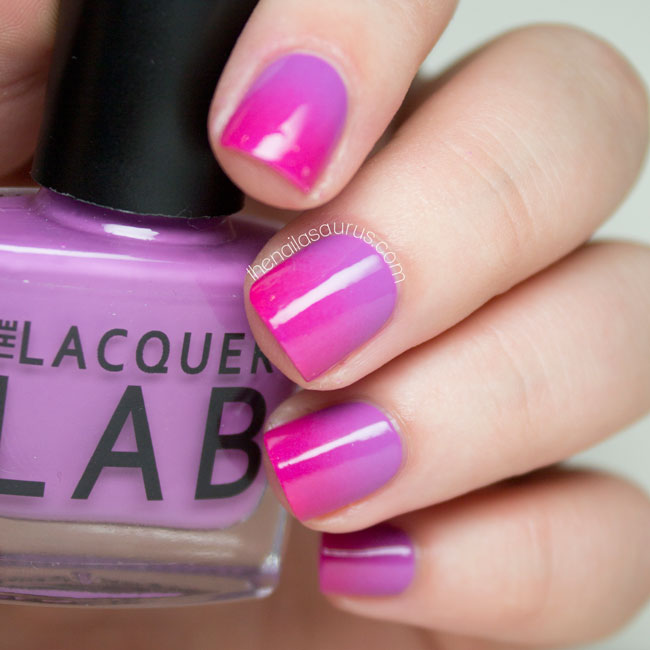
    For the gradient, I used The Lacquer Labe Ultra Violet as my base colour and created the gradient with Sally Hansen Back to the Fuschia. There’s a gradient video tutorial here.

    I topped the gradient with Cirque Liquid Laminate and snapped a few pics (below) before I added the art.

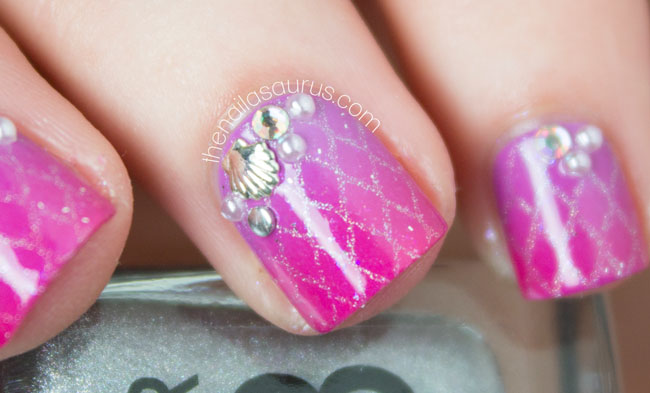
    I stamped on the fishnet / mermaid scales pattern from Bundle Monster plate BM209 using The Lacquer Lab Moonshine and used another coat of Liquid Laminate.

    Finally, I added all the little gems using top coat and a wax pencil. The selection you see is 1mm Swarovski Flatbacks, Gold and Silver 3.5mm shells and 1mm Flat Back Pearls with a shell embellishment from She Sells Seashells (currently out of stock).

    After I took these pictures, I added a layer of Liquid Laminate over the details and not a single thing fell off before I removed everything 24 hours later!

    Gradient Mermaid Nail Art // The Nailasaurus
    Gradient Mermaid Embellished Nail Art // The Nailasaurus
    Gradient Mermaid Kawaii Nail Art // The Nailasaurus
    Hot Pink Gradient Nail Art // The Nailasaurus#
    Hot Pink and Purple Gradient Nail Art // The Nailasaurus
    Share:
    Nail Art, Uncategorised

    DIY Nails Abandon Ship Nail Art

    DIY Nails Abandon Ship Water Decals // The Nailasaurus

    So you saw my review of DIY Nails decals a few days ago and here’s some nail art with them! As soon as I saw these decals, I knew I wanted to go for a rustic look. I’ve been hooked on anything mildly piratey since I played Assassin’s Creed Black Flag! I tried to mimic the paper that you always see treasure maps on in the movies. Anyone remember in school whenever you had to do a history project – you’d stain the paper with a tea bag and burn the edges (under the close supervision of an adult, of course) to make it look old? That’s the look I was going for!
    I used a few neutral Barry M polishes with the Textured Saran Wrap technique for a very subtle mottled effect. I would have mixed a bit of darker brown in there too but I wanted to keep the canvas nice and light so the decals would stand out. How cute is the purrrrppy?! He looks like a real sweetheart but you know he’s got your back if you find yourself in a tavern brawl after too much rum!

    What I Used for this nail art

    Barry M Coconut
    Barry M Almond
    Barry M Olive
    DIY Nails Water Decals in Abandon Ship
    She Sells Seashells Gold Anchor Embellishment
    Glisten & Glow HK Girl Top Coat
    DIY Nails Abandon Ship Nail Art // The Nailasaurus
    She Sells Seashells Gold Anchor Embellishment // The Nailasaurus
    DIY Nails Abandon Ship Nails // The Nailasaurus
    Textured Saran Wrap Nail Art // The Nailasaurus

    1

    Share:
    Favourites, Uncategorised

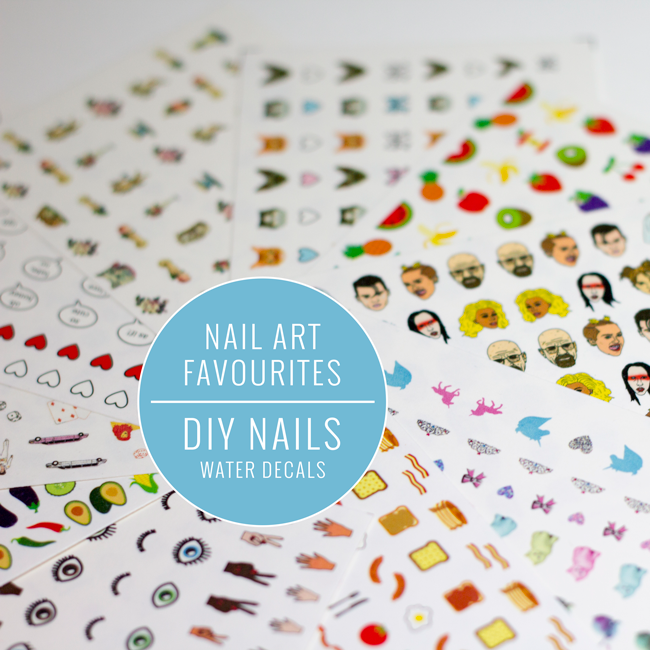
    Nail Art Favourites: DIY Nails Water Decals

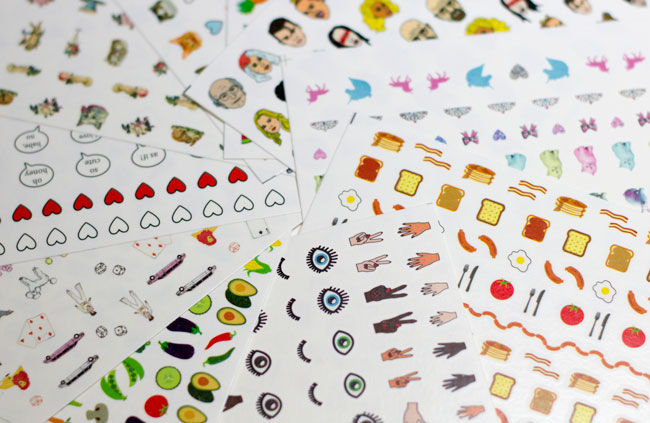
    Time and time again, I find myself reaching for my DIY Nails decals whenever I’m feeling a bit too lazy for more time consuming nail art but still want something that’s going to make people take notice of my nails! These are my favourites for more than a few reasons.
    For starters, they’re printed on to a super thin material so you’ll never get any air bubbles or visible lines around your decal when it’s on your nail. This does mean you have to take a bit more care when placing them as they’re very delicate but just remember that time and tweezers are your friends!
    There’s another very important quality I look for in water decals. It’s tricky to explain but I’m going to try anyway! With some water decals, they’re printed on to one single sheet of ‘decal plastic’ and you have to cut very closely to the actual design to get a viable decal. DIY Nails decals are all individual printed so you only have to cut out the design you want to use very roughly and the compacted little decal itself just slides right off the paper.
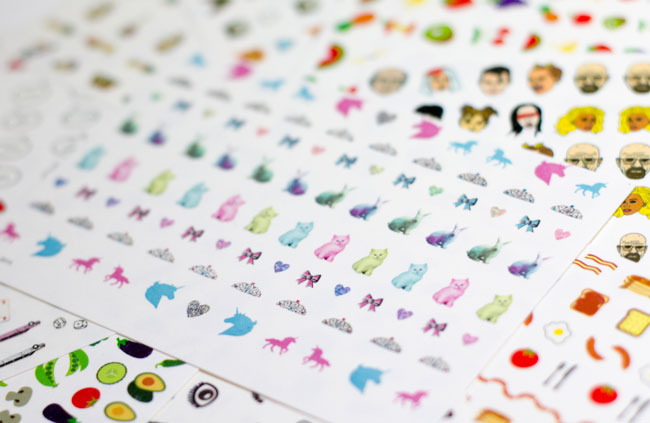
    We also need to talk about the designs – they have everything from unicorns to breakfast foods to Ziggy Stardust! They’re all completely original, many are hand drawn, and they really stand out in a crowd. You can even get your own images turned in to custom decals which I think is a great gift idea for the nail art lover in your life.
    If you like water decals, there’s no way you won’t love DIY Nails. Easy to use with a great selection of designs and not an air bubble in sight! What more could you want from your water decals?

    Where to Buy DIY Nails

    DIY Nails Water Decals are available from diynails.co.uk and select retail stores. RRP £6.00.
    It’s also worth checking the sale section to snap up any end of line stock before it’s gone for good!
    Share:
    Nail Art, Uncategorised

    Fashion Inspired: Collaboration with Nail That Accent

    Nonoo SS15 Nail Art // The Nailasaurus x Nail That Accent

    Today I’m joining forces with Lindsay of Nail That Accent to bring you a blog collaboration post. You might even say, a coBLOGoration! That works right?!
    When we started chatting, we knew we wanted to work on something together that included nail art and that would work well on our blogs. After running through a few possibilities, we decided it would be fun to take one source of inspiration, each work on it independently and then come together to see our different interpretations of the same idea.
    Fashion is always a good starting point for nail art and it gave us each a chance to find something suited to our own style. Lindsay chose a piece from Alberta Ferretti and mine came from Nonoo – both SS15. Make sure you jump over to Nail That Accent to see the freehand nail art we created inspired by the Alberta Ferretti dress.
    It’s really fascinating to see our creations side-by-side. They’re the same but different! It just goes to show that there are so many possibilities when it comes to nail art and in any form of art, it’s very unlikely that any two interpretations of the same source material are going to be the same! Isn’t it funny that both of us have taken notice of the shoes on the other’s choice of outfit and chosen to include that in our design?
    Nonoo SS15 Nail Art by Nail That Accent
    Lindsay started by polishing her pinky with OPI Push and Shove to replicate the silver shoes (push and shove comes with a special base coat). She then polished all her nails with Motives Daydream. 
    Next, she freehanded a thick white stripe with Essie Blanc (using the regular nail polish brush). 
    When that was dry, she used used Essie Midnight Cami to create the abstract blue effect. She dipped a nail art brush in acetone, wiped the majority off her brush and then dipped the brush into midnight cami to create the splattered effect.

    She topped her nail art with Glisten & Glow HK Girl.

    Where to find Lindsay

    Lindsay blogs at Nail That Accent and you’ll also find her on Facebook, Twitter and Instagram.
    To see Lindsay’s collaboration post featuring a different SS15 piece from Alberta Ferretti, click here!
    Nail Art Inspired by Nonoo SS15 // Nail That Accent
    Nonoo SS15 Nail Art by Nail That Accent
    Nonoo SS15 Nail Art by The Nailasaurus
    I started with a base of Barry M White and a thin coat of Glisten & Glow HK Girl.
    At this point, it gets messy. I applied tape to the skin around my nail and taped off the bottom half of my nail diagonally. Next I used a straw to splatter Sally Hansen Thinking of Blue on the section of nail that was showing through and then immediately removed the tape.
    I used another coat of HK Girl and put tape over the part of my nail with the splatter section, then painted on NYC Raindrop and removed the tape.
    I finished it off with one final coat of HK Girl!
    Nail Art Inspired by Nonoo SS15 // The Nailasaurus
    Nail Art Inspired by Nonoo SS15 // Nail That Accent

    To see the next collaboration post, visit Nail That Accent

    Share: