Follow:
Browsing Category:

Glitter

    Glitter, Uncategorised

    Just a Sprinkling

    I picked up this new  No7 polish last weekend just before my £5 off No7 voucher expired. I noticed that they have quite a few new shades and the ‘Speed Dry’ colours are gone, or rather replaced with ‘Stay Perfect’ equivalents, and every bottle is decorated with a ‘New brush and formula’ sticker. I loved the formula on this and the brush has a domed end which is much better than the old brushes which were long and thin with a square end.
    I love this colour! It’s a summery turquoise and I was worried it would be too similar to Barry M Cyan Blue which I already have but I can definitely see a difference which I can’t describe. I just know it’s different. But maybe I’m seeing things to justify buying this colour!
    Base Colour: No7 Stand Back
    Models Own Juicy Jules and E.L.F. Twinkle sponged on
    Share:
    Glitter, Holographic, Uncategorised

    Revision Nails


    Civil Twilight – Letters From The Sky

    I have a short attention span. I always have and probably always will. It doesn’t affect me all the time, just when I have to do something really boring! I can get totally engrossed in something I enjoy and waste away hours on end without even realising but as soon as I have to concentrate on something I’m not interested in for more than twenty minutes, everything else becomes infinitely exciting. Even cleaning starts to look like a more appealing option that what I’m doing.

    It’s not a good trait to have when it comes to studying.
    I have a lot of exams coming up and I kept giving up on my revision to paint my nails so I decided I needed a mani that I wouldn’t want to take off.
    I know glitter is a massive pain to remove so I decided to apply a very thick, glitter manicure that I wouldn’t be tempted to remove any time soon due to all the effort that would entail.
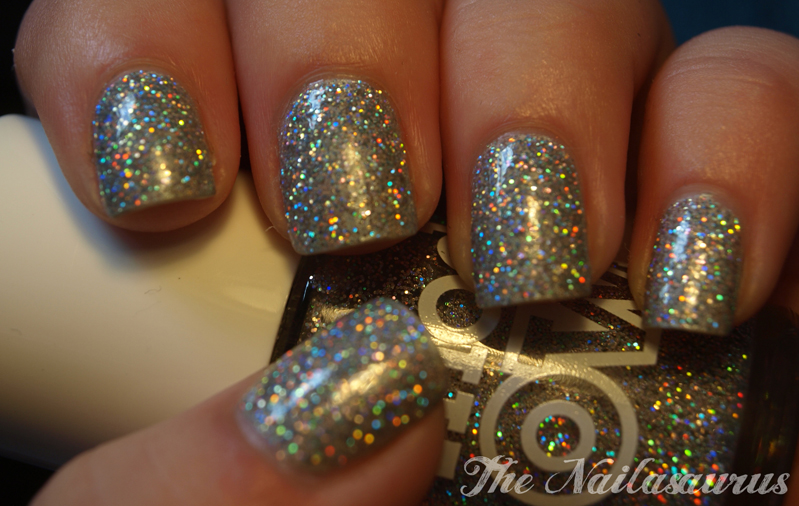
    I decided on Models Own Juicy Jules because I absolutely love this holographic glitter polish but I’ve never worn it on its own before.
    There are loads of pictures because I just couldn’t narrow it down. This polish is so pretty.
    Gosh Holographic
    Models Own Juicy Jules
    NYC Top Coat
    I applied 2 coats of Gosh Holographic first because I didn’t trust the glitter to cover the whole nail without leaving little gaps.
    I probably used 4 or 5 coats of the Juicy Jules to make it super removal proof and then a few coats of NYC Top Coat to smooth things over.
    In Sunlight
    And slightly blurry so you can see the rainbow.
    In Artificial Light
    The colours sparkle more under artificial light. I spent a lot of time admiring the glitter when I was in my exam because there were fluorescent lights which made it super gorgeous and distracting!
    And blurry for the holo-ness…
    Share:
    Glitter, Stamping, Uncategorised

    Glitter Daisies

    I picked up this Urban Outfitters polish in a charity shop (thrift store) a few weeks ago for just £1. There was a whole tub of them but I most of the colours didn’t really catch my eye. I assume they were old stock because they also had loads of Urban Outfitters jewellery but it was still fairly expensive so I didn’t buy any.
    They’ve tried to scribble out the brand and original price on the side but the pen they used is only like 20% opaque!

    Plate: Bundle Monster BM205
    Base Colour: Urban Outfitters – Denim Blue
    Stamp Colour: Stargazer 118
    I used Models Own Juicy Jules to fill in a few of the flowers with a little nail brush
    Top Coat of NYC
    Share:
    Glitter, Uncategorised

    The Nailasaurus is One Year Old!

    It was my blog’s birthday last night and I missed it. I saw that Steph @ Imperfectly Painted is having a blogaversary giveaway so I decided to have a look back and see when my first post was because I knew it must be coming up to a year and it was exactly one year to the day! I feel kinda bad that I missed it. Like I should have had a giveaway, or at the least a post, prepared but oh well. I’m planning a giveaway soon to make up for it.
    I got Juicy Jules last weekend and I’m infatuated with it! It is without doubt THE sparkliest polish I own and it’s just stunning in the sun. I plan on wearing it a lot in the summer.

    The base colour is Urban Outfitters Matte Black and I used a sponge to apply the Juicy Jules to the tips in a gradient.I used two coats of NYC to finish it off.


    And out of focus so you can see all the amazing holographicness of the glitter…

    Share:
    Glitter, Uncategorised

    Simpleton

    So far I’ve been keeping up with my blogging schedule. For those of you that didn’t catch my post a little while back, I mentioned that instead of putting pressure on myself to post every day as I used to, I’m setting myself a goal of 3 posts per week. I’ve finalized the plan and the schedule is to post on Monday, Wednesday and either Saturday or Sunday. Whenever there is a special occasion, like St. Patrick’s Day for example, I might throw in a quick, freebie nail art post.
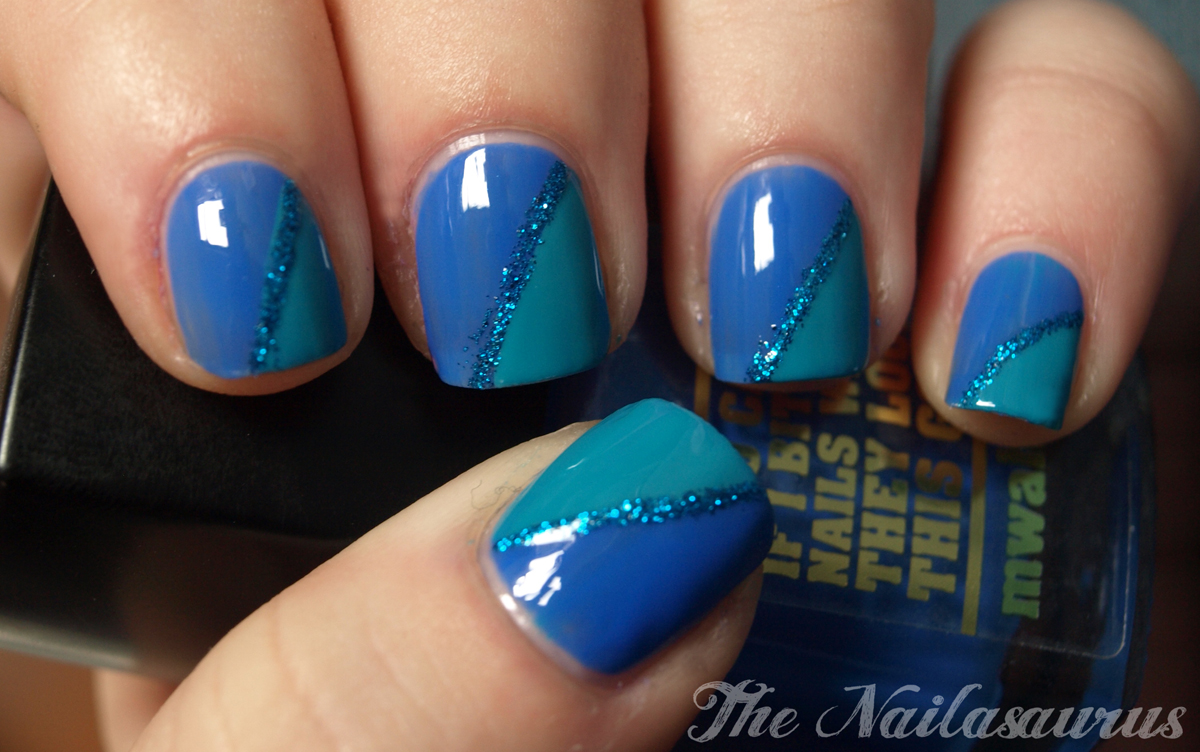
    Last night was my first attempt at a ‘Scotch Tape Mani’ made famous, I believe, by the fabulous Erika at Chloe’s Nails*. It basically involves placing strips of scotch tape on your nails which act as a stencil to give you crisp lines between multiple coats of colour. Depending how you use the tape, you can get all kinds of great results and it’s so easy to do. Make sure you check out Erika’s blog to see what amazing effects you can achieve.
    My first few attempts were a bit disastrous to say the least. I’m very impatient and wanted to get to bed so I kept putting the scotch tape on too quickly and it would rip off the base colour so after a few failures I decided to leave my base coat to dry over night before subjecting it to any tape torture.
    I used Jay Jays Thrillseeker as the base colour and applied a top coat of NYC last night. I got to the fun bit in the morning when I applied the tape diagonally across my finger and used BYS Fools Paradise for the second segment. I then applied Barry M Blue Glitter with a striping brush for the dividing line and topped it off with another top coat of NYC.

    * If I have this wrong and you know of someone else who was using the technique before Erika, please let me know as I like to give credit where credit’s due.
    Share:
    Glitter, Stamping, Uncategorised

    Leopard Got The Blues

    How do you like my new banner? I’m not too sure about it so I might make another one or go back to the old one soon.


    Konad Plate: M57
    Base Colour: No7 – Betty Blues
    Konad Colour: China Glaze – Adore
    Barry M Blue Glitter for the dots
    Top Coat of NYC
    Share:
    Glitter, Tutorial, Uncategorised

    ‘Foil Method’ Glitter Polish Removal Tutorial

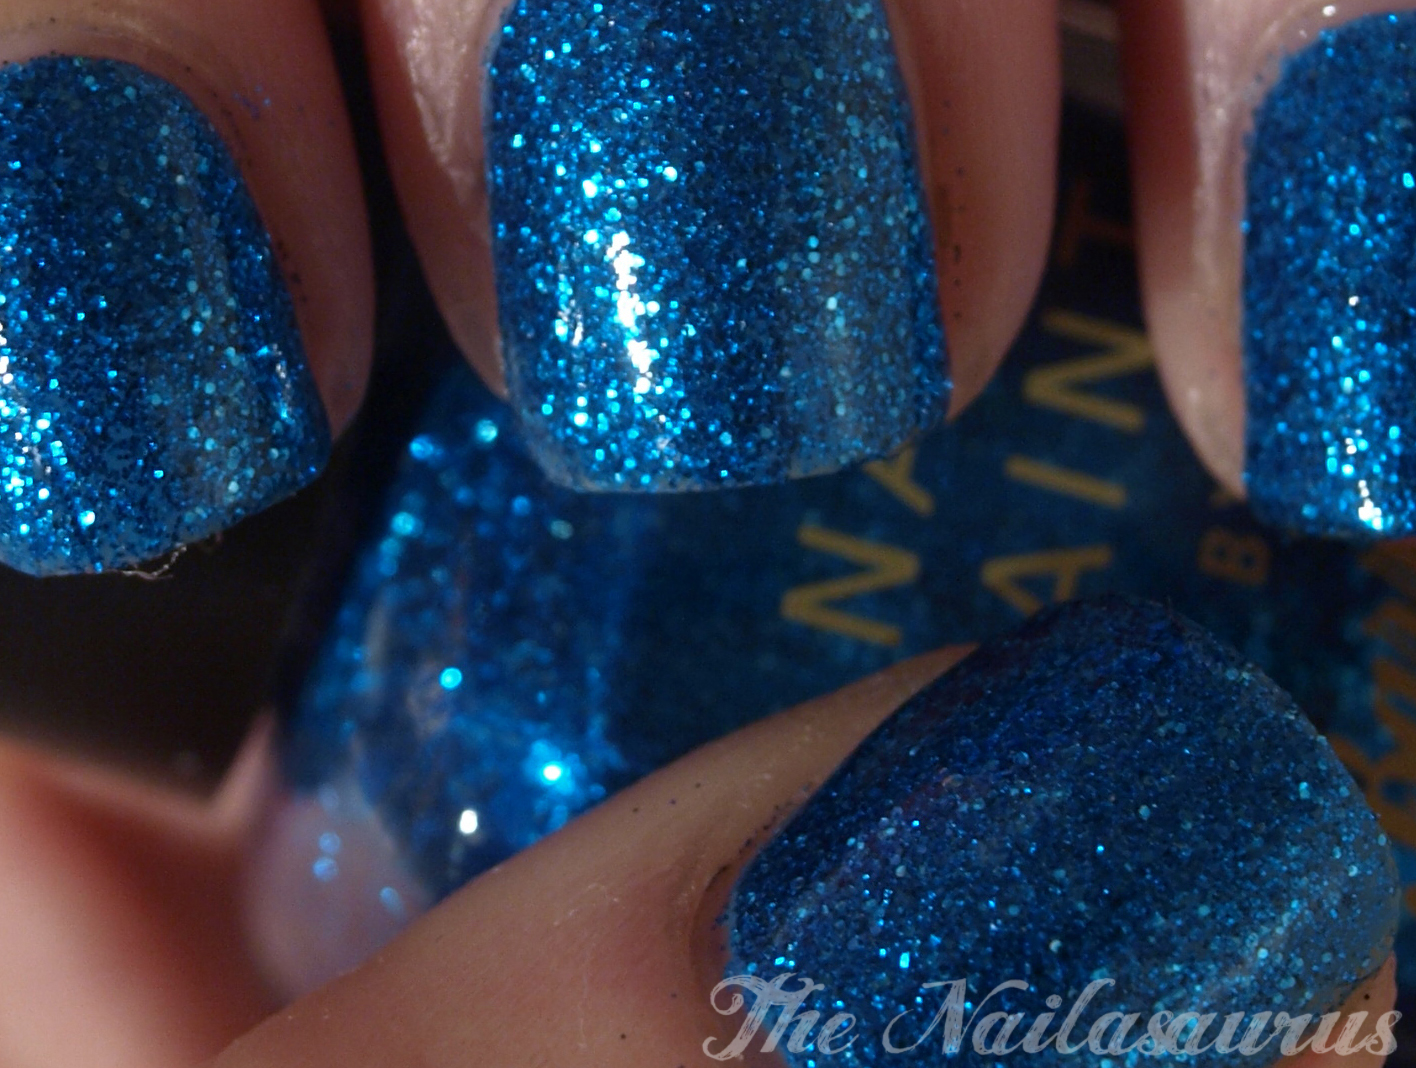
    I recently fell in love with some of Barry M’s glitter polishes but hated the trouble I ran in to when attempting to remove them. At first I tried my usual polish remover on a cotton pad, but the pad just got ripped to bits. Then I tried the same with pure acetone but the same thing happened. Aside from being a pain in the butt I could also see it was damaging my nails because any pieces of glitter that had come loose was scrubbing my nails like sandpaper. 
    I remembered reading about this foil method before but was a bit hesitant to try it because it seemed like so much hassle. I’m really glad I tried it and after doing a few nails I got the hang of it.
    From what I understand, wrapping your fingertip in foil prevents the acetone from evaporating and lets it really soak into the polish and soften it up so it easily comes off your nail. 
    So here’s how I do it…
    1. Be Prepared
    You’ll need acetone, cotton wool pads (or whatever you like to use to remove your polish) and foil cut into rectangles about 2″x4″.

    2. Cut (Costs)
    I cut up my cotton pads into quarters. You can use them whole but cutting them up makes them (and the acetone) go further and I find them easier to handle.
    If you have longer nails you could use them whole or just cut them in to halves.
    3. Soak It Up
    Whenever I’m using acetone, I pour a bit out in to the lid of the bottle so if there are any accidents the consequences aren’t too catastrophic. Dip a corner or edge of your cotton in to the acetone and wait a few seconds for it to soak up through the pad. This way you won’t end up with too much on the pad and you won’t have it dripping it all over the place.
    4. Place and Wrap
    Place the cotton on your nail and wrap your whole fingertip in foil. 
    Be firm and secure the foil in placed but don’t squeeze too hard or you will squeeze all of the acetone out of the cotton.
    5. Repeat
    Repeat this process for each finger. Only do one hand at a time so you have some fingers free in case of emergencies!
    6. Leave 
    Leave the foils on for about 5 minutes.
    After 5 minutes, just slide the foil off the end of your finger while pressing down slightly on the nail.
    The glitter should slide off easily with the cotton. If there are any bits left on your nail, just use regular nail polish remover to get rid of them.
    The End 🙂
    Has anyone else found this method to be their saviour when it comes to glitter polishes?

    Share: